
HOME TOUR
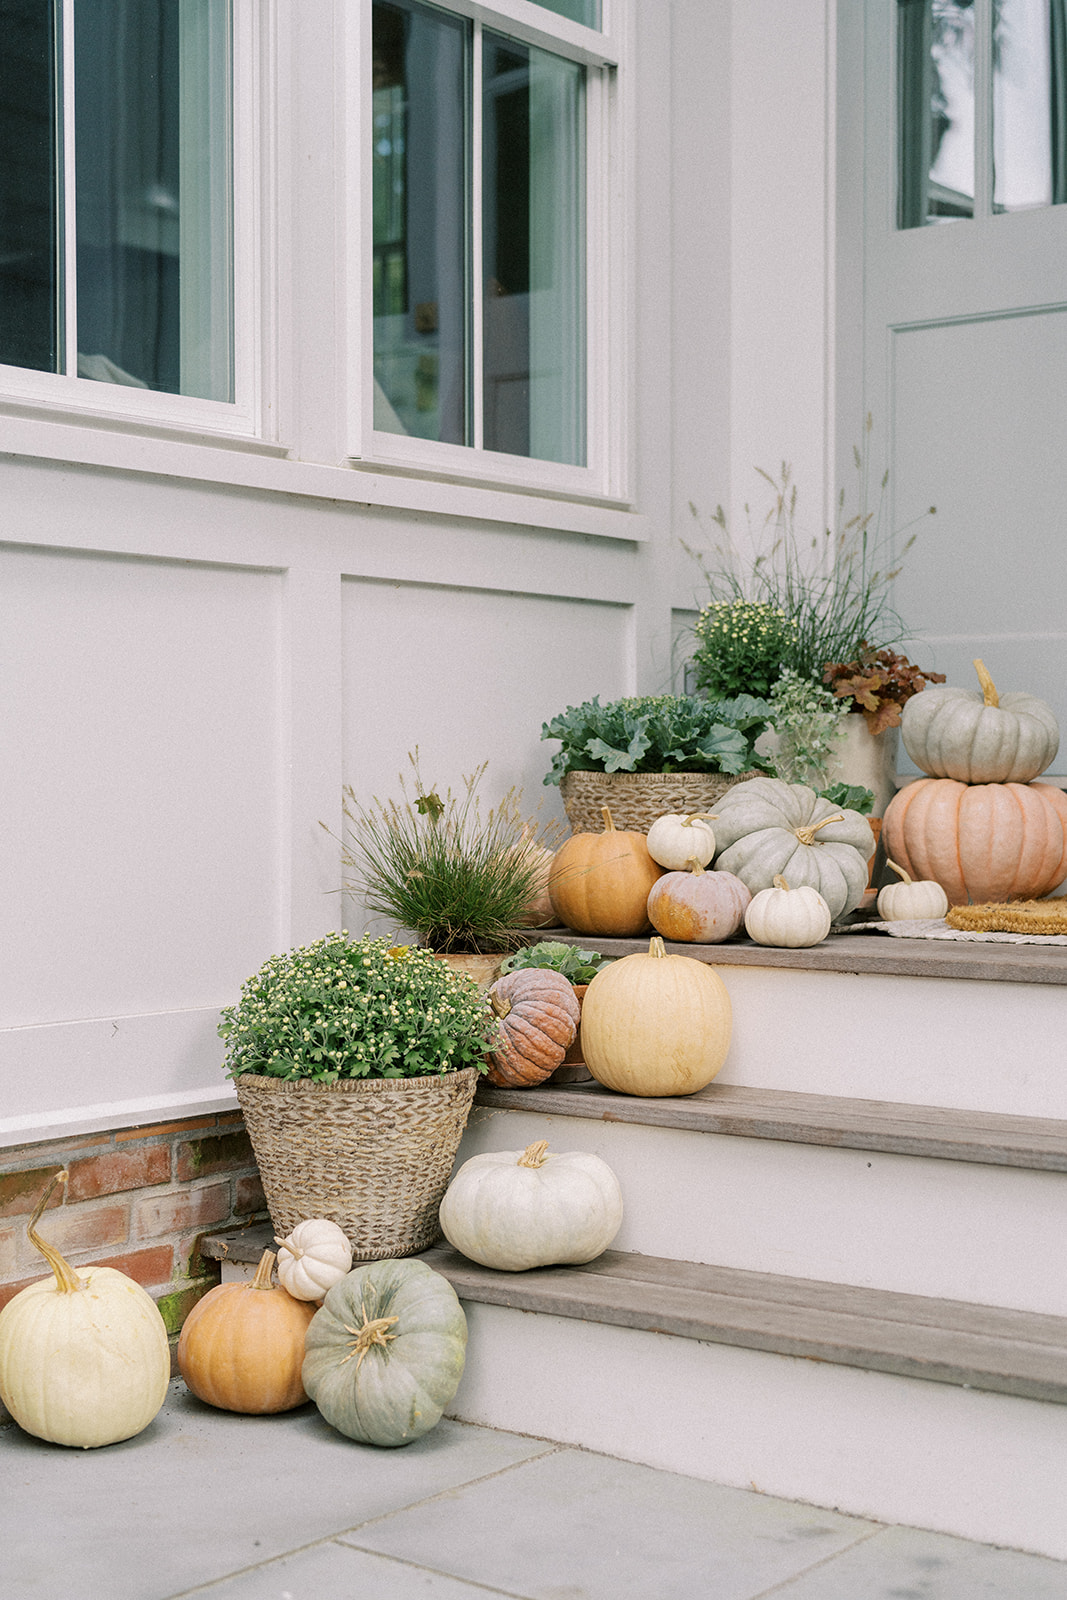
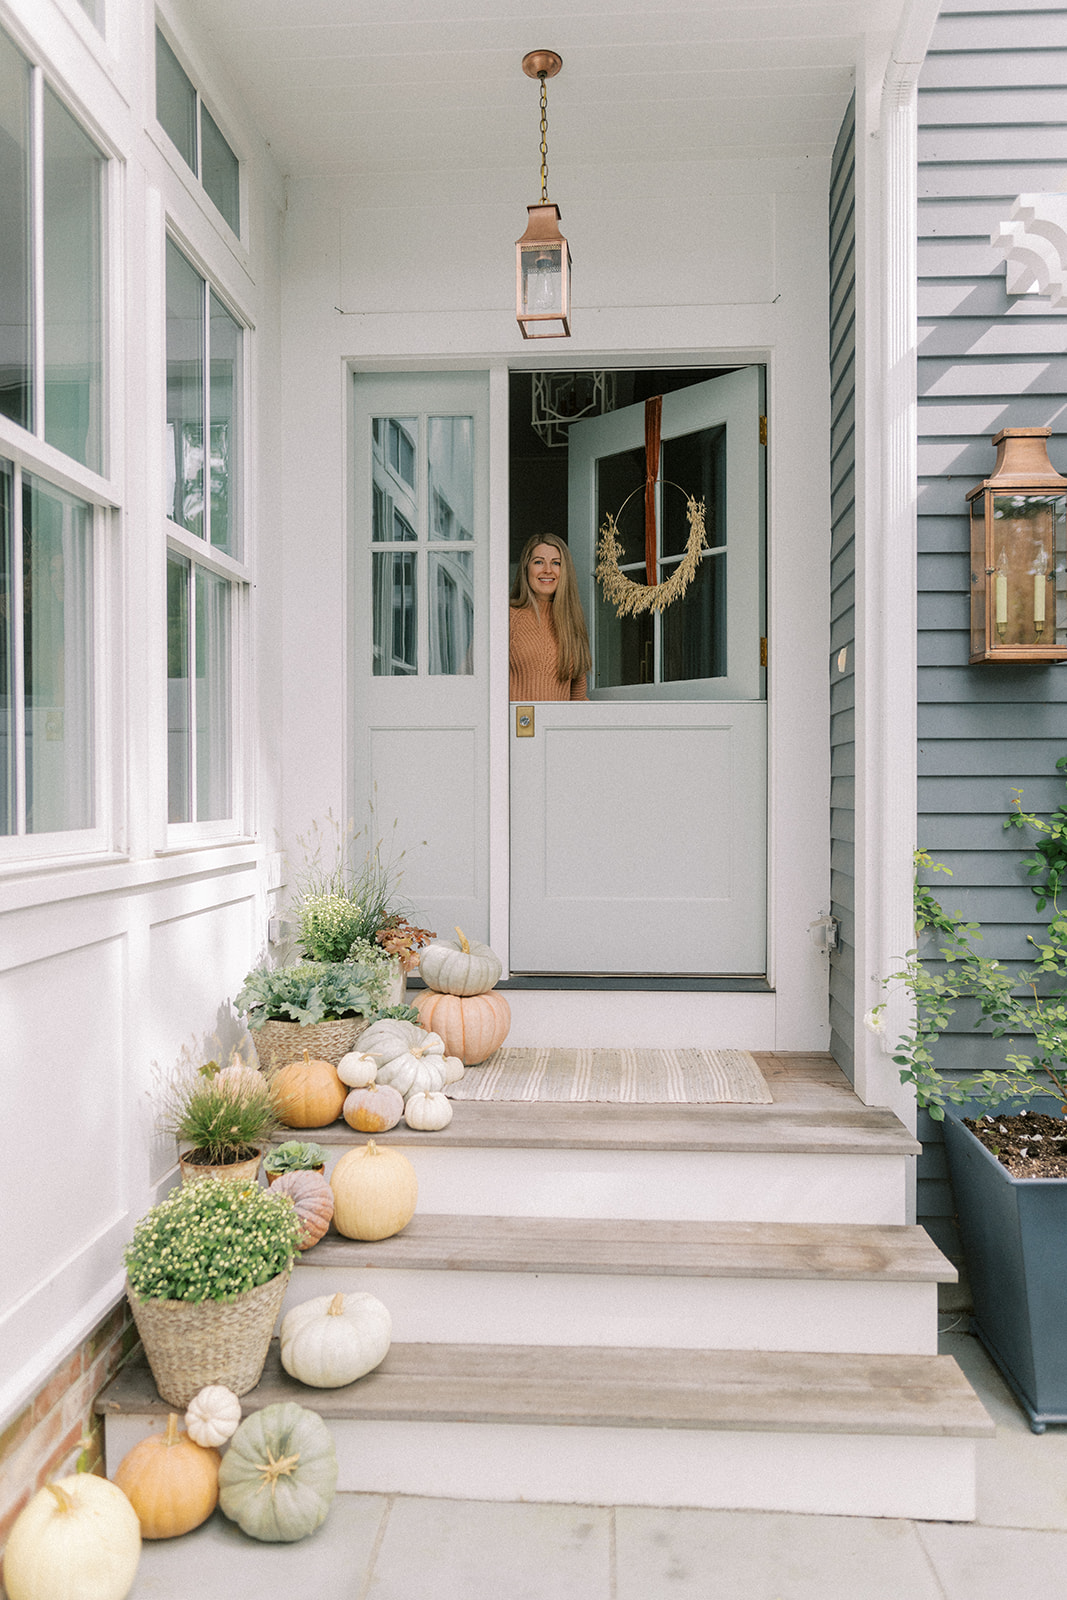
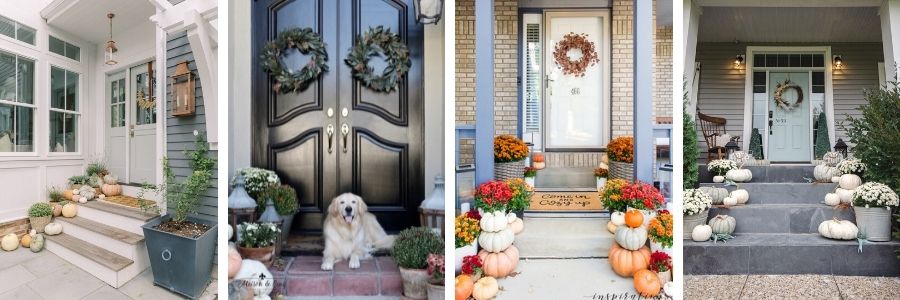
Aubrey and I were feeling the fall tug last week and went to our favorite nursery to pick up pumpkins. They had some of the most unusual ones I’ve seen and it was fun watching Aubrey find her favorites. I tend to steer clear of the bright orange early in the season, opting for softer, muted shades. I’m joining some sweet friends today for a outdoor fall decor blog hop so I thought I would share where all these fairytale pumpkins ended up and some tips on decorating steps with pumpkins. Beautiful pictures by Ruth Eileen Photography.
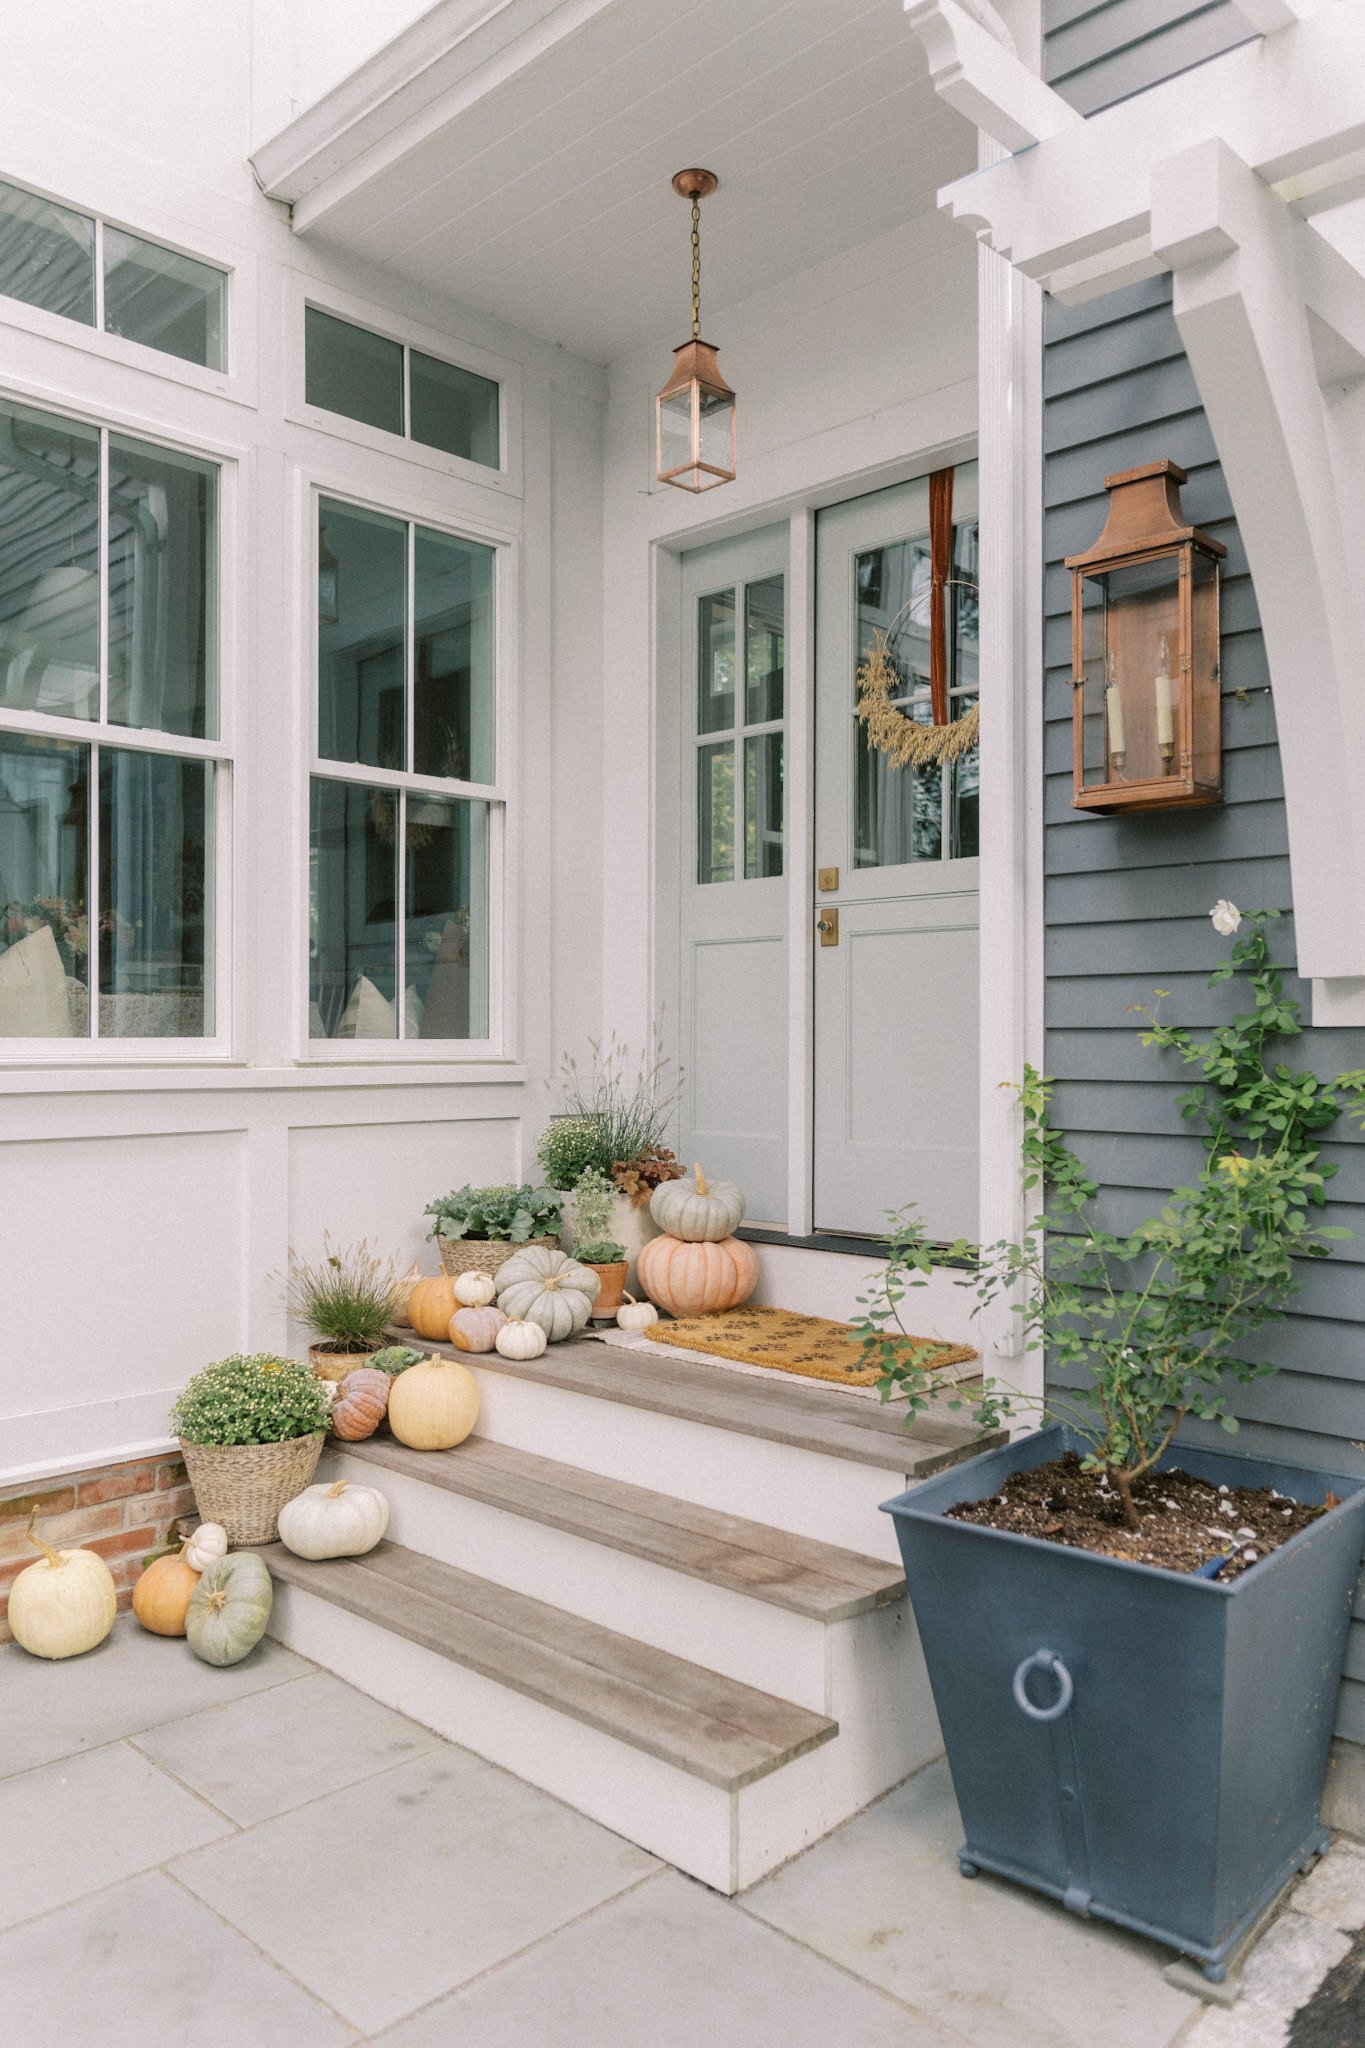
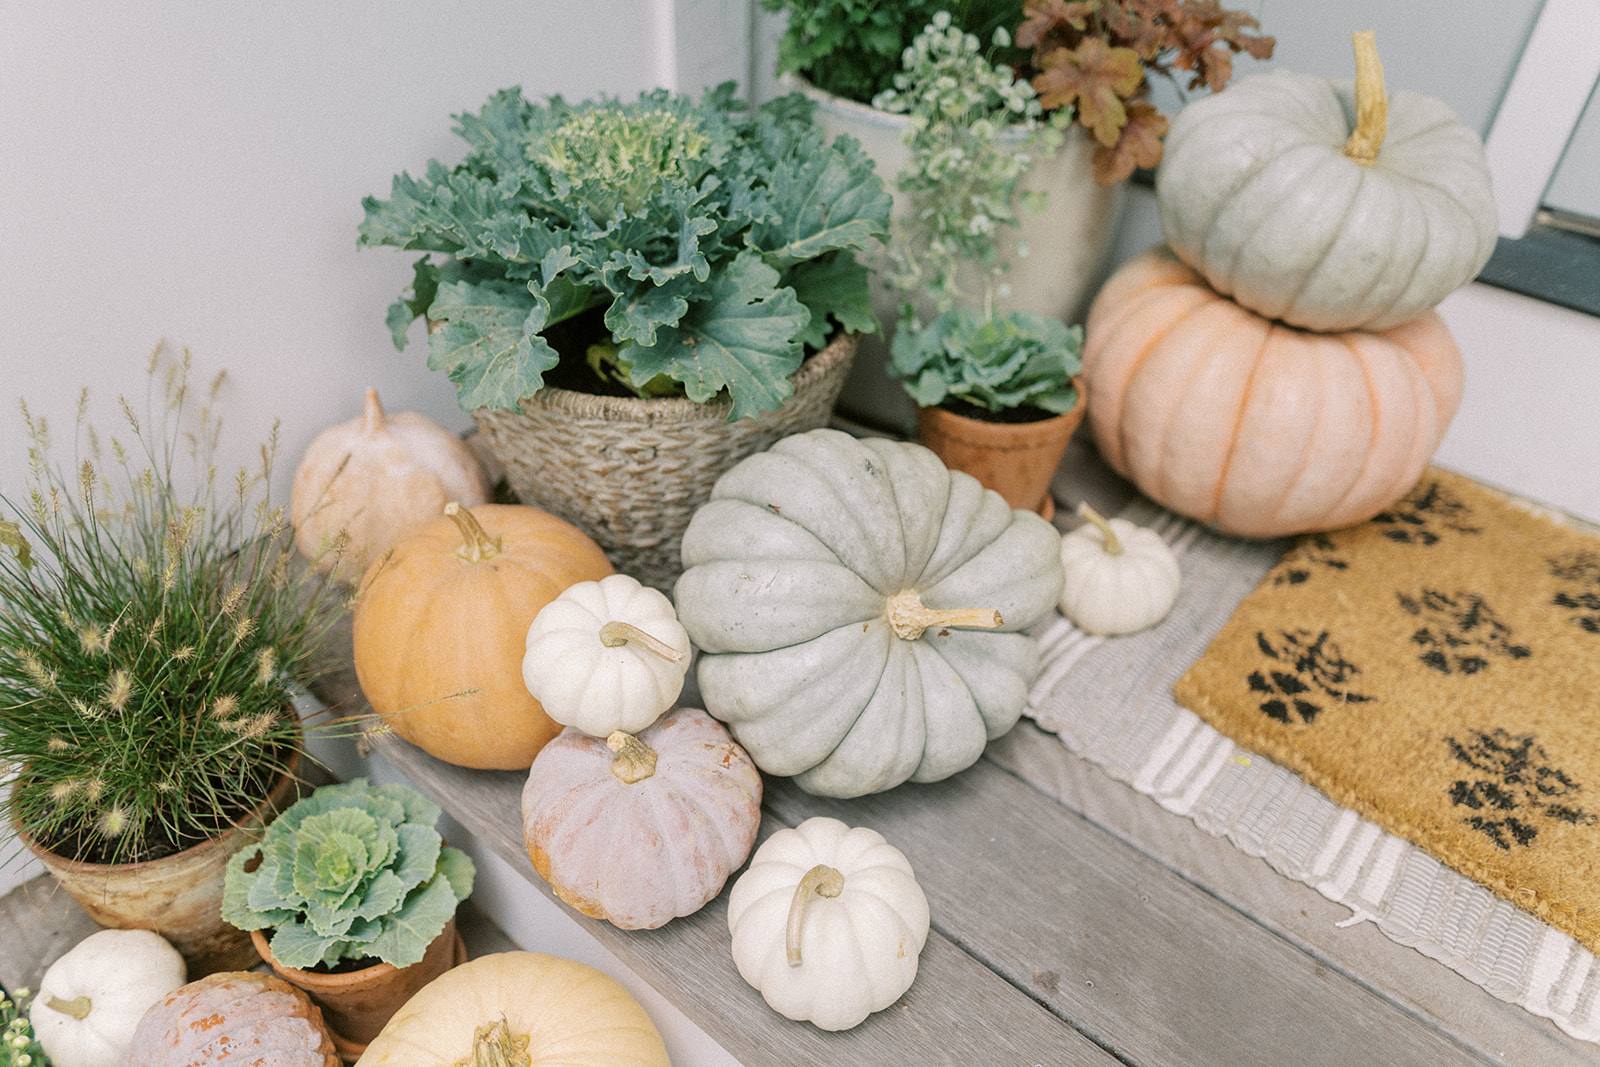
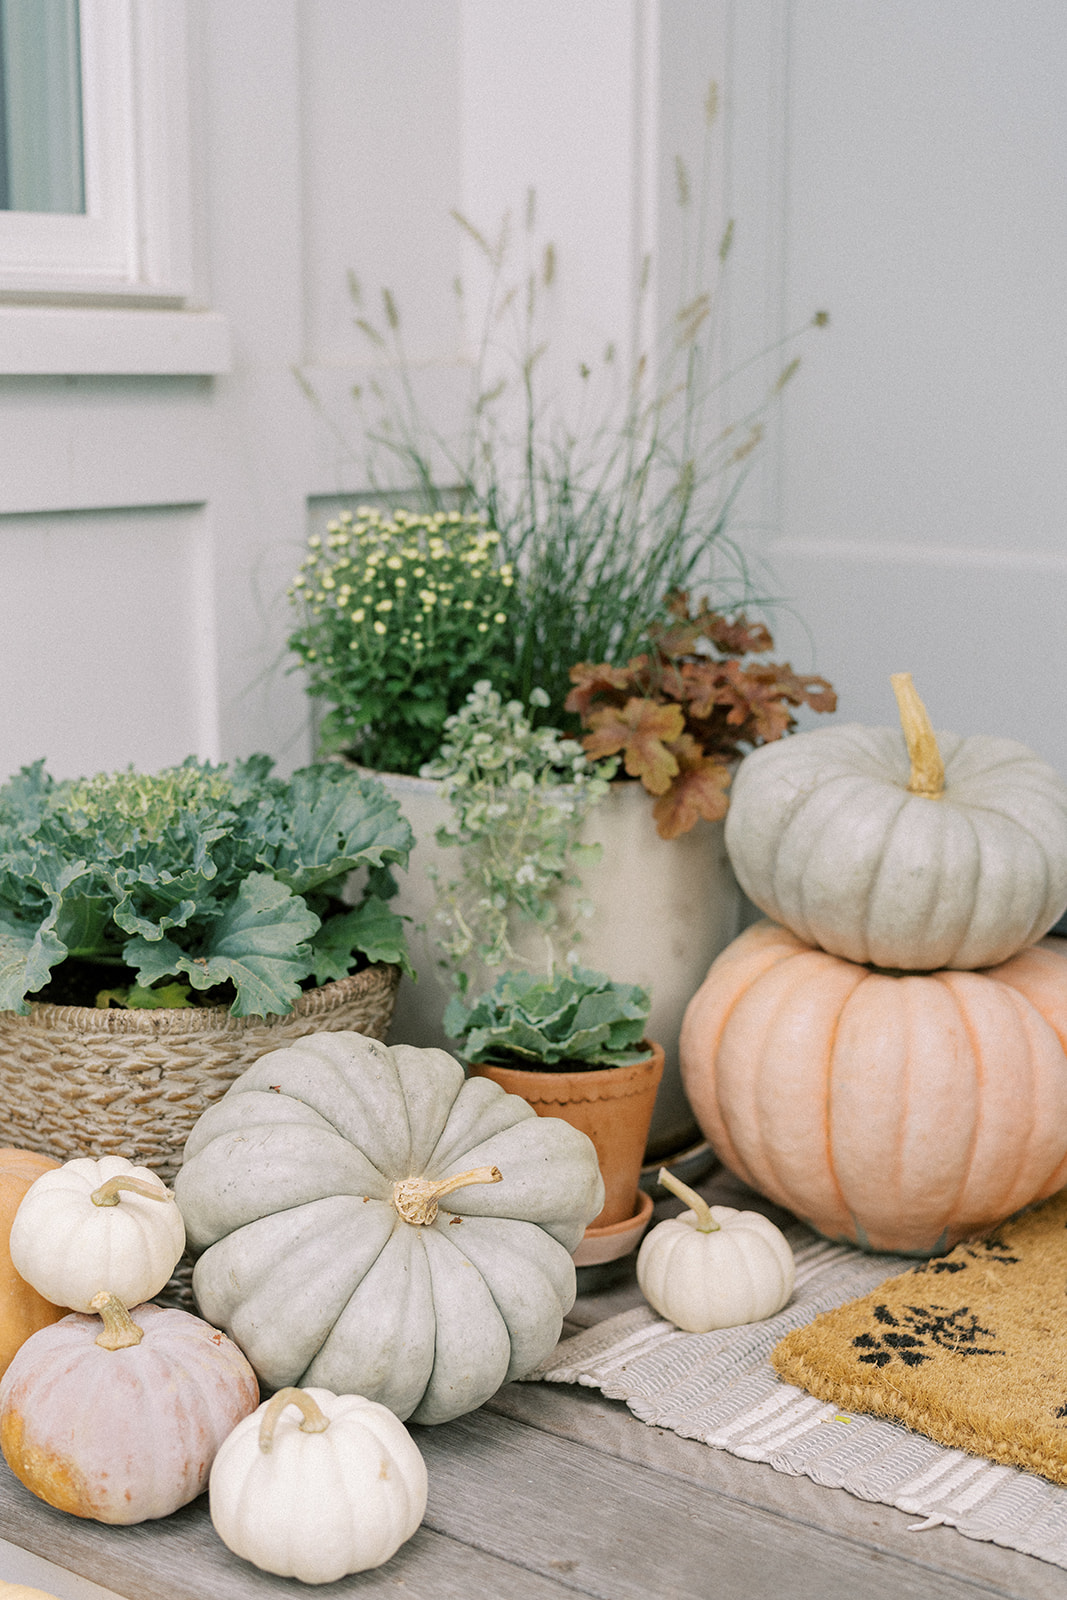
It seems like more and more unusual varieties are more readily available. We get the bright orange ones later in the season on a family outing to the pumpkin patch and those are the ones we end up carving. But the fairytale pumpkins are my favorite and I can’t help myself when I encounter a stack of them. They might as well all jump in the car because I have no will power. They sure look pretty with this wreath I made last year for our fall home tour.
When decorating steps with pumpkins you’ve really got two options: real and faux and you can do either well now days.
REAL PUMPKINS
If your heart loves the real ones as much as I do, try your local nursery (Russells in Wayland, Ma for me), Home Depot, or grocery store– Whole Foods usually has the pretty ones and Trader Joes too. They are either priced per pound (I paid $1.49 per lb at my local nursery) or as a flat rate. You get better prices if you wait a bit. It can be hard to justify spending money on something that is temporary but what you get are lovely, unique pumpkins that are a joy to decorate with. Your most inexpensive option is to grow them yourself however, speaking from experience here, they take over your yard and it isn’t a guarantee. But I have started removing seeds from them at the end of the season and trying to grow some of my own. If you’re lucky one might magically sprout out of your compost pile like we had happen this year.
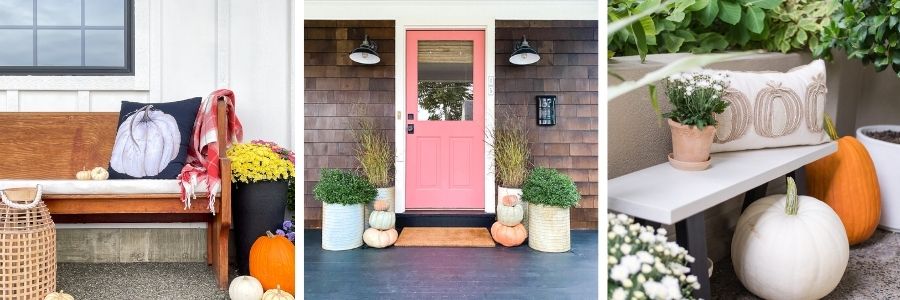
FAUX OPTIONS
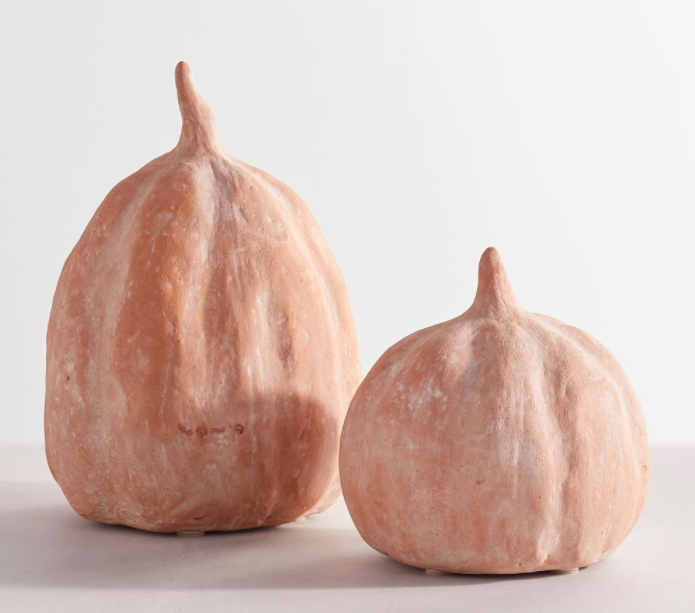
Now more than ever before there are some lovely faux ones which may interest you if you live in a hot area of the country or if it’s early and you can’t find the real ones yet. I invested in these adorable terra cotta pumpkins and used them on my front porch earlier this month. The foam ones that look more realistic are definitely an investment. They are pricey (~$30-60 each), especially when buying many, but are looking better and better. My tip: buy a few realistic faux pumpkins, remove the plastic stem and replace it with a real pumpkin stem. I’ve linked a few of my favorites below. A major downfall is having to store them all year which is already my husband’s pet peeve given the Christmas tree apocalypse in the attic. Taking all these things into consideration, I tend to go with the real ones and embrace the seasonality of them.
CREATING A PATTERN
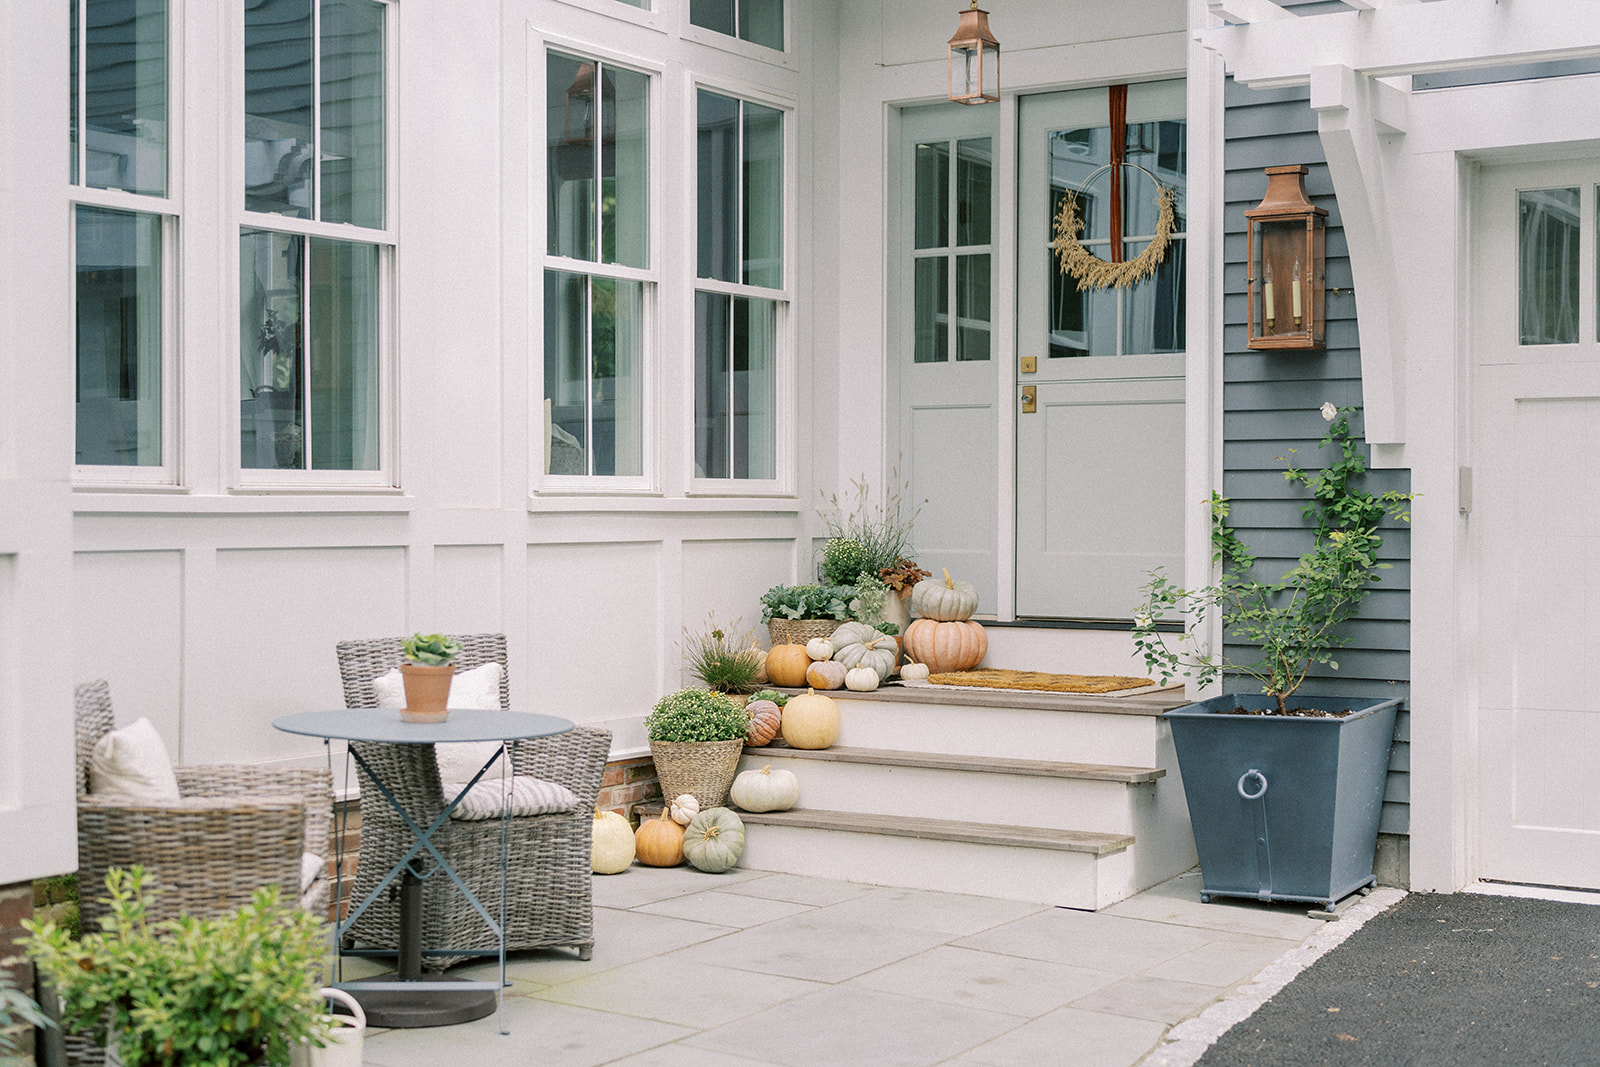
Typically I line both sides of my steps with different sizes of pots filled with fall plantings. From grasses to mums and kale and then scatter the pumpkins around them. I love this look but this year, I took a cue from our dutch door. With an asymmetric side window, it dawned on me that it may look lovely to have all the pumpkins and plantings on one side. I love it. Pair big and little pumpkins together, stack some, turn some on their side and add in the babies for a sweet, unfussy fall look.
The woven basket pots are from Home Depot and are made of a composite which weathers the cold winters nicely. The tiny scallop pots are by Berg and a terra cotta I’ll need to pull in for the winter.
Thank you for stopping by! Happy fall to you.
Make sure to check out these amazing posts!
How to Decorate your home With Outdoor Fall Decor | My 100 Year Old Home
Minimalist Fall Porch | Modern Glam
Simple Outdoor Fall Table Decor Ideas | Twelve on Main
Fall Mum Display Ideas for the Front Porch | Happy Happy Nester
Decorating Steps with Pumpkins | Finding Lovely
Fall Porch Decor in Subtle Autumn Colors | Maison de Cinq
Fall Decorating on the Front Porch | Inspiration for Moms
How to Make Pumpkins Last Longer (for decoration or eating!) | The DIY Mommy
Modern Farmhouse Fall Front Porch Decor | The Happy Housie
Would You Paint Your Door Pink for Fall? | Most Lovely Things
Fall Front Door With Pumpkins and Mums | Life is Better at Home

 comment share
[…] Decorating Steps with Pumpkins | Finding Lovely […]
[…] Decorating Steps with Pumpkins | Finding Lovely […]
[…] findinglovely […]
Hi! What’s the paint color of your front door? Thanks!
Hi there, it is Farrow & Ball Light Blue
[…] Decorating Steps with Pumpkins | Finding Lovely […]