
HOME TOUR
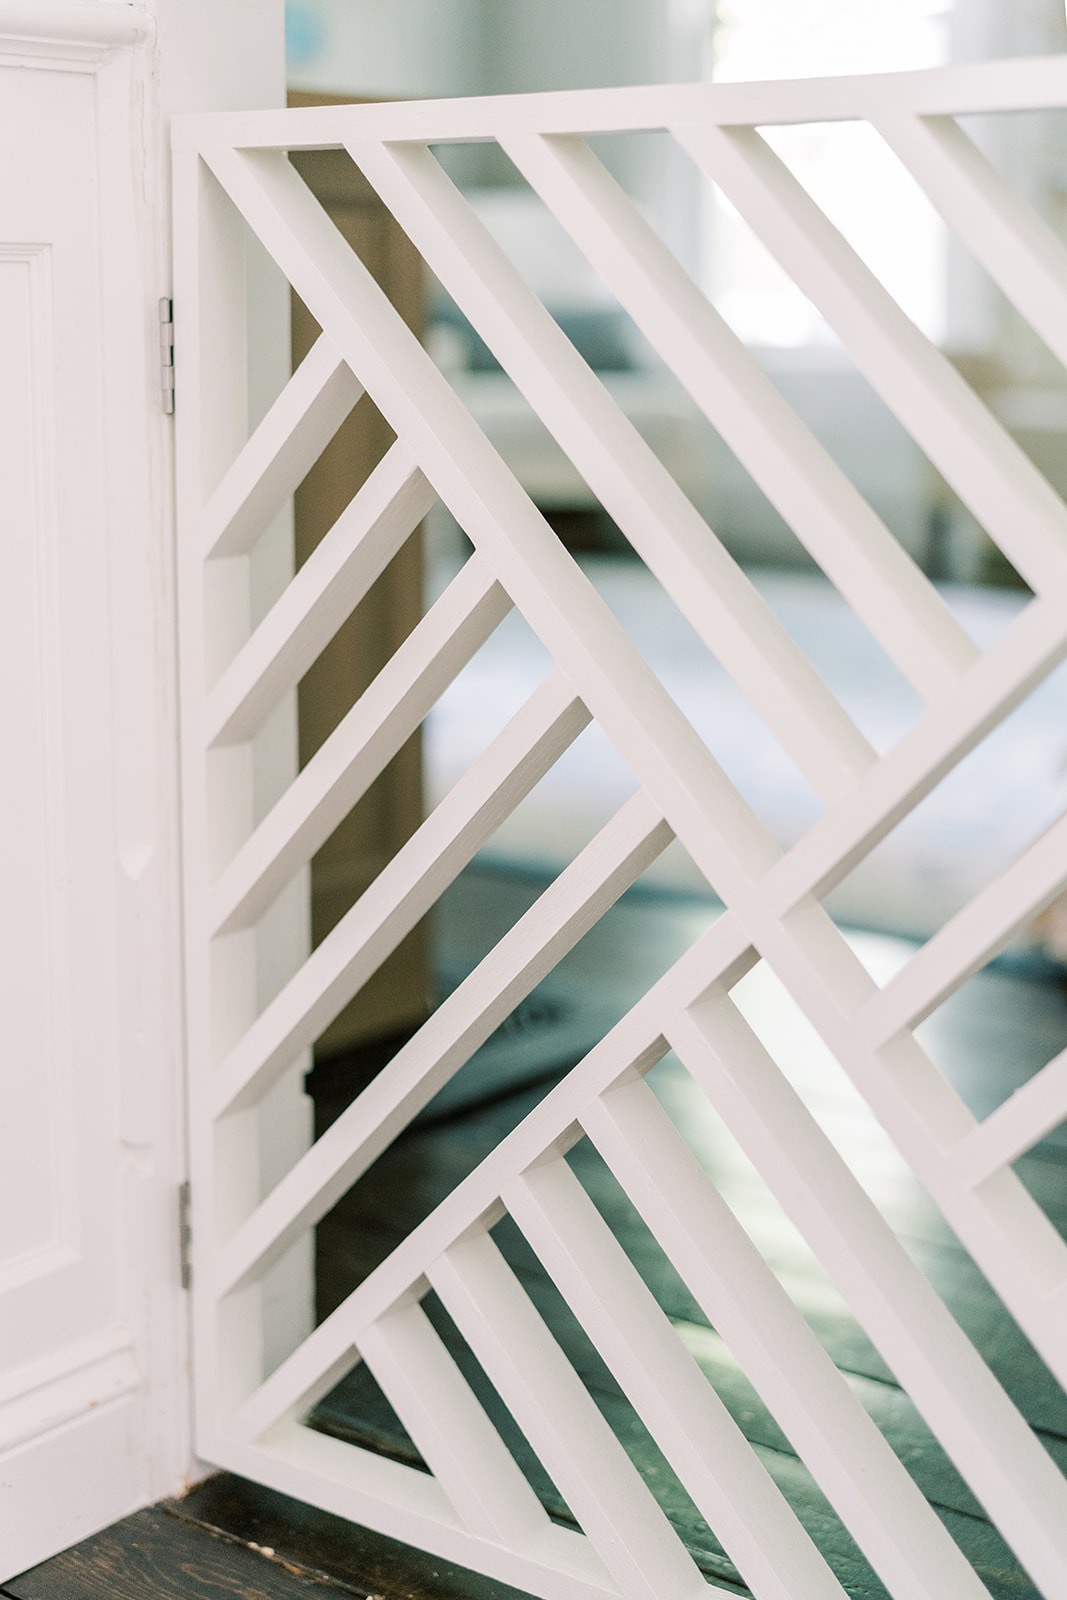
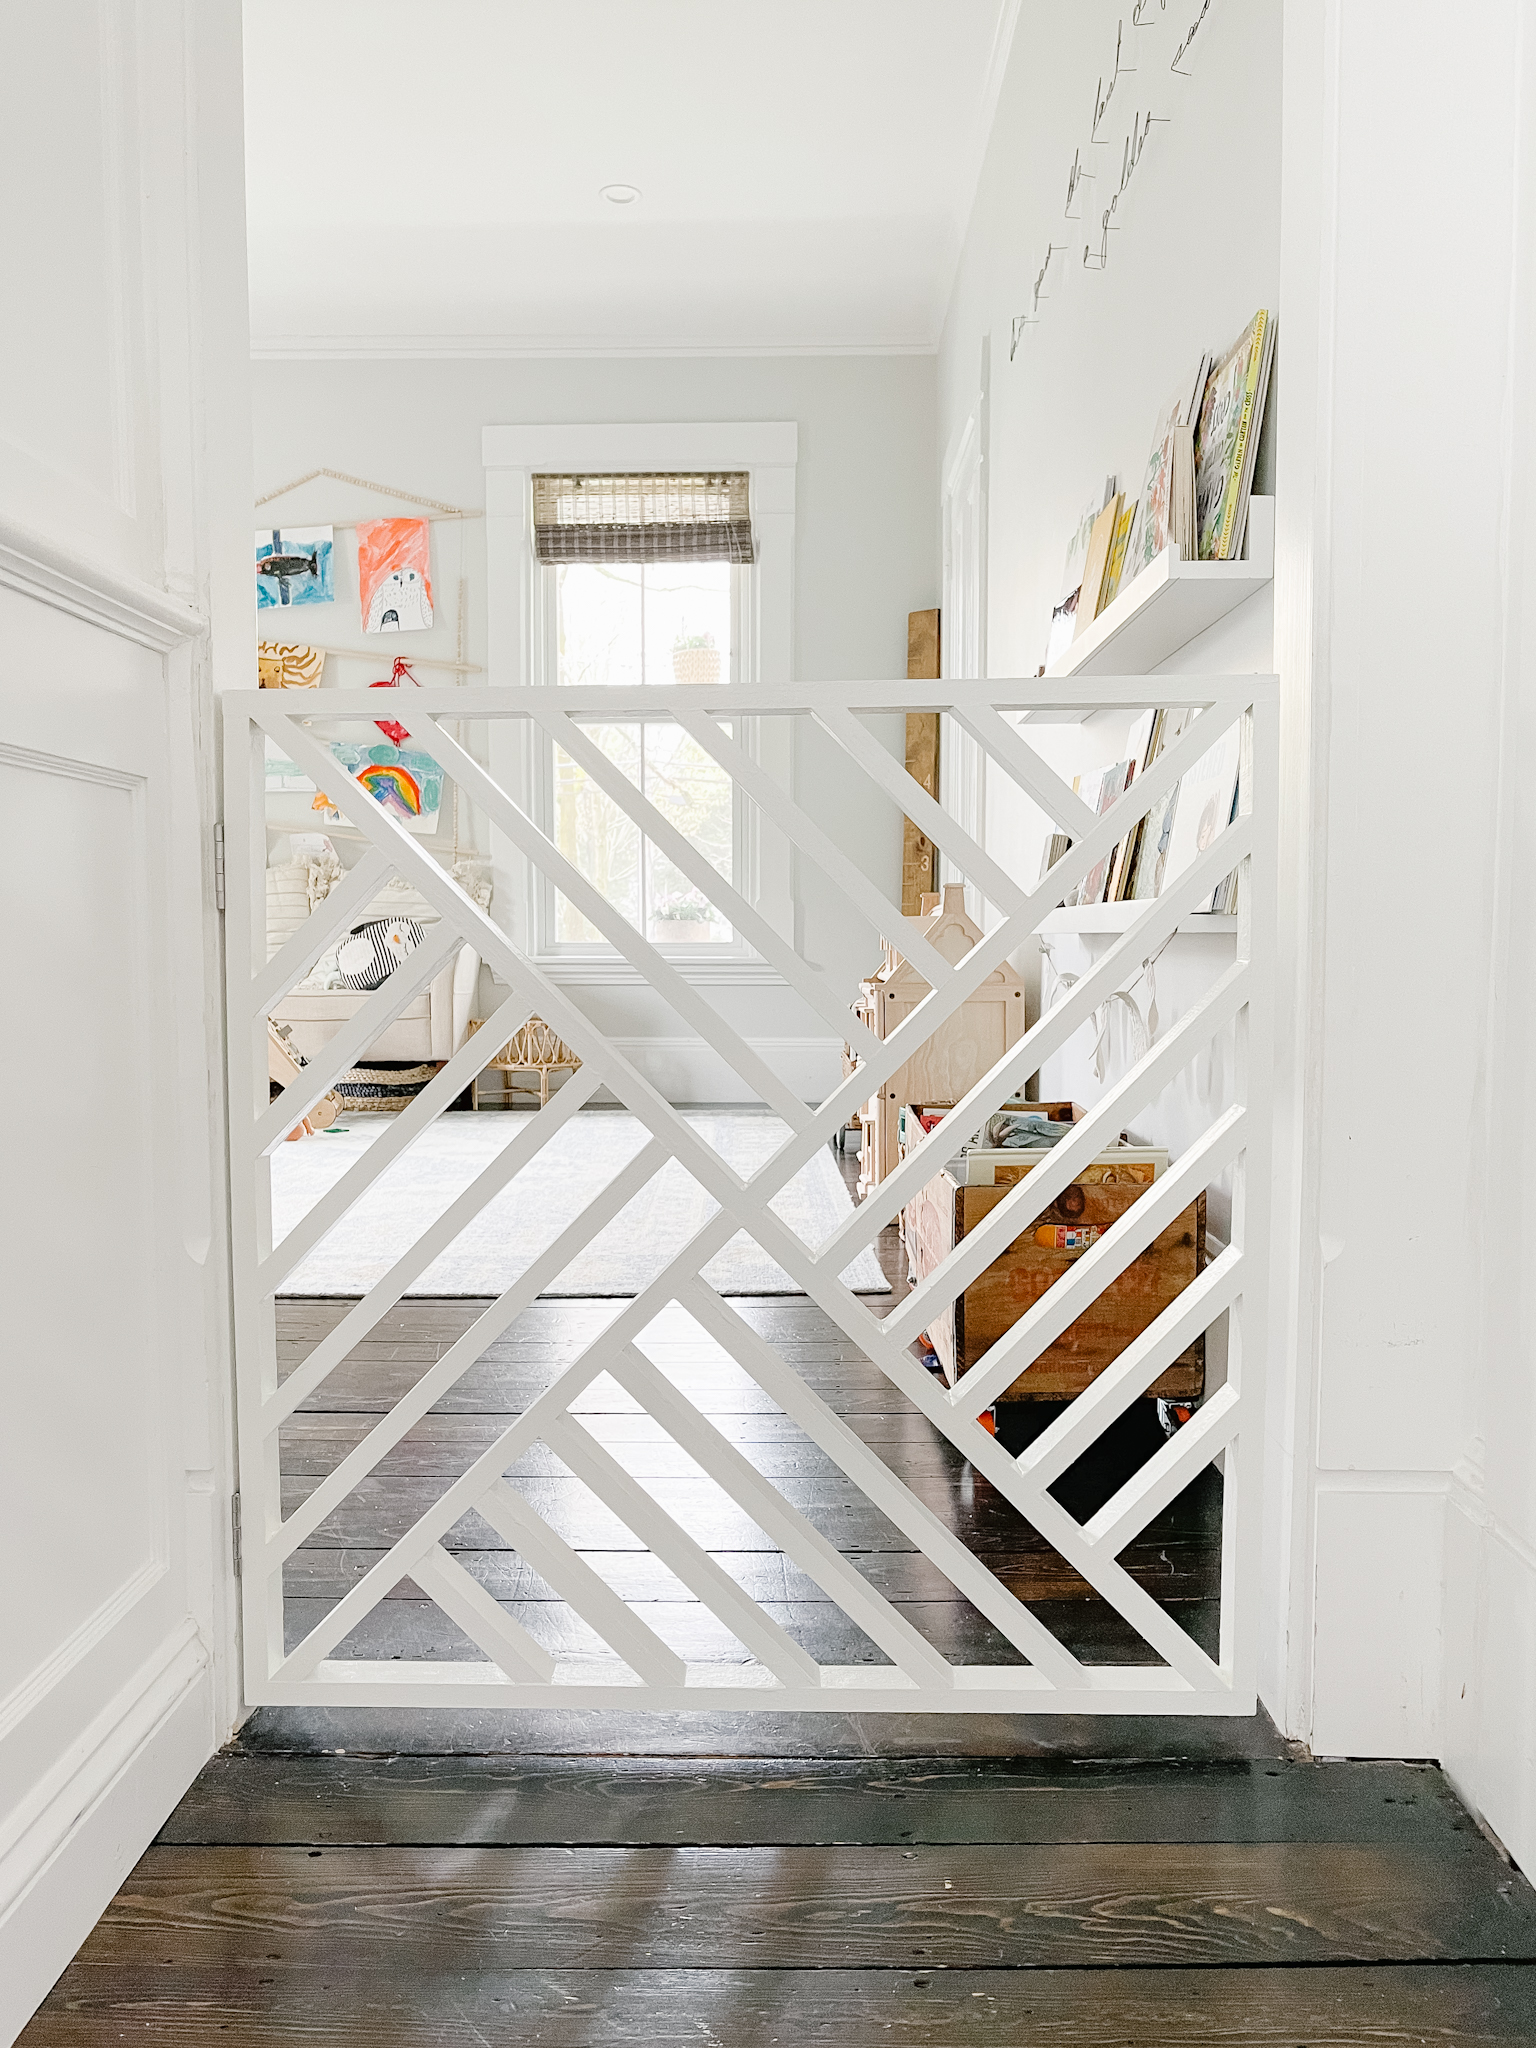
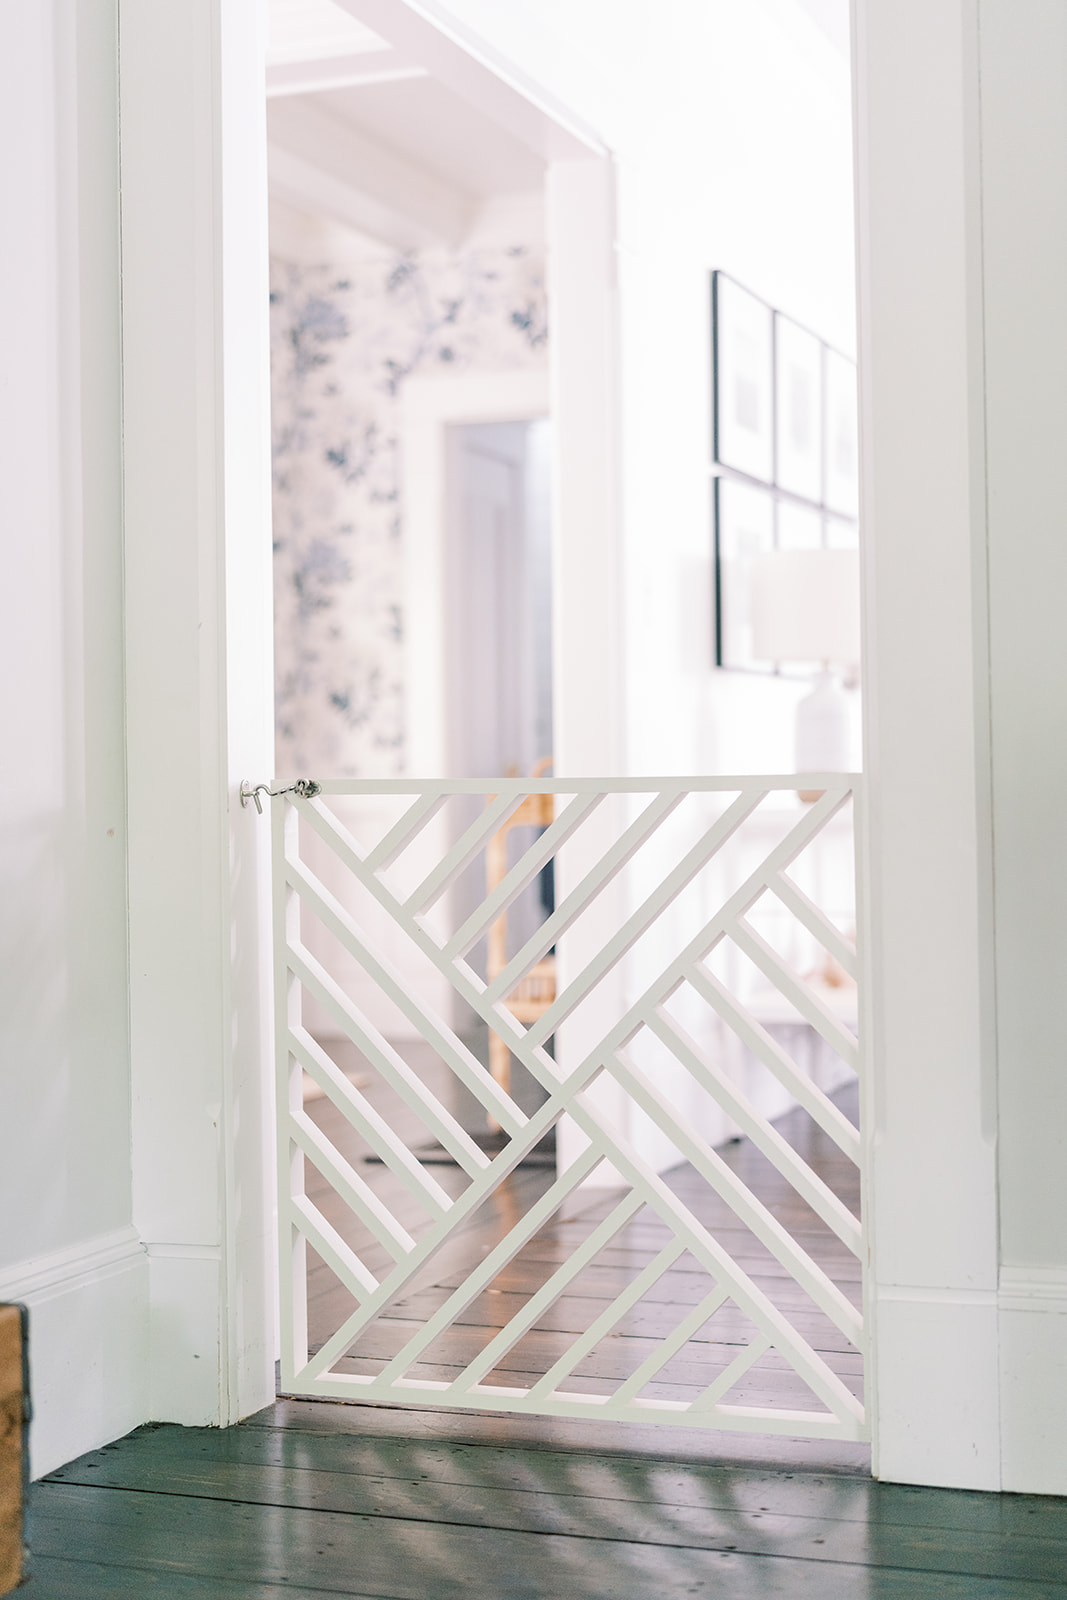
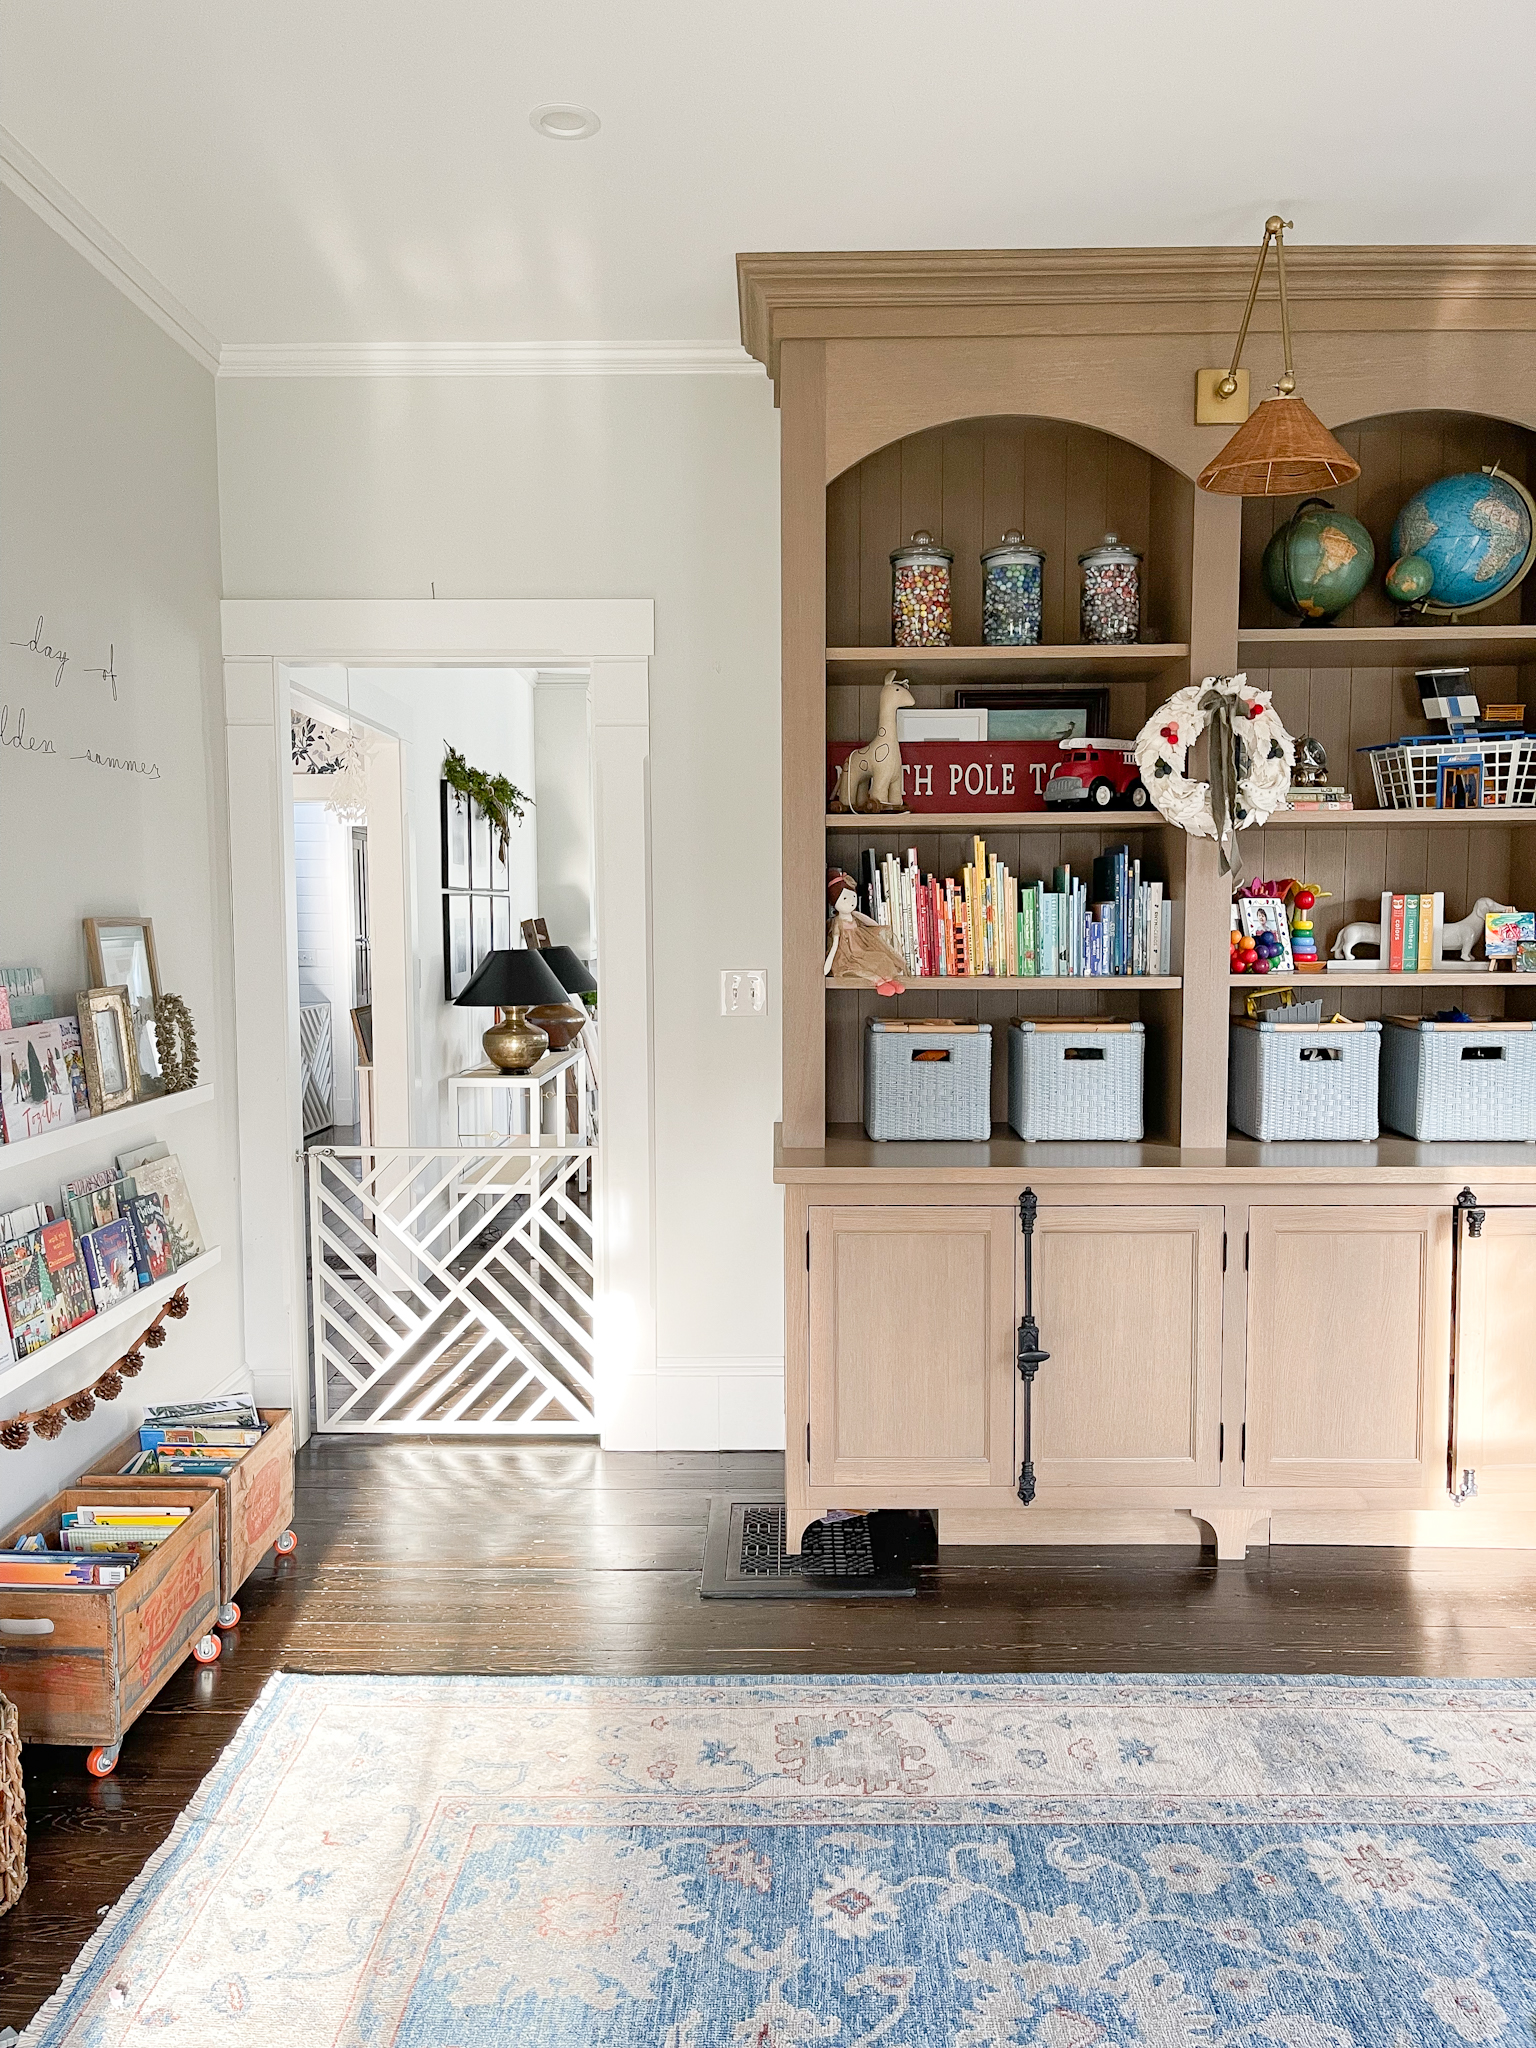
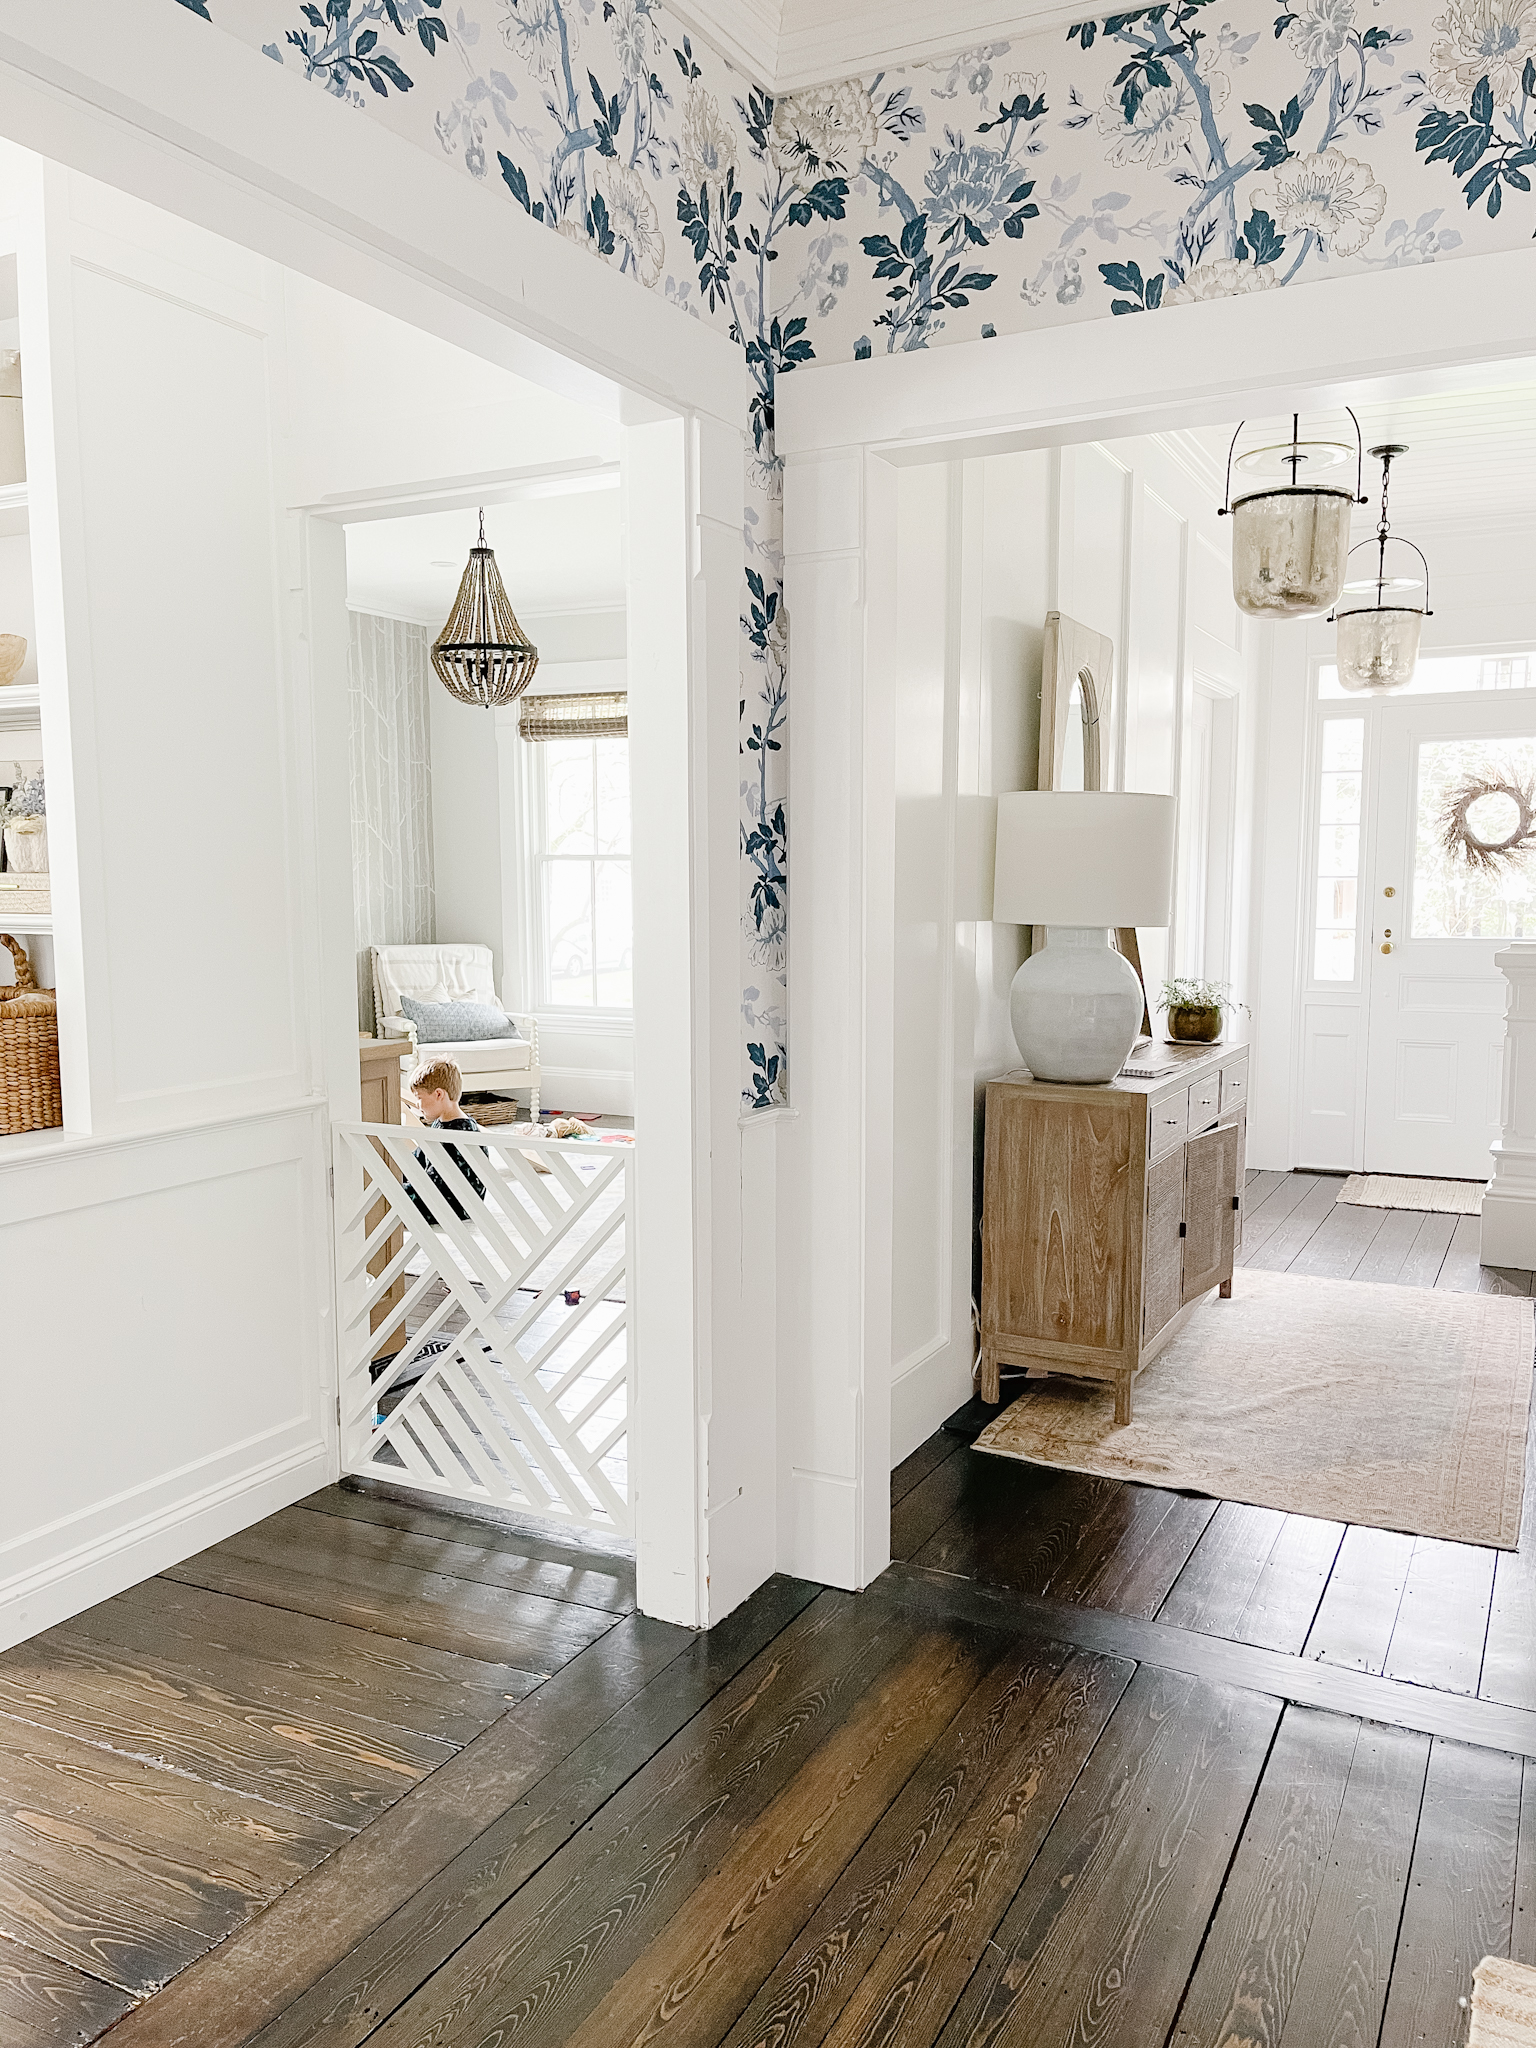
Ok maybe in reality a pretty dog gate but you get the idea. Regardless, we had a rickety, ordinary, plastic baby gate barring the playroom from the rest of the house for awhile because a certain mischievous cocker spaniel was stealth attacking the playroom toys. I drew up a picture of how I wanted the baby/dog gate to look, modeled after some railing from a house I liked during a visit to the Cape. It’s a fairly common railing design the question was, could we DIY this sucker and make a pretty baby gate? Why yes you can, keep on reading to make your own pretty DIY baby gate.
Honestly it wasn’t that hard. But then I didn’t do the majority of the work. You could always buy one on Etsy. We started with a trip to Home Depot to pick up wood. We purposely bought hardwood–the nice oak because we knew this gate was going to see a lot of action from small hands and we needed it to hold up. It ended up being 40 ft of 1″ x 2″ oak at $1.50 a foot (this was a year ago now and lumber prices have only gone up).
Matt here. Our gate into the playroom is 31″ square. The square design seemed like it would make things easier so we went with that, but it probably wouldn’t be much harder (if at all) to make a rectangle instead.
![]()
CREATING THE BORDER OF THE GATE
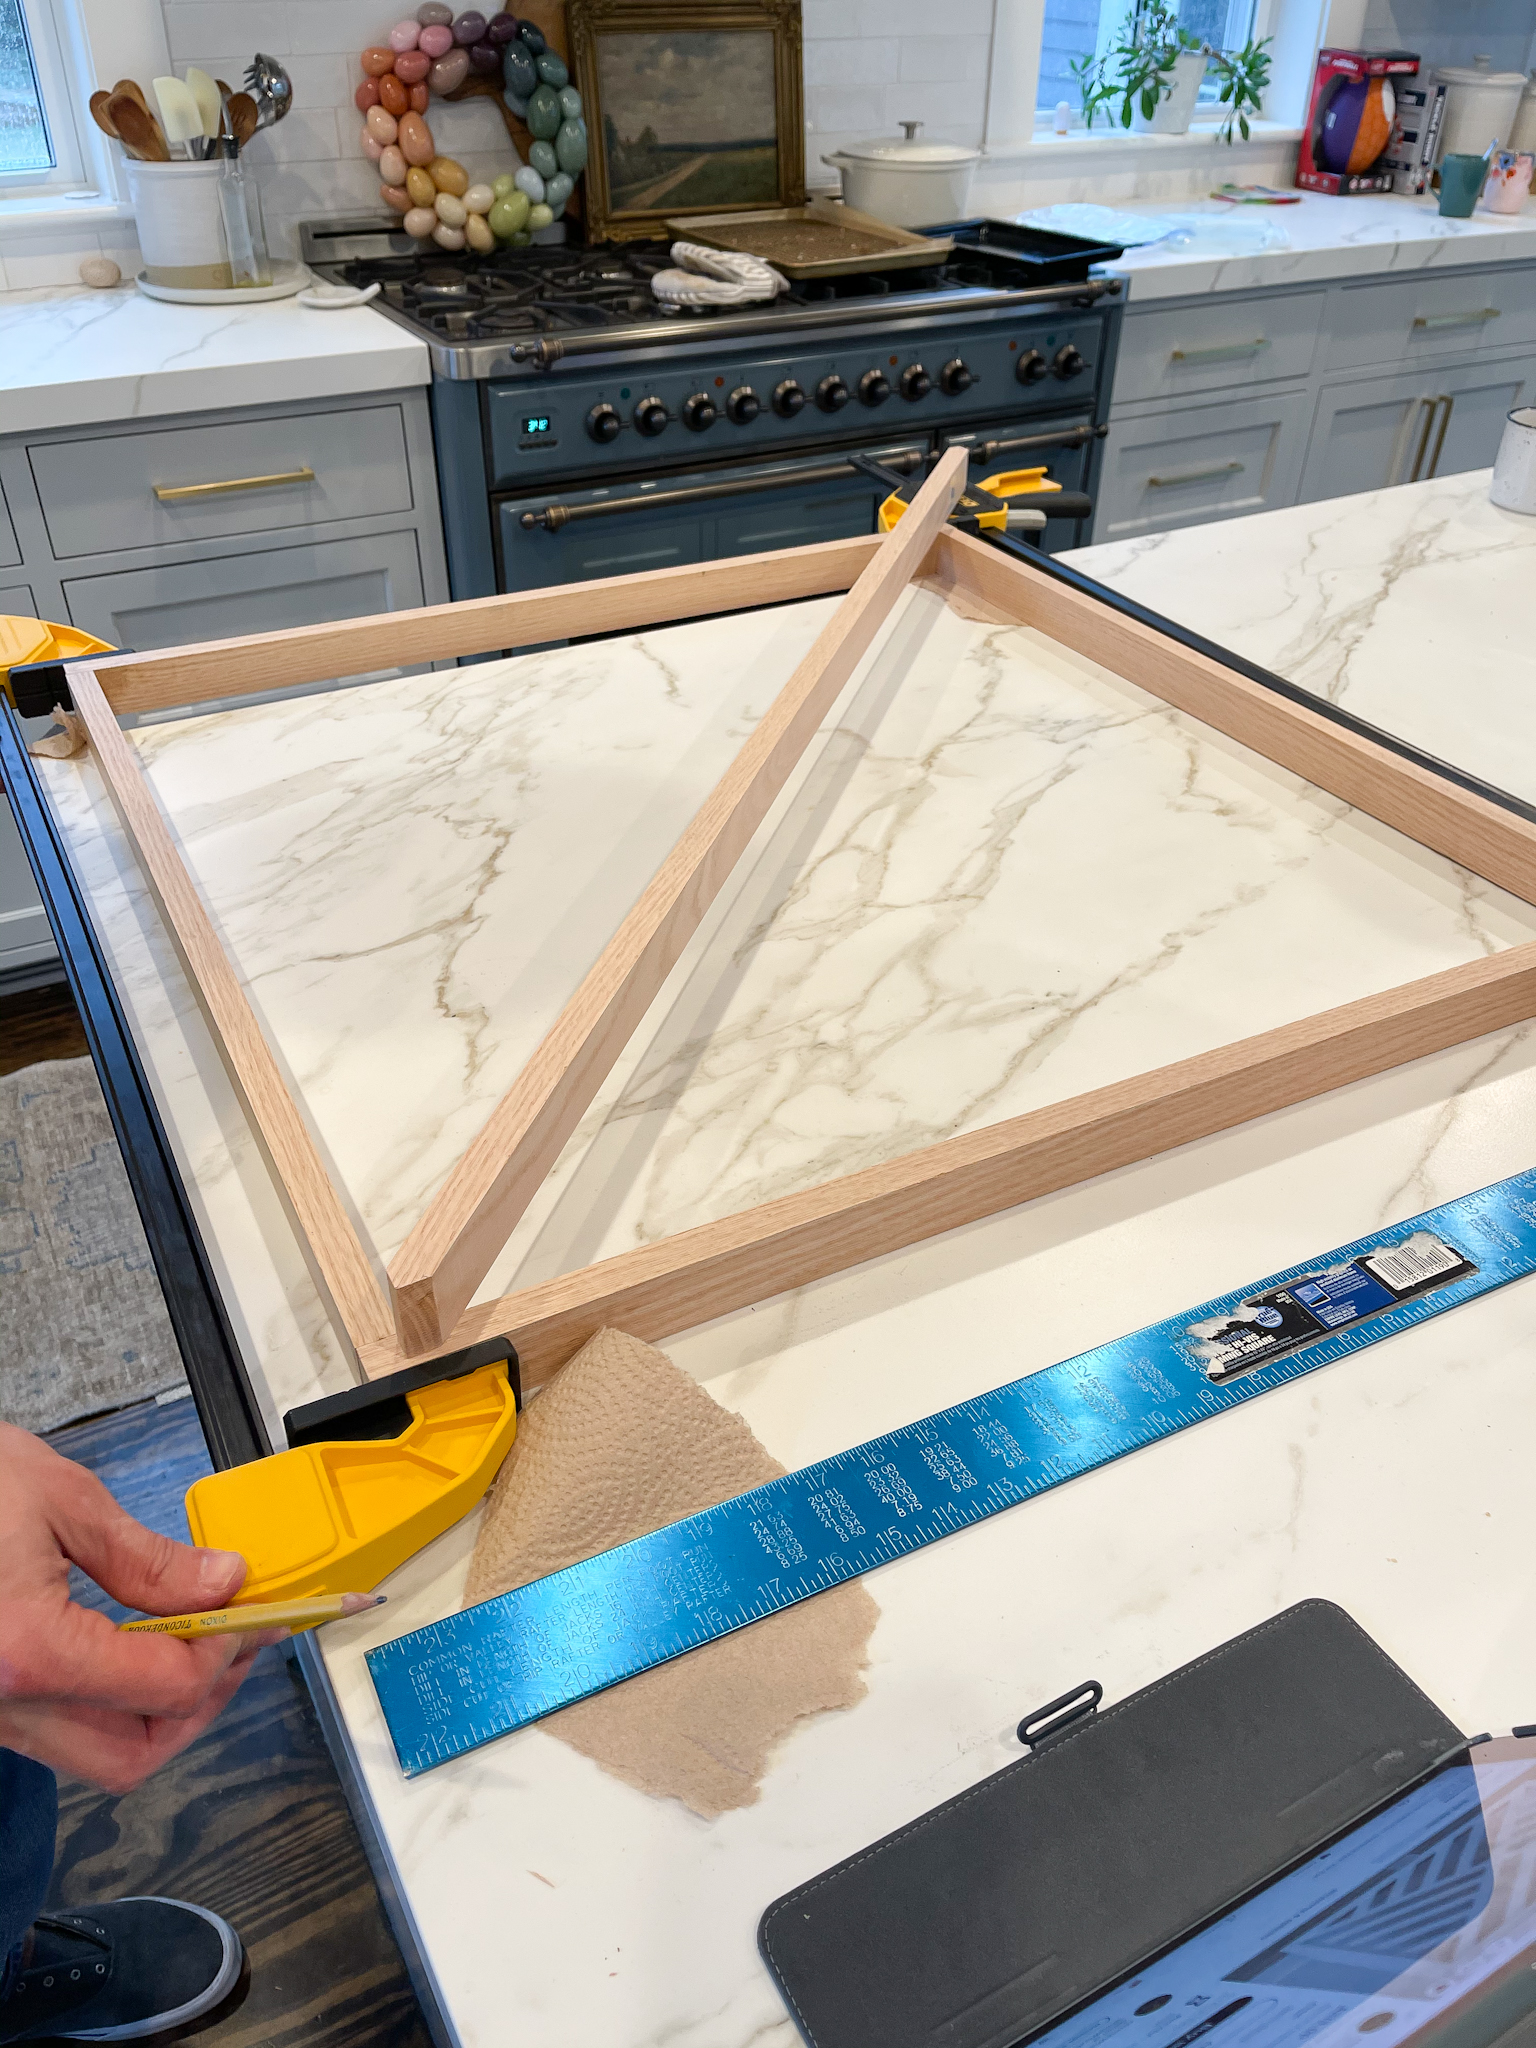
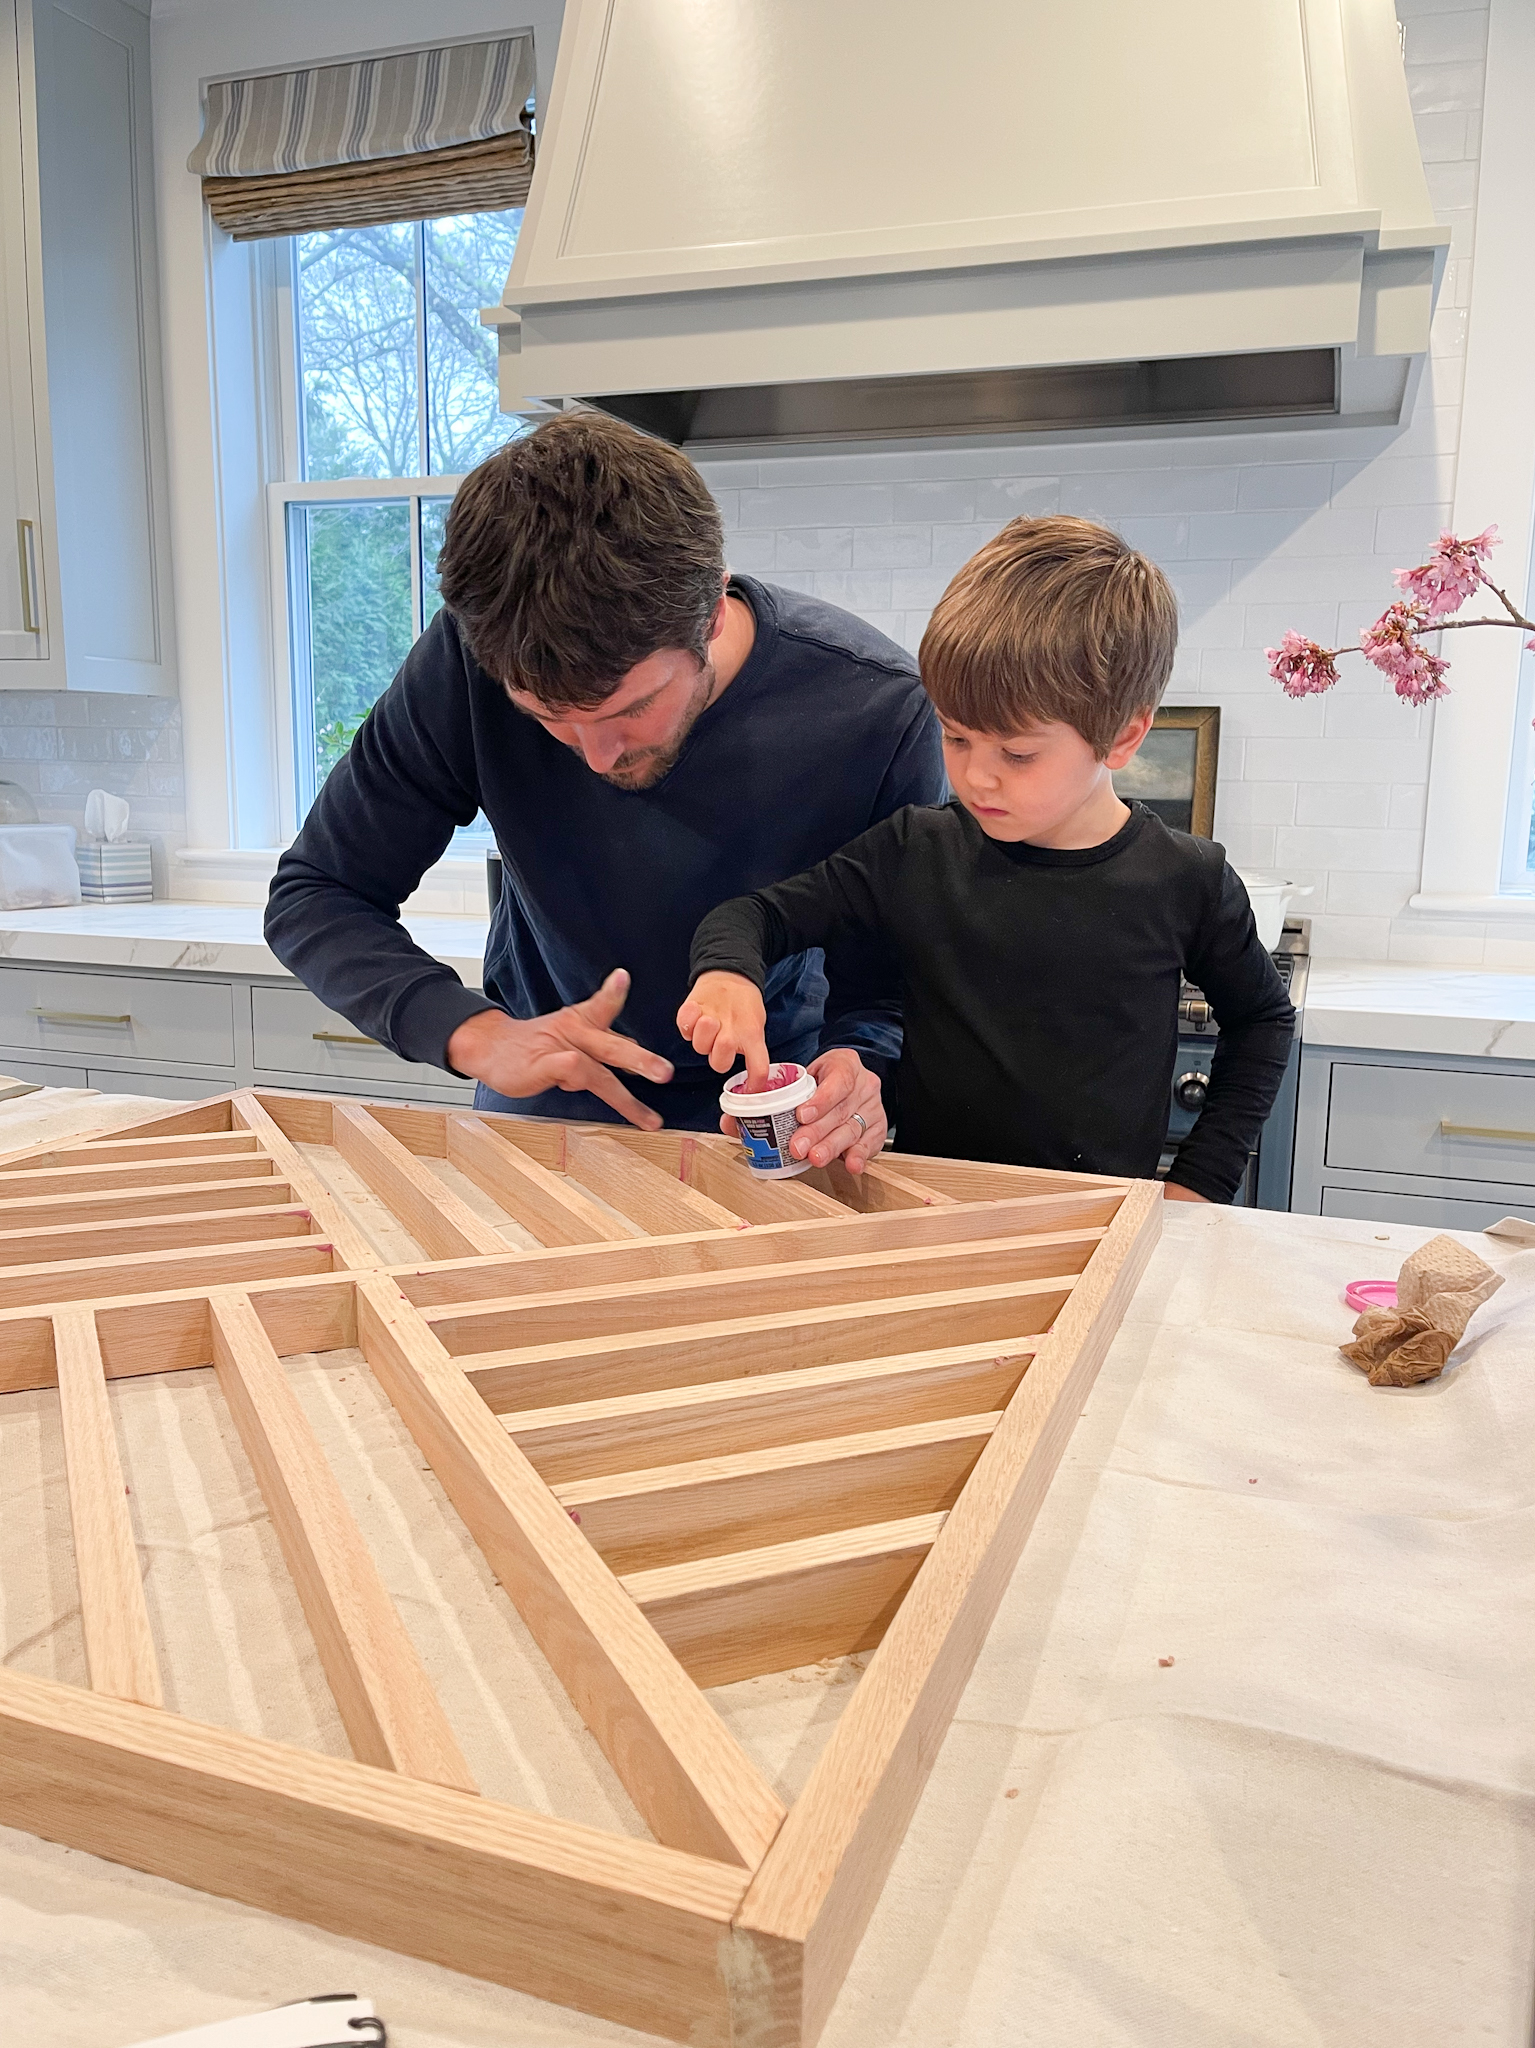
The border comes first. Cut two pieces of oak 31″, then two pieces 29.5″. Use wood glue, a square, and a 36″ clamp to make the square border. We connected two pieces at a time to make sure the corners were as close to 90 degrees as possible, although it’s certainly not perfect and that didn’t turn out to be a big deal.
After the glue is set on the border (20-30 mins is enough as long as you don’t move it around too much), it’s time to make the X through the center. Note that the X doesn’t go directly into the corners of the border, but the outside edge of the X touches the corner of the border. First cut one piece that goes corner to corner, and once that’s glued in place you’ll need to use two pieces to make the other line of the X.
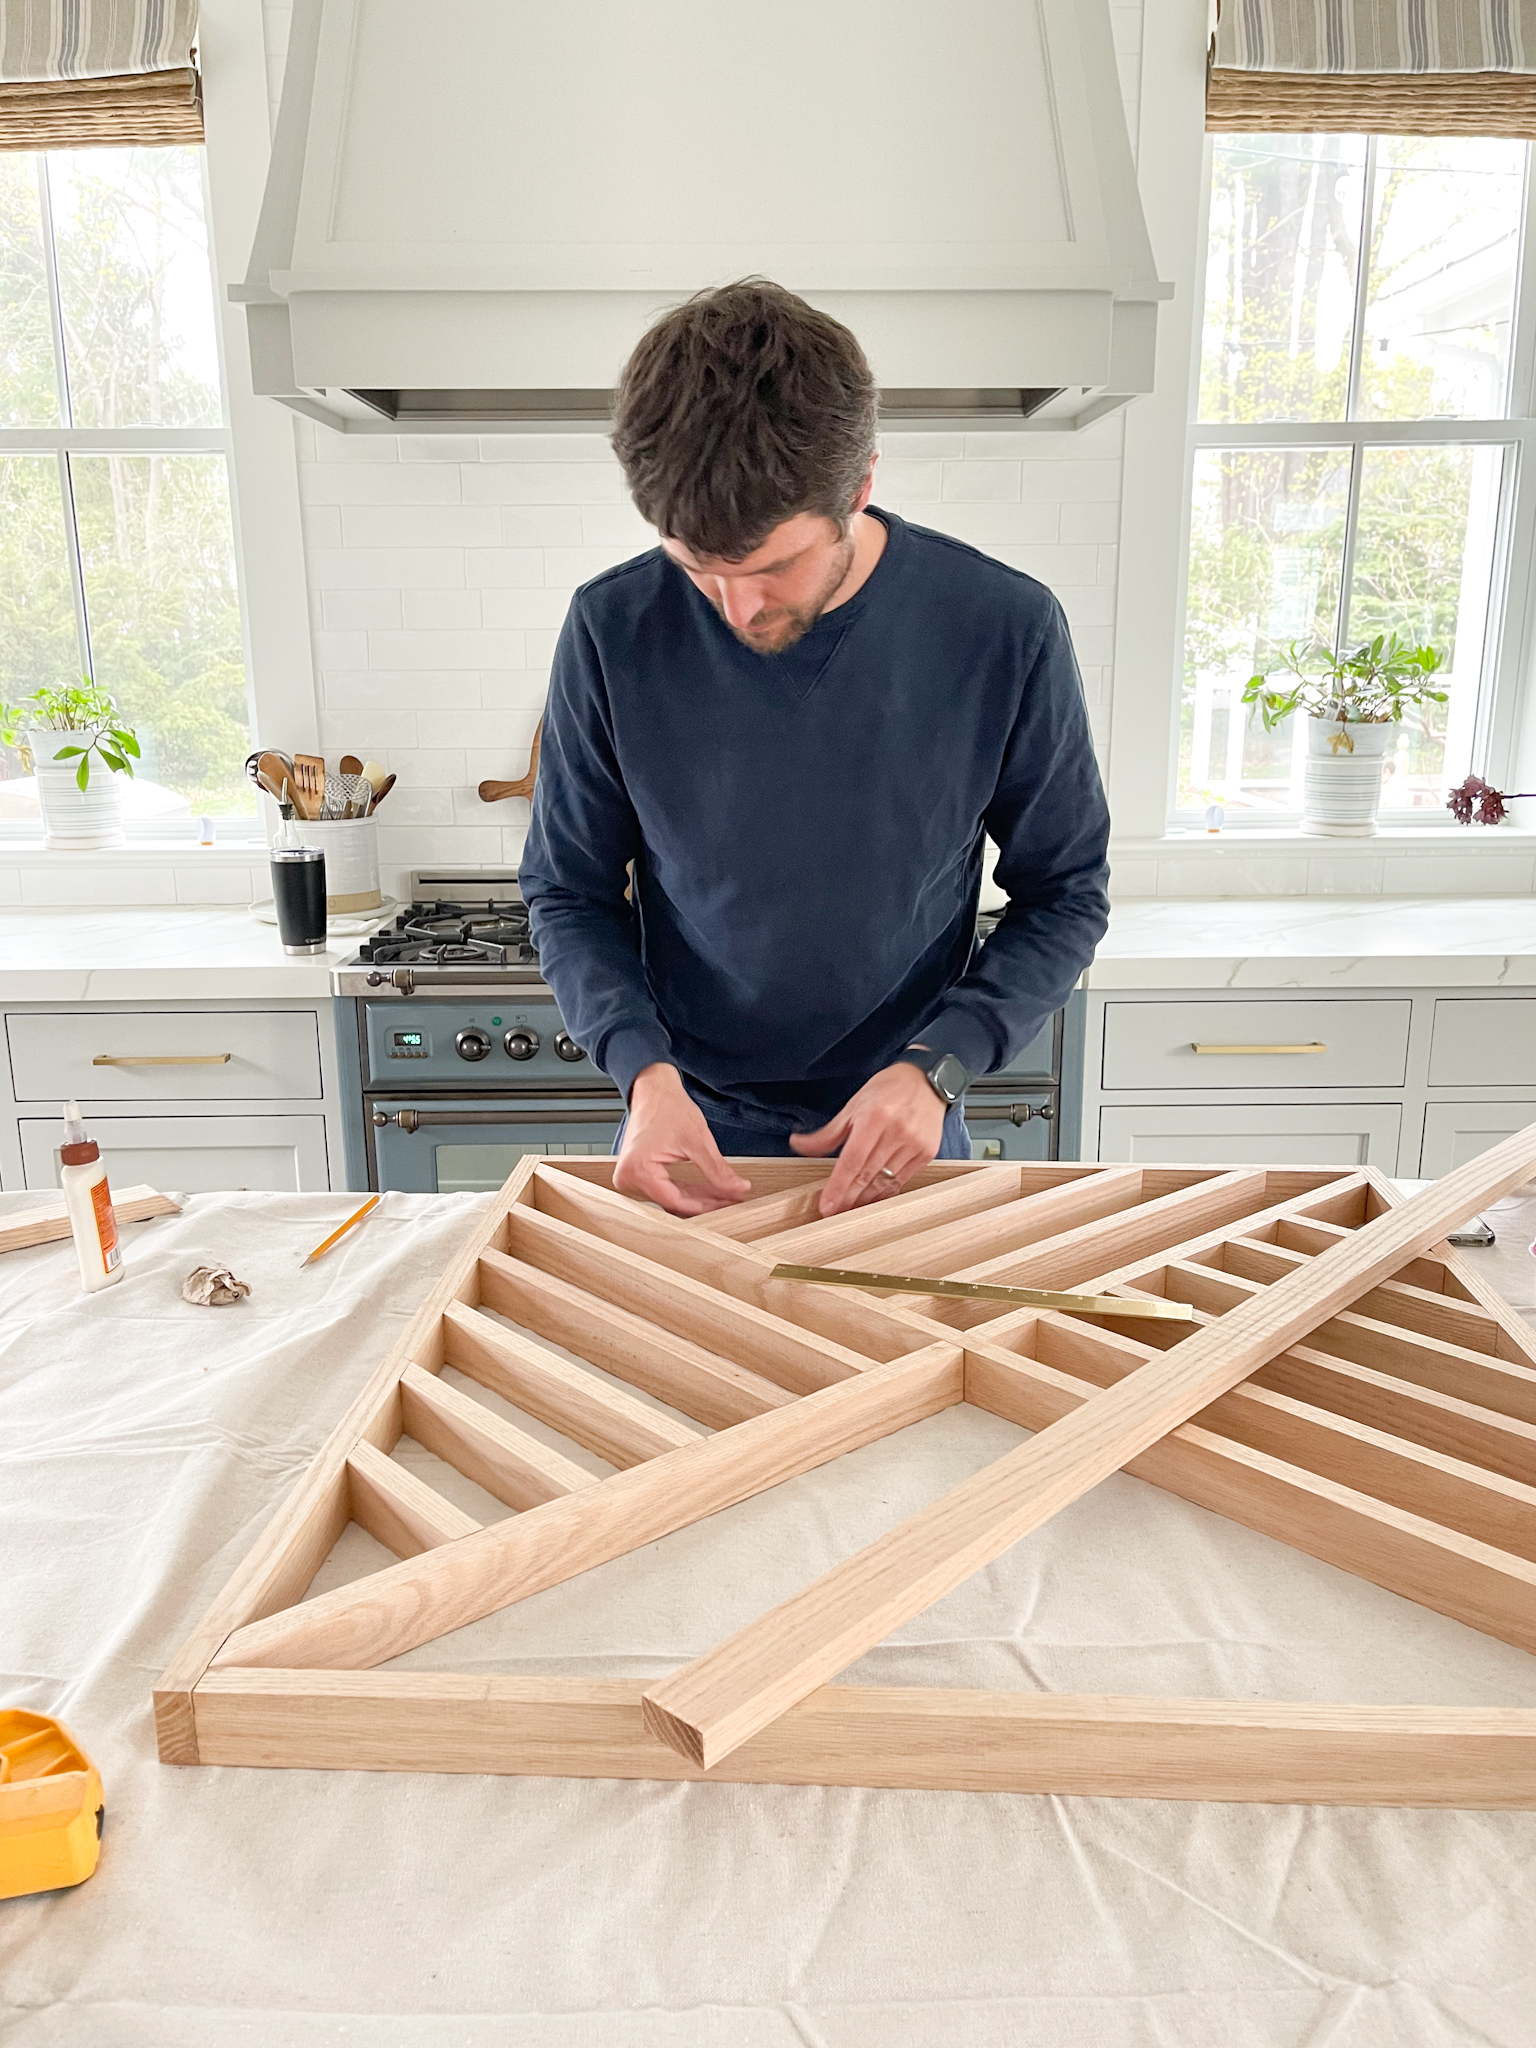
![]() Note on prepping pieces to cut: For the X and all subsequent pieces, there’s no need to measure. The border should be sitting on a flat surface, so just lay the next board you want to cut on top of the border in the place you want it to be. Then use a small pencil and draw your lines on the under side of the piece you want to cut (I used a mechanical pencil so I could make the lead really long, which made it easier to make a line right in the corner of the two pieces). When you use this method you don’t want to cut the lines you’ve drawn.
Note on prepping pieces to cut: For the X and all subsequent pieces, there’s no need to measure. The border should be sitting on a flat surface, so just lay the next board you want to cut on top of the border in the place you want it to be. Then use a small pencil and draw your lines on the under side of the piece you want to cut (I used a mechanical pencil so I could make the lead really long, which made it easier to make a line right in the corner of the two pieces). When you use this method you don’t want to cut the lines you’ve drawn.
A Note on glueing:
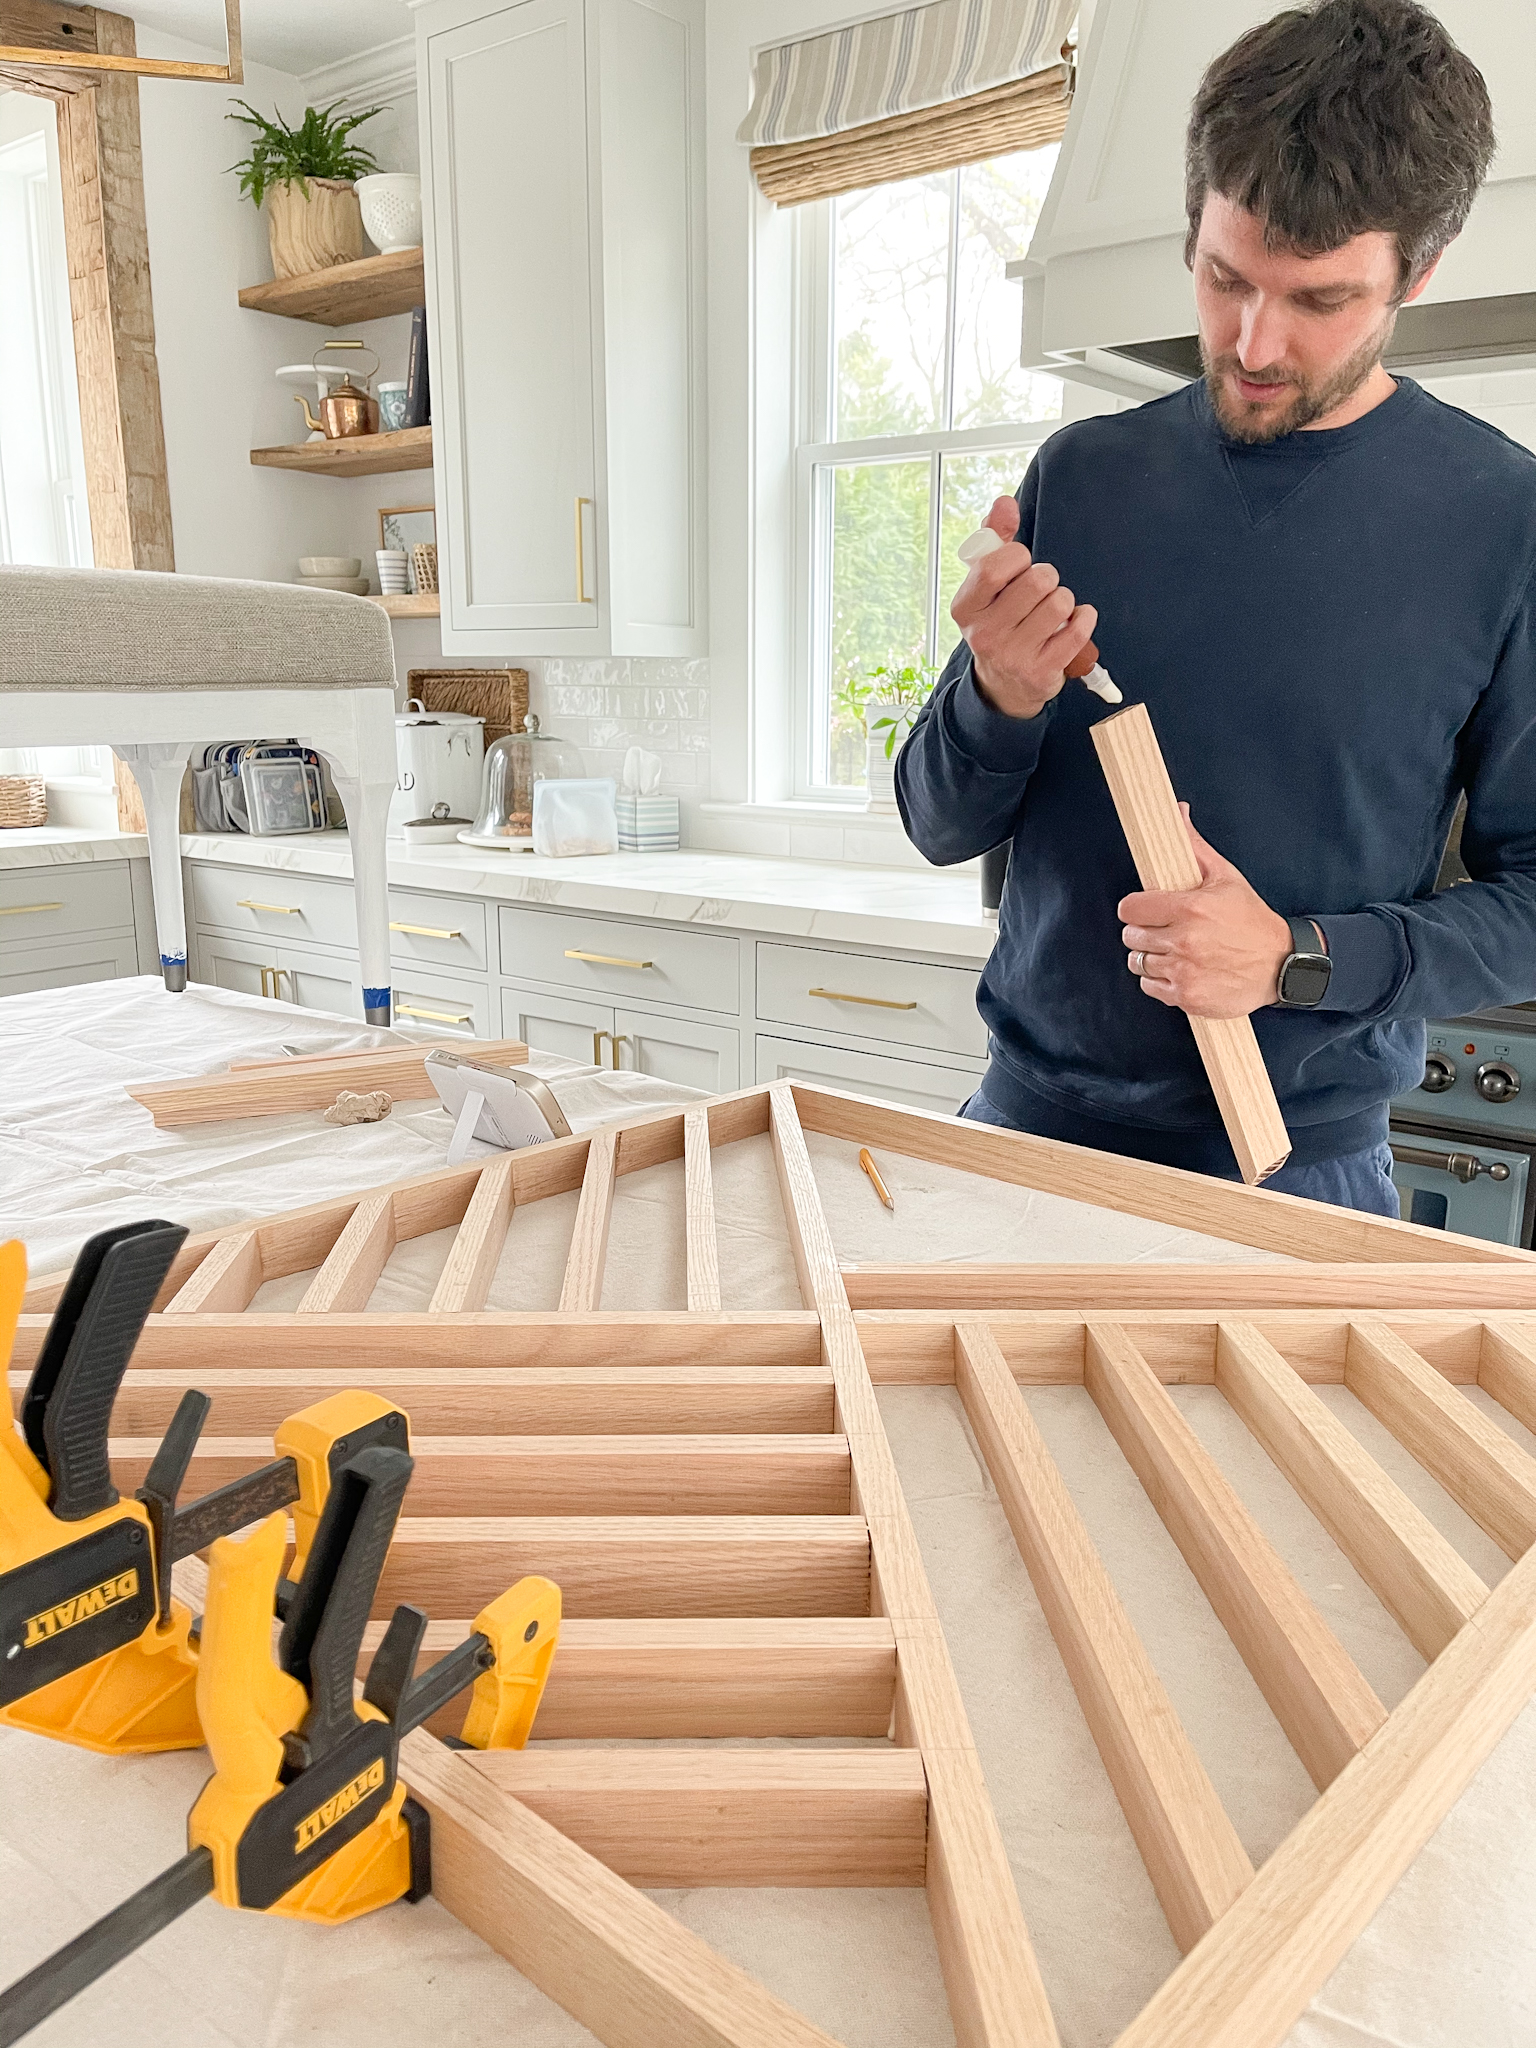
I used some small clamps to keep some pieces in place to glue. The angle pieces sometimes need two clamps – one to push the two pieces together and another one to keep the angled piece from sliding out of place. But for most pieces you can just push with your hands for a minute or so and the glue will hold. If you’re not a pro (and probably even if you are?) you’ll need to use wood filler at the end to fill small gaps, so it’s okay if the pieces aren’t perfectly flush.
Now that you’ve got a border with an X in the center, decide on the space you want between the angled pieces. Our angle pieces are 2.25″ apart. I just cut a few pieces to about the length that we’d need and laid them out to get an idea of the spacing. For each piece, lay the board you want to cut on top of the frame and measure from the center of the X, and from the inside edge of the border, to the new piece. One thing that makes life easier is drawing lines on the frame where you have the new piece when you’re drawing the cut lines, so once your piece is cut you know where you need to put it. This part is time consuming because there will be 20 pieces to cut and glue (if you have 5 per quadrant like we do), but you don’t need to wait for the glue to set before moving on to the next piece as long as you’re careful to not move the gate around much.
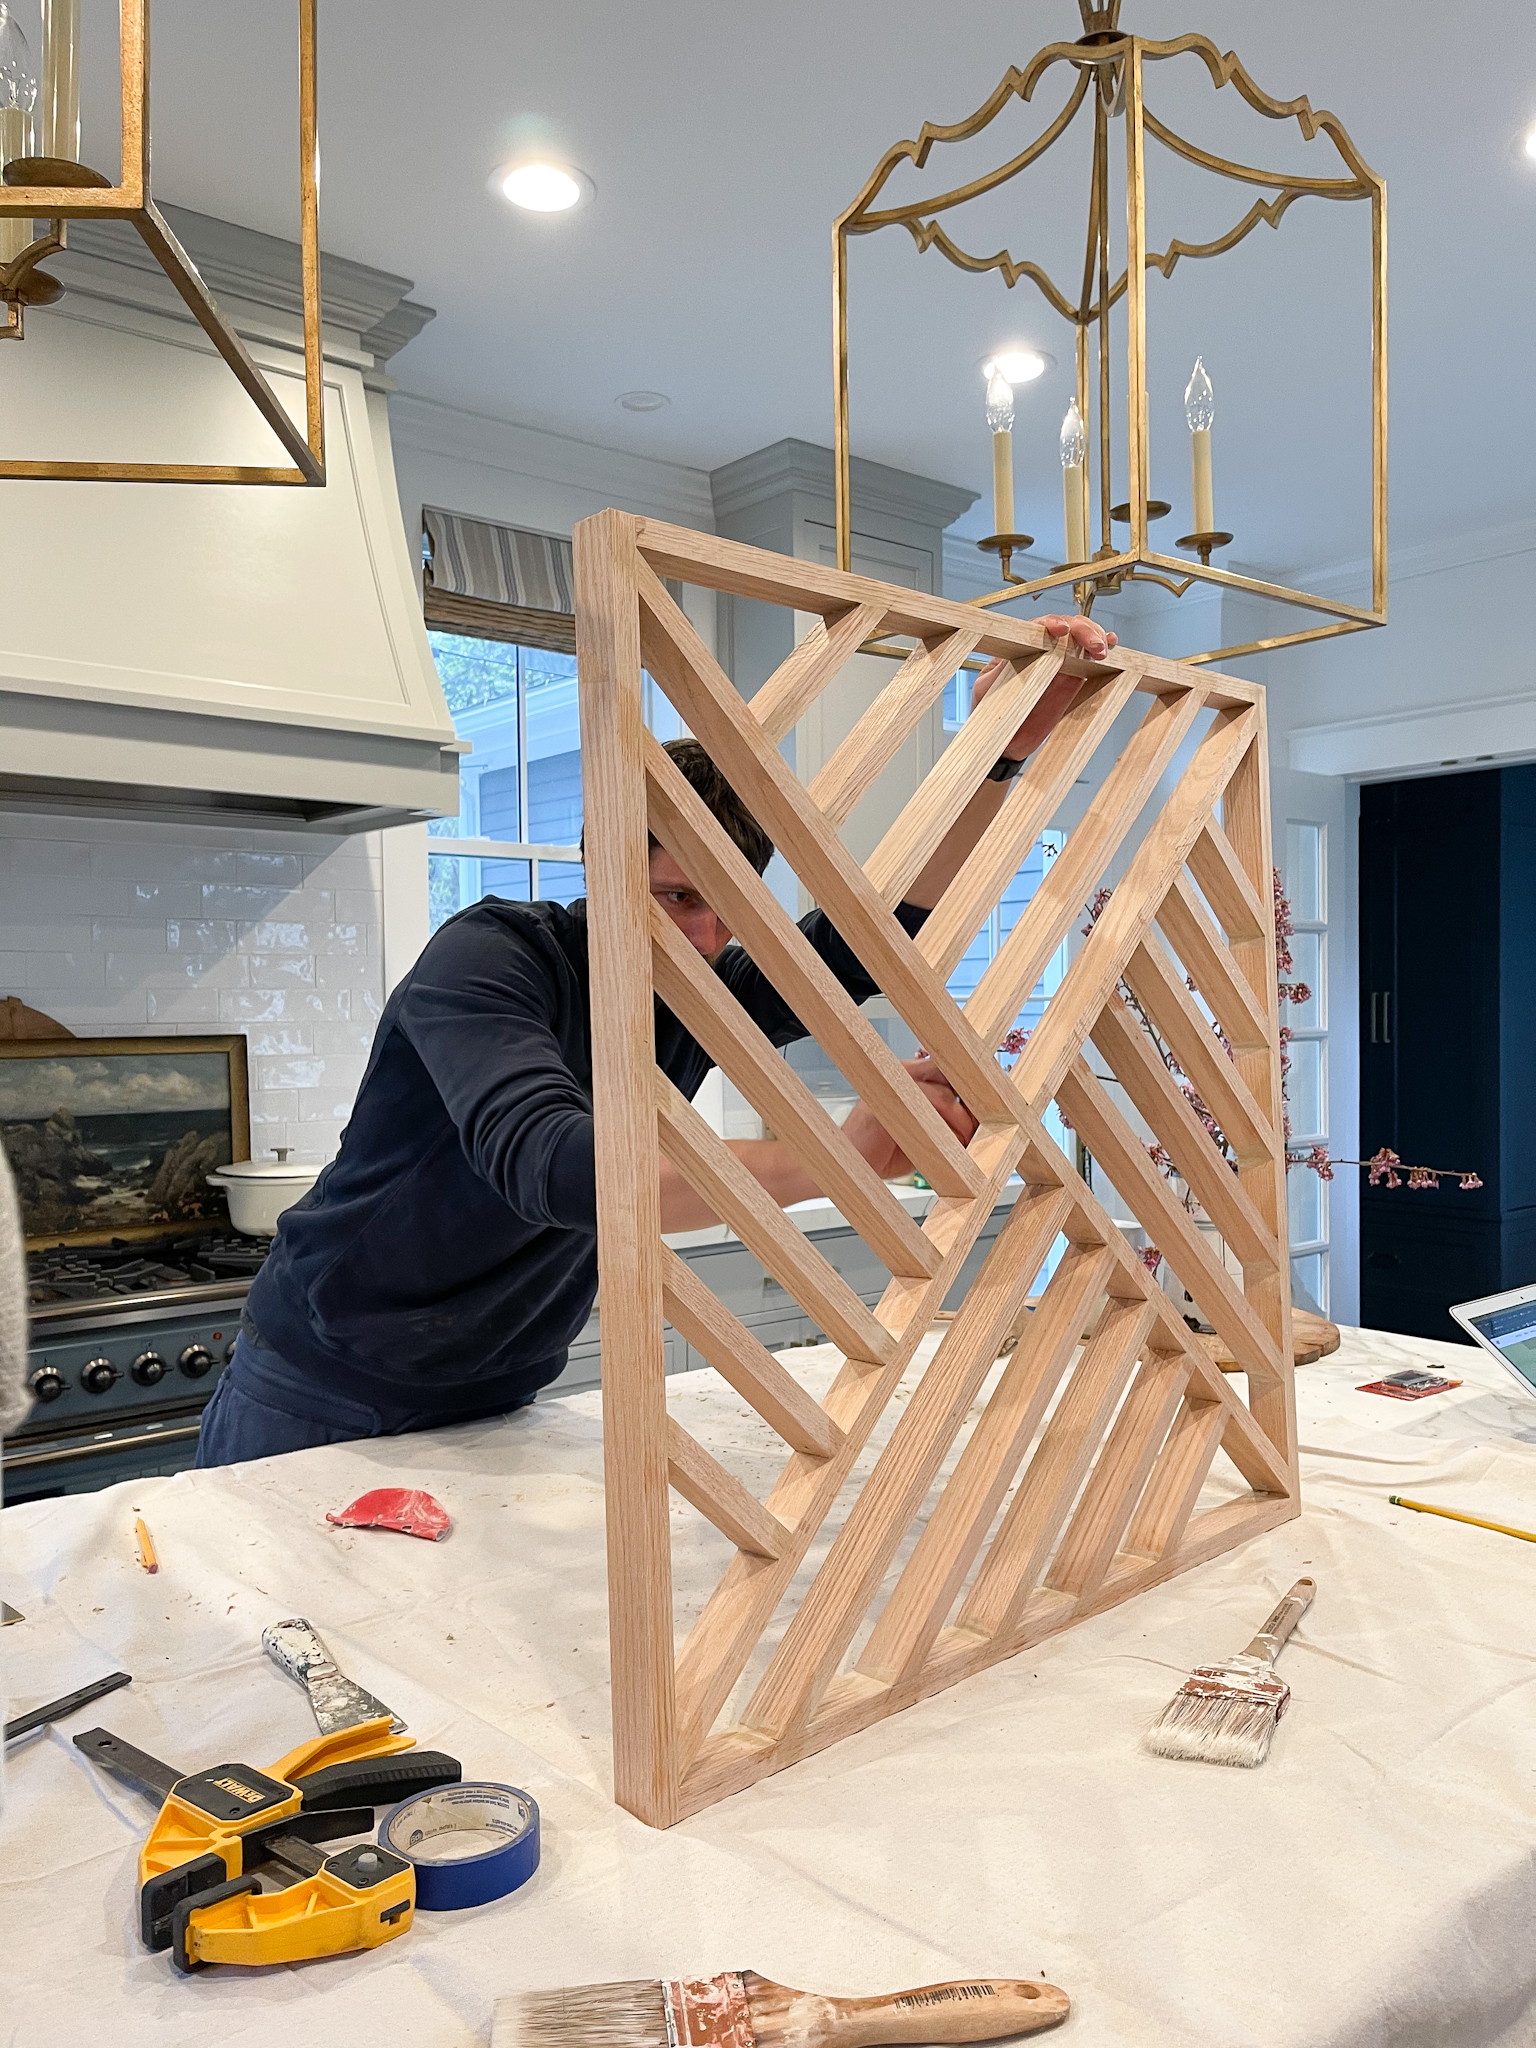
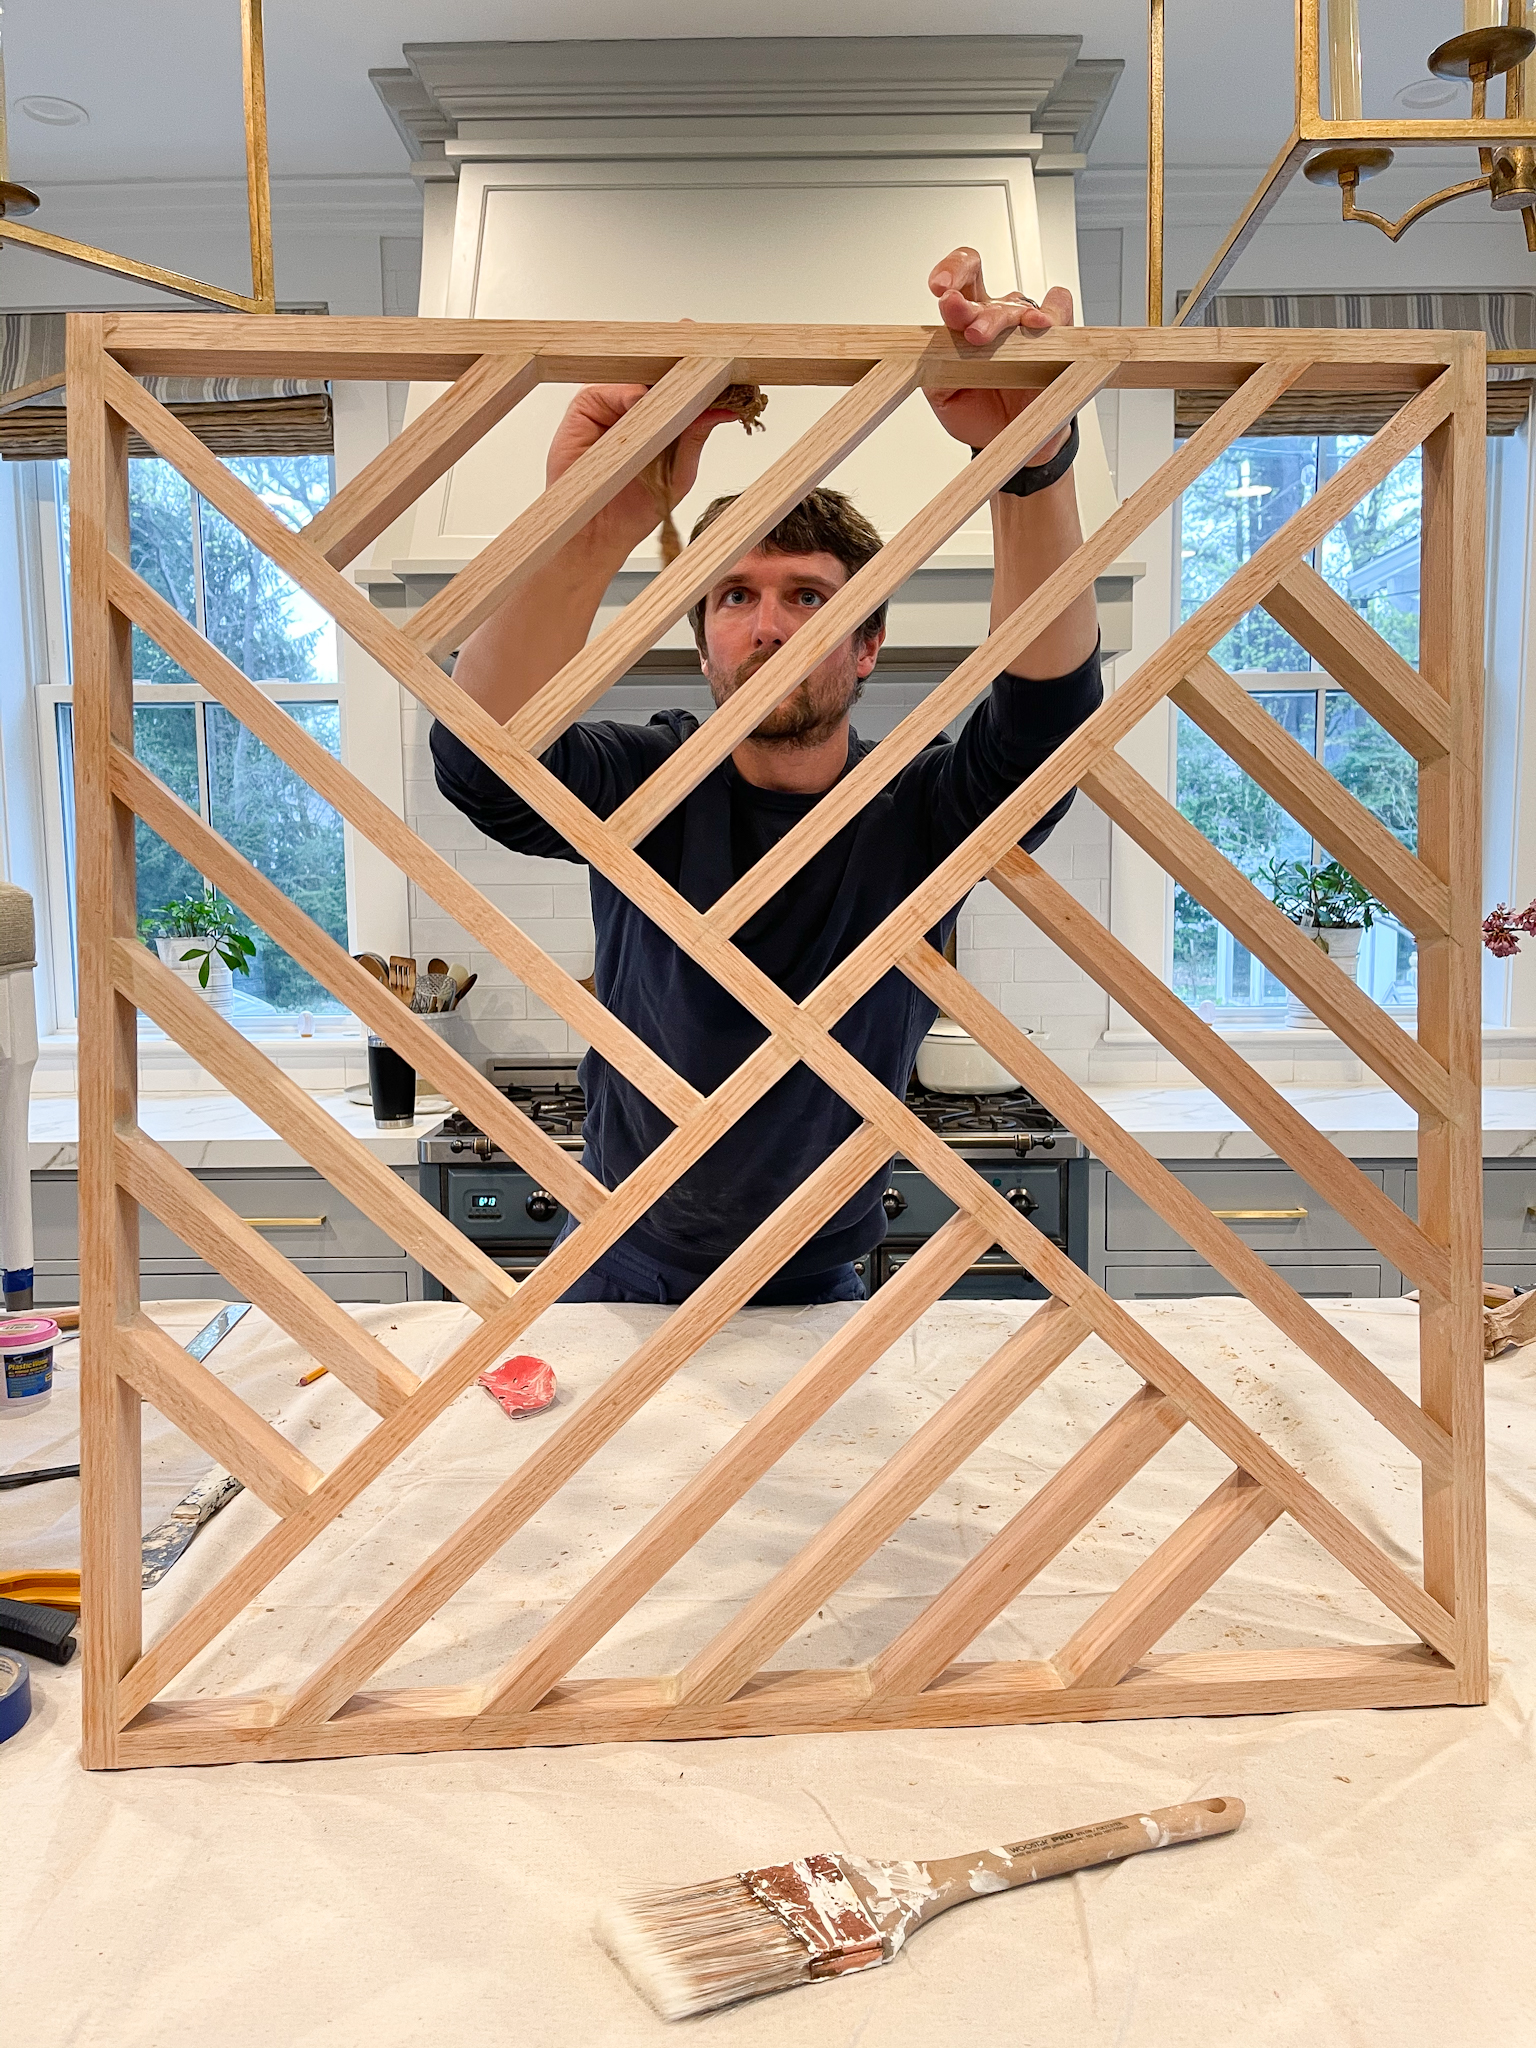
Once all your boards are cut and glued, use some wood filler to fill any gaps. Sand the wood filler smooth and paint. We needed three coats since we used oak (which is super strong and worth the extra coat of paint), but you might get away with two coats if you use a hard maple.
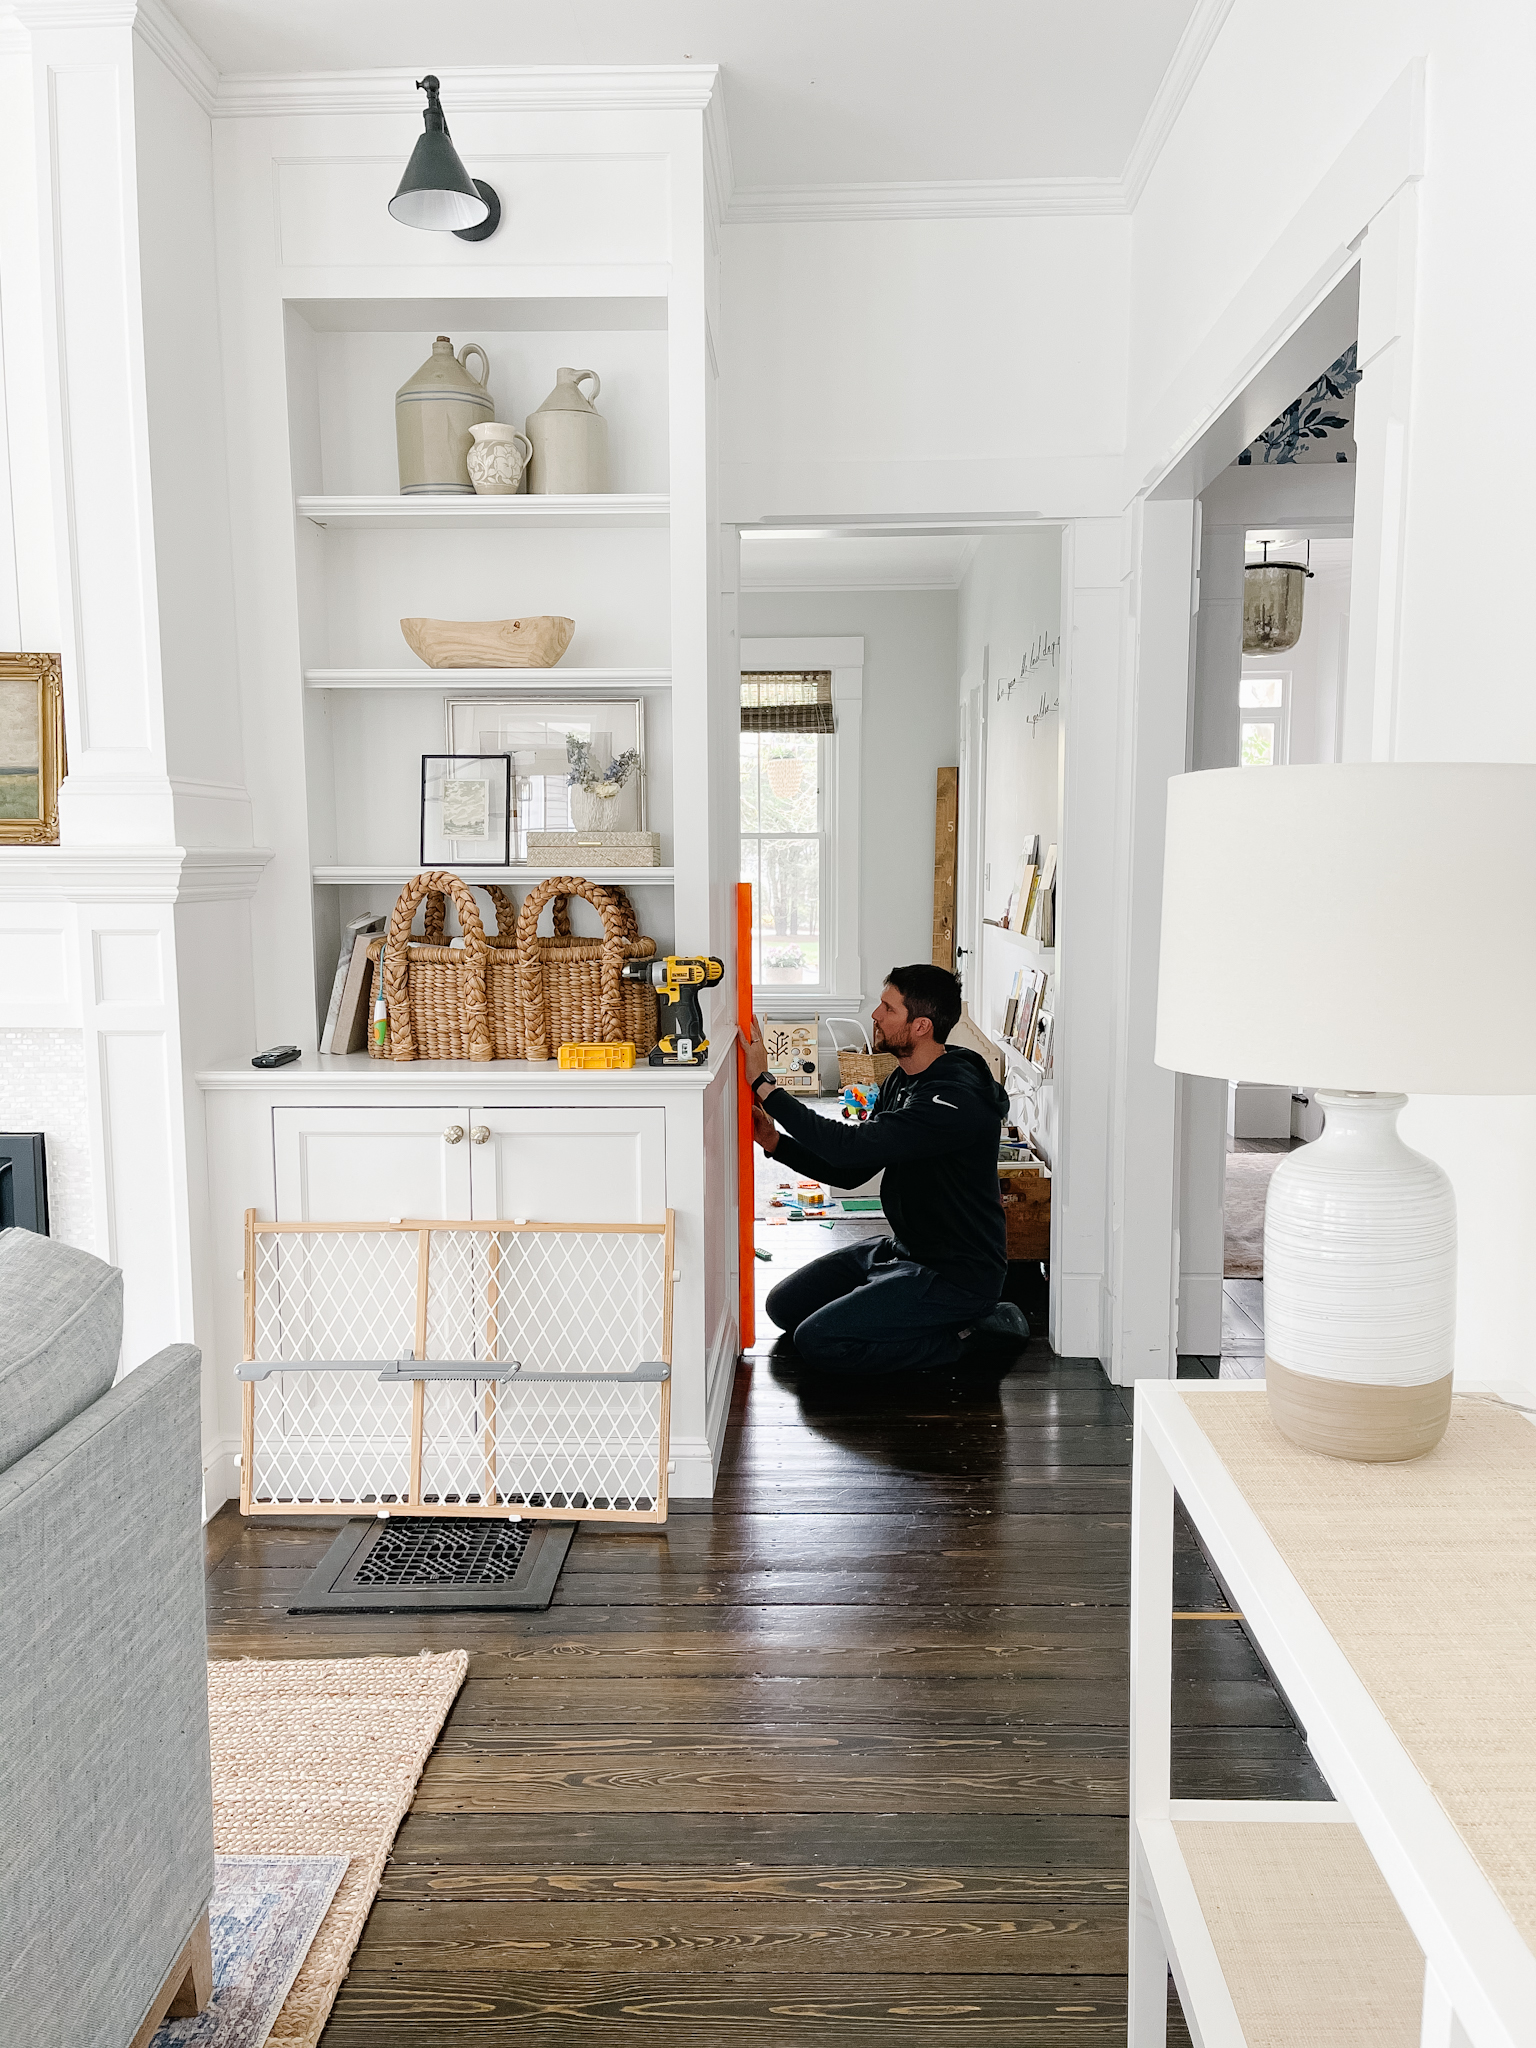
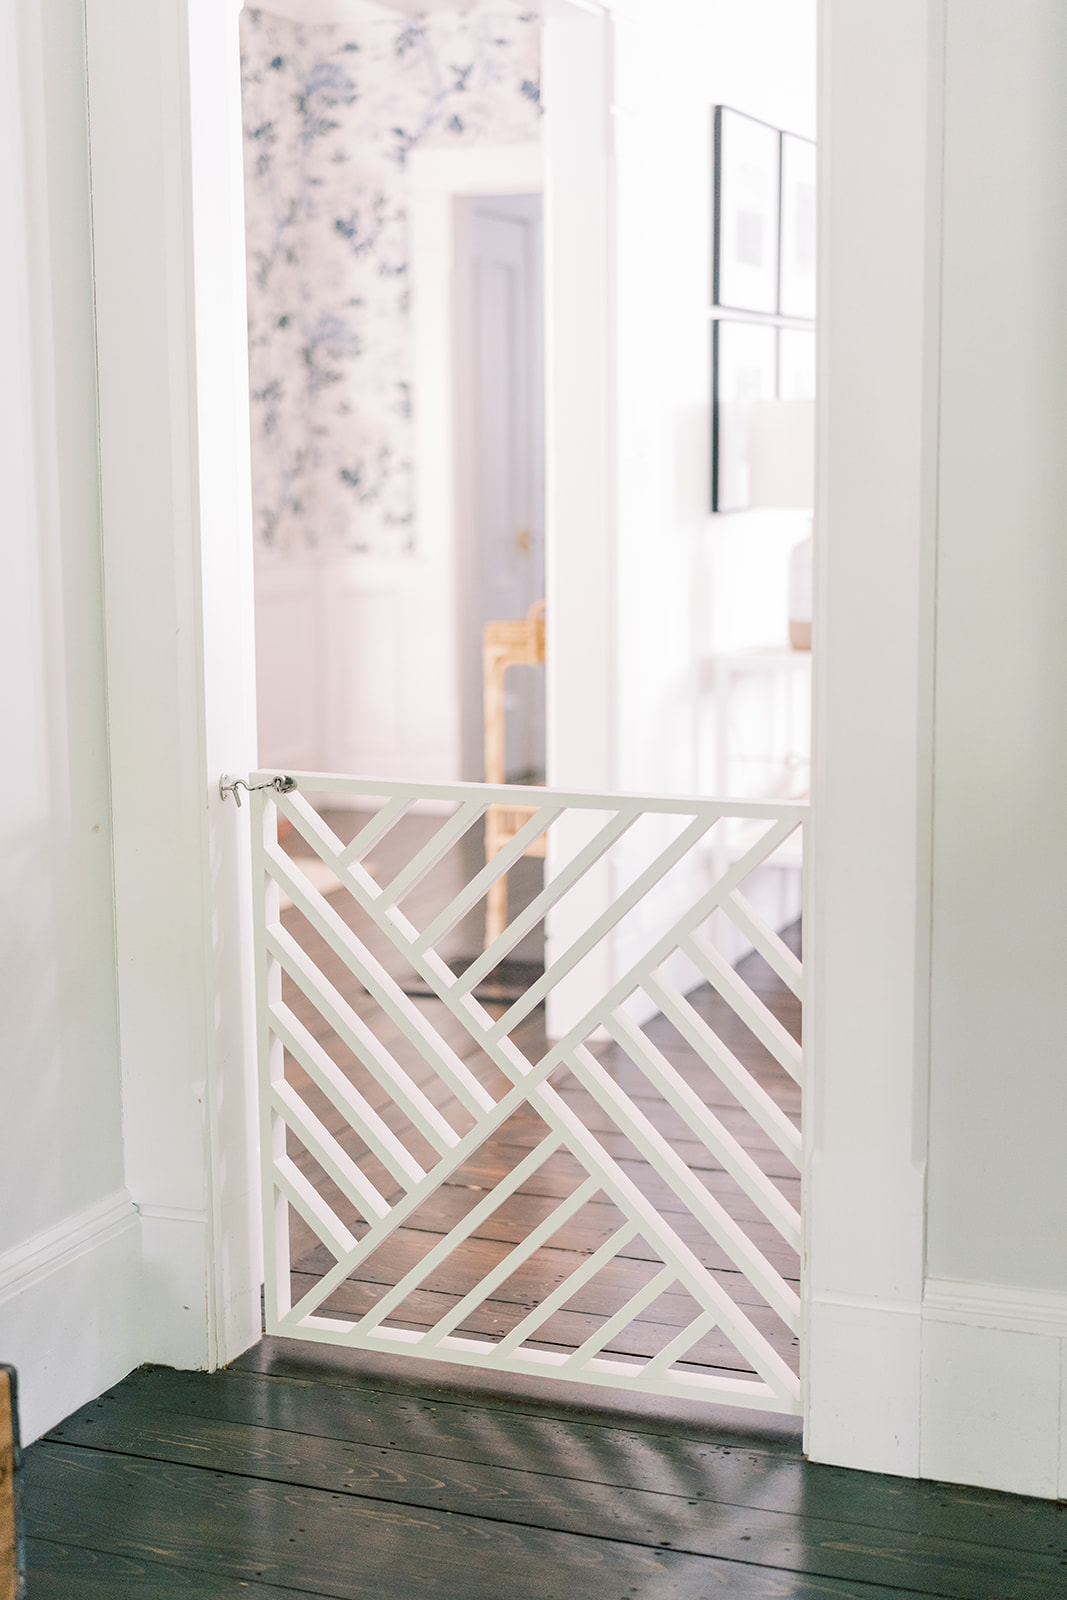
The two narrow hinges are holding strong. We didn’t want to see the hinges, so we installed them between the door frame and the gate. This is okay for us because our gate can only open 90 degrees, but if you want your gate to open 180 degrees you might want to get something prettier. Make sure to use a level to ensure your gate will open and close smoothly, and install on the edge of the door frame.
FINISHING TOUCHES
Lastly, a few well-placed bumpers will keep your walls safe. I installed a couple on the door frame so when the gate closes it won’t bang against the frame.
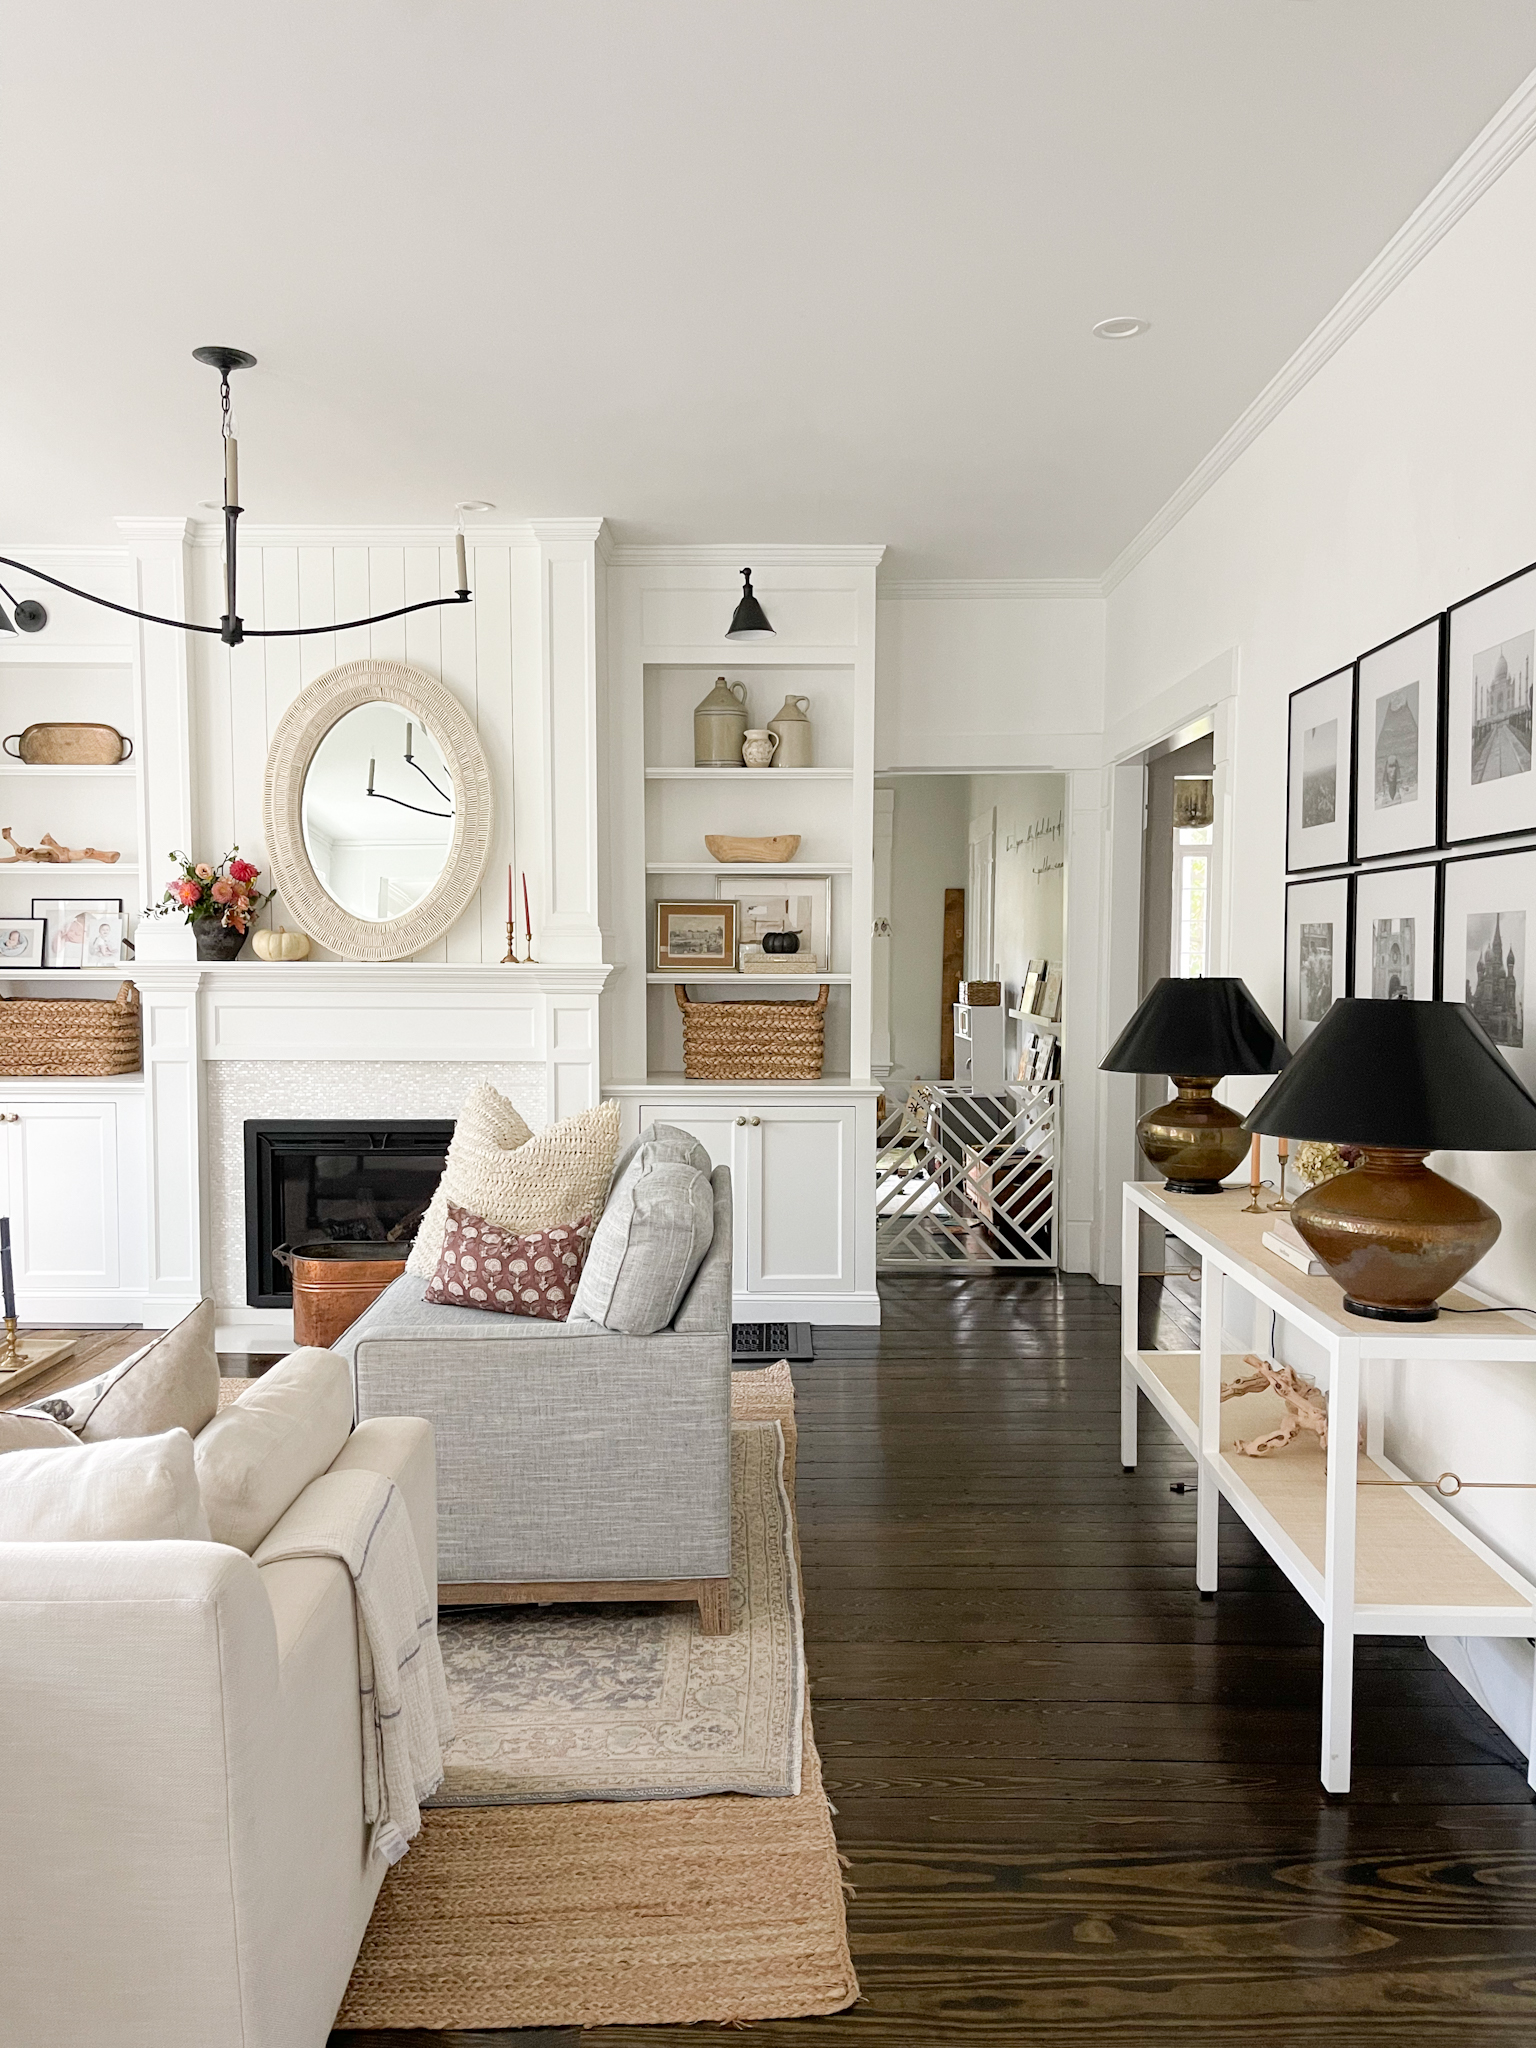
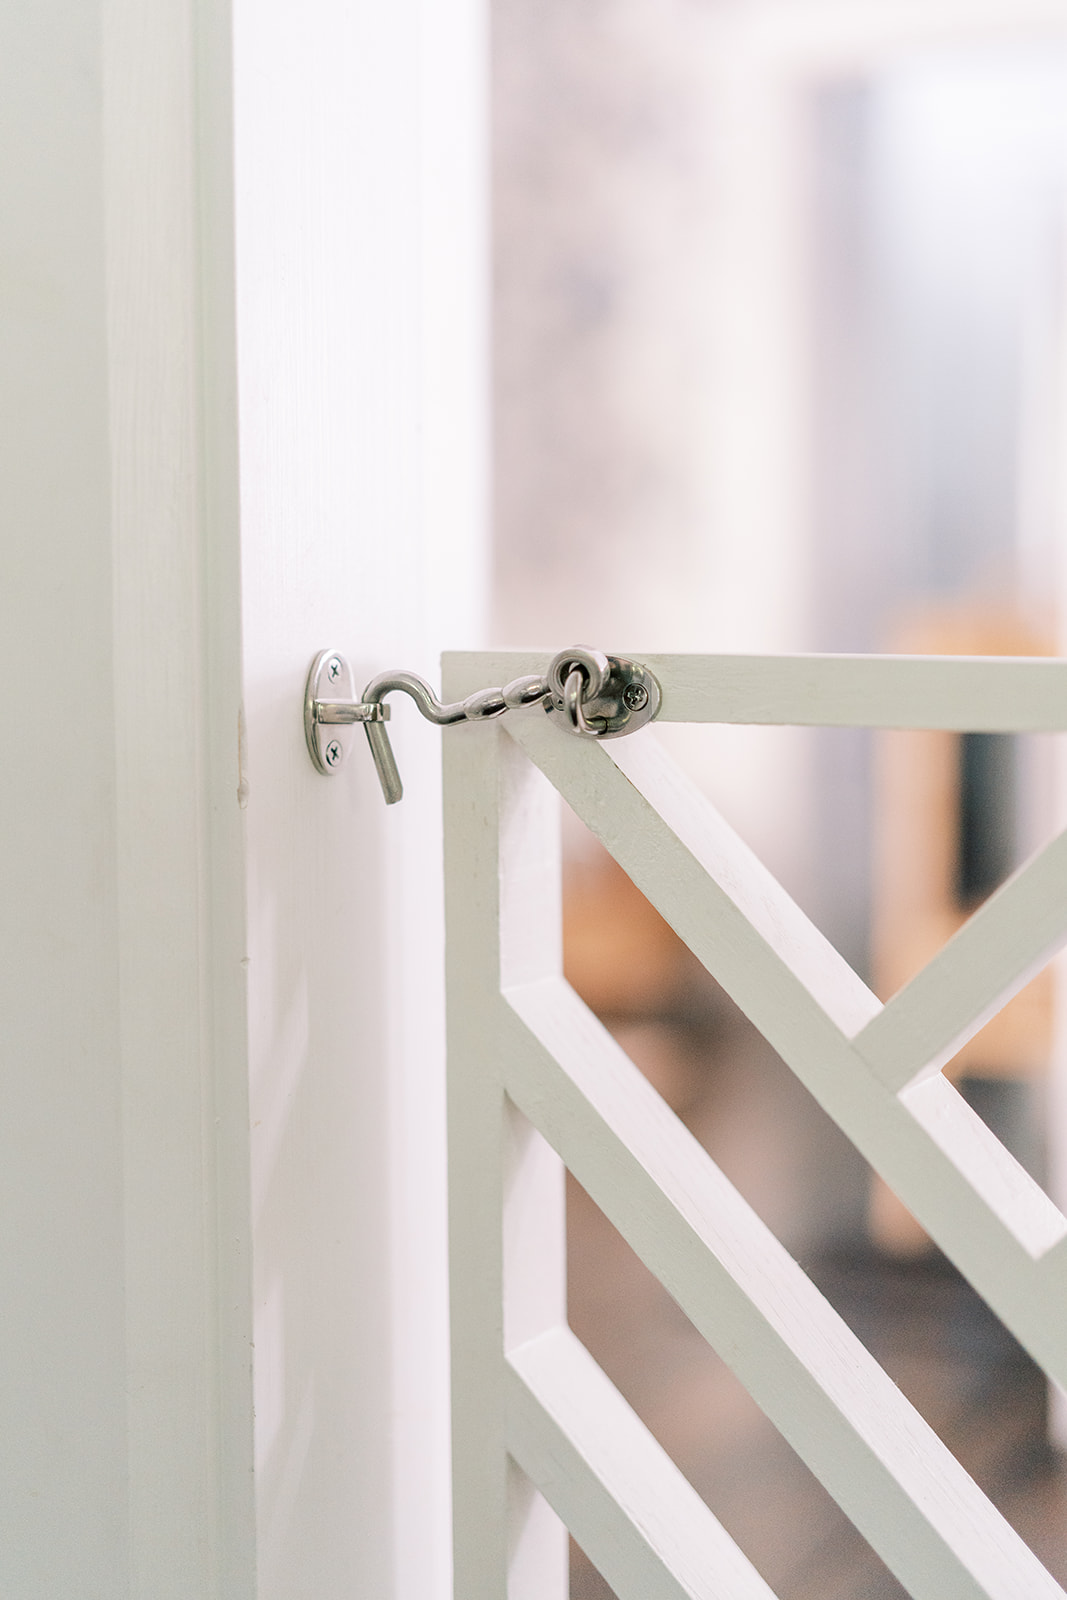
We ended up needing a hook latch to keep the gate shut and went with a stainless steel latch for the strength. Roobee figured out quick how to nose her way into the gate so the latch has been crucial and lasted well. We ended up creating a second gate on the back staircase and used a magnet on the door frame and screwed into the floor to keep that gate closed.
I hope you’ve enjoyed this pretty DIY baby gate and feel inspired to save some $$$ and make your own. Please email us with questions: jackie@findinglovely.com. Beautiful final pictures captured by my sweet friend Ruthie of Ruth Eileen Photography.

 comment share