Trackbacks & Pingbacks
-
[…] I got our mud kitchen reveal up on the blog. And that was a doozy because hubby had to sit and write out how he built it. Now I […]
Leave a Reply
Want to join the discussion?Feel free to contribute!

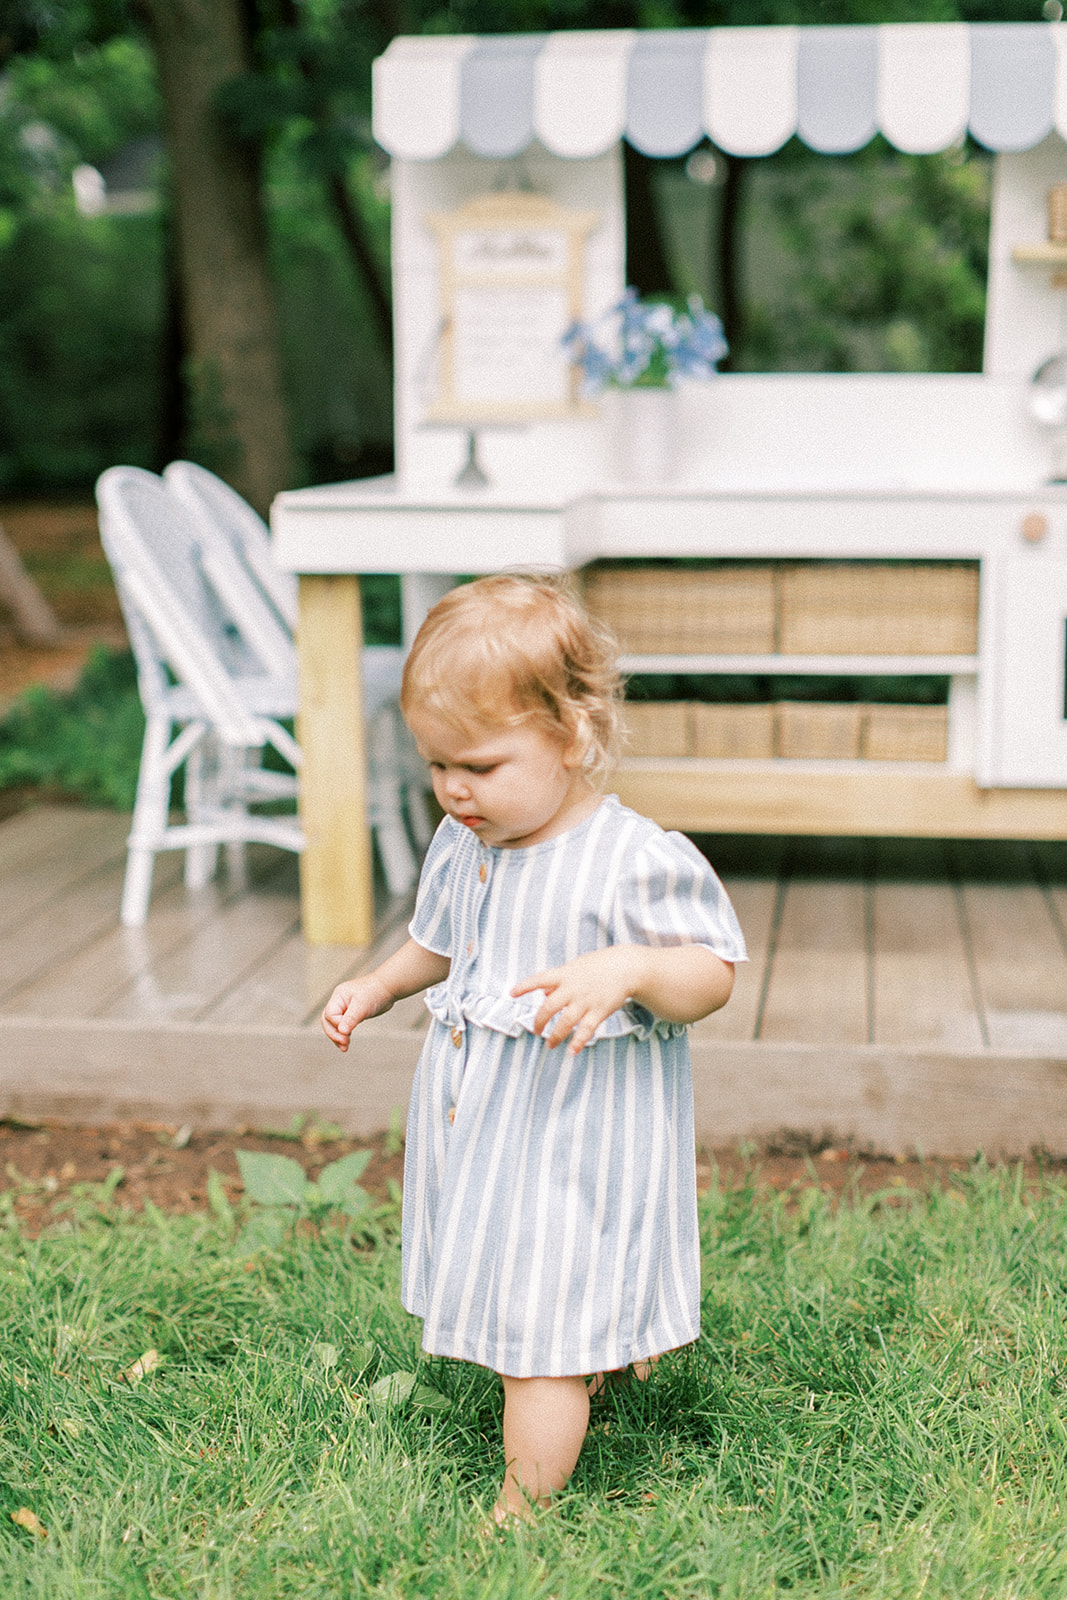
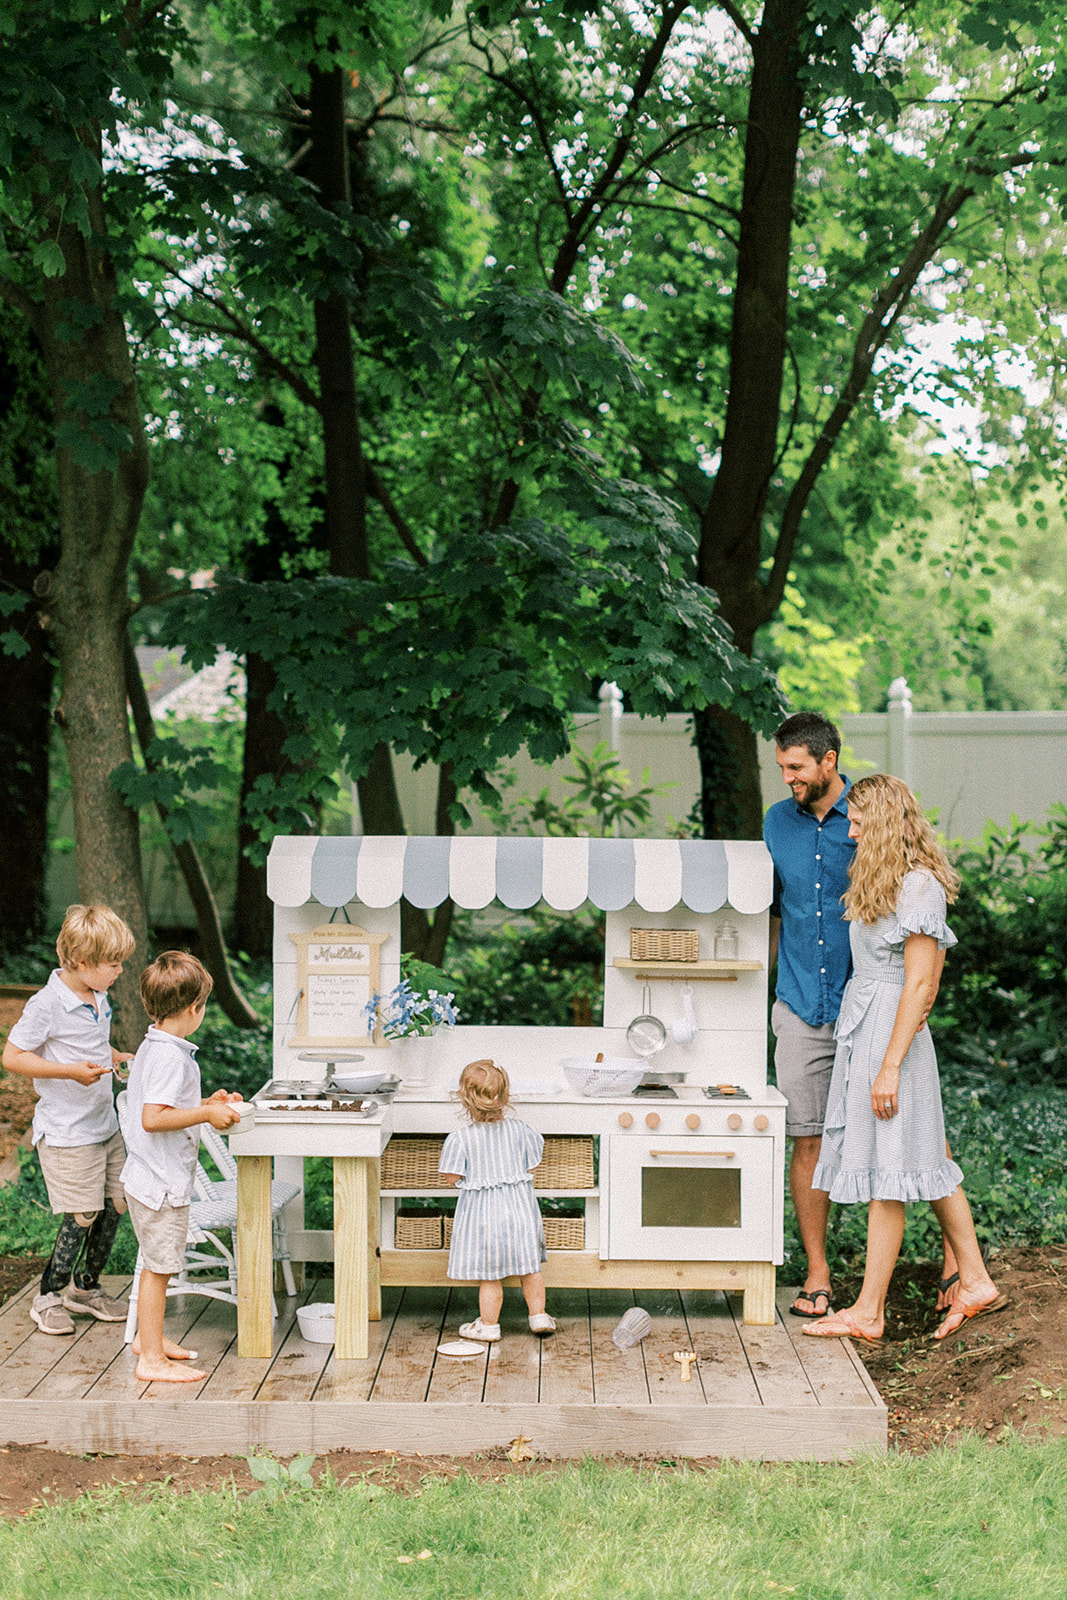
Last year I doodled a mud kitchen design and tucked it into my planner. We had hoped to get to it last summer but with Matt building the back deck and assembling the custom CedarWorks Playset, he had little energy or time to tackle another DIY. Especially one that didn’t come with a manual, rather, straight out of his wife’s head, which can be precarious at times. Regardless, this summer proved to be the perfect time to create the sweetest mud kitchen for our kiddos.
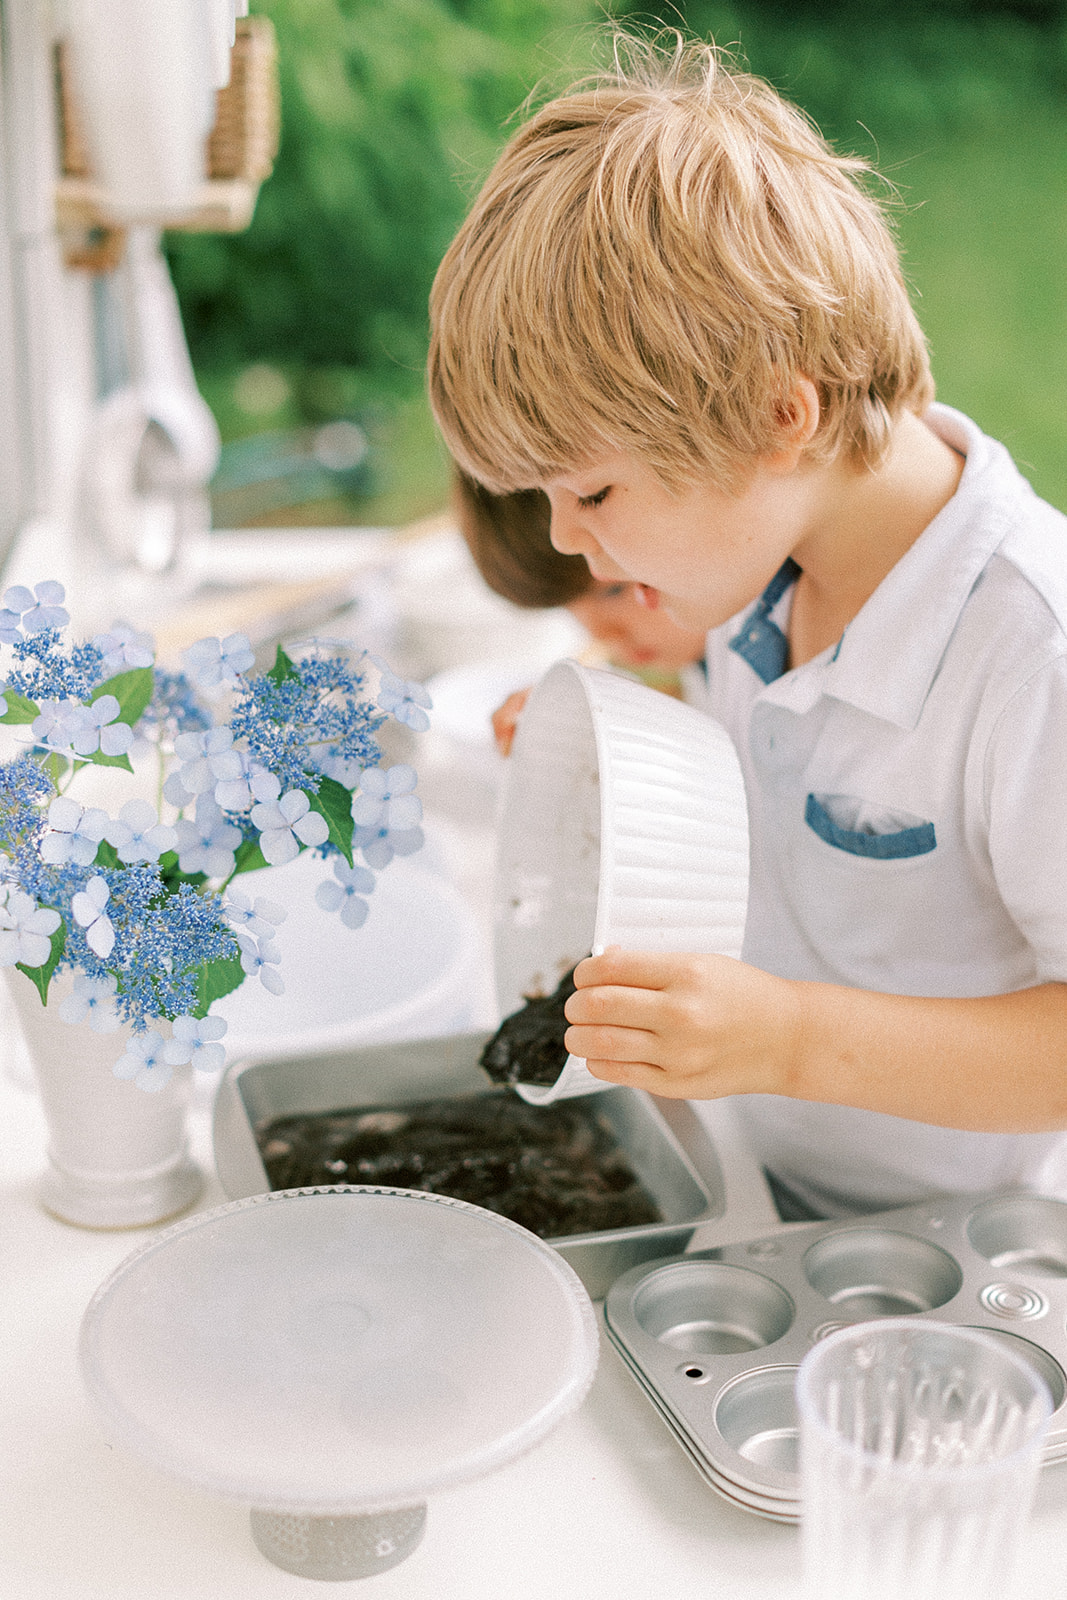
I’m a big proponent of outdoor play and getting dirty. And science backs me up on this one. Playing in dirt is good for them. It lowers anxiety, builds the immune system and creates sensory play.
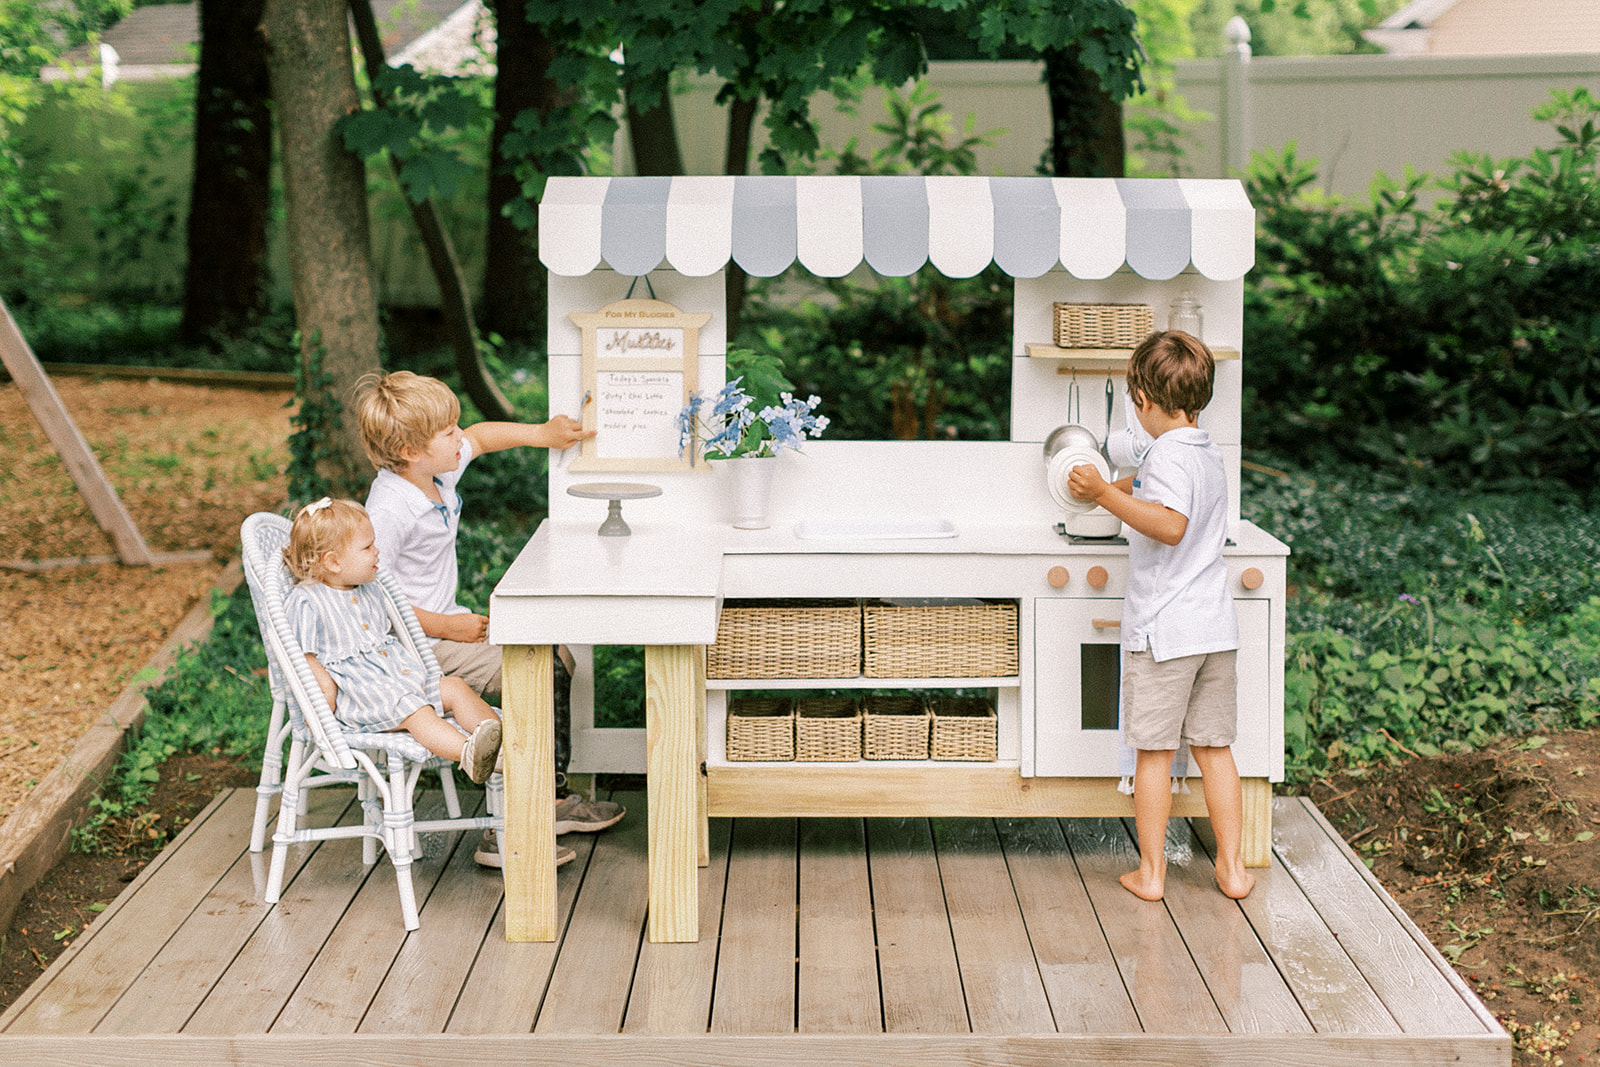
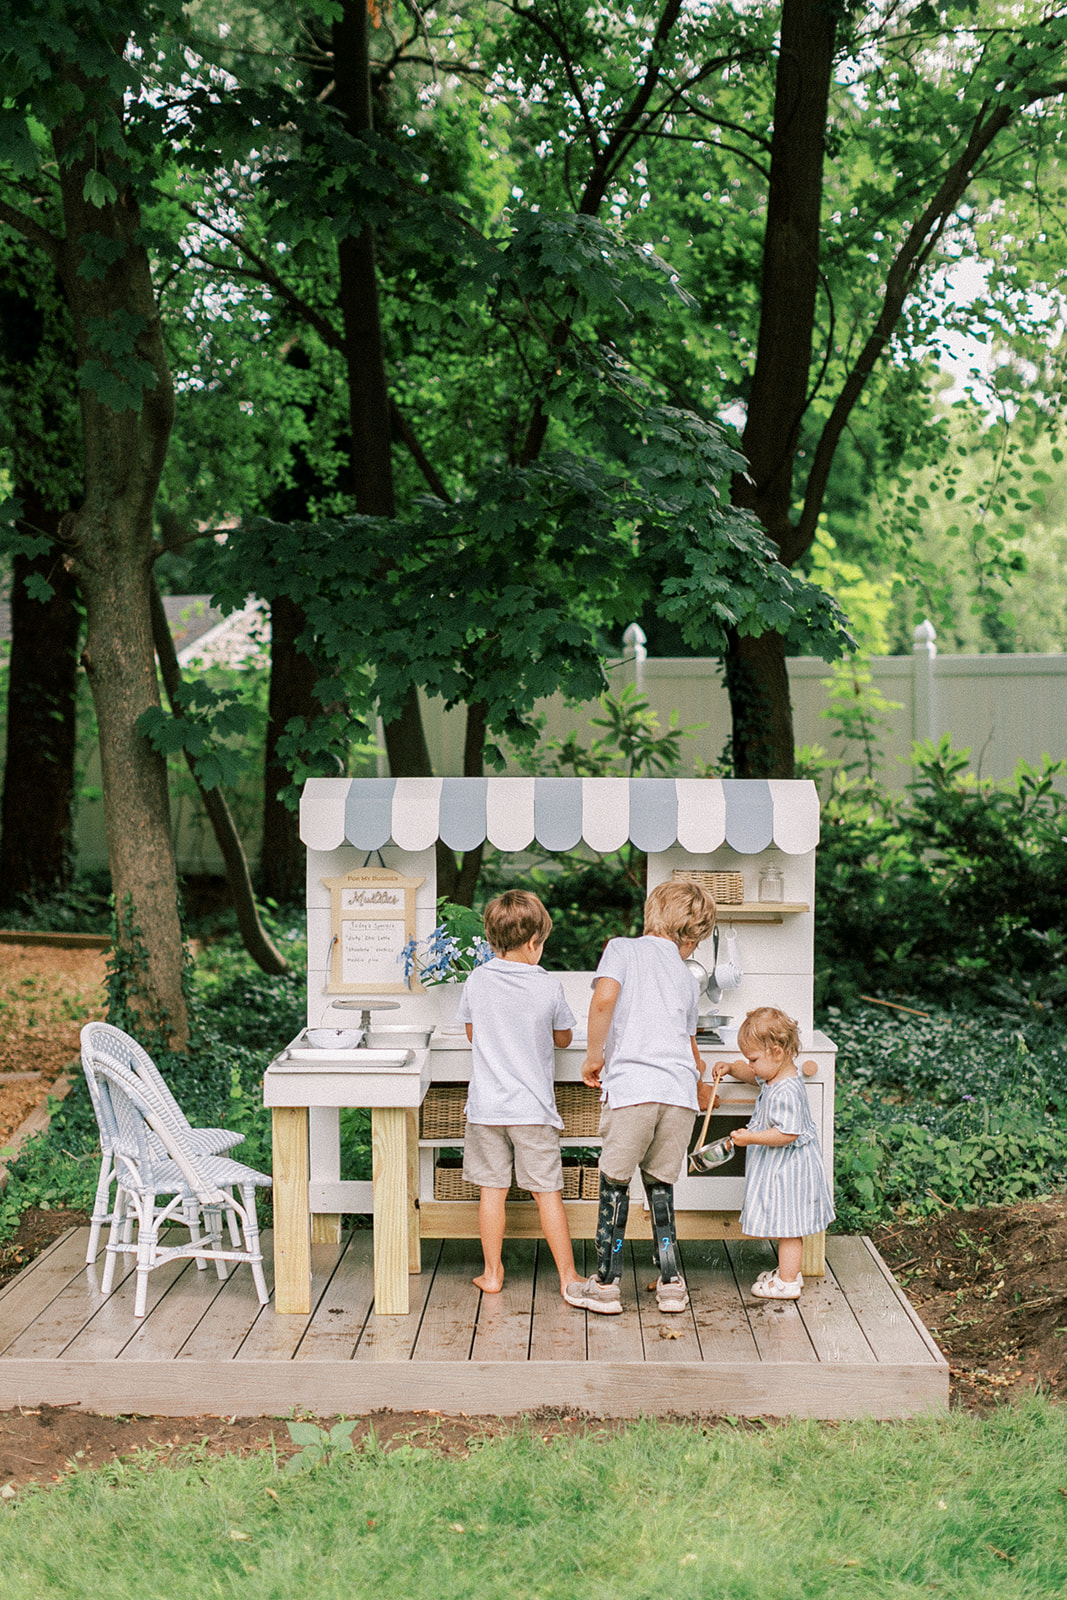
If there’s going to be a big hunk of wood sitting front and center in my backyard, I’m going to make it lovely. Which is why it’s white and blue and oh-so-cute–the sweetest mud kitchen.
It is shaped like an ‘L’ to create a peninsula to cozy some chairs up to and a counter to serve customers. The oven range is on the far right with a magnetic closure that holds the door up. I found the perfect size of strong, slightly frosted plastic in the window aisle at Home Depot for the oven door. Add an adorable wood cabinet pull and those wood knobs and you’ve got a sweet little pretend range. The knobs were a bit of a snafu if you remember or watch my Instagram Story Highlights. Matt installed them and I immediately thought they stuck out too far. And like the saint he is, he used a hand saw to take about a 1/2″ off the front of them. They were jagged and rough once he was done so I used a handheld sander to smooth them back out. Now they’re perfect and I didn’t have to send anything back.
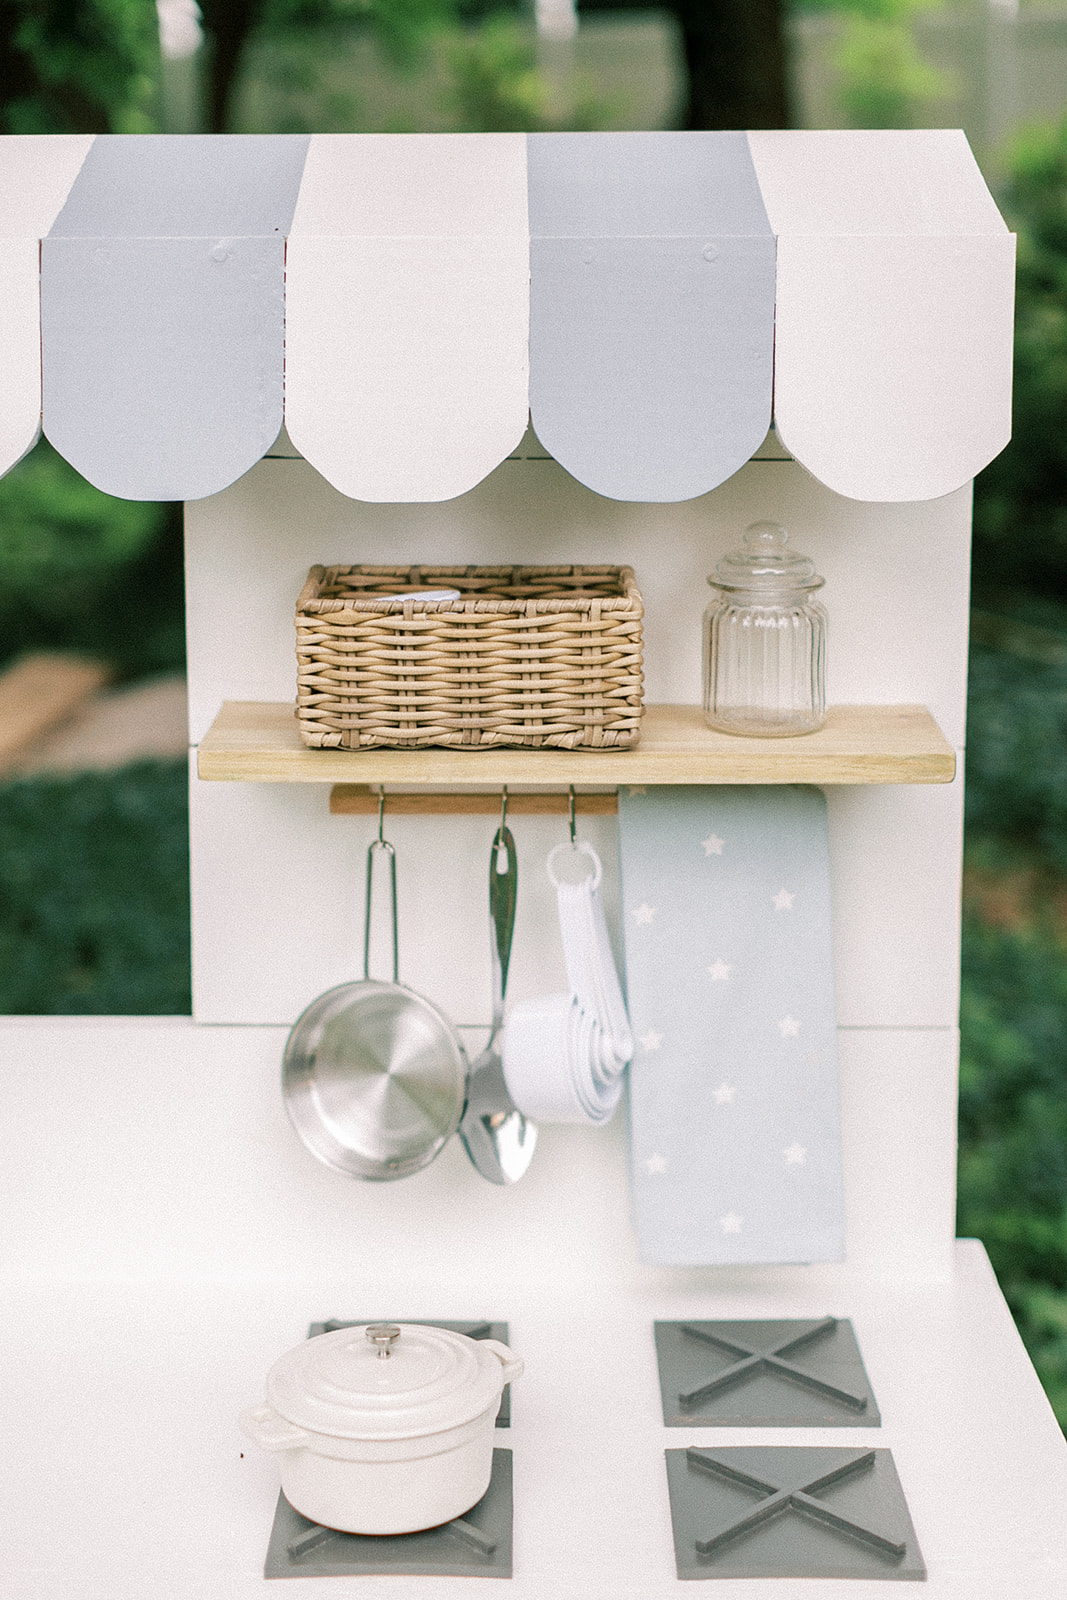
I got the slightly larger wood cabinet pull (11 5/8″ in oak) to match the oven door pull (8 3/16″ in oak) and mounted it 2″ below the wood shelf which was just a piece of 1″ x 6″ board Matt screwed in place from the back. I bought these S hooks so I could hang some pots and pans, maybe some oven mits. These hooks literally fit perfectly, very snug and don’t slide around which actually helps them not get lost and little hands to quickly grab whatever is hanging.
Matt cut a hole in the top of the counter to the size of this plastic dish washing bucket to make the sink. The lip of the plastic tub holds it in place. He used a combo of a jigsaw and a dremel to get all the way to the back of the counter. And although not featured, it’s going to have an adorable vintage brass faucet mounted on that back board above it once it comes from Kiev, care of Etsy. Leave it to me to order a Soviet-era treasure not realizing it was coming from so far away. These beautiful pictures by Ruth Eileen Photography of the sweetest mud kitchen couldn’t wait for it’s arrival.
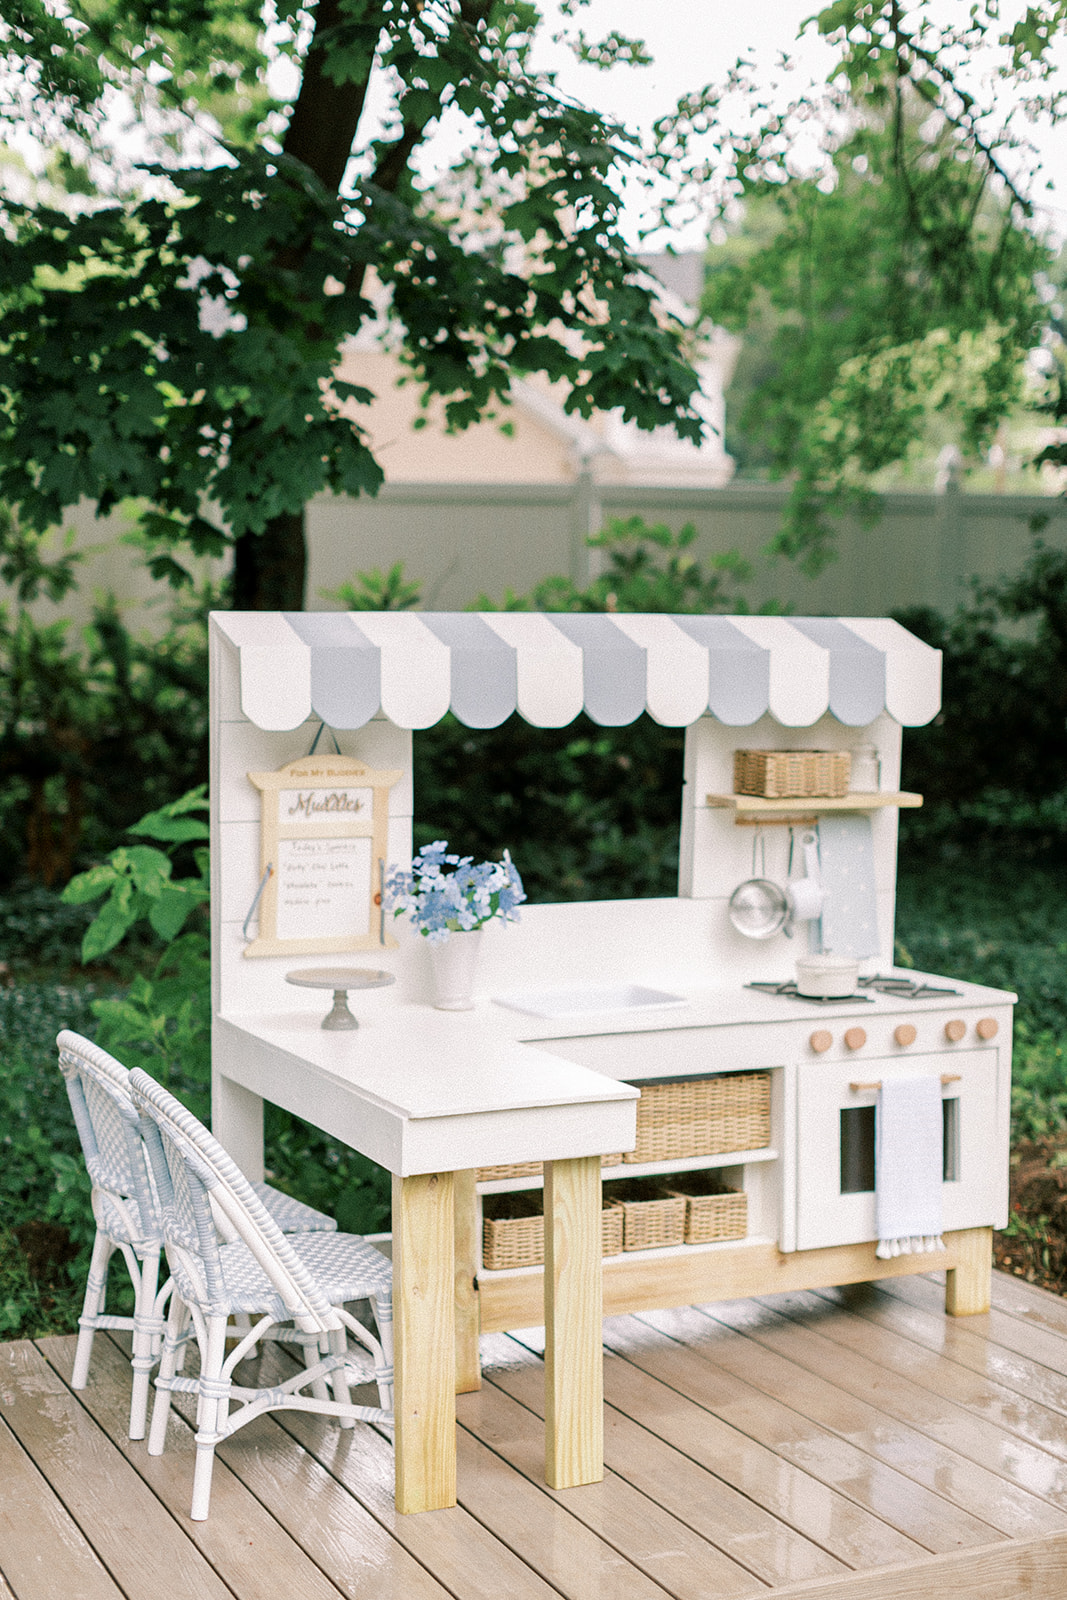
Probably the most striking feature is that adorable scallop overhang. It’s just so cute and ended up being easier to pull off than we initially thought.


Matt made a few straight cuts to the ends of those boards to give me the rough scallop feature and I sanded them out to make the rounded edge smoother. Matt screwed them on so I used wood putty to fill the holes prior to sanding. Painted like a striped awning, it adds a tremendous amount of character to the sweetest mud kitchen for our kiddos.
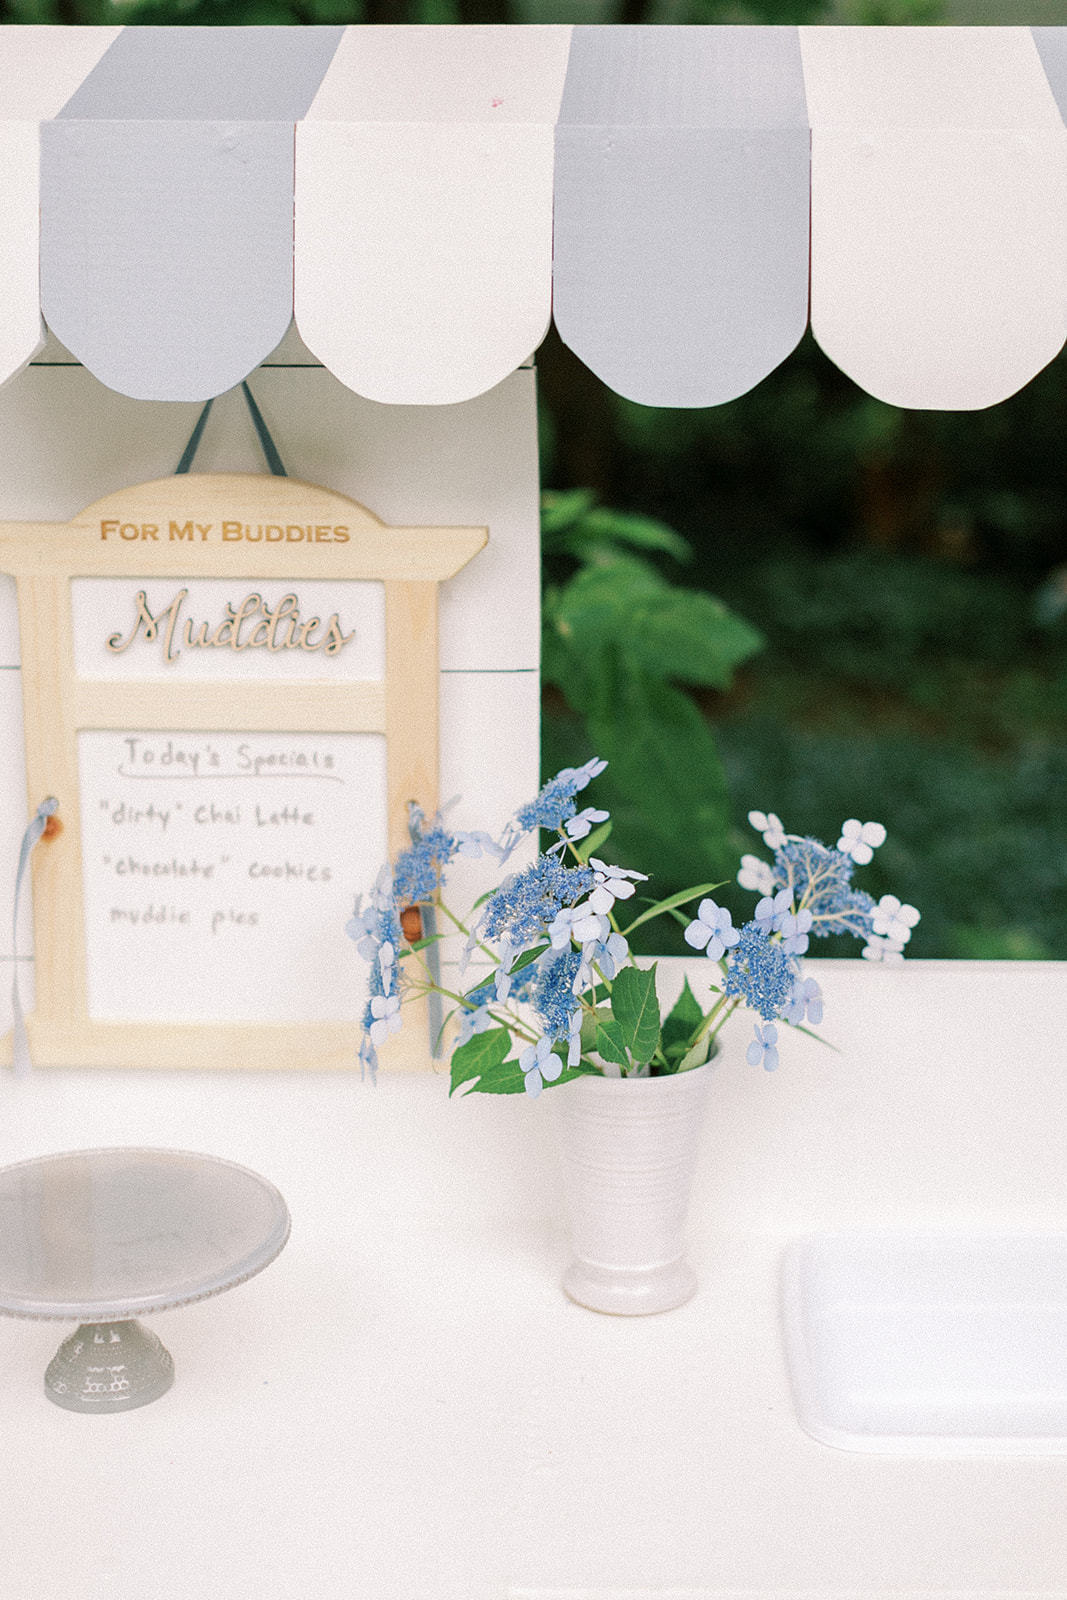
Now clearly the sweetest mud kitchen needs an adorable name and sign. So ta da, “Muddies for My Buddies” was born, serving up delicious muddy confections since the global pandemic of 2020. I particularly enjoy the “dirty” chai latte.I asked Red Fern Design to customize their animal stall sign for our mud kitchen. Up until this glorious day on Etsy, I had looked high and low for one that could serve as both a cafe name sign and a “specials of the day” white board. I figured I’d have to make one. Cale’s design was perfect and he handmade it with love. We couldn’t recommend him enough. How adorable would this sign look for an inside playroom kitchen too!?
If you glanced quickly at this post, you’d probably be alarmed that it’s being touted as an “outdoor mud kitchen” yet it is painted white and there are wicker baskets. Insanity. I used the highest quality Behr exterior paint in semigloss finish and took my time to paint it well. The white is Polar Bear and the pretty blue grey is Intercoastal Grey. I let the paint dry for a week and then painted three coats, sanding lightly between each one with a quart of Minwax Helmsman Clear Satin Water Based Varnish. And so far so good. Everything wipes clean.
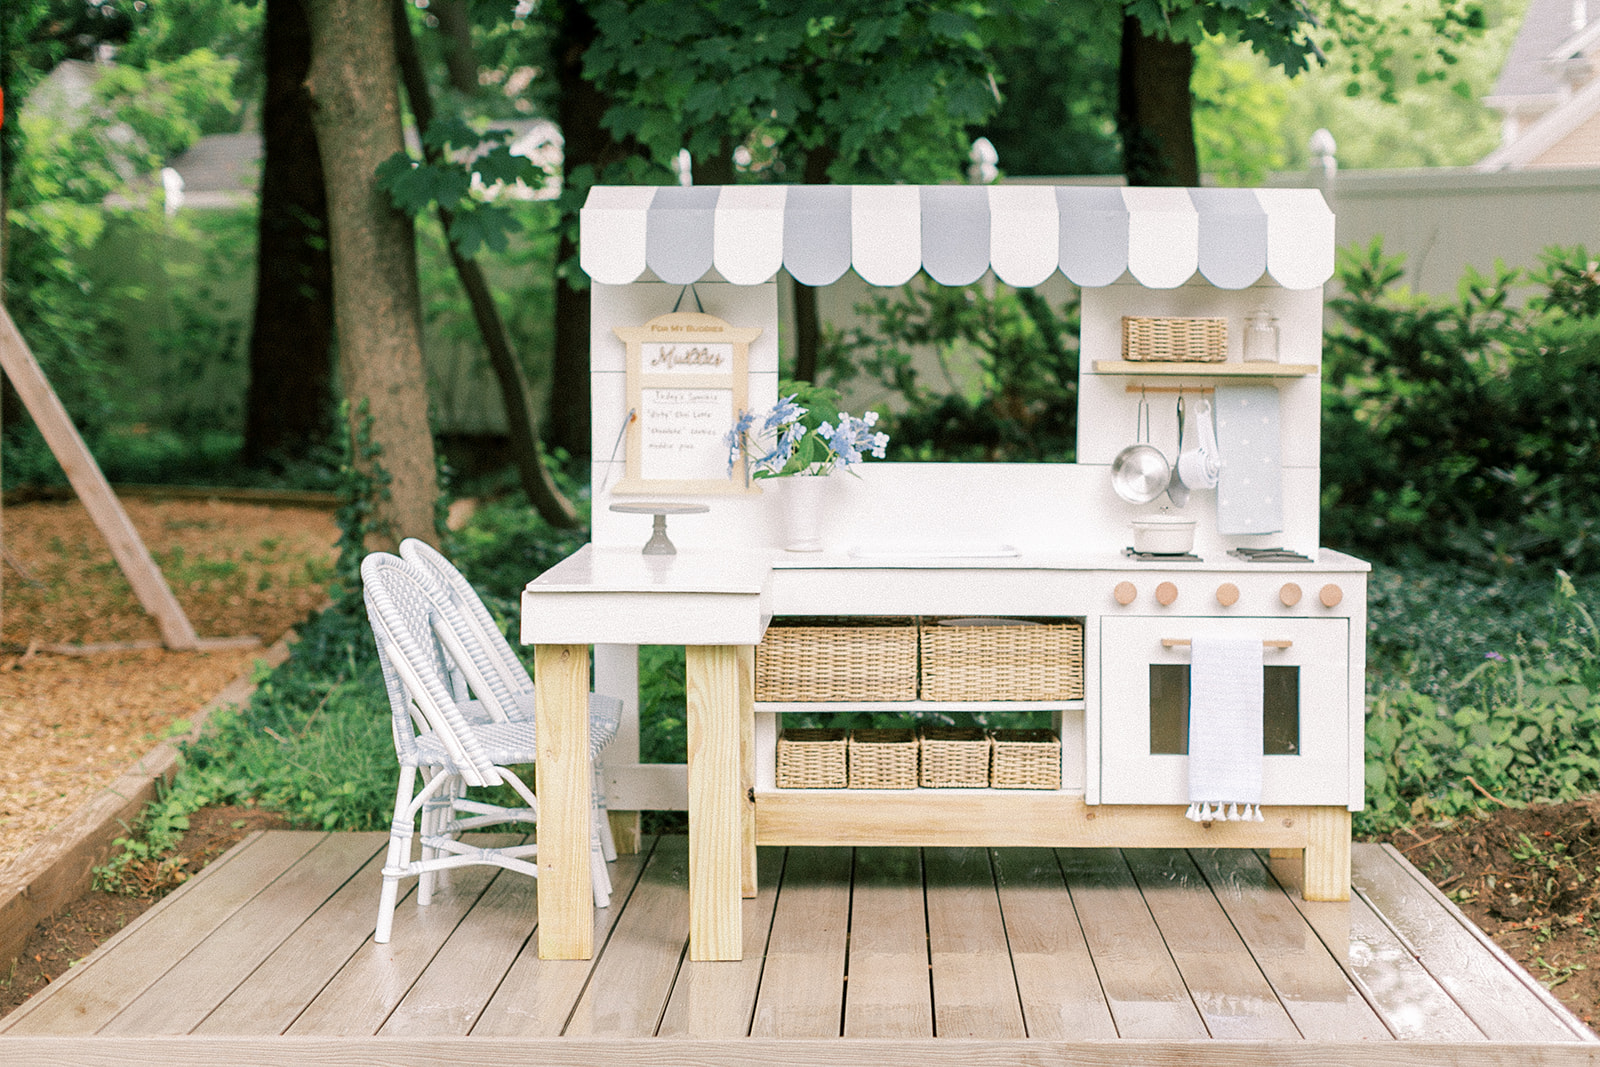
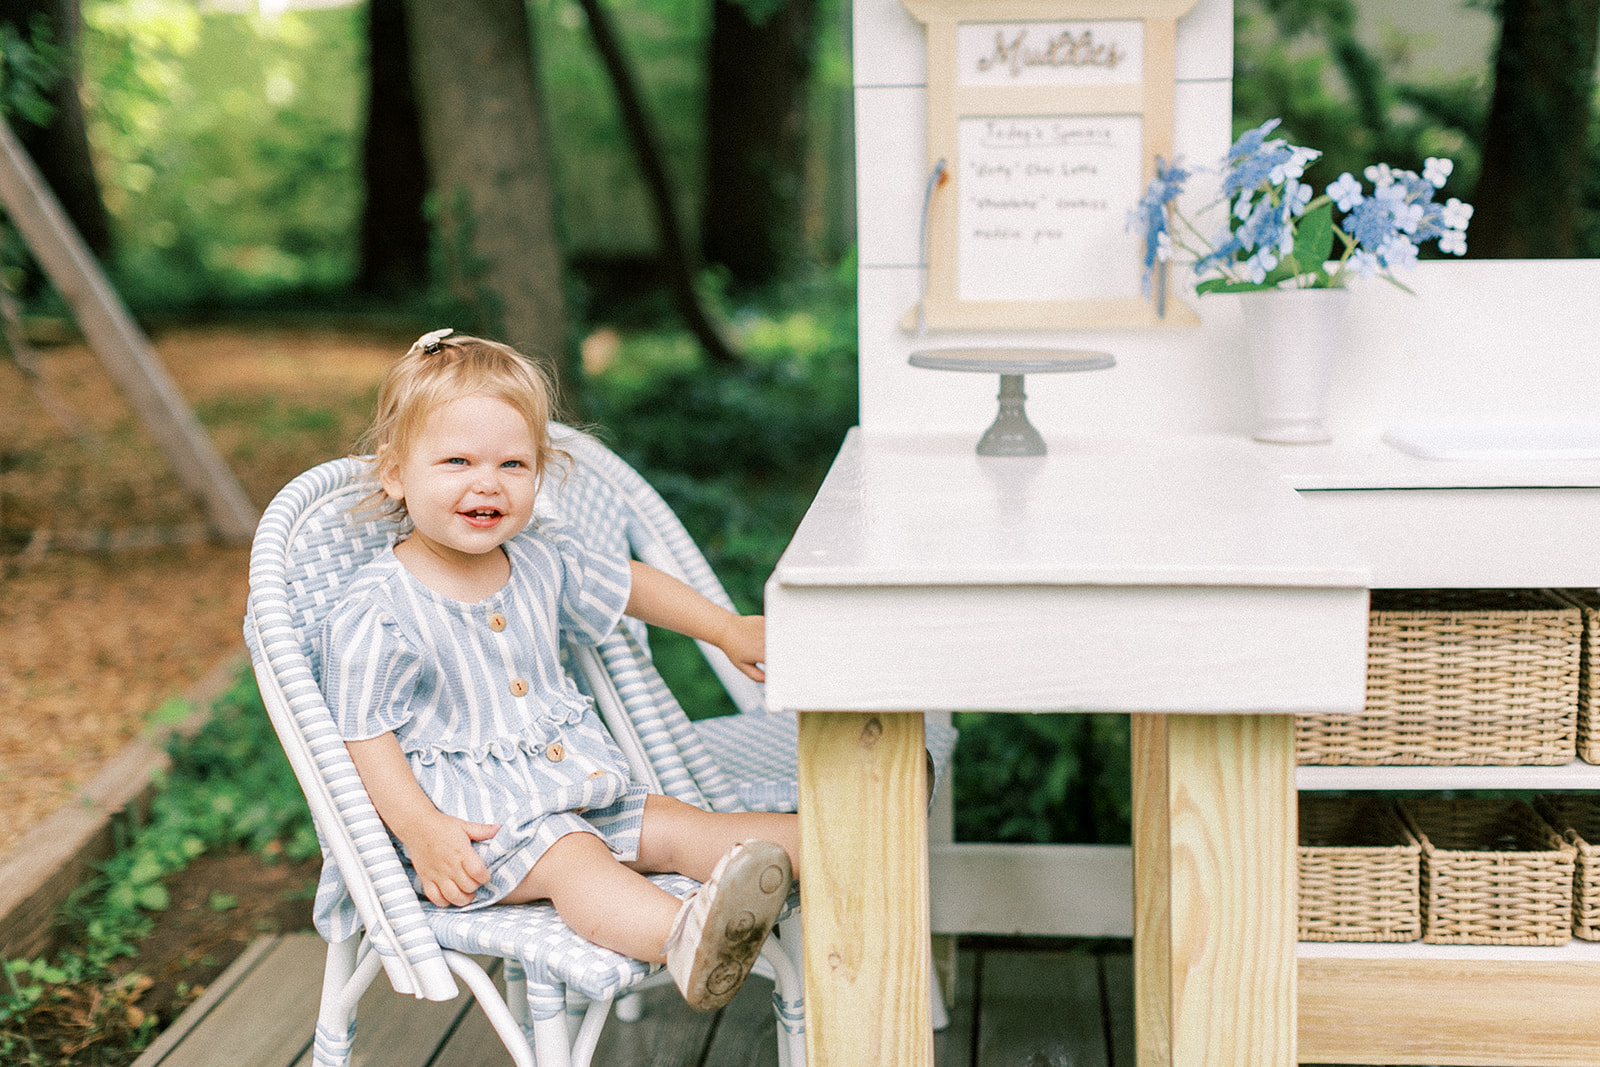
The wicker baskets were the find of a lifetime. I bought two sets and plan on using way more of these. They look like wicker but are plastic and came with a fabric liner that I took off so these could sit outside holding all the muddy cooking tools without being ruined. They give me that beautiful wicker look while being weather-resistant. And somehow, magically so, the shelves Matt built were made for these.
Most of the cooking gadgets I got for the mud kitchen came from the Dollar Tree. I spent less than $20 on bowls, silverware, glasses, baking sheets, muffin tins, cake pans and I bought two of each because, well, I was trying to maintain peace and order between two competitive little brothers. I did splurge on this adorable enamel kid’s size cast iron dutch oven from Target (thanks Jo!), this cooking pan set and this cooking tools set with holder.
We’re going to try our best to list out the steps and tools we used to build it. I let Matt write this section. Please know we are not professional woodworkers rather part-time DIYers and full time parents. We often wing our projects and learn as we go, so bear with us, ask questions if something isn’t clear and we’ll do our best to help you build one too. It’s darn cute and the kiddos in your life are going to love it. In terms of a DIY, there is a higher level of intermediate skill needed. Which means it shouldn’t be your first time using a table saw. We take no responsibility if you get hurt. Always exercise extreme caution around power tools that can take your fingers off. Wear the right safety equipment and work when you aren’t distracted, ie after the kids go to sleep.
Table Saw that has angle cut feature (these are expensive but can be rented)
Hand Held Sander and coarse grit and fine grit sandpaper refills
Deck Screws (most of them were 2.5″, several 1.5″ and 6″ lag screws)
Six Pressure treated 2″ x 4″ x 8′ boards
Three Pressure treated, 1″ x 8″ x 8′ boards (this is for the slanted roof that you attach the awning pieces to and the shiplap back)
One Pressure Treated, 1″ x 6″ x 8′ board (these are for the scalloped awning)
One, 4′ x 8′ x 1/2″ thick piece of pressure treated plywood (this is the counter material), we had Home Depot cut two 16″ strips
11 x 14″ Nonglare Picture Glazing (in the window aisle at Home Depot)
Minwax Helmsman Water-based Poly Urethane in Satin (I got a quart at Sherwin Williams)
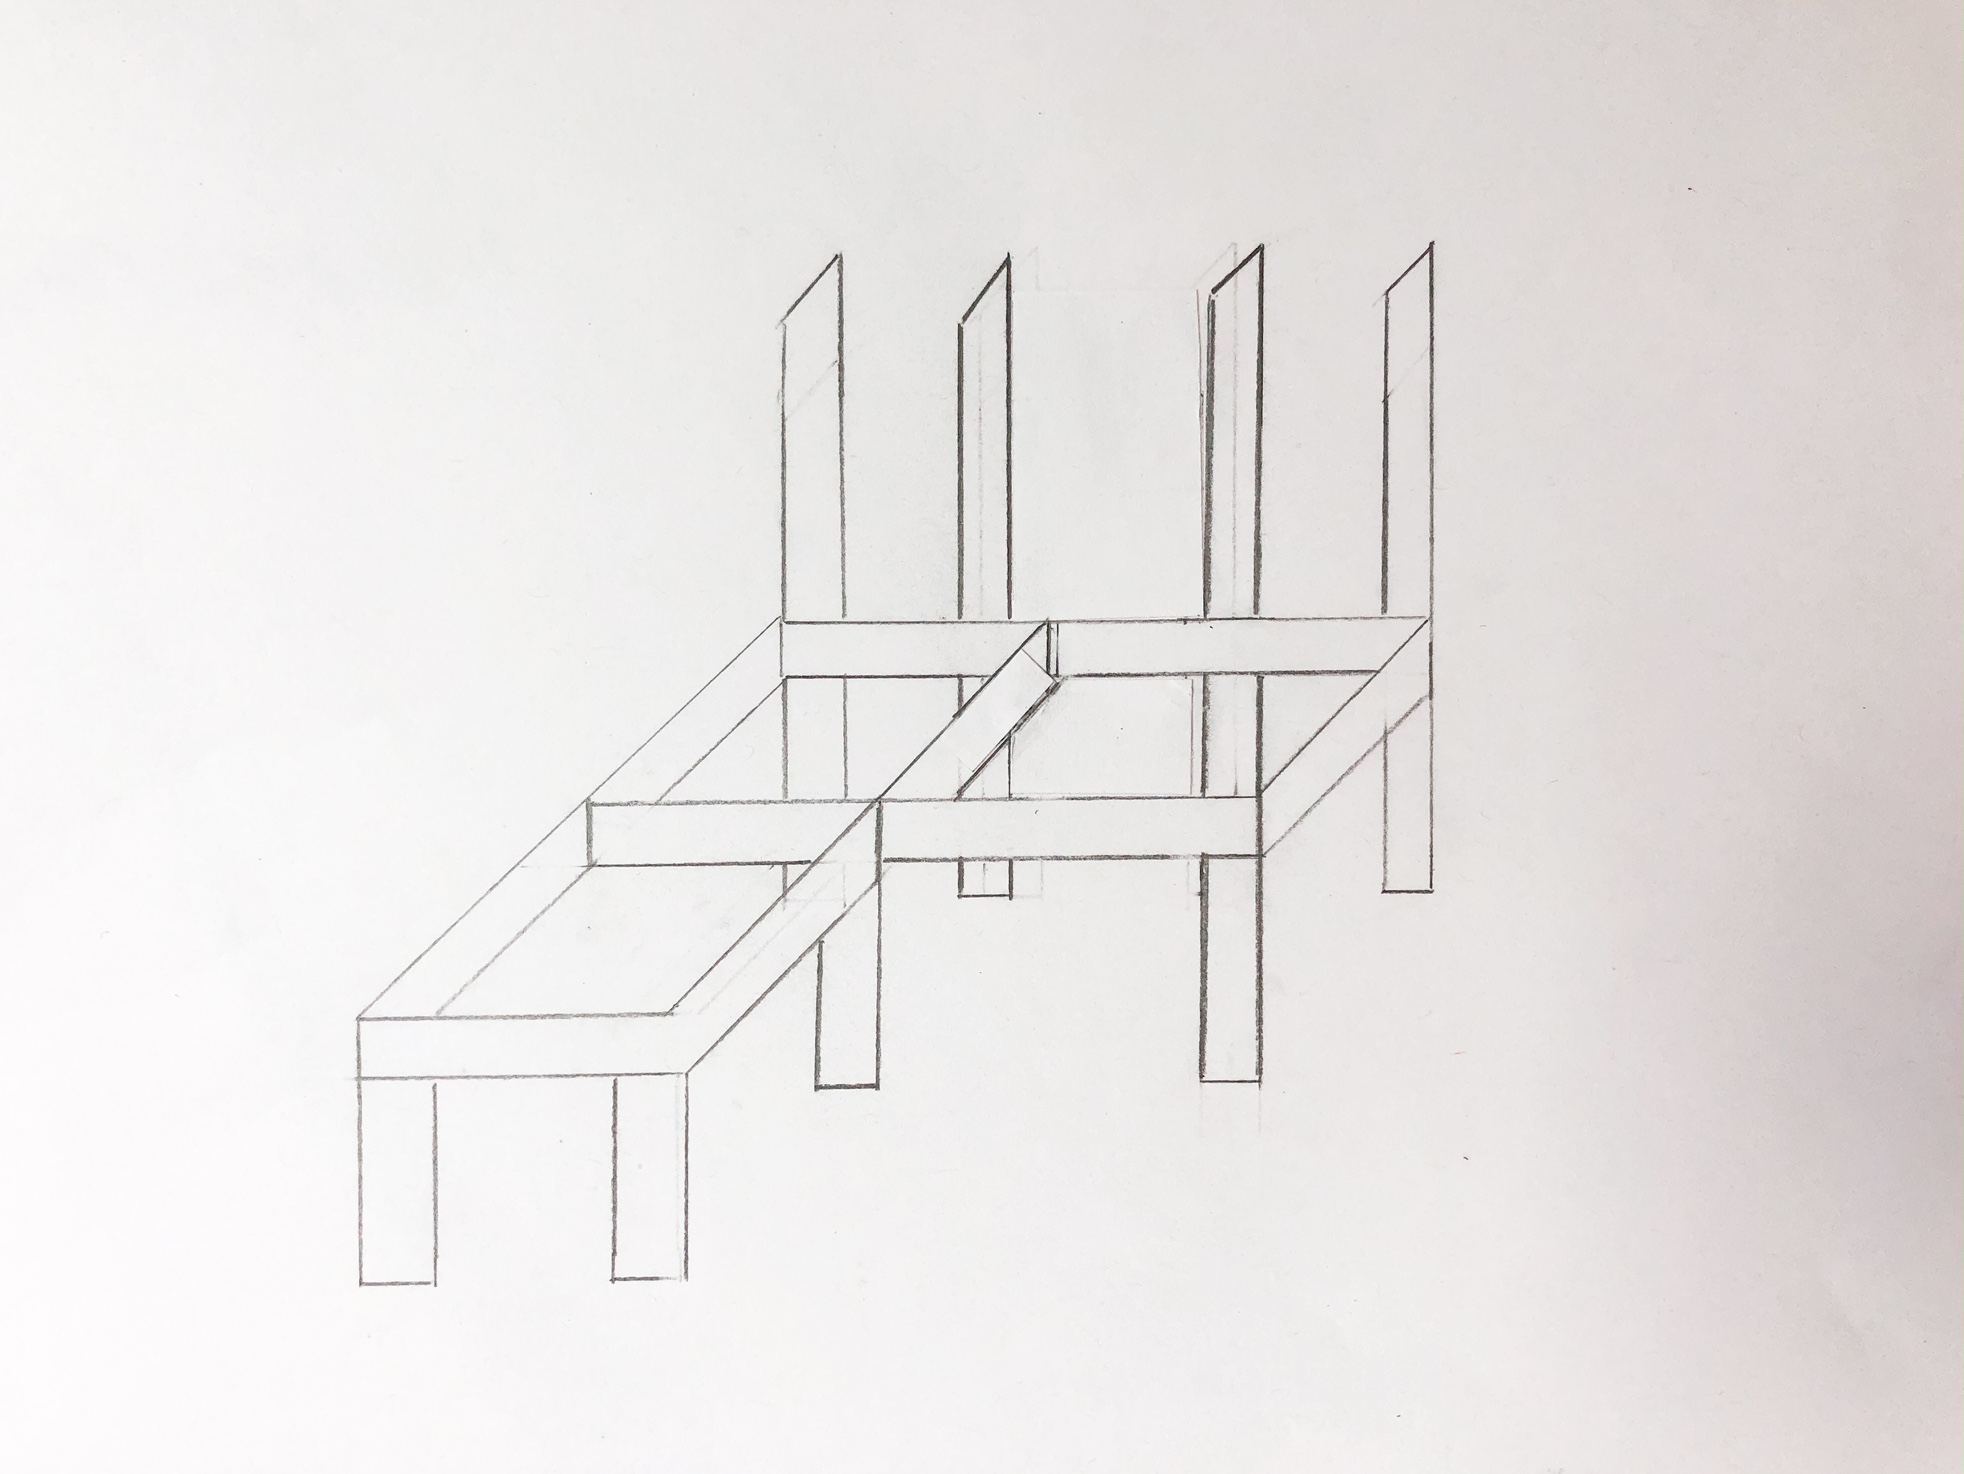
The 4 supports across the back are 55” tall (the tops are cut at 22.5 degrees to hold the 1″ x 8″ board for the sloped awning).
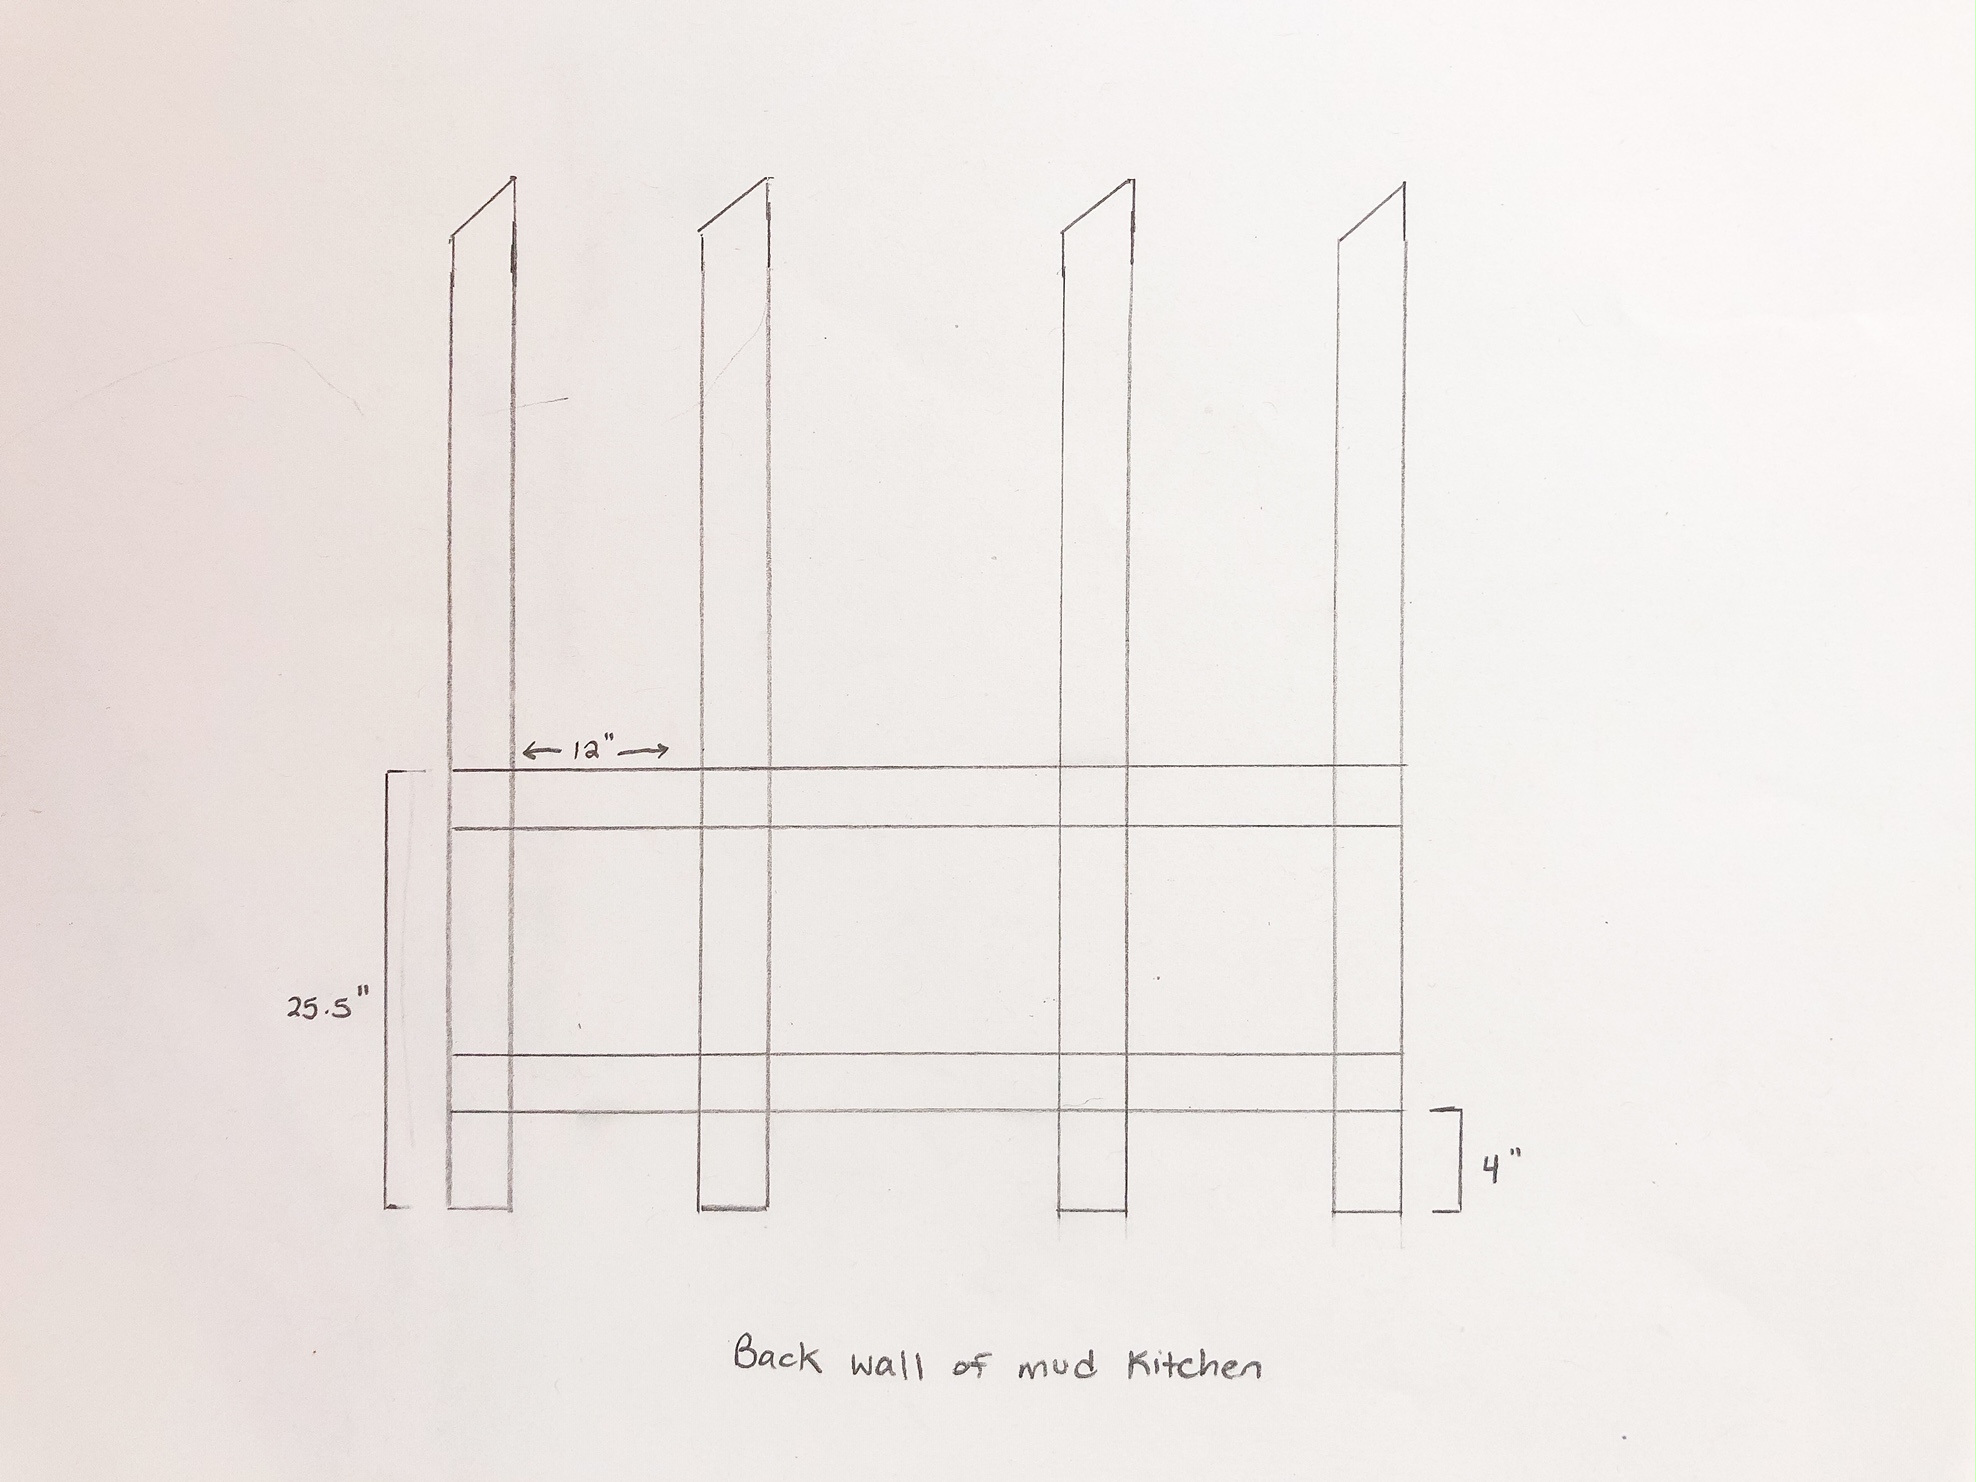
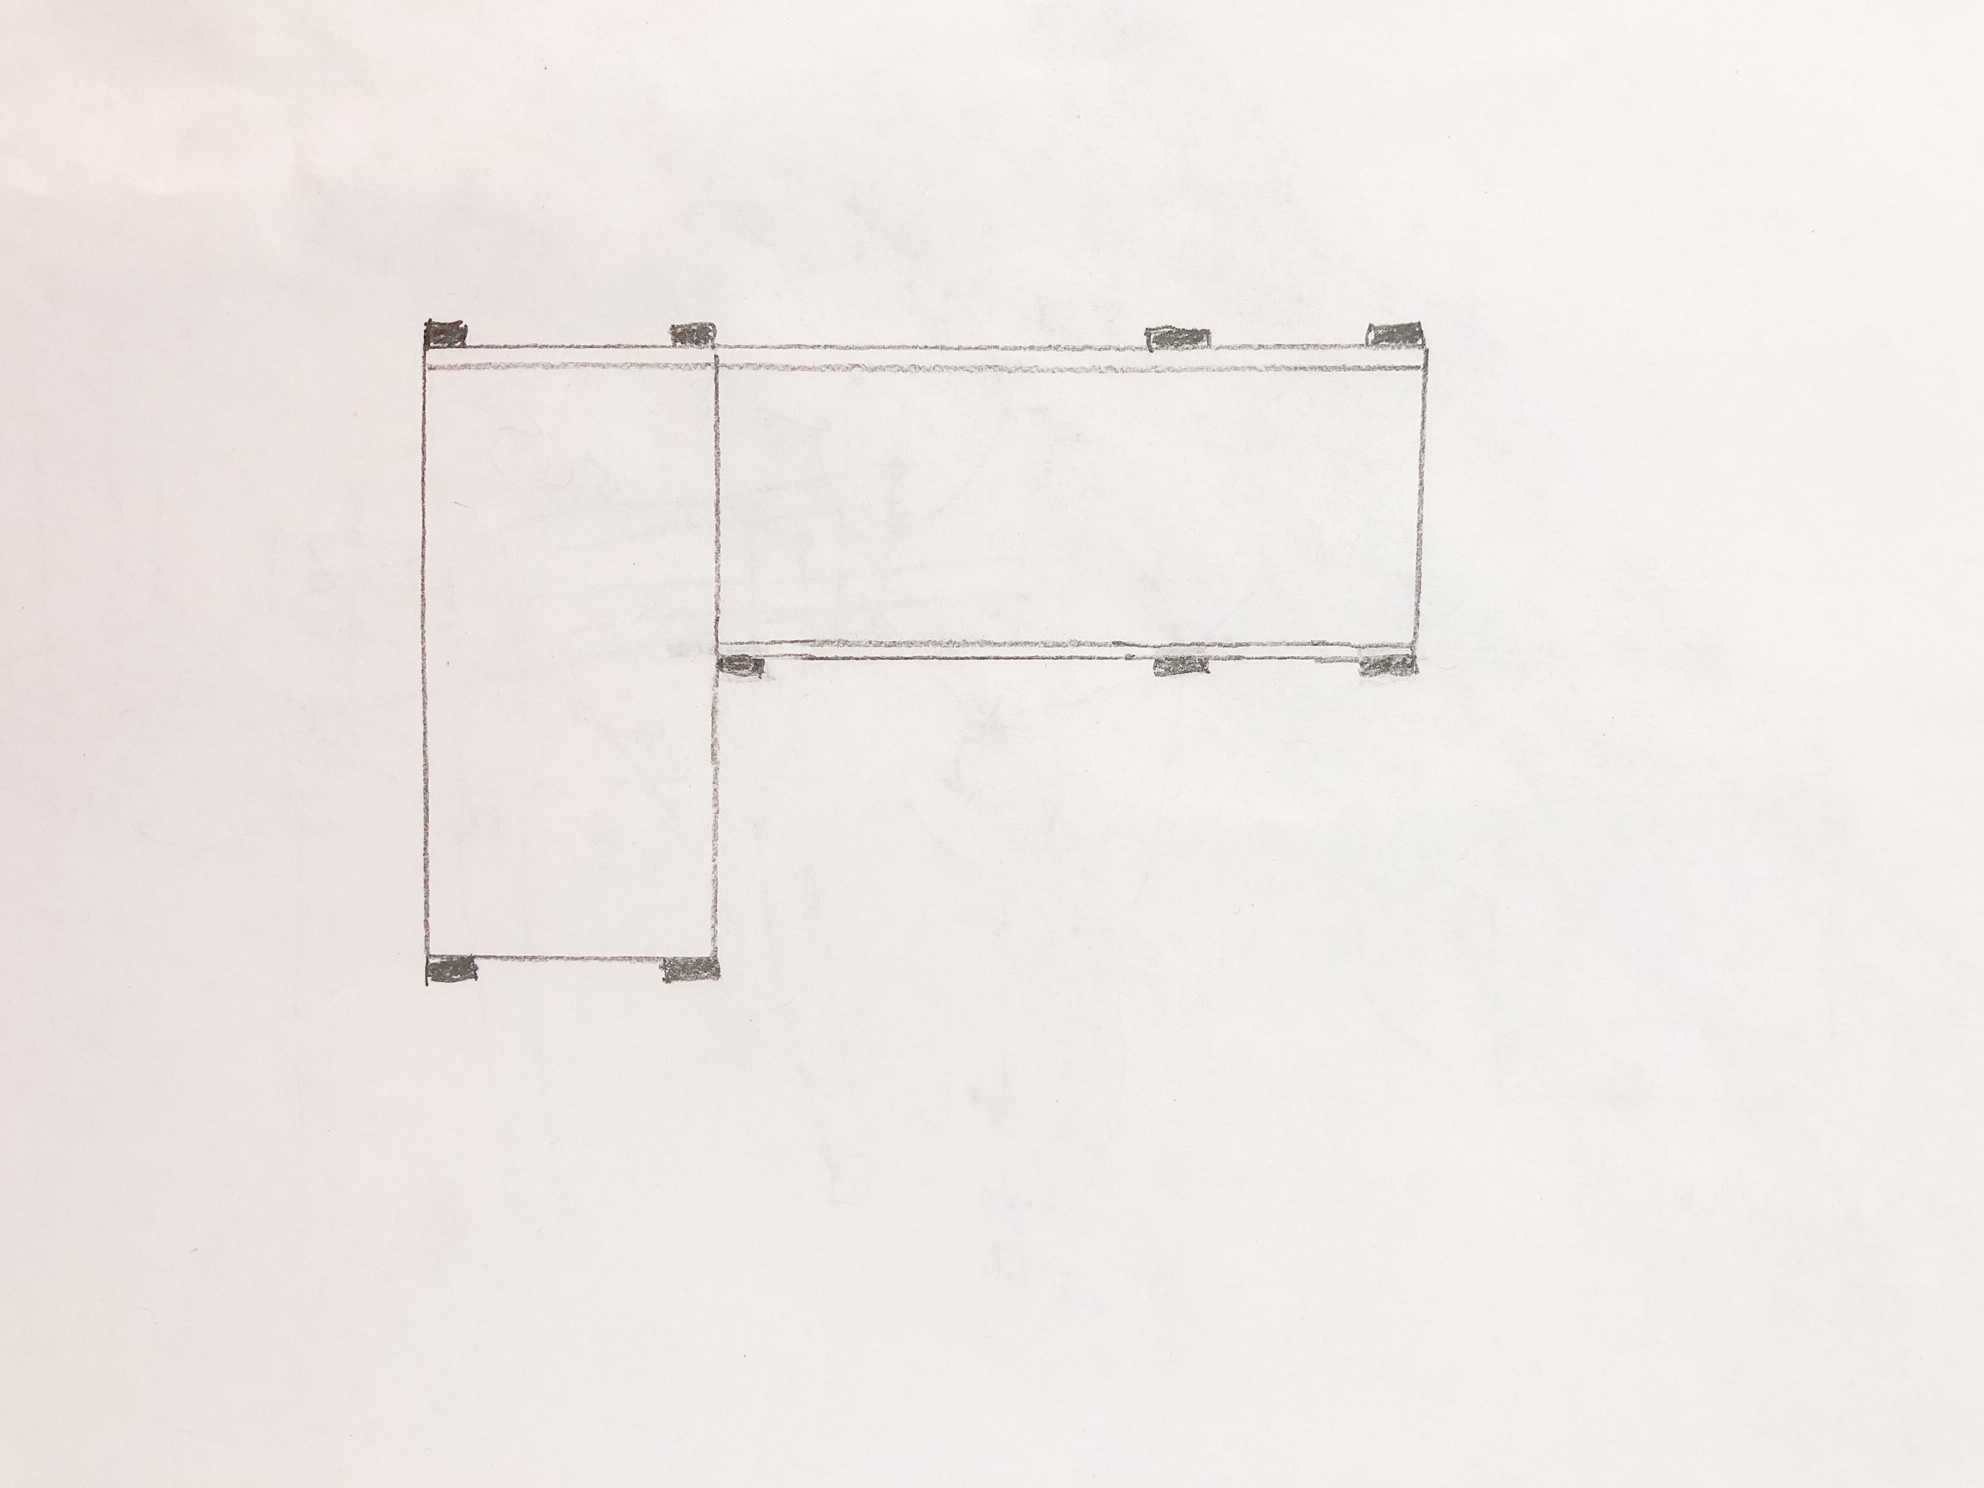
Build an L shape for the counter support – the counter is 16” deep, the back side of the L is 60” (the full width of the unit) and the left side that pops out is 36”. So basically a 36” x 15” rectangle on the left side, and a 45” x 15” rectangle on the right side, connected together.
The L shape is fastened to the 4 vertical supports at 25.5” from the bottom, and there are four 25.5” legs to support the front of the frame (one in the front right, two at the front of the 36” pop out on the left, and one at the inside corner of the L. A fifth 25.5” support is 20” inside the front right support to make the left side of the opening for the oven.
2 horizontal supports are at the bottom, 4” off the floor. One across the back (60”, in front of the 4 back vertical supports) and one mounted behind the two front legs on the right (50”). The bottom shelf / base of the oven will sit on these supports.
The picture above shows the basic layout from a bird’s eye view. The dark blocks are the vertical supports and the lines are the horizontal pieces that make up the L. The double lines show where another 2 x 4 is fastened 4” off the floor.
Run a 60” 1 x 8 across the back of the frame. Then lay the back part of the counter against the 1 x 8, which will give you a 3/4” overhang on the front. Cut a 16” strip of plywood to 36” long and use it for the left side pop out, then cut another strip for the right side that was long enough for an overhang on the right (about 46”).
Cut more 1 x 8s to the lengths of the two back walls – ours are 16” on the left and 20” on the right. Put two quarters between 1 x 8s to create the shiplap look. The top 1×8 will need to be ripped so it aligns with the top of the back supports, with a 22.5 degree top.
Cut another length of the plywood for the bottom shelf, which will also be the base of the oven. Fasten to the lower horizontal supports.
Rip a 60” length of 1 x 8 with a 22.5 degree side. This way when you affix to the 22.5 degree back supports the front of this slanted board will be vertical.
Cut 11 5.5” lengths of 1 x 6 to make squares. To round one side, cut at 45 degrees to take off about an inch of length on two adjacent corners, then shave the two bottom corners to 22.5 degrees. Then use an electric sander to round the edges.
Affix rounded pieces with 1.5” screws to the vertical side of the slanted 1 x 8.
Enclose the back and left walls of the oven with plywood. We used 1x8s on the right side and continued the ship lap look.
The door of the oven is made with 1 x 4s. Ours is 14” x 18” and the 1x4s are glued together. Then an 11 x 14” piece of plastic from Home Depot is glued to the inside to make the “glass”. I used gorilla glue and then clamped it overnight.
Connect the bottom of the door to the bottom support with 2 hinges and affix the magnets on the top support and the inside of the door.
Cut 2 x 4″ blocks to use as risers and cut another length of plywood for the top shelf.
Build the shelf on its own, then turn the unit on its side and screw from the bottom of the lower shelf into the base of the legs. I also screwed into the supports on the oven side from inside of the oven.
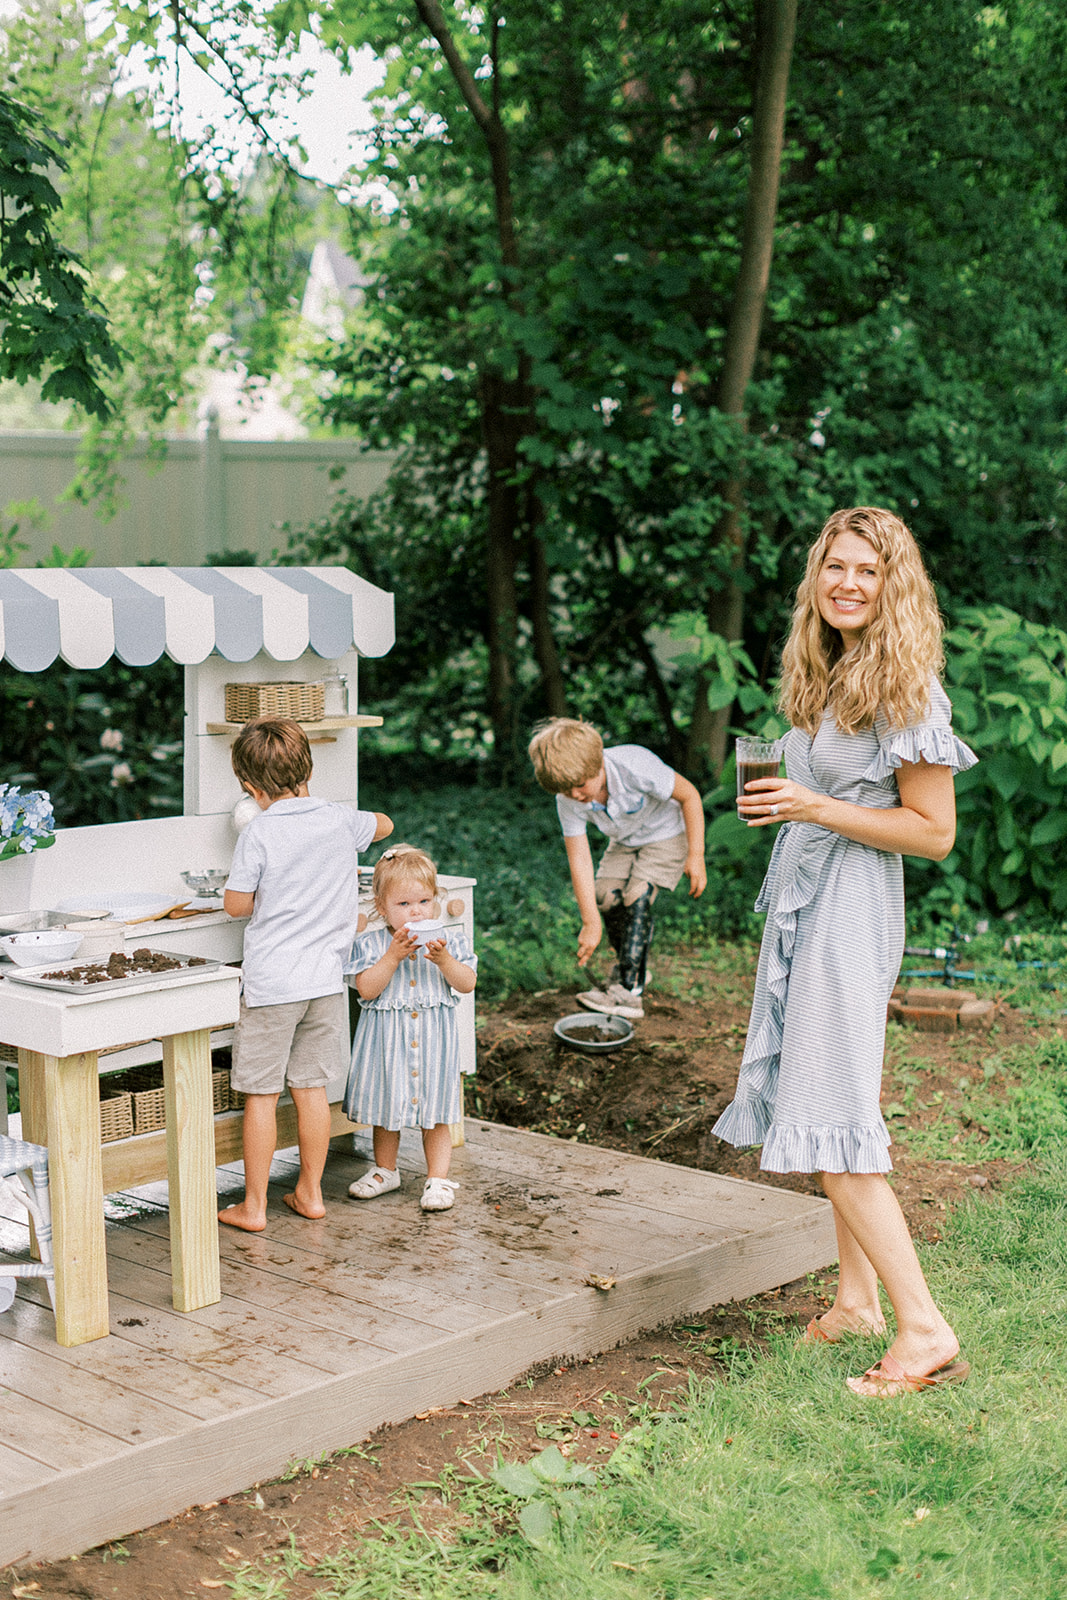
I hope you have enjoyed this post–the sweetest mud kitchen. A true labor of love and an absolute joy to watch this design unfold. These many hours sacrificed have created a pretty perfect spot for some creative mud play in our yard. Ruth Eileen Photography did a beautiful job capturing these special moments for us.

 comment share
Do you have photos or a link to the faucet you added?
Hi there! We got it off Etsy. Here is a link to the faucet:
https://rstyle.me/+HfTNnGMGhrR8P7ZJU21LeA
Hi! Do you have rough cost on what you guys ended up spending? I’d like to try but just would like to have a ballpark on what I’m looking at!
Hi there, the majority of the cost comes from the wood. Most of the outfitting of the mud kitchen was dollar store cookware and Target dollar spot finds. It has been a bit too long for me to remember exact costs but I’ll ask my hubby to estimate the wood and get back to you. Now three years later, it’s still played with daily and has held up nicely.
Hi there,
What size/dimensions do you use? Are it inch or ??
Thanks!
All measurements are in inches. ” is a standard abbreviation for inches. ‘ is the standard abbreviation for feet.