
HOME TOUR

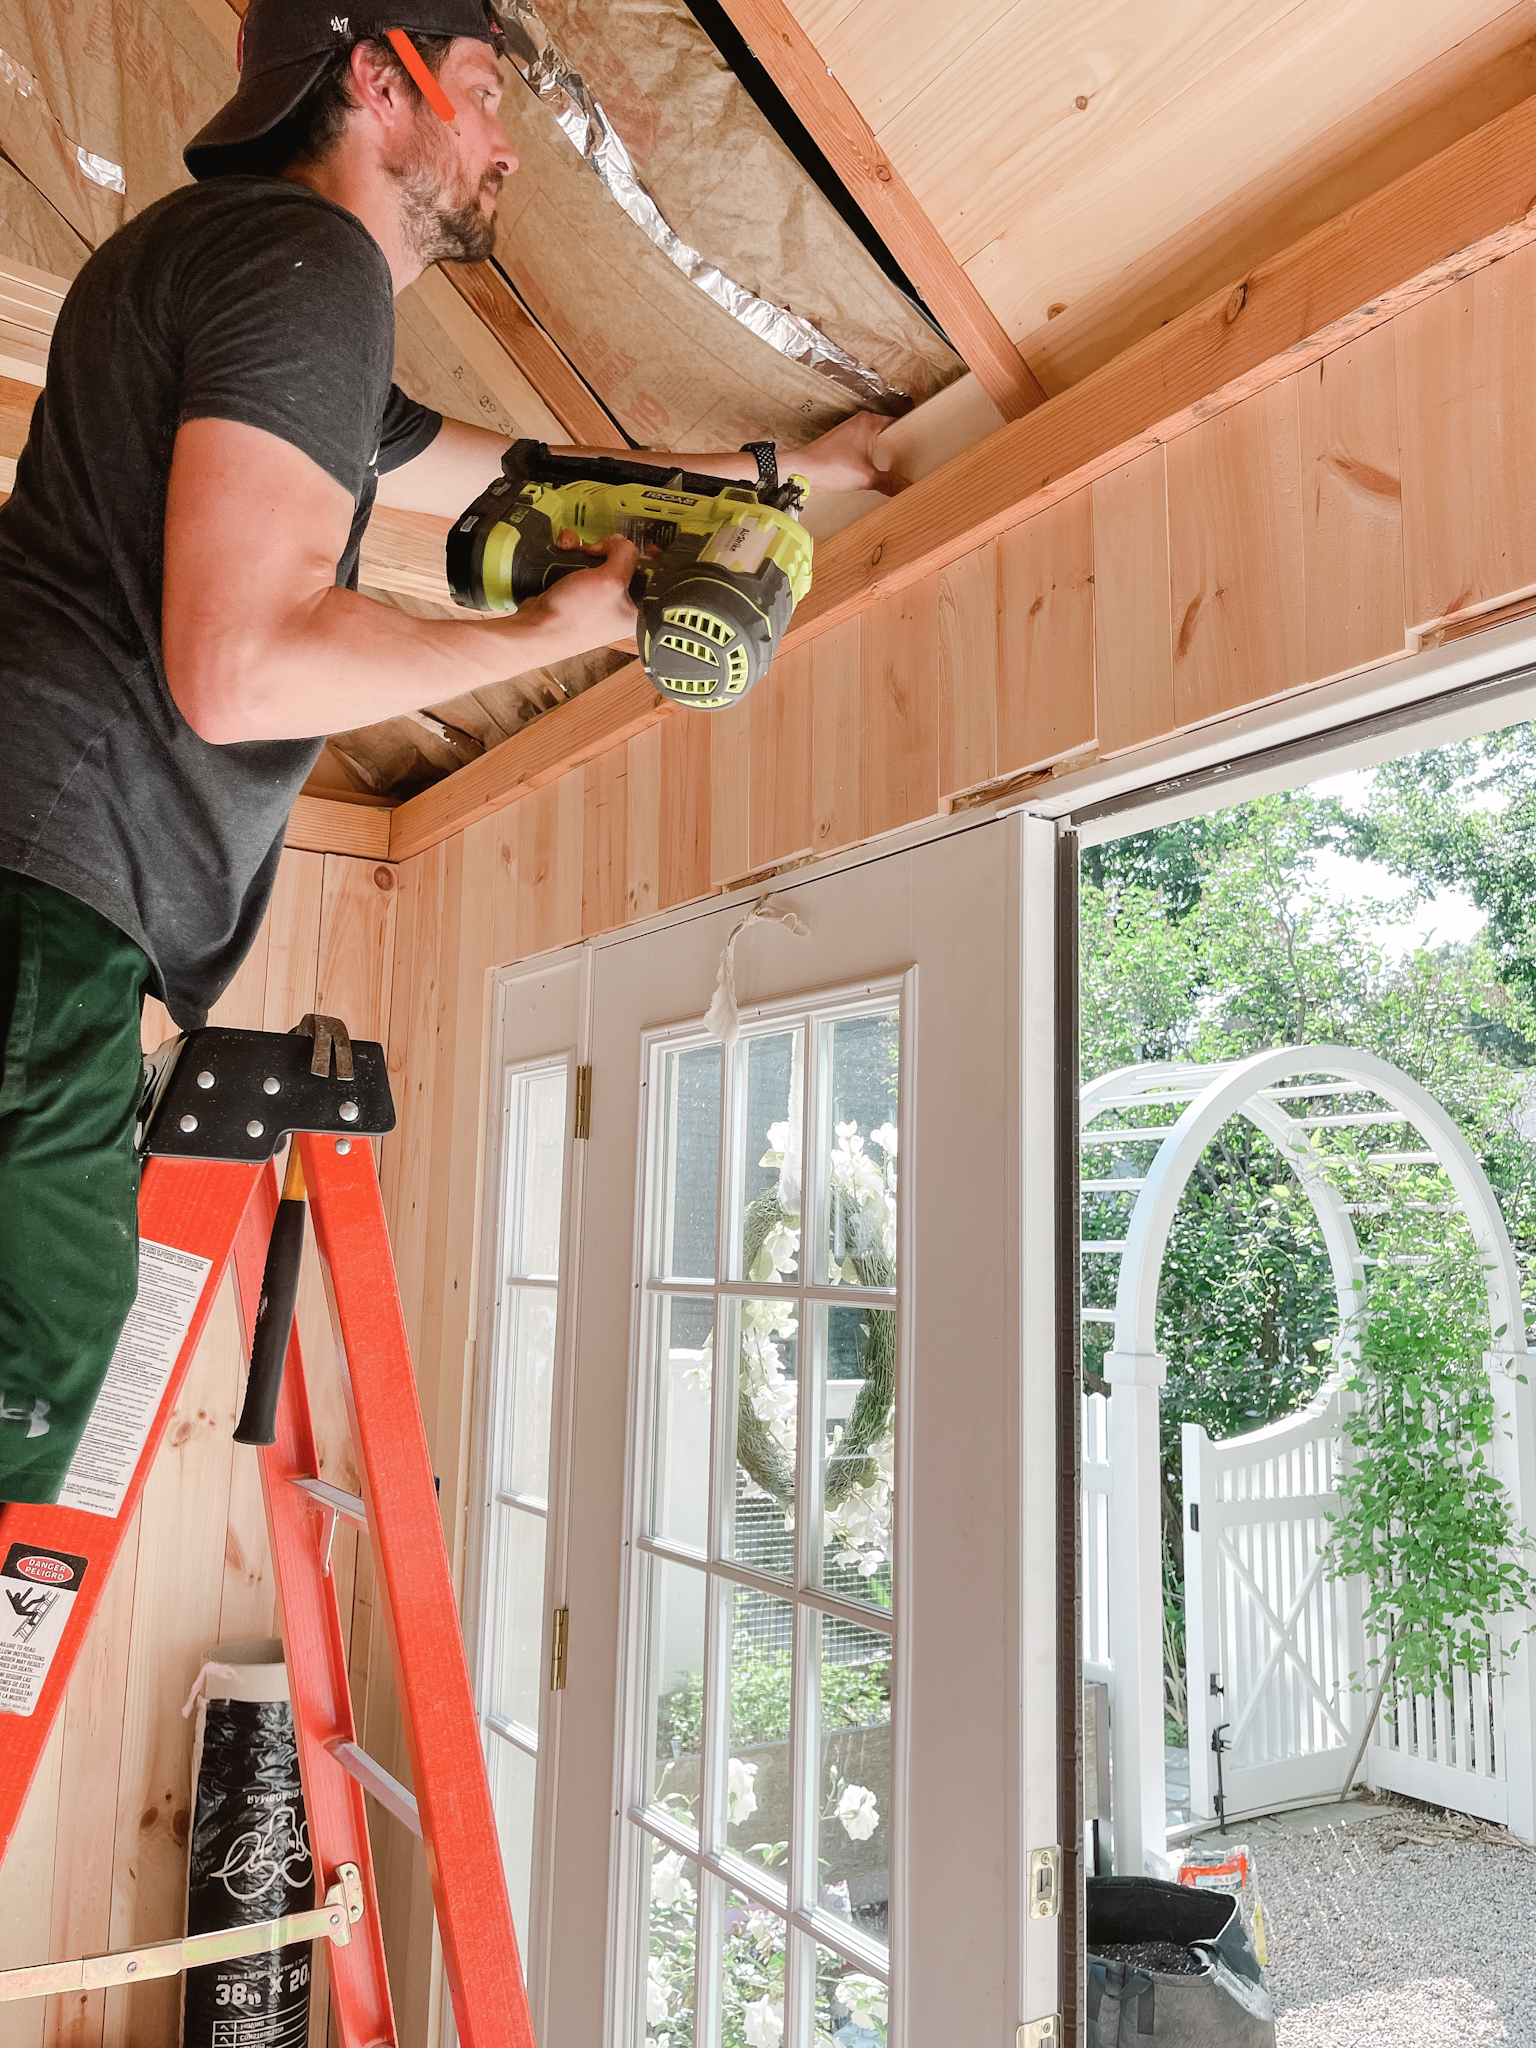
Some of the more frequently asked questions are about my She Shed and I realize I haven’t done a good job of documenting this project. Probably because it’s been a looooong one but we’re finally moving on it and I’m excited to share progress. The photography along the way is awful, all iphone snaps while balancing a baby Aubrey on my hip. I promise the finished pictures will be much better. So let’s chat about it, numbers and all. And if you keep scrolling, a glimpse at my She Shed plans and all the design goodness coming over the next few months.
Now two years old, she’s been sitting sweetly in my cottage garden wearing the occasional wreath on her French doors–lovely on the outside, unfinished on the inside. Partly due to Covid and resultant school closures, partly due to winter weather. There seemed to be no shortage of DIYs around the home that took precedence. If you have kids you can relate to the tension between wanting to have weekends off to just play and wanting to accomplish lingering DIYs with those few precious hours a week you aren’t doing your main job. In Matt’s case, that’s financial software. He has no formal training in construction and is self-taught, a true Renaissance man. He claims it’s out of necessity because I’m allegedly expensive but you aren’t fooling us husband, we know you love this stuff. Hence the two year time frame on this DIY.
THE PURPOSE
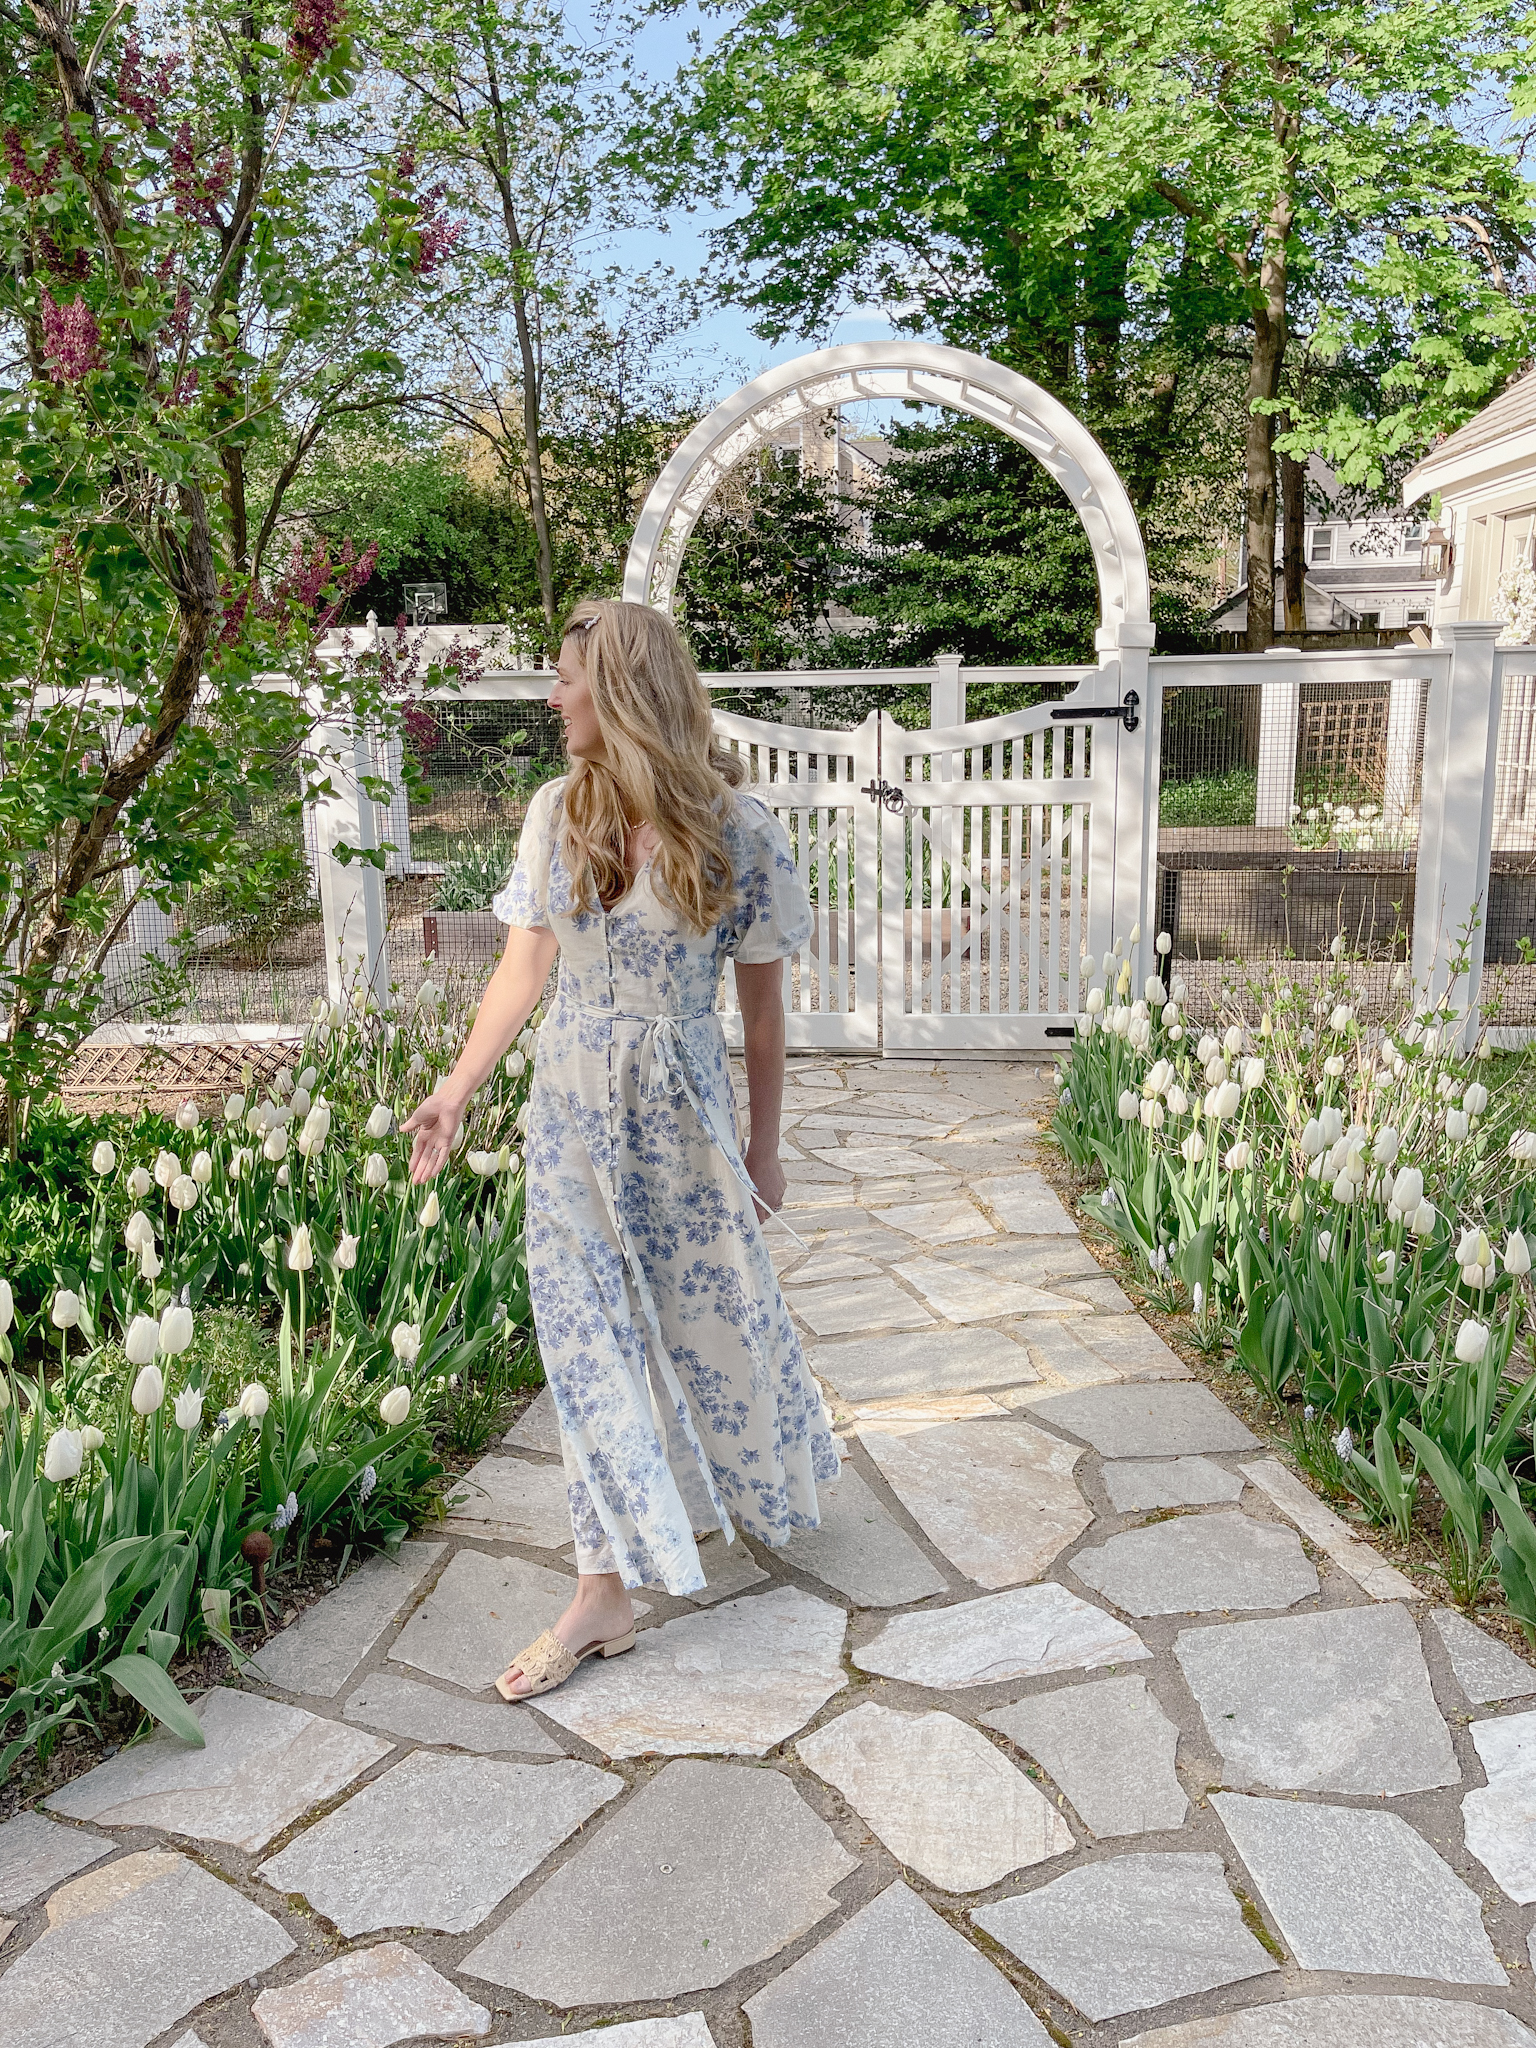
The She Shed will be my office, my haven and a lovely place to linger. Right now my “office” is in our closet. Which if you haven’t seen in a while, its worth taking a second look because Matt finished it himself on a budget and it’s beautiful and functional. Regardless, I’m tired of taking client calls with my jeans in the background.
SHED DETAILS
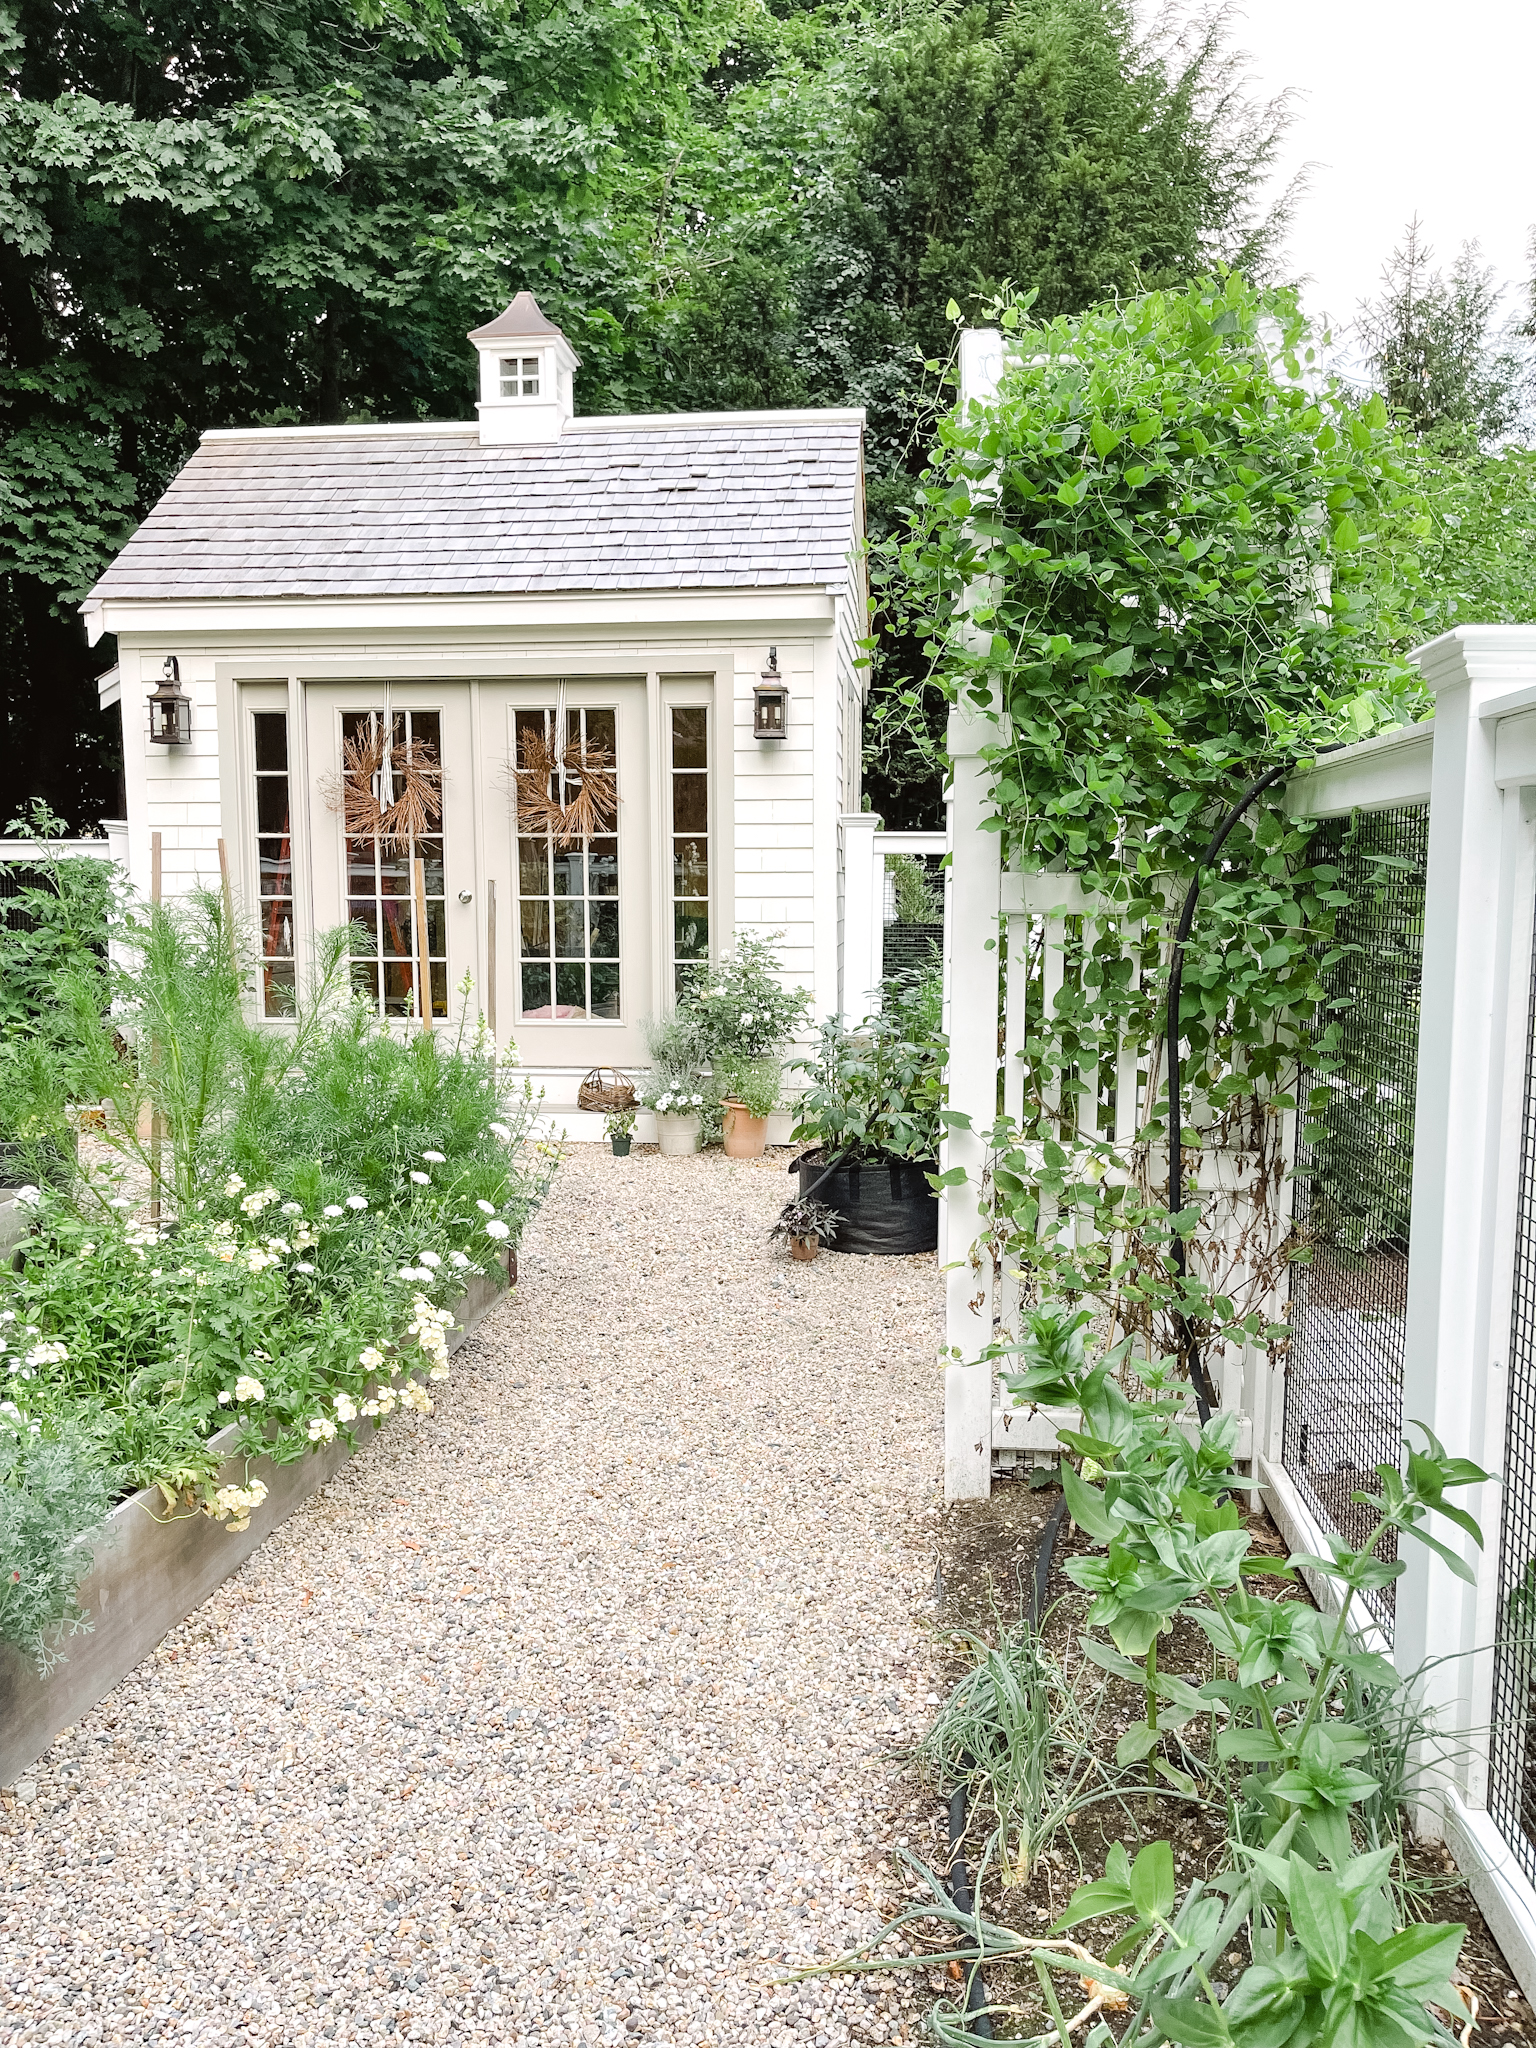
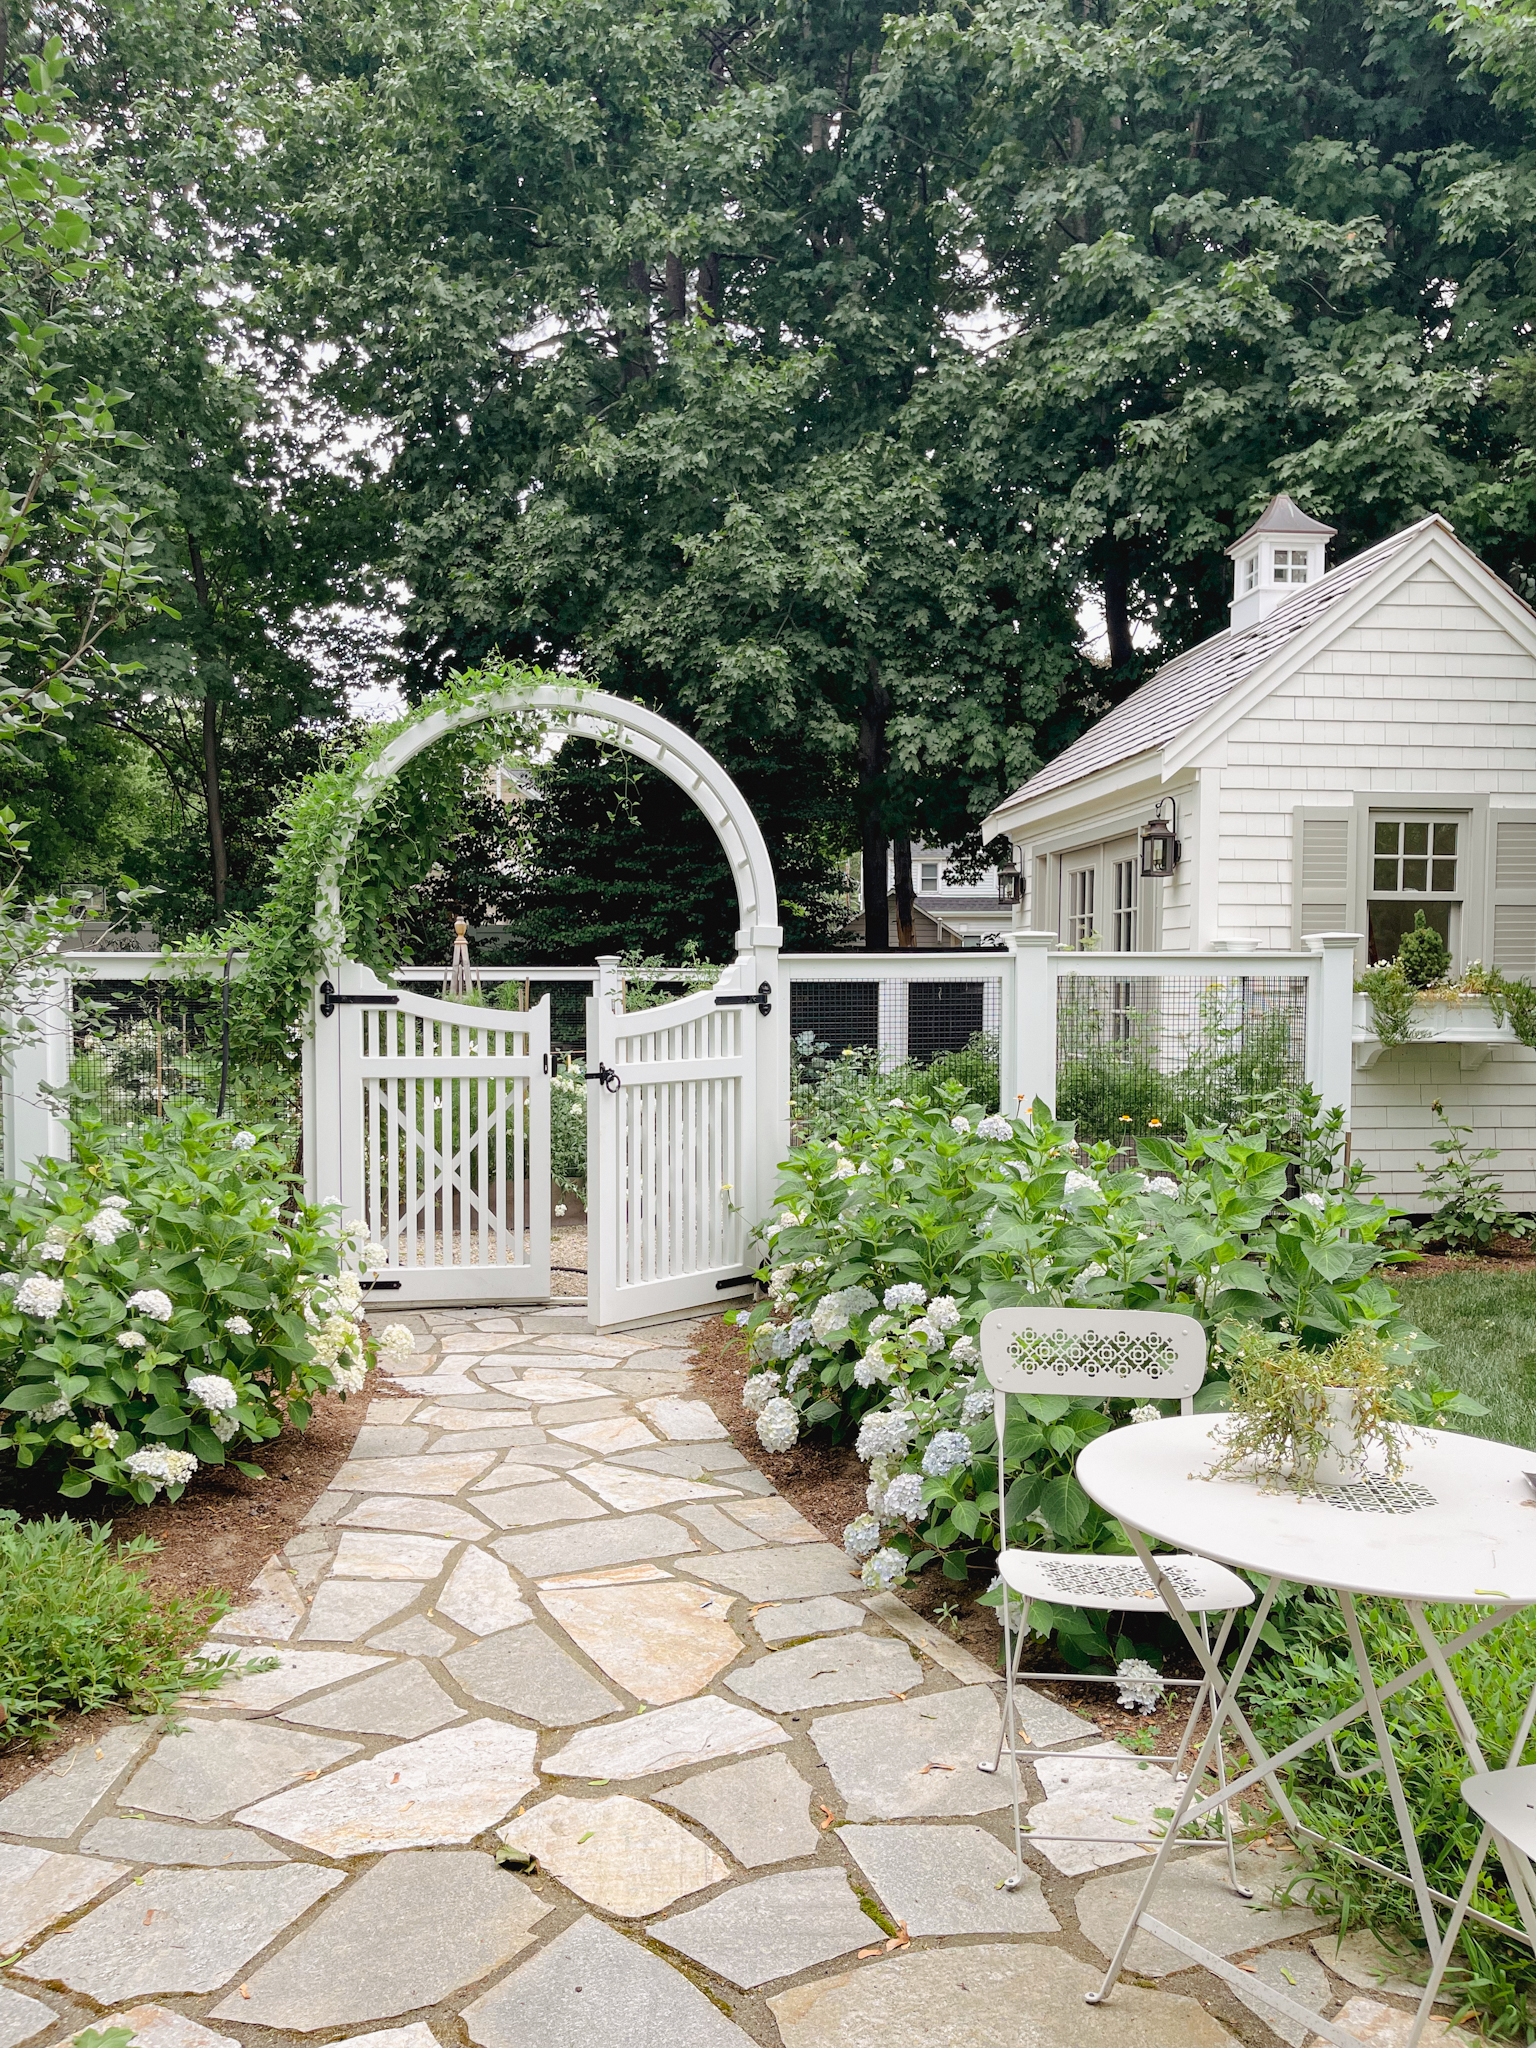
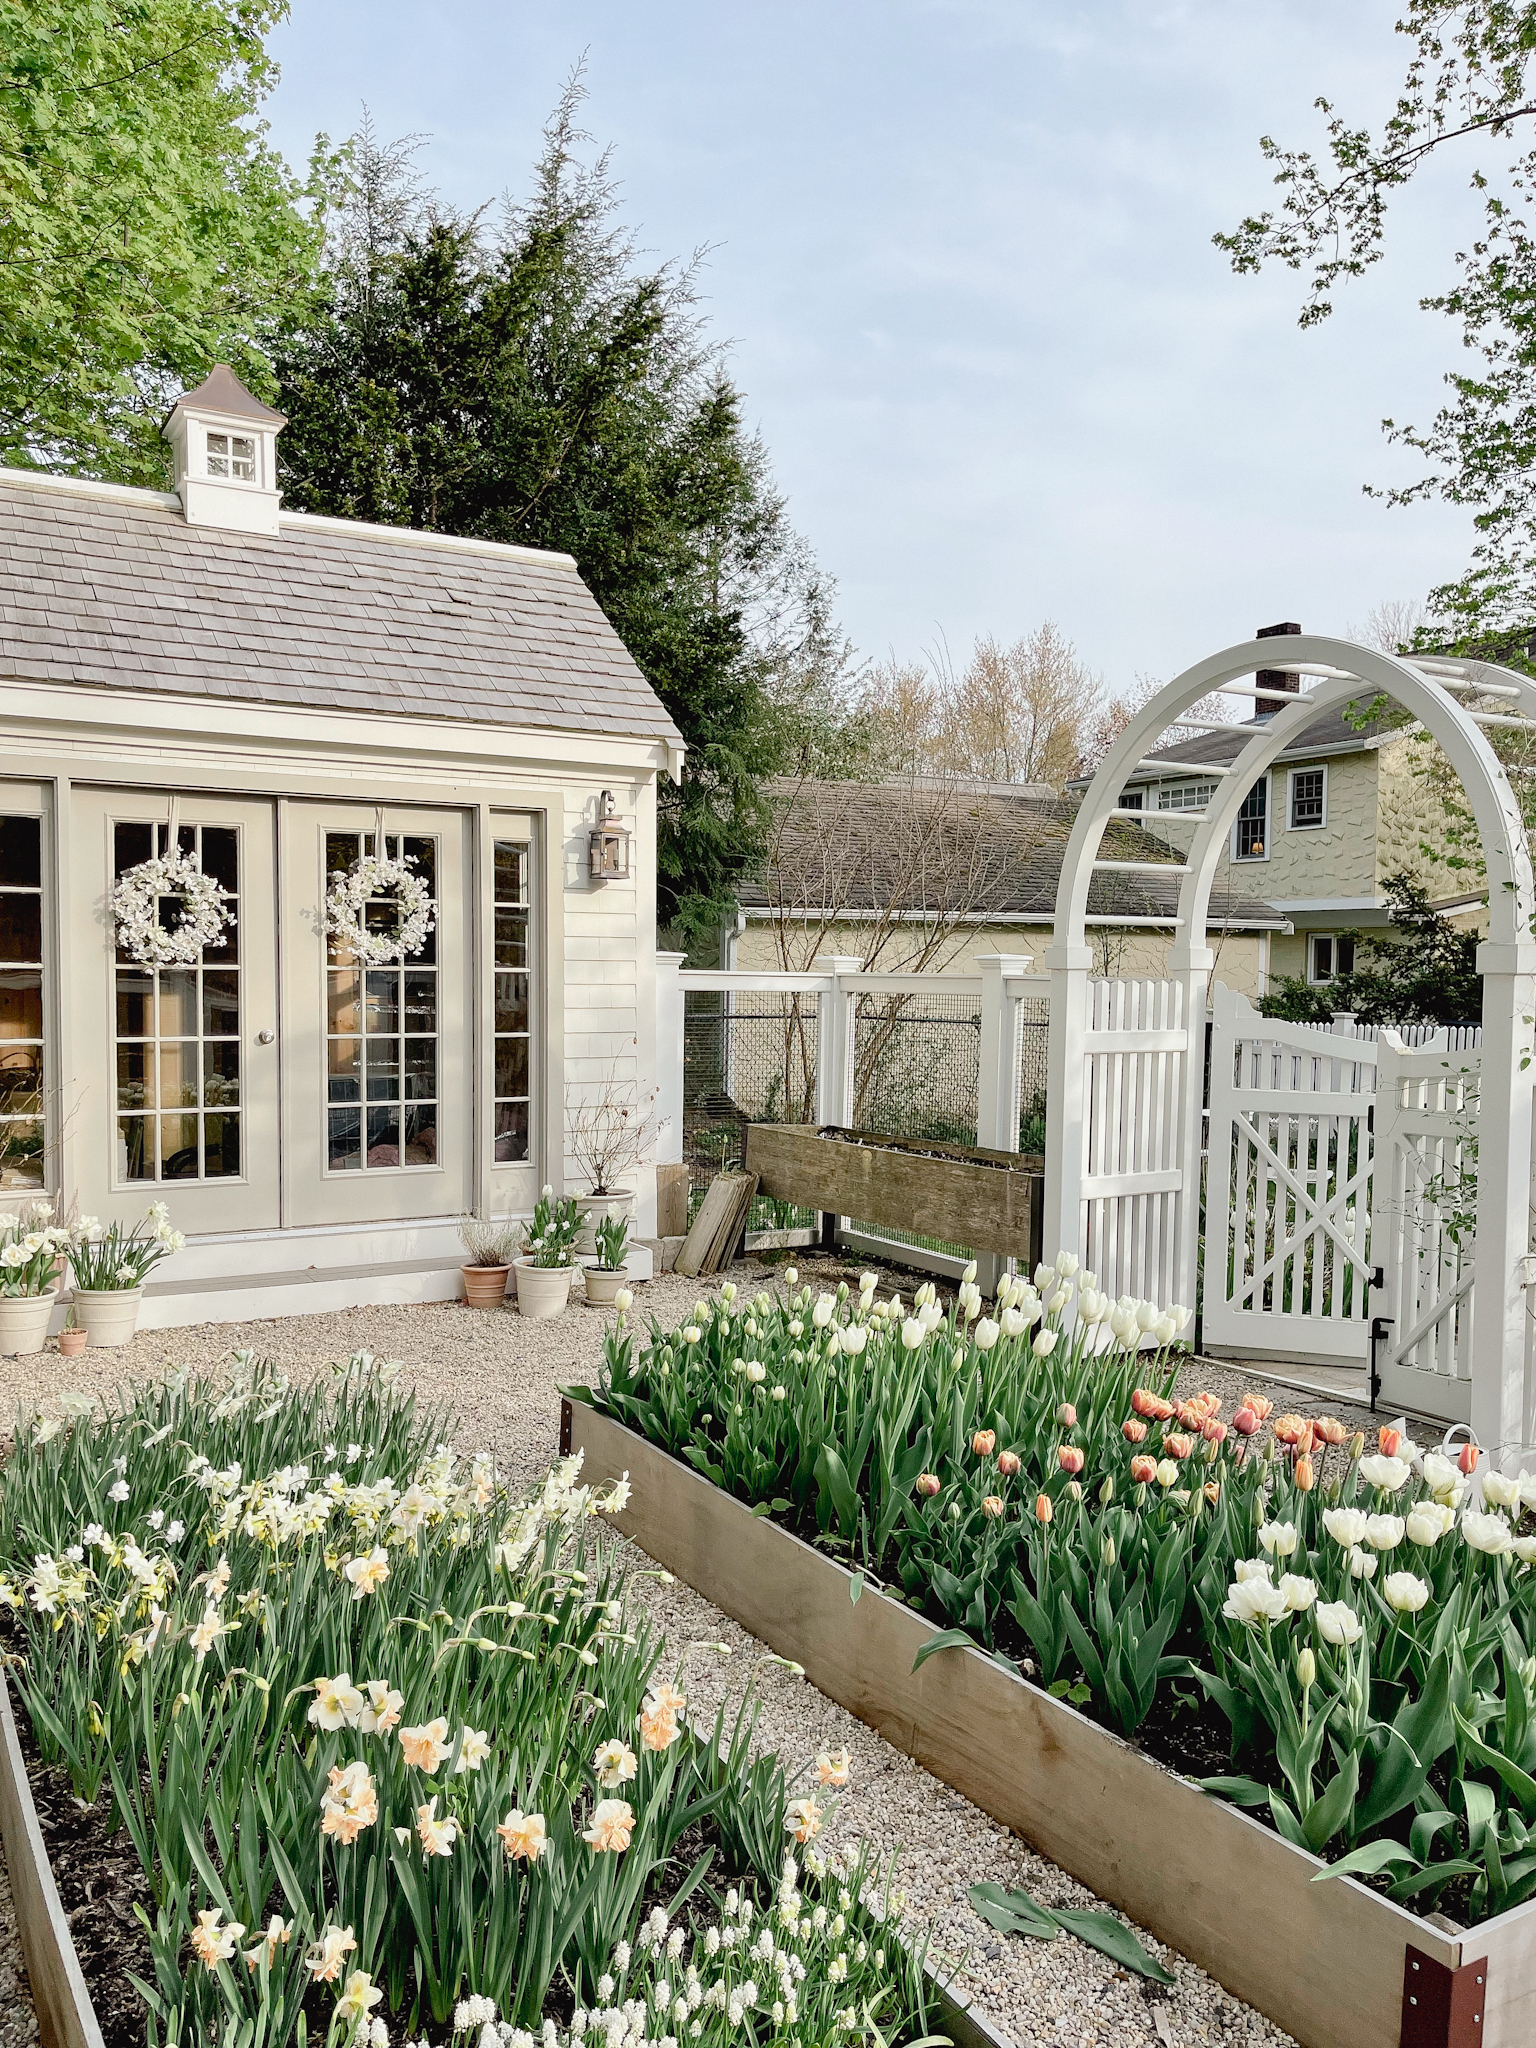
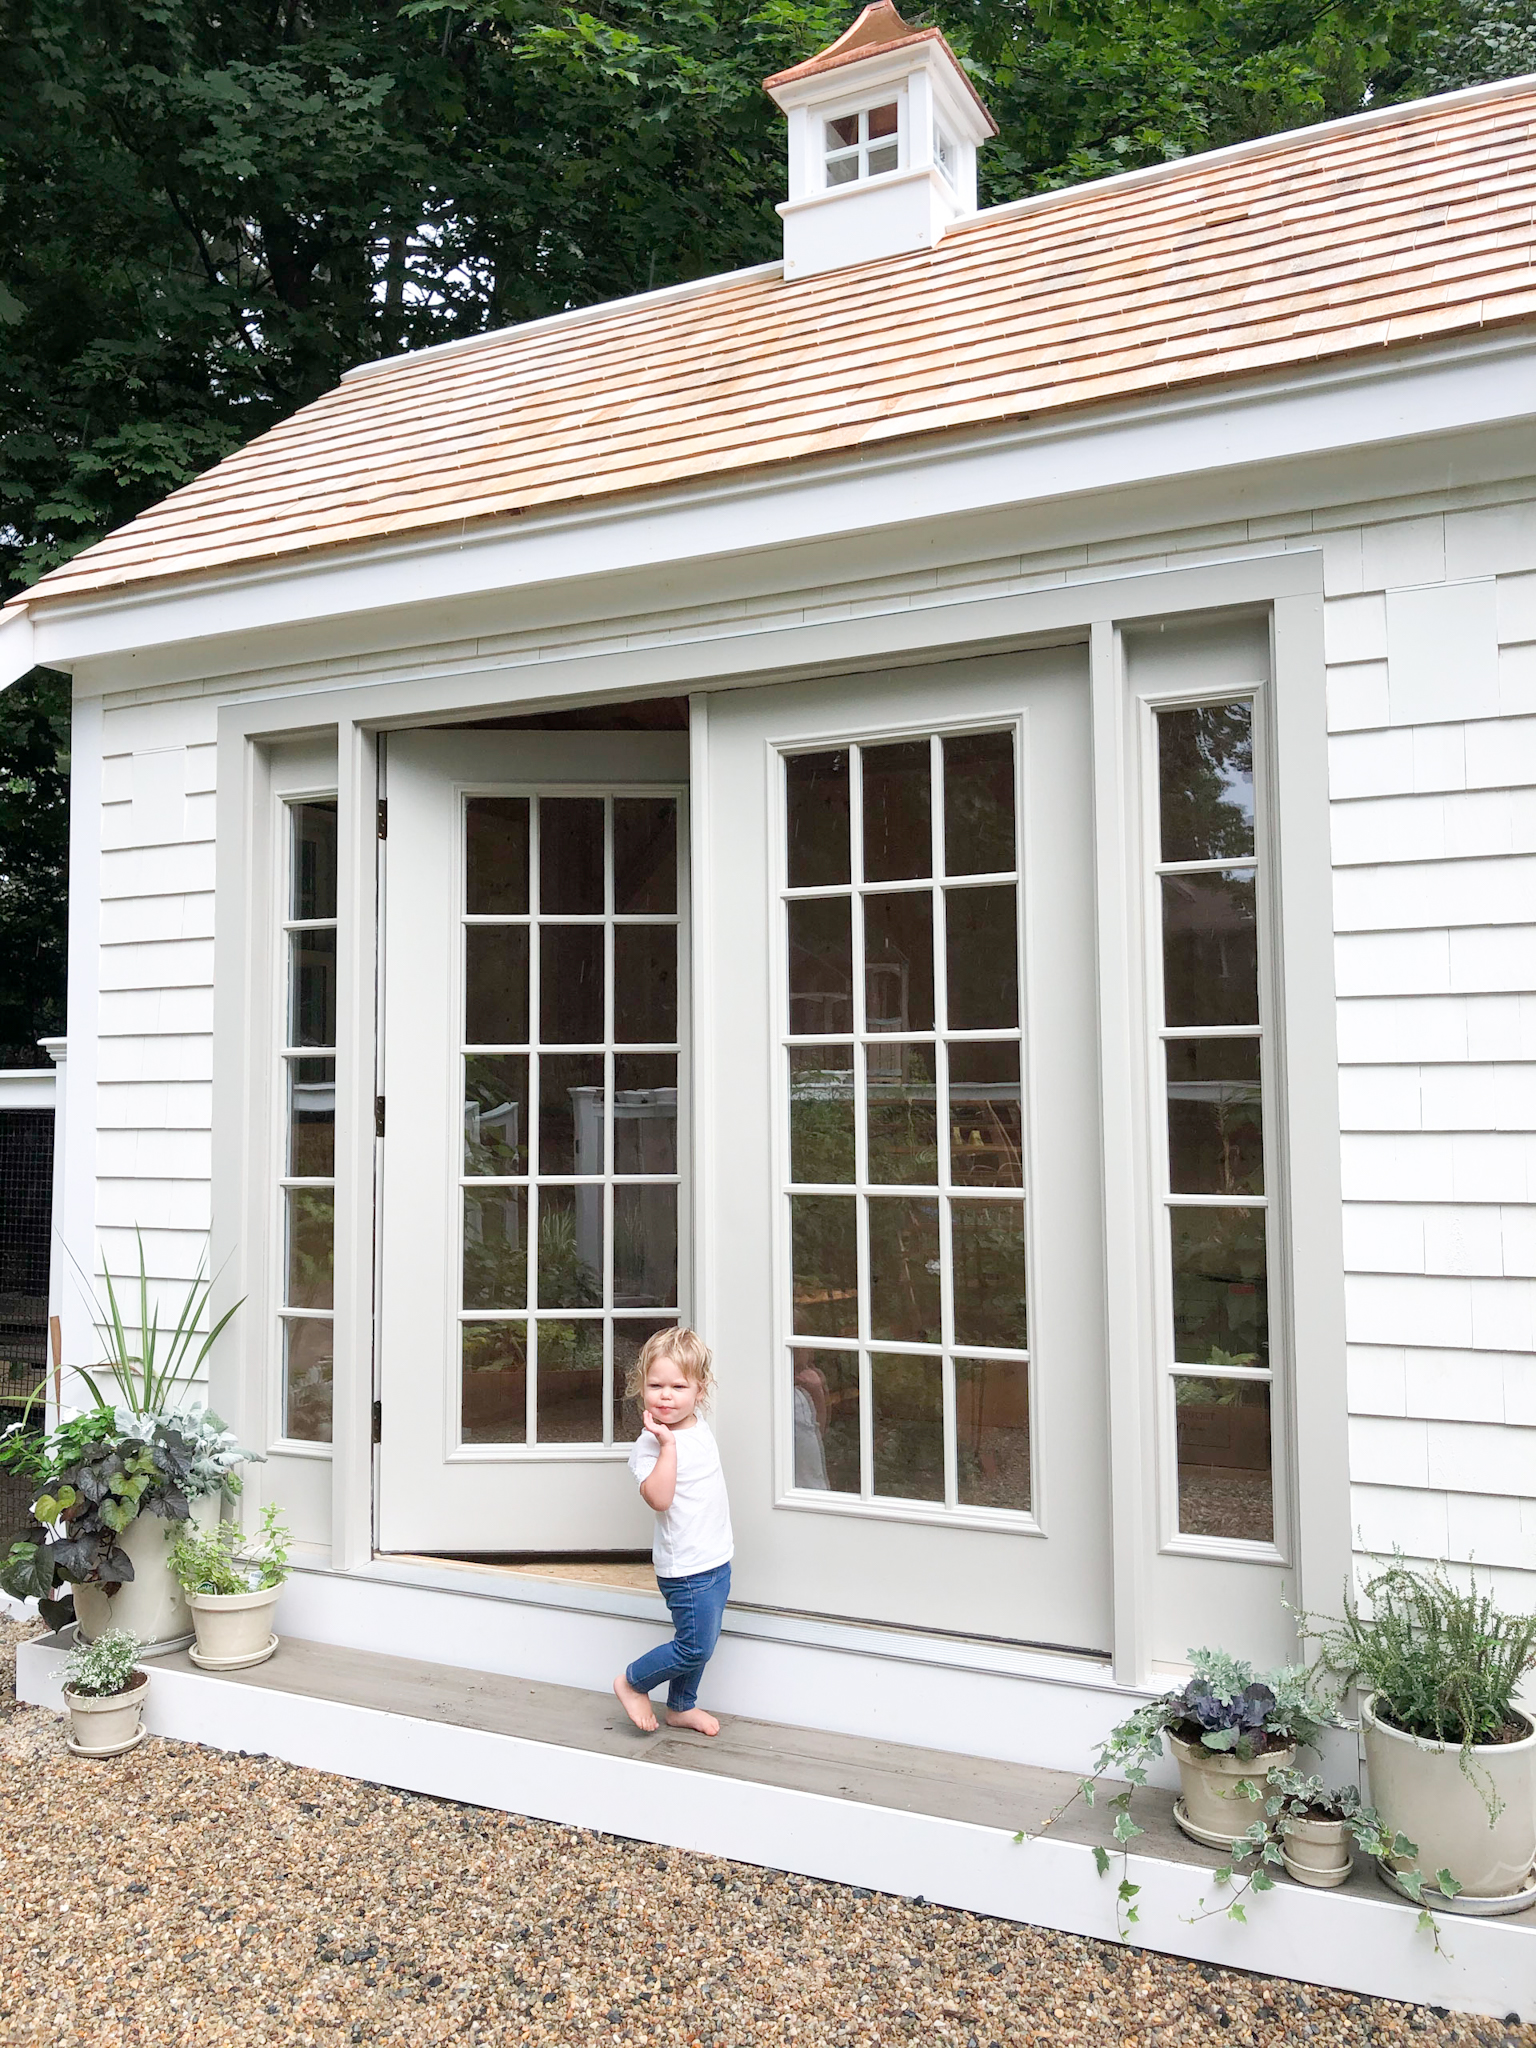
Here are the rough details which frankly were dictated by the building code in our town. Anything over 100 square feet we needed a building permit for and would be subject to setback requirements for our lot size. I wanted the shed right up against the lot line which would have required a special permit that, just to initiate, costs $800 and they would have said no. So we stayed under at 96 square feet or an 8′ x 12′ footprint. The shed is from Pine Harbor Sheds. We customized their signature Cape Codder by increasing the wall height to 8′ walls. I did this on purpose so the finished roof line would be taller and more substantial. High ceilings make small footprints live bigger.
SHED COST
I added 6′ french doors with flanking transom windows on the front side of the shed, basically a wall of windows. I designed a custom “bump out” which if it had gone according to my drawings, would have had a the custom desk pushed into it to clear up floor space. This element was lost in translation and only as it was being built did I realize it was never going to work. As it sits right now, the “bump out” is too high to do anything with, I suppose it could be a stand up desk. It’s pretty though. It would have been nice but was too costly a mistake to fix after the fact. It has an 18″ Carlisle cupola (no weather vane yet but on my radar) and cedar shingles for siding and the roof. After all the customizations, having the floor insulated under the shed and professionally built, the total came to $12,720.00.
HARDWOOD FLOORS
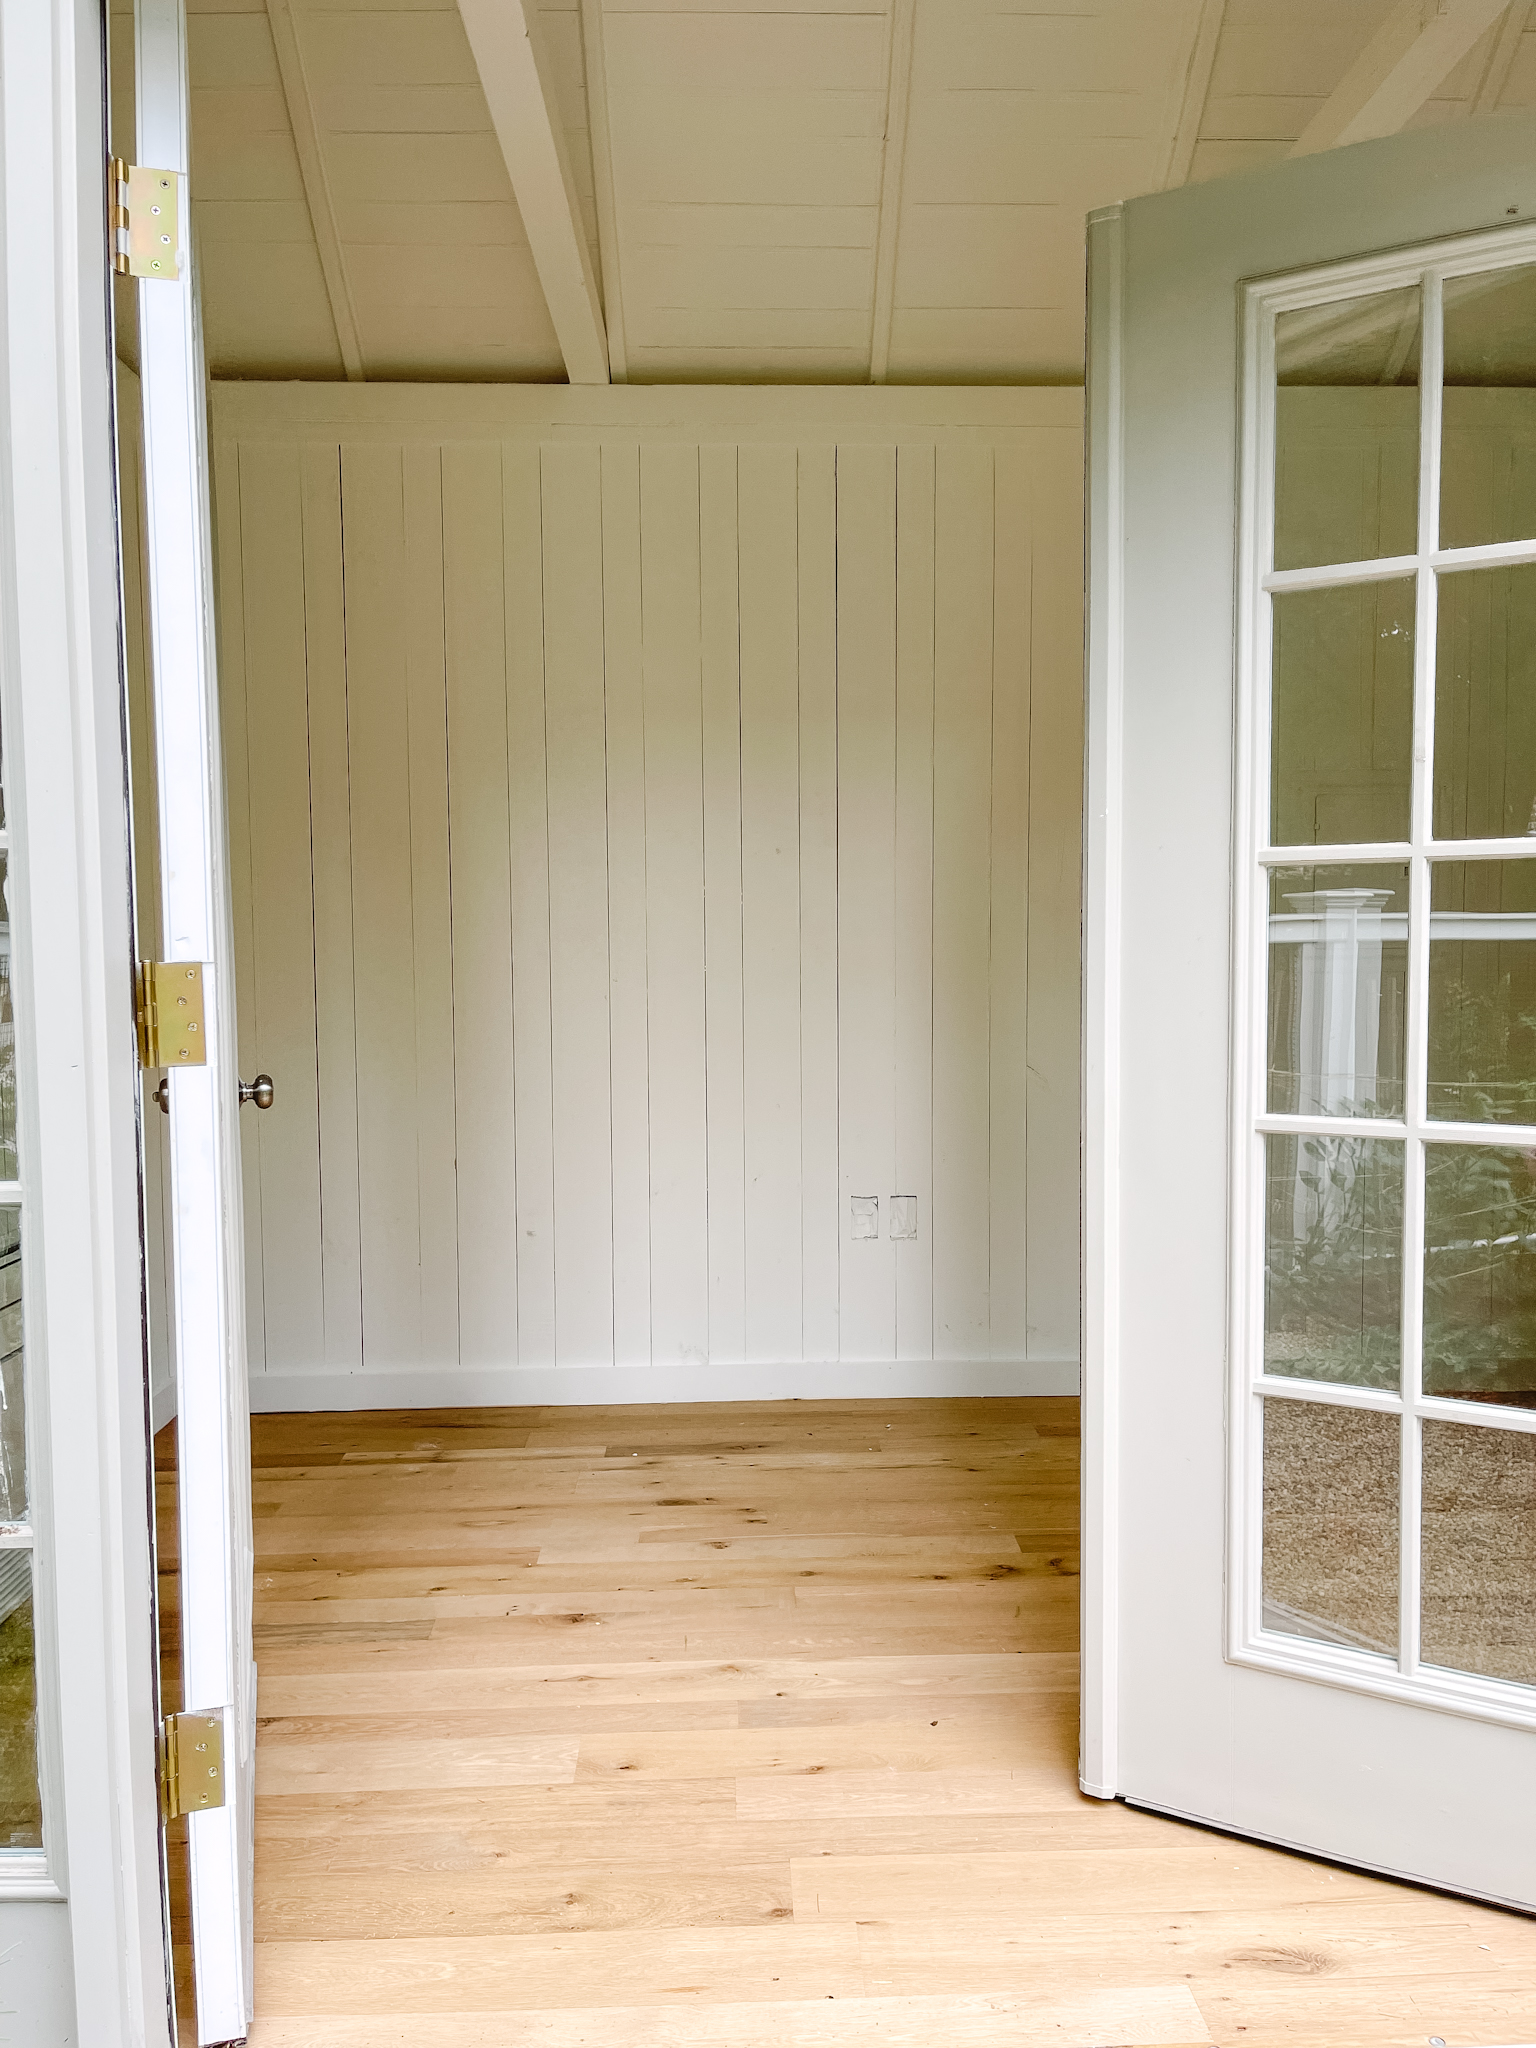
Last summer I purchased reclaimed antique white oak floors from one of my favorite places, Long Leaf Lumber in Cambridge, Ma. This was costly at $1436 for 104 sq ft but the finished product so worth it because old details done right infuse character into a space. When you go the reclaimed floor route you need to order more than you actually need because some pieces come with unsightly knots and discoloration that would have driven me crazy. It’s old wood and it has worm holes, knots, checking and occasional nail holes. With antique flooring you get varying lengths and widths. Ours ranged from 3″ to 5″ wide and from 2-12′ long. I LOVE the look of varying widths on the floor so for this project it was perfect. The floor is gorgeous, I wish I could do my whole home! It had a long lead time, 10+ weeks and Matt installed it himself once it came.
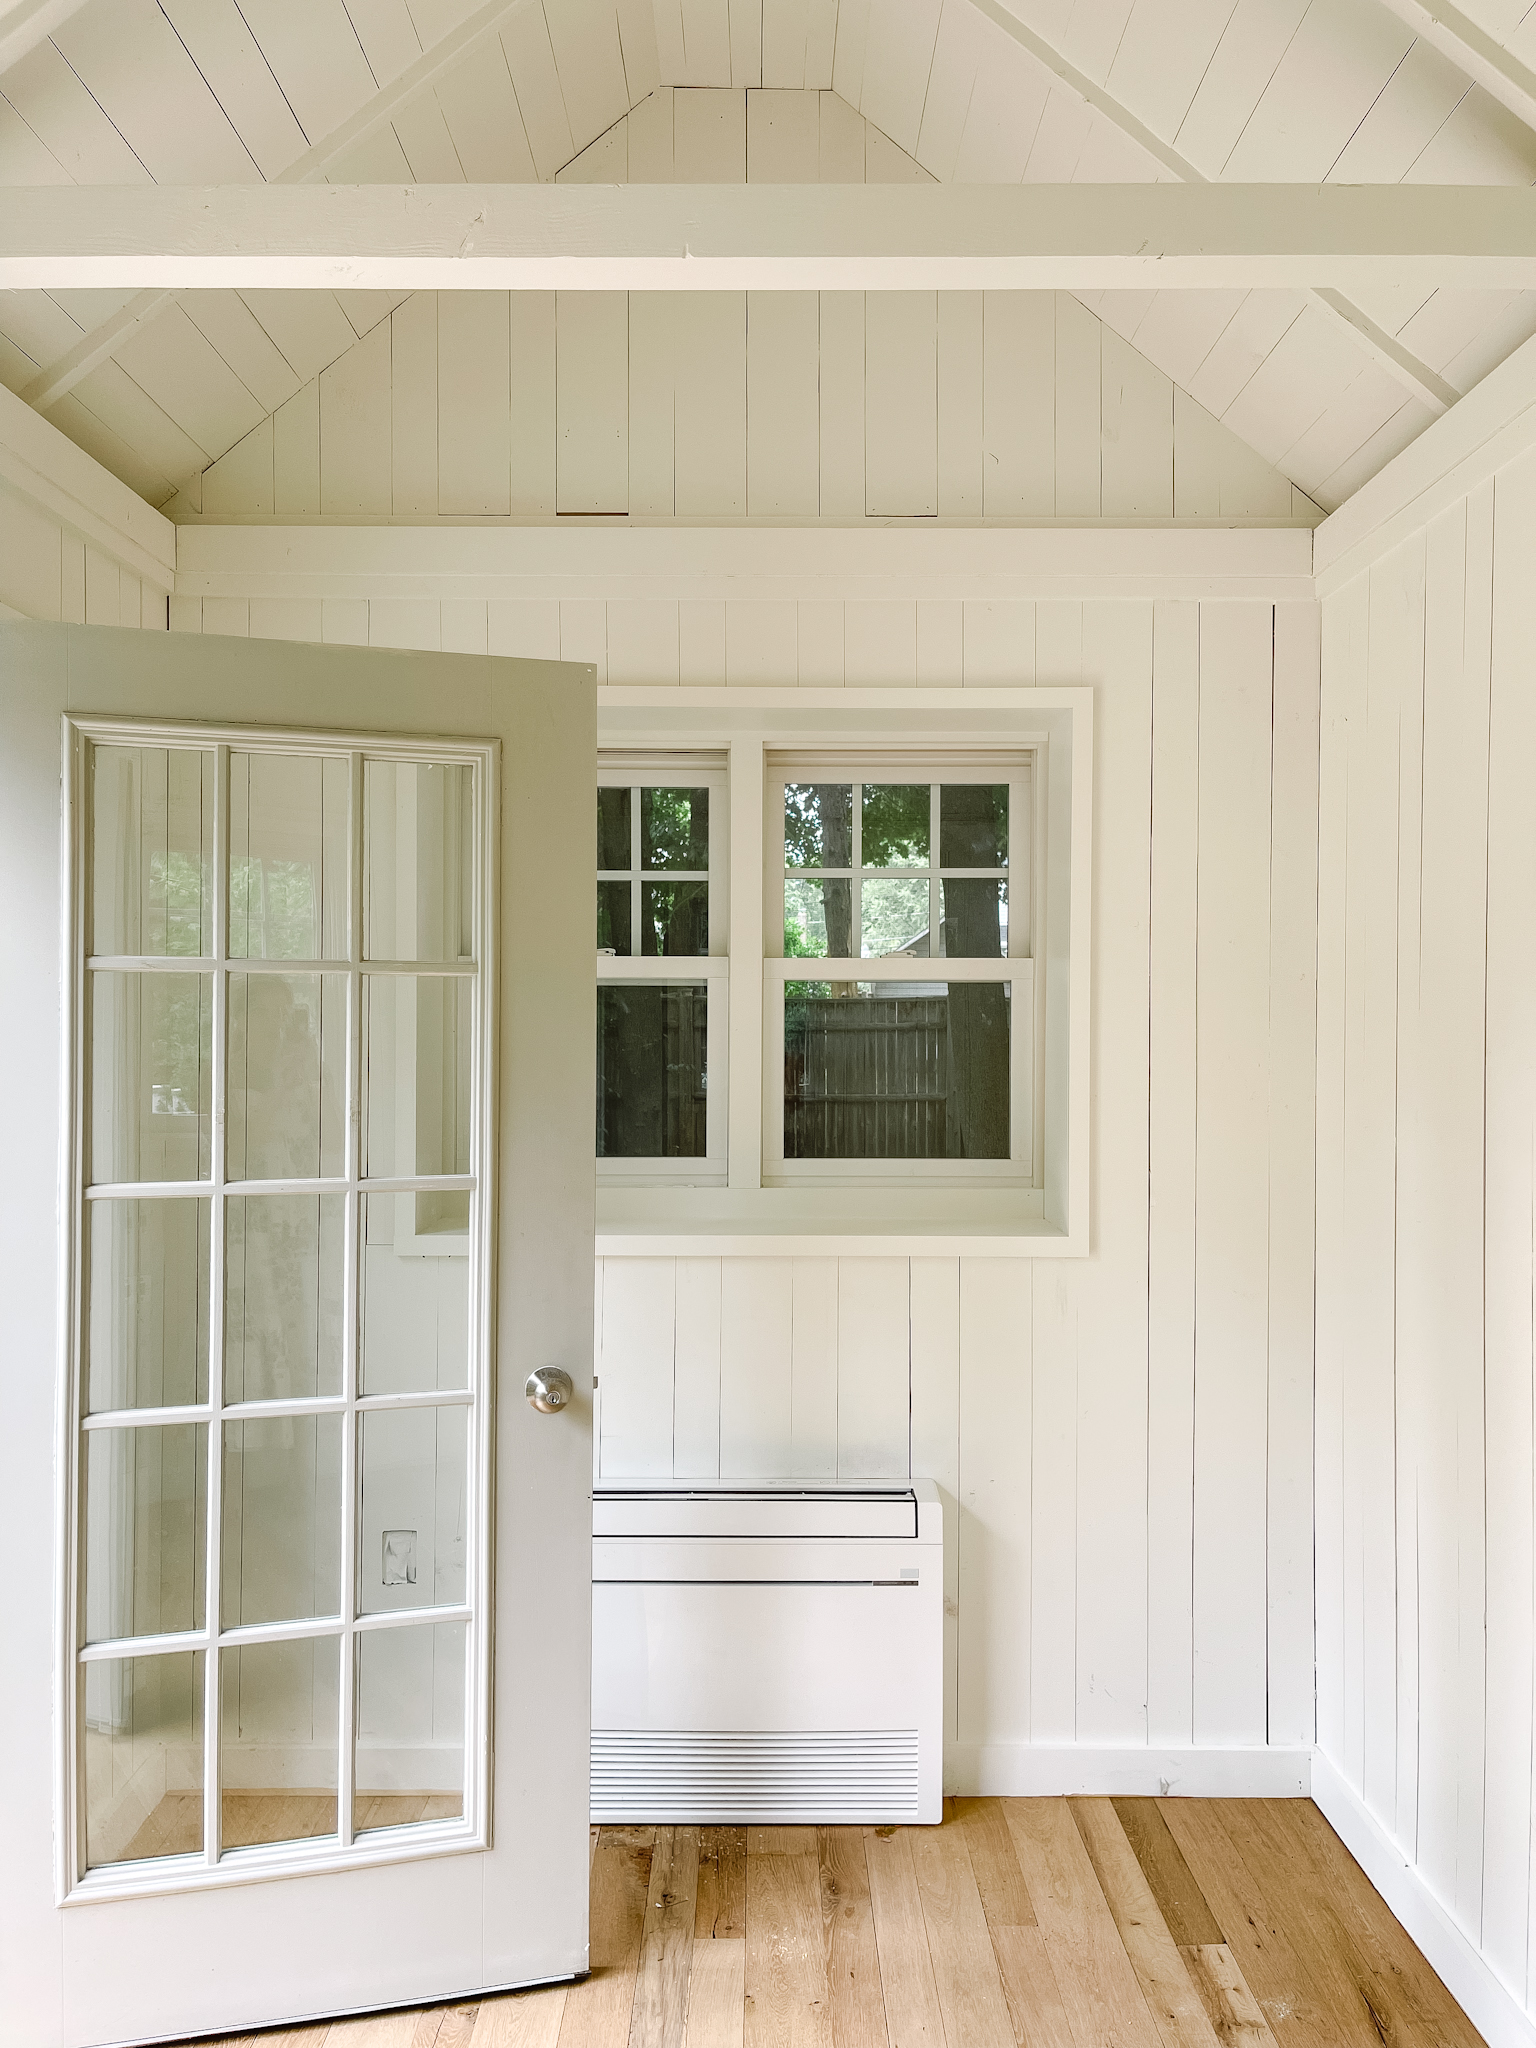
HEATING / COOLING
We live outside Boston so if you don’t have heating / cooling this whole endeavor is basically useless. It’s too hot in summer and too cold in winter to actually use it and the whole point is to actually use it. Last November, over Black Friday we purchased a Mitsubishi mini split unit which will provide heating and cooling to the shed. If you follow along on Instagram you remember our dilemma. We had a quote from our trusted HVAC company for $7500 for the unit and installation. Which blew our mind. $7500 for 96 square feet!! We purchased the same exact unit for $2300 (this one here) and it hasn’t been hard to install. We have a friend coming who works in HVAC and is doing the finally hook up at an hourly rate. Maybe an hours worth of time. That $5 k swing made all the other stuff that needed to happen (insulation, paneling, wood floors, lighting, etc) way more doable. Which is why we DIY some projects.
PAINT
I tested white after white and beige after beige and found the winning combo for my shed. The exterior is BM Swiss Coffee and the trim is BM Northern Cliffs. I painted it myself during many toddler naps. The interior white is BM Swiss Coffee but at 50% strength in eggshell finish. Matt rented a sprayer and got it painted this last weekend after finishing up fully insulating the shed and putting up the vertical plank. Which is alternating 6″ and 4″ wide common wood boards from the Home Depot. I want this paint combo on my actual house but the husband/wife paint debate is still going strong. We have a total exterior overhaul coming in the next couple of years (new siding, copper roof accents, porch updates, etc) and at that point I’m hoping I finally get a white house. The shutters are solid wood and purchased unfinished from Home Depot here. They are the 15″ width x 39″ H. The window box is from Amazon, you can find it here, I think mine is the 3 ft size.
THE FUN DETAILS
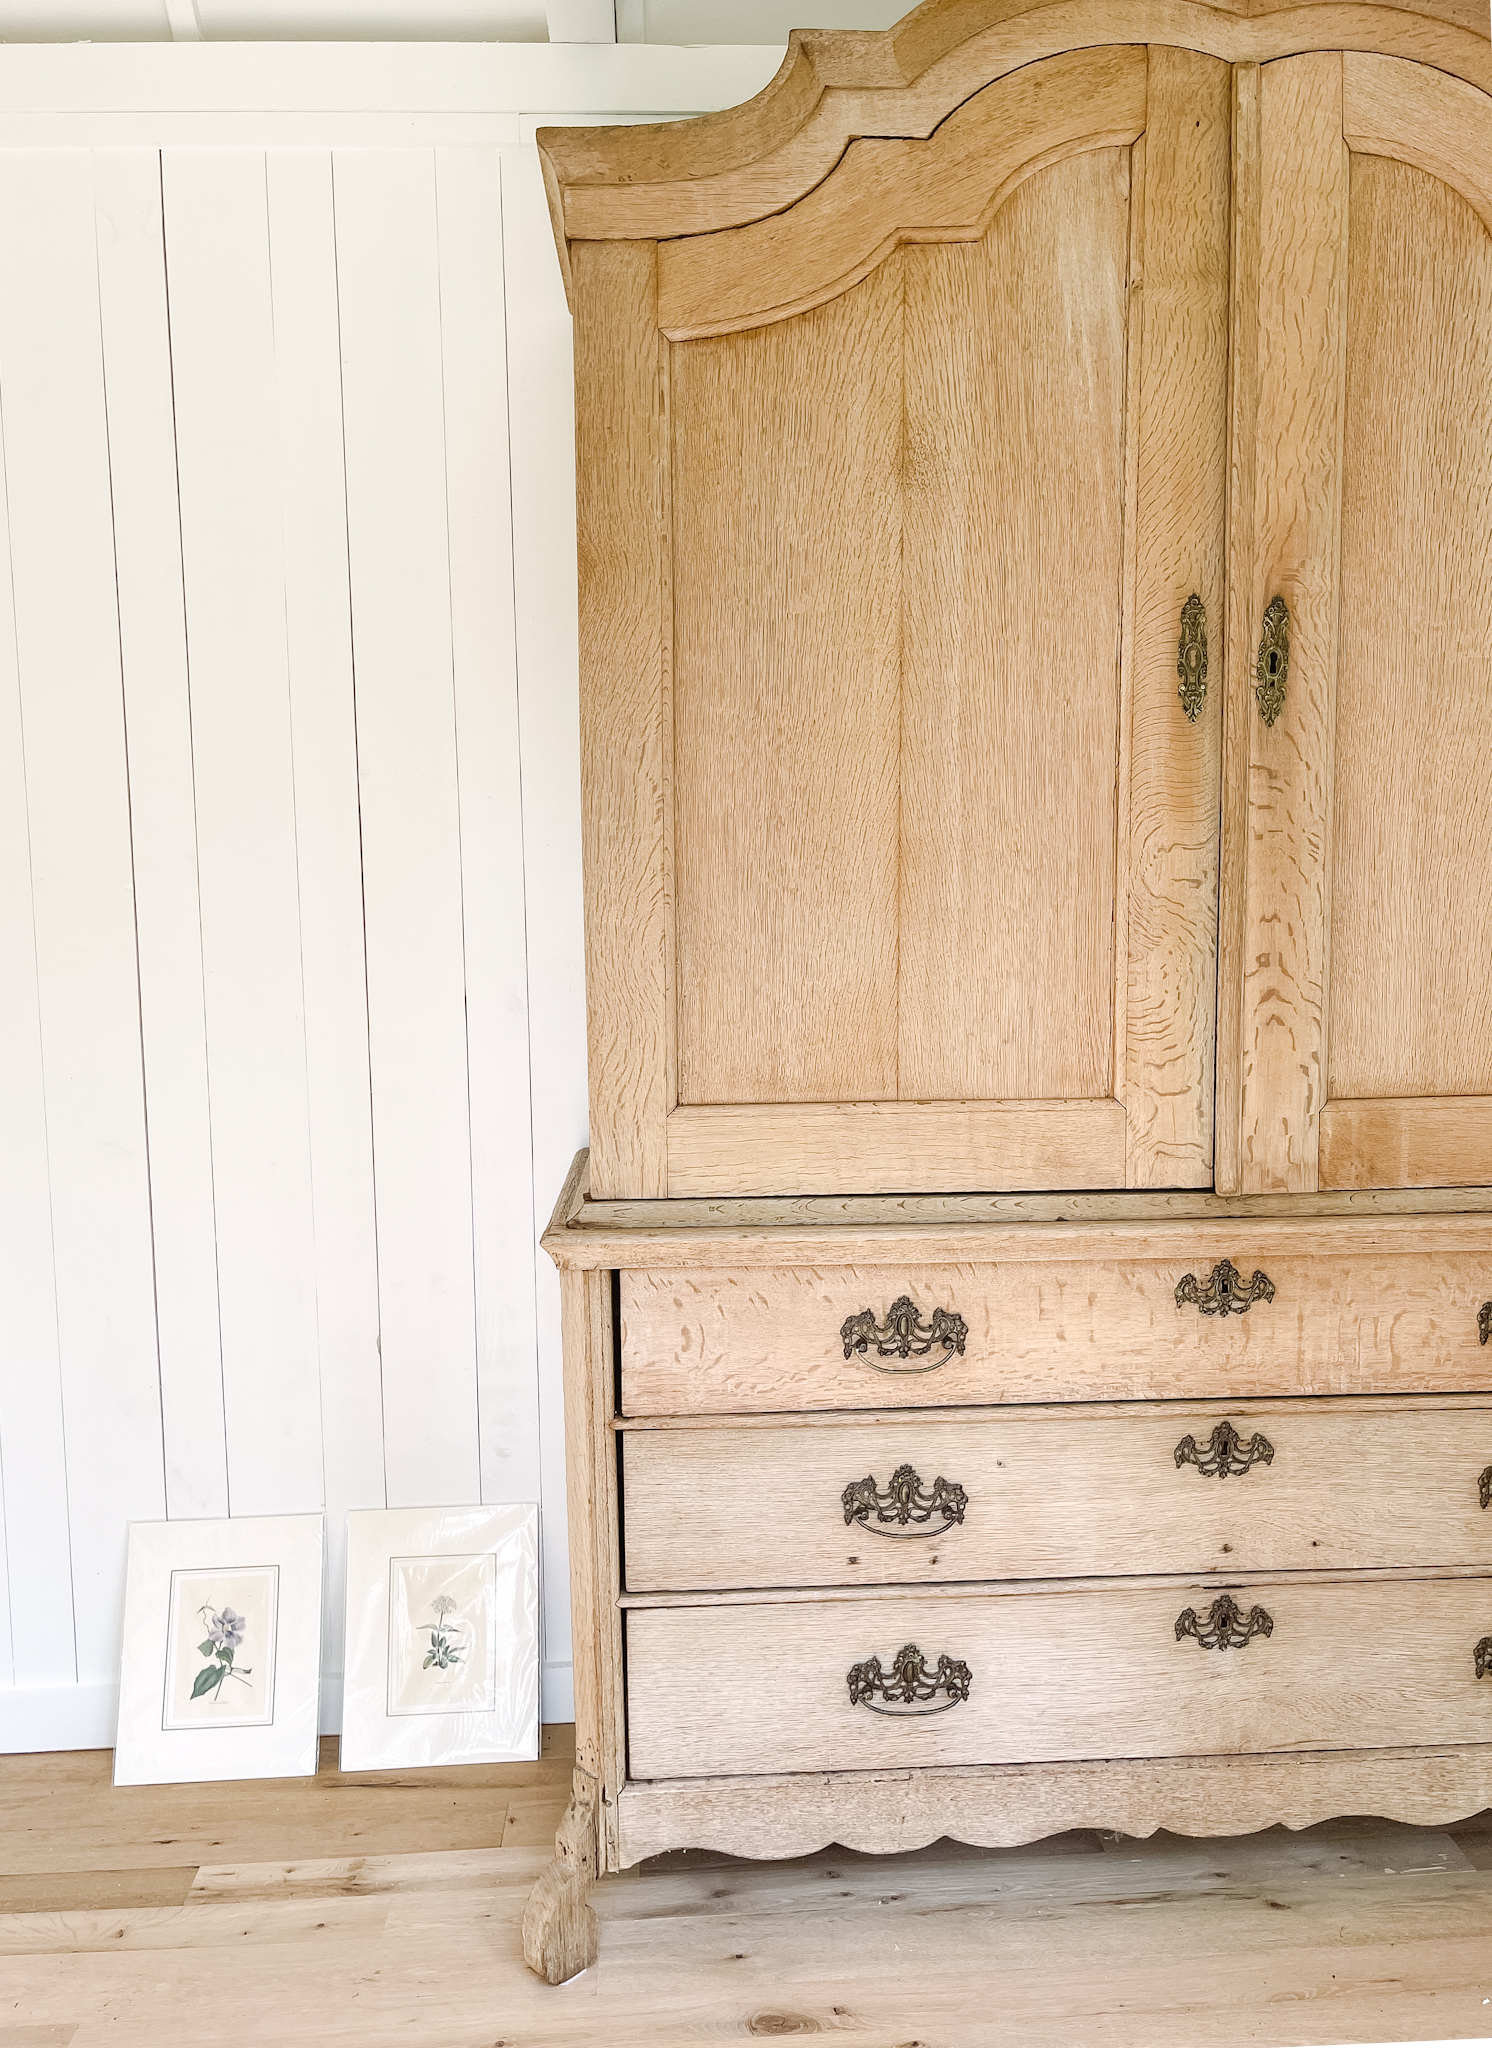
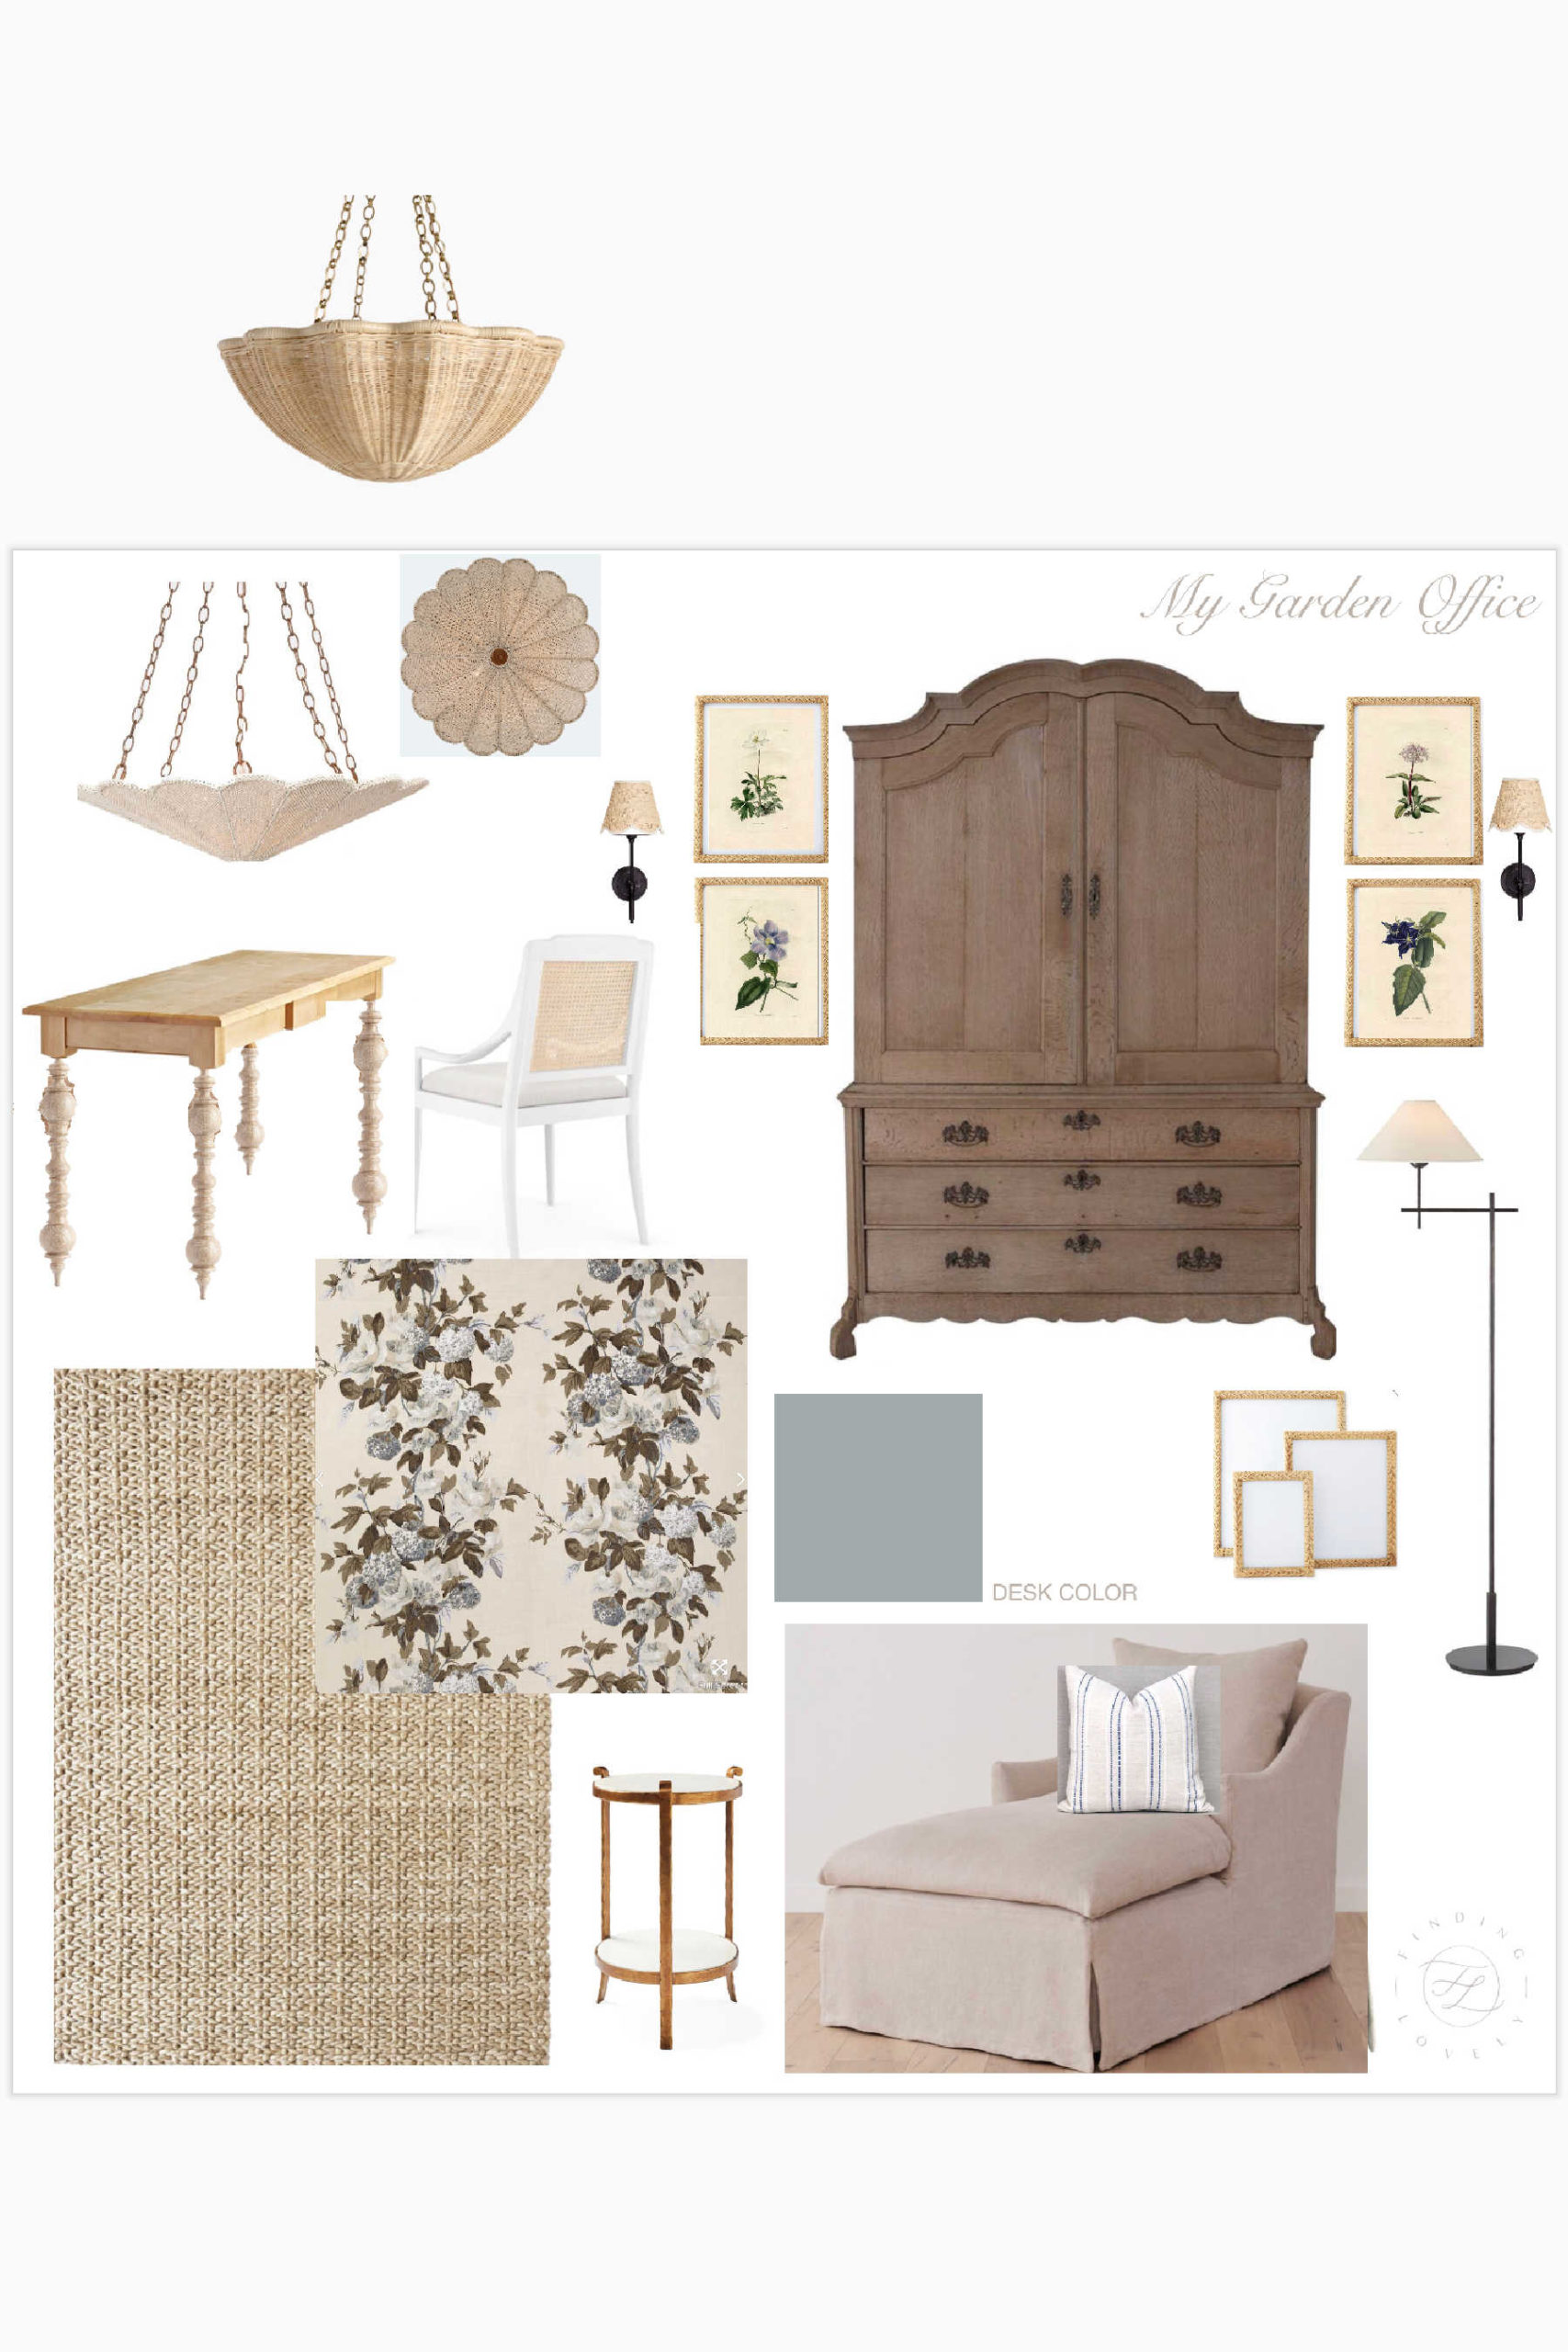
After the “bump out” debacle ended my dreams of having a desk take up less space in the shed, I embraced it and went the custom route. Stacey from Dunes and Duchess made my desk and it is painted in a pretty color, California Paints Beacon Fog. It will have these amazing custom turned legs. I have an antique hutch for storage at the center of the shed. Flanked on either side will be a set of antique botanical prints and possibly sconces. Yet to be determined is the pendant lighting which I had secretly been hoping to find in France but alas, antiquing with kids is hard work.
I’d love a striped material or maybe two different fabrics/a unique pleat on a chair & ottoman. My mom has a small chair I’d love to bring to the East Coast. But logistically getting a single piece of furniture to Boston is costly. I do have my fabric picked out for drapery which was my starting point for the design of the garden shed. The lighting on the exterior of the shed is beautiful, the E.F Chapman Bedford Scroll Lantern in small. I am still on the hunt for a door handle. All these details take time and they always do, but the journey is the fun part. And in this case not working in the closet is an added bonus. Here’s a rough mood board that has me at least heading in a design direction.
Did I forget anything? Oh! I remembered something. Matt built a step along the front of the shed to make accessing it easier. It is the same composite material as our deck which you can find info on in this post. It’s fun to see this project coming along and I couldn’t be more excited to get out there!

 comment share
Thanks for sharing. May I ask what is (and where is) the bump out?
Hi Steph, the bump out is opposite the window with the shutters that you see from the front. You can really only see it from the back of the yard. There are a couple images in the post where you can see it–from the inside the picture with the air conditioner unit looks right at the bump out. From the outside it has a small roof over it and corbels underneath. If it had a larger window it would have gone down lower to more of a seated desk height. Then with a custom desk that had only two front legs it could have slid into it and taken up less of the footprint of the shed. It’s a really pretty element that I wish I had switched to the side you see from the front.