
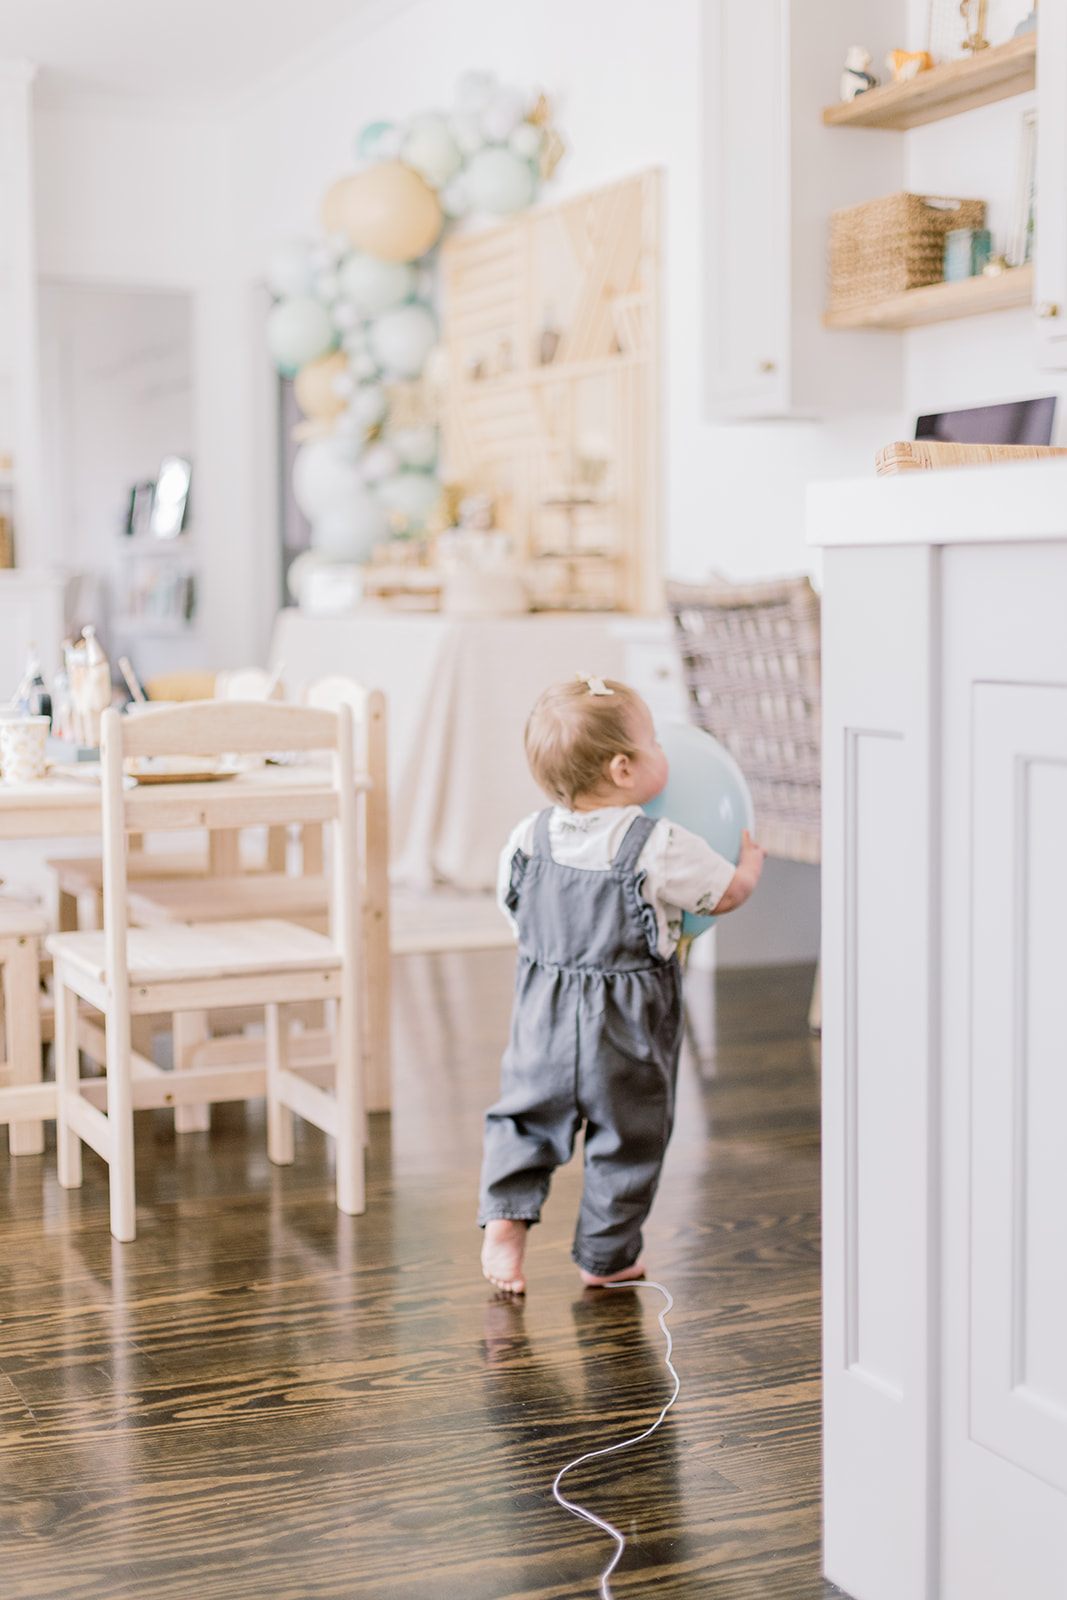
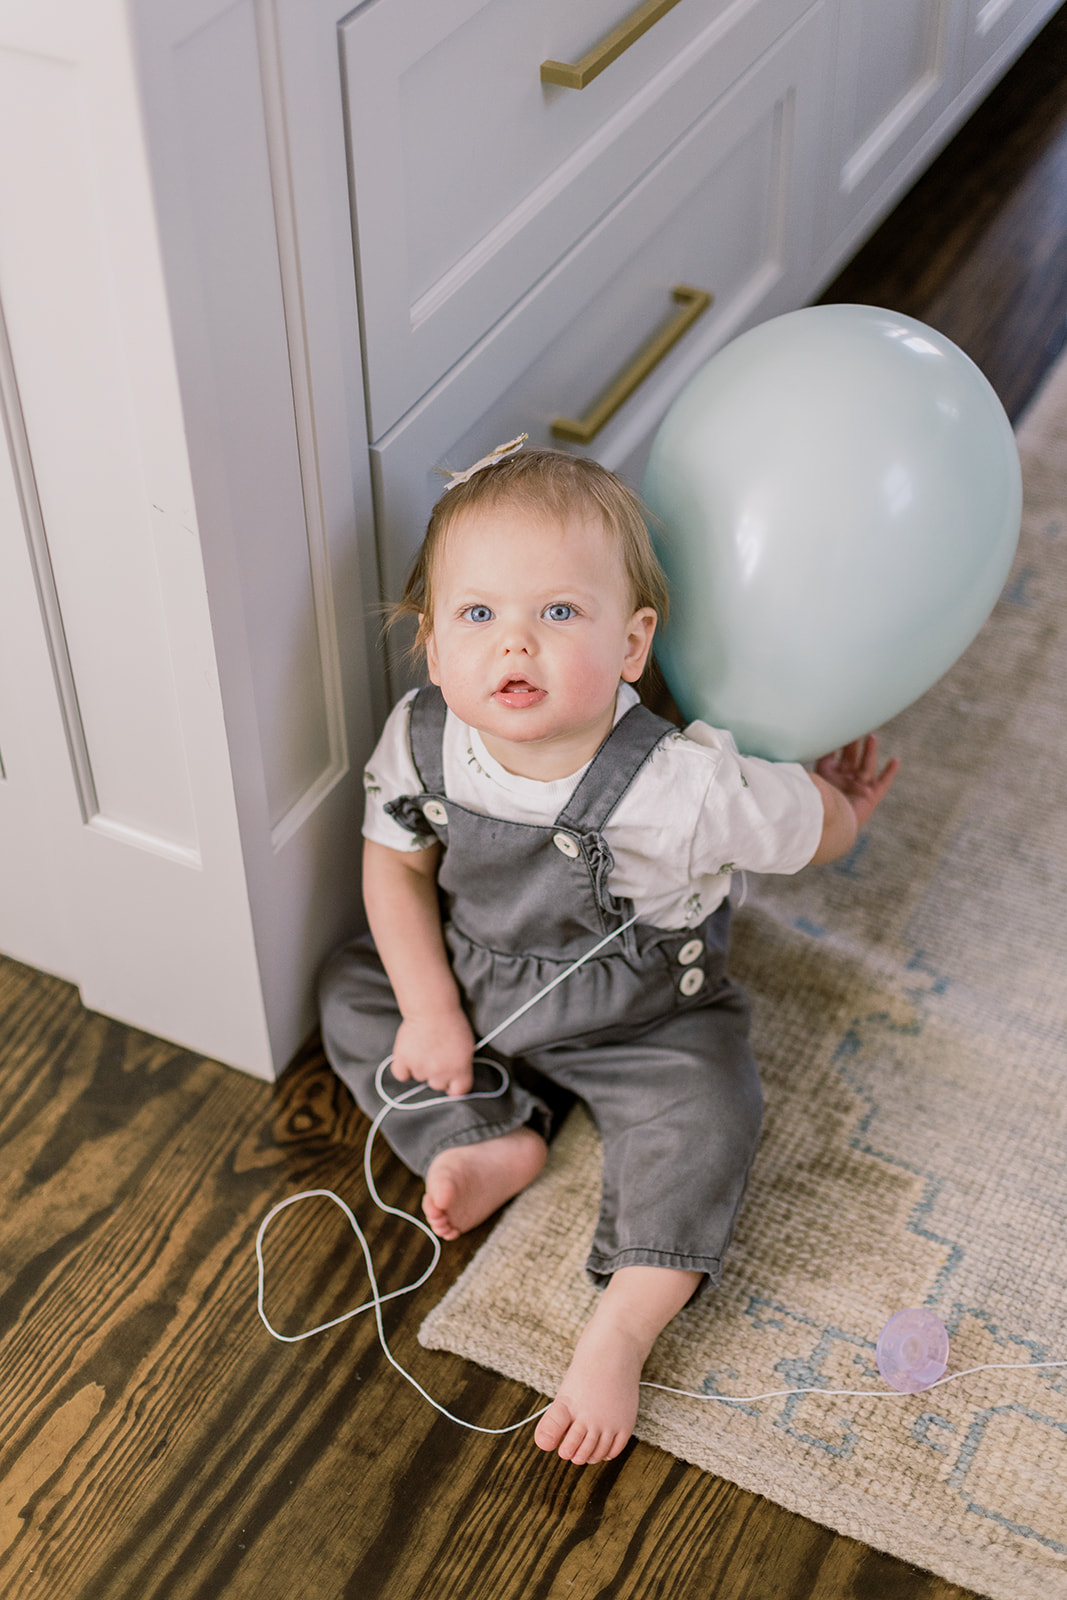
Get in line it’s party time. Cade celebrated his 6th birthday recently with classmates, a hilarious magician and animals in party hats. It feels like we were just celebrating his 5th Airplane Birthday. This party featured homemade projects done on a budget, a pretty sweet DIY dessert table and lots of darling wooden animals. Just the way our animal-loving boy preferred. And looking back on this day, right before Coronavirus commandeered our world, I’m reminded that some day soon we will be able to gather and celebrate sweet milestones again.


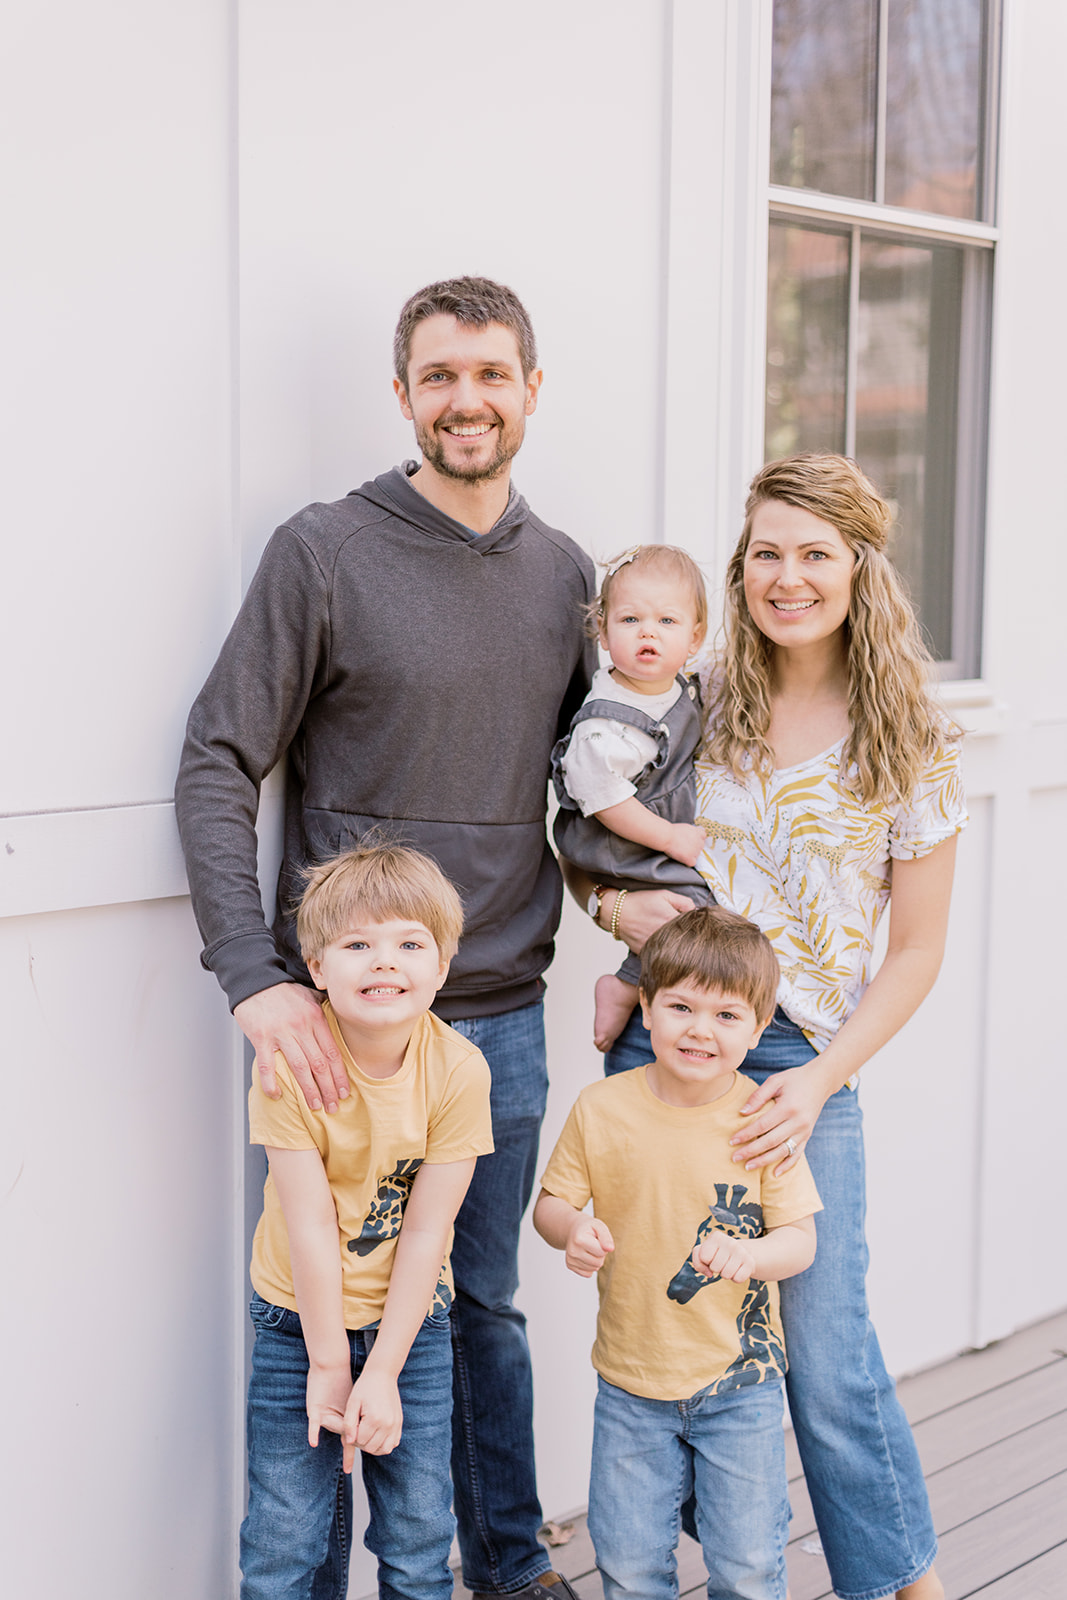
I’m fairly confident every kid out there loves animals and requests an animal birthday party at some point. This was our year, Cade loves stuffed animals or “stuffies” as they are affectionately known in our home and asked that this be the theme.
I was a bit burnt out and didn’t start planning this until after Aubrey’s floral strawberry party which meant it all came together in about three weeks. I knew I wanted softer colors and not really a typical safari or jungle theme. Inspiration hit when I spied one of the kiddos playing with our wooden animals.
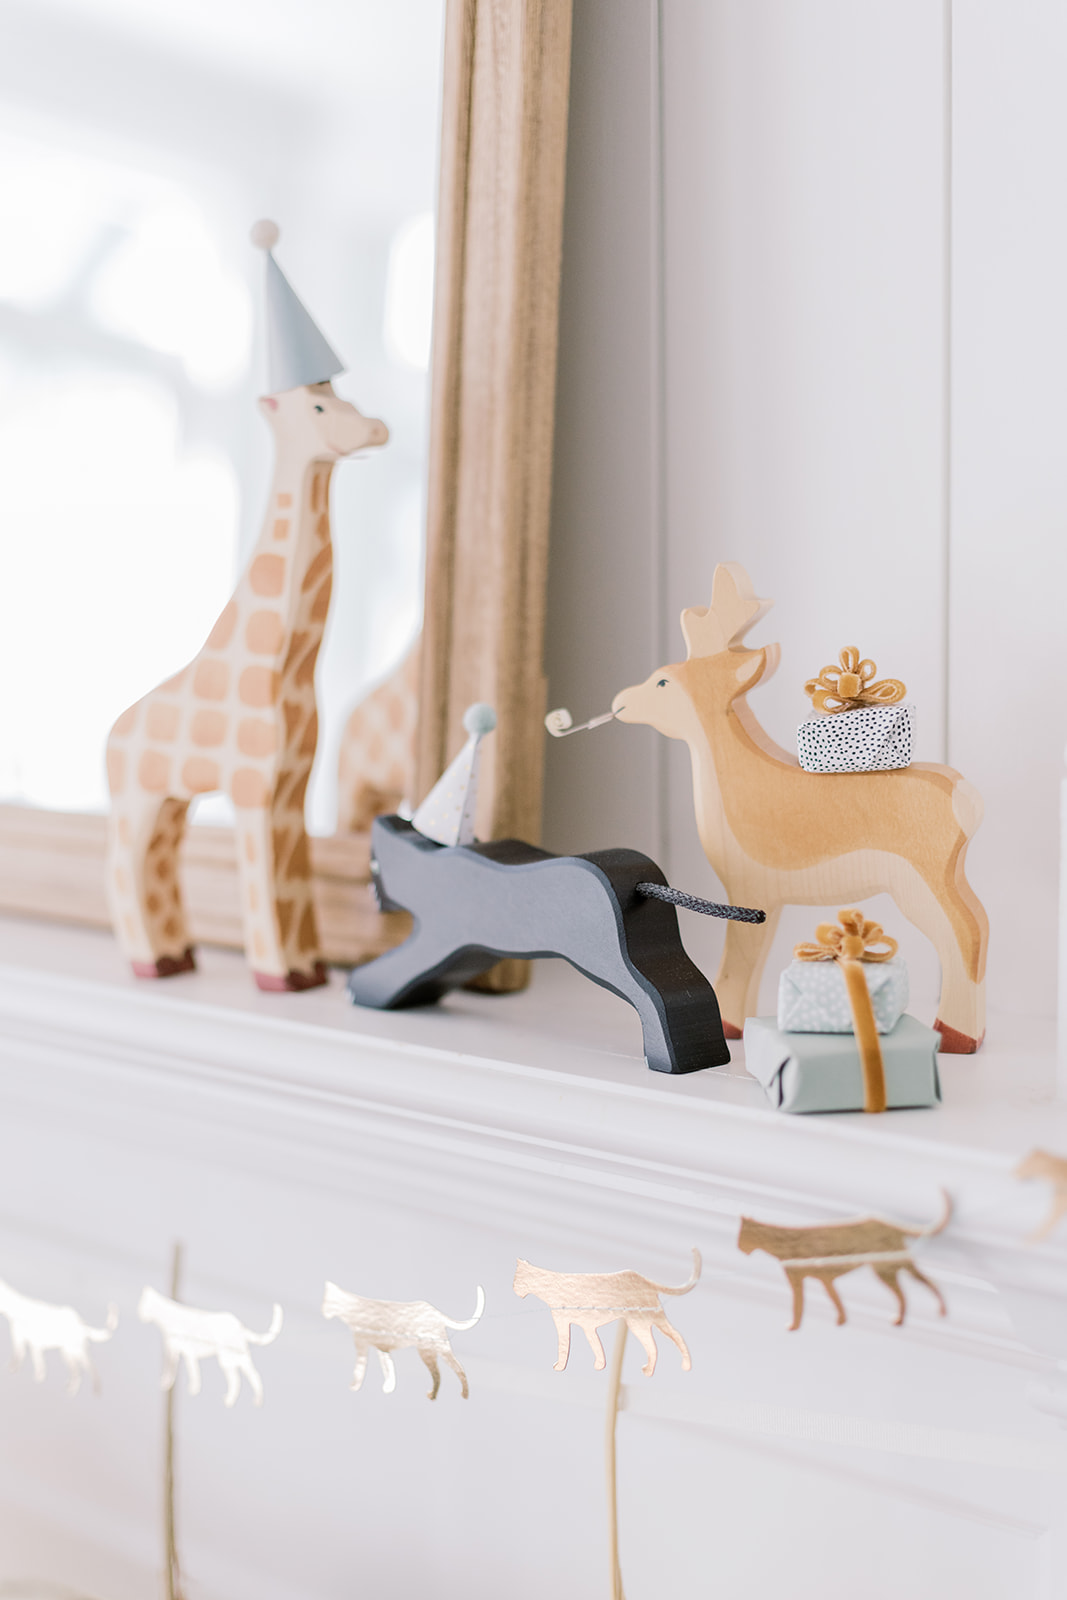
My mom started collecting these wooden animals for us when Cade was a baby. They’re pricey but well made–non toxic, eco-friendly and absolutely beautiful. If you gather them over time they make a timeless collection, an heirloom to be passed down. They’re by the German brand Holztiger and I realized quickly that not only did I love this idea, but it was a sweet way to honor my late mother. We sure miss you Nana. There are some adorable parties out there that feature these wooden animals with mini paper party hats and I’m so thankful to Ruthie of Ruth Eileen Photography for capturing ours. I hope it inspires you to plan one for your kiddo’s special day.
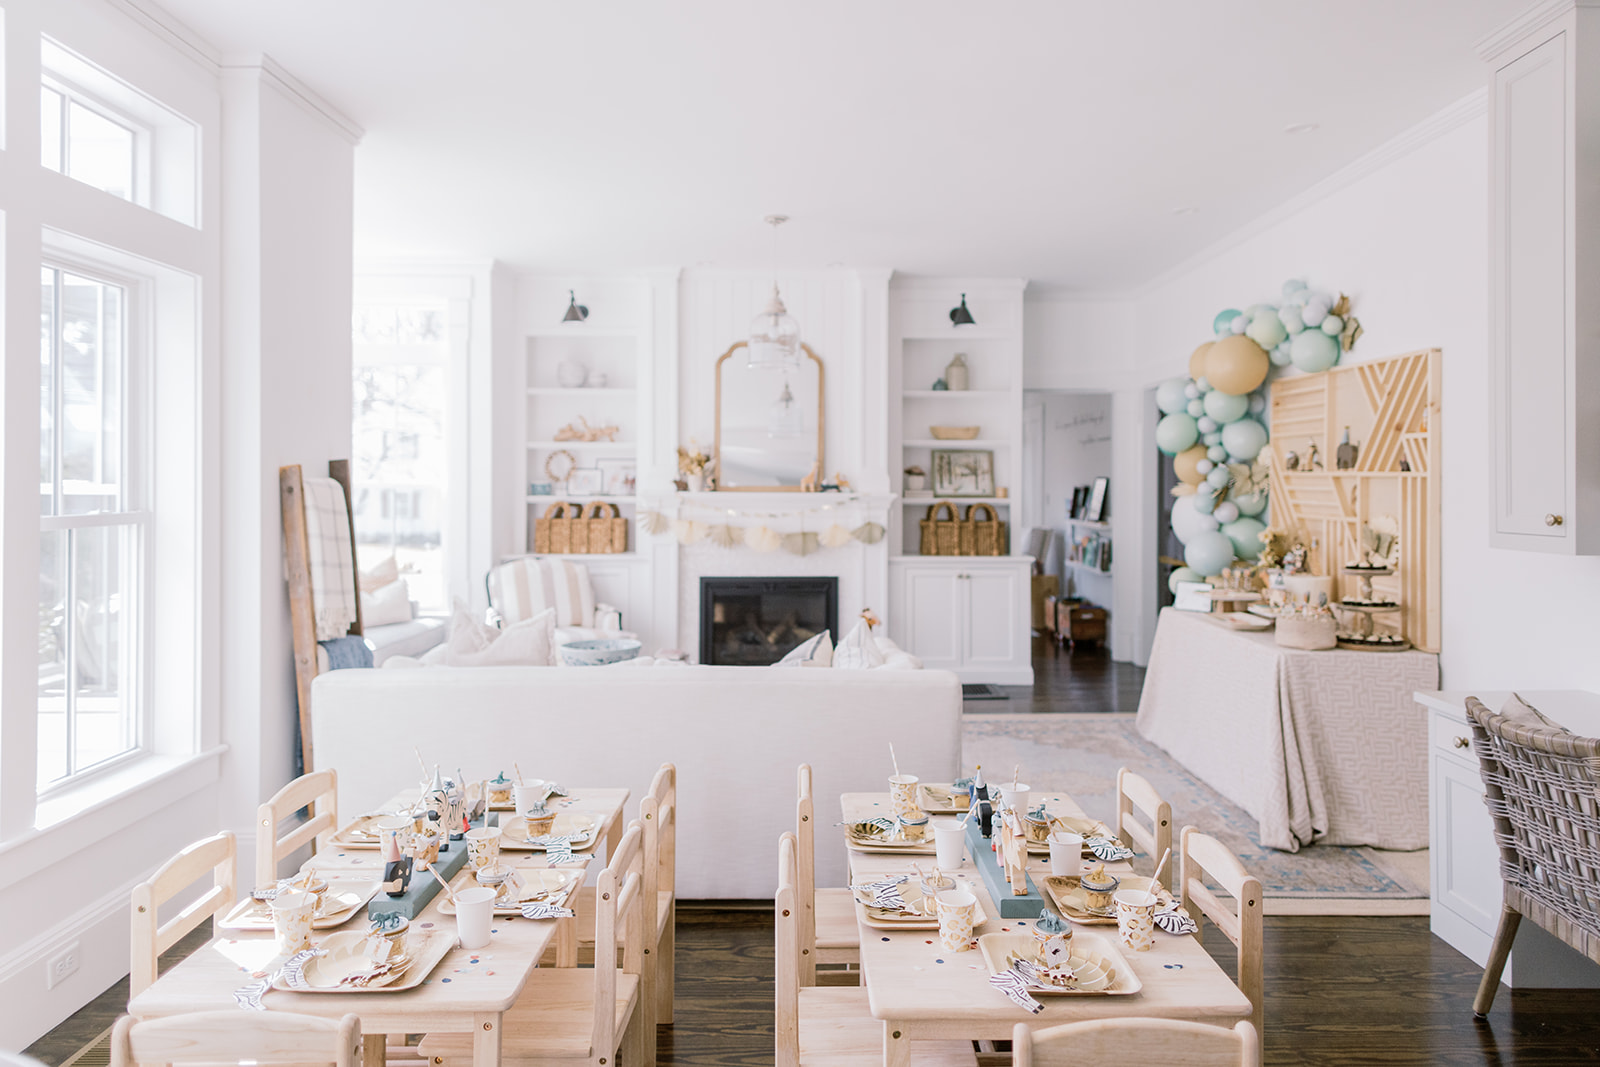
DESSERT TABLE BACKDROP
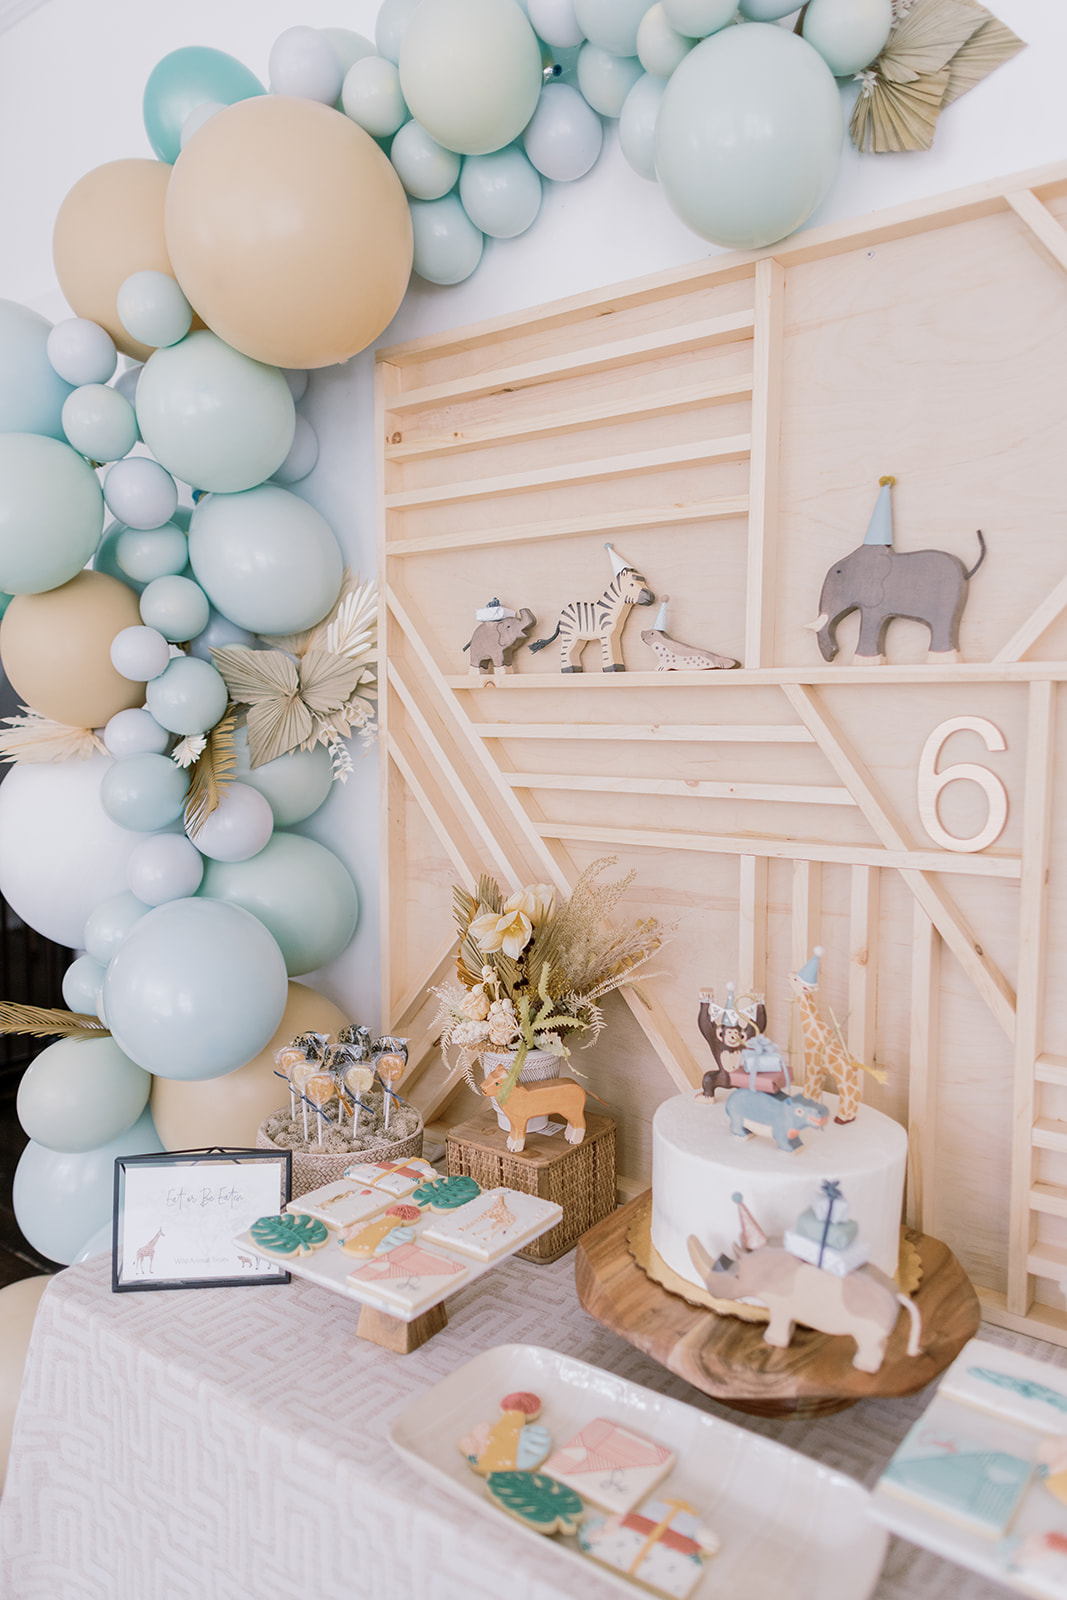
In order to make the dessert table (my favorite part of the decor for the animal birthday party), hubby picked up plywood and hobby wood at Home Depot. They cut our plywood to 5′ wide by 4′ high. I drew out this geometric pattern on paper and hubby pulled it off to perfection. All in, this project was about $40. We used a combo of wood glue and the nail gun to attach the hobby wood to the plywood. Really it was just the time commitment that was steep. Hubby worked on it over two days, about 5-6 hours total. The party decorations are for sale, send me an email or leave a comment. This wooden backdrop would certainly look beautiful as part of a wedding or store display, in a nursery or playroom, etc. So cute!
BALLOON GARLAND
The balloon garland was easy but a major time commitment. I’m thankful I did it several days before the party and had a babysitter. I ordered soft blues, tans and grey balloons in various sizes from a specialty shop on Etsy and the plastic garland ribbon here. Make sure you have a hand pump because the 5″ balloons are nearly impossible to blow up by mouth. If you’ve never done a balloon garland before they’re nice because you don’t need helium, you can do them several days before the event and there’s just something magical about balloons. If you’re worried about the environmental effects of even so called “biodegradable” balloons, use colored paper balls instead. And never release balloons outdoors, they have detrimental effects on the environment and animals eat them when they pop. I tucked in palm fronds both real and paper ones we made. In order to do the palm frond groupings, I used a small finishing nail to tap a paper bowl to the wall next to the balloon garland. This gave me an anchor point to hot glue the palm fronds to and build a little grouping that didn’t pop the balloons.
DESSERT TABLE DETAILS
My mother-in-law and I found the material I used for the table cloth in the basement clearance section at Zimmans, a North Shore fabric store. It was steeply discounted–I got 3.5 yards for $35. This is probably my number one tip for creating a lovely dessert table. Buy yards of fabric and cover your basic folding table and don’t forget to iron it. It takes 30 seconds to steam wrinkles out and makes such a difference.
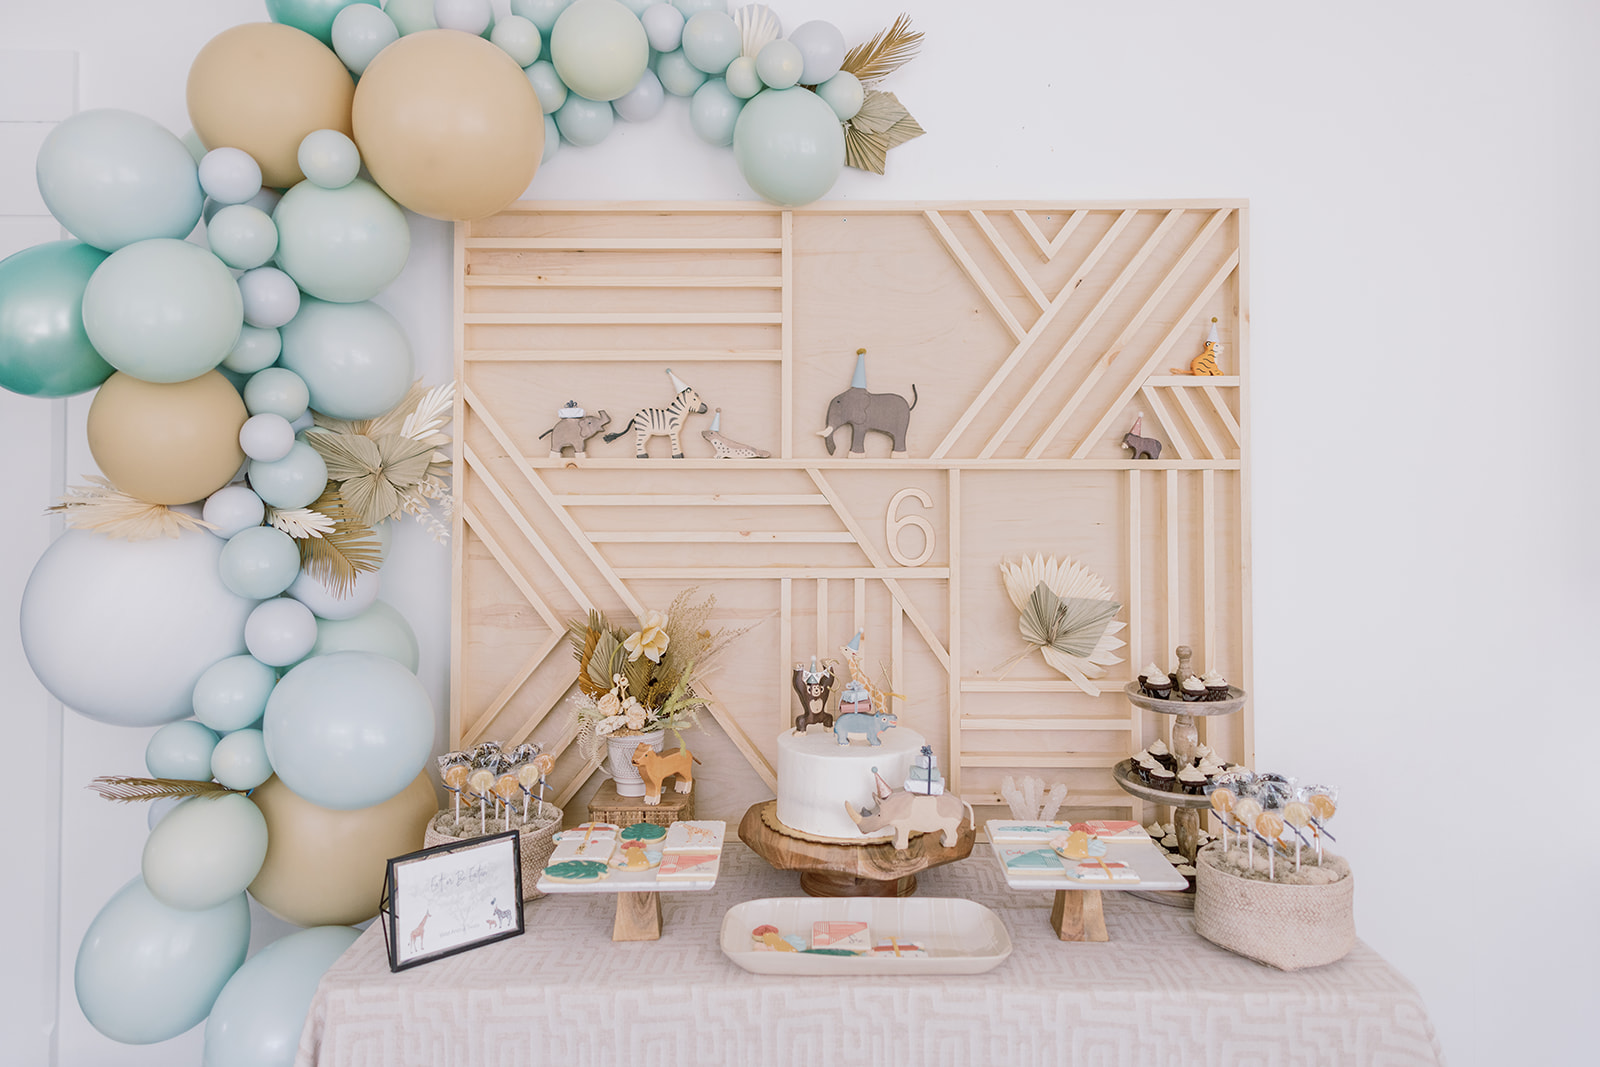
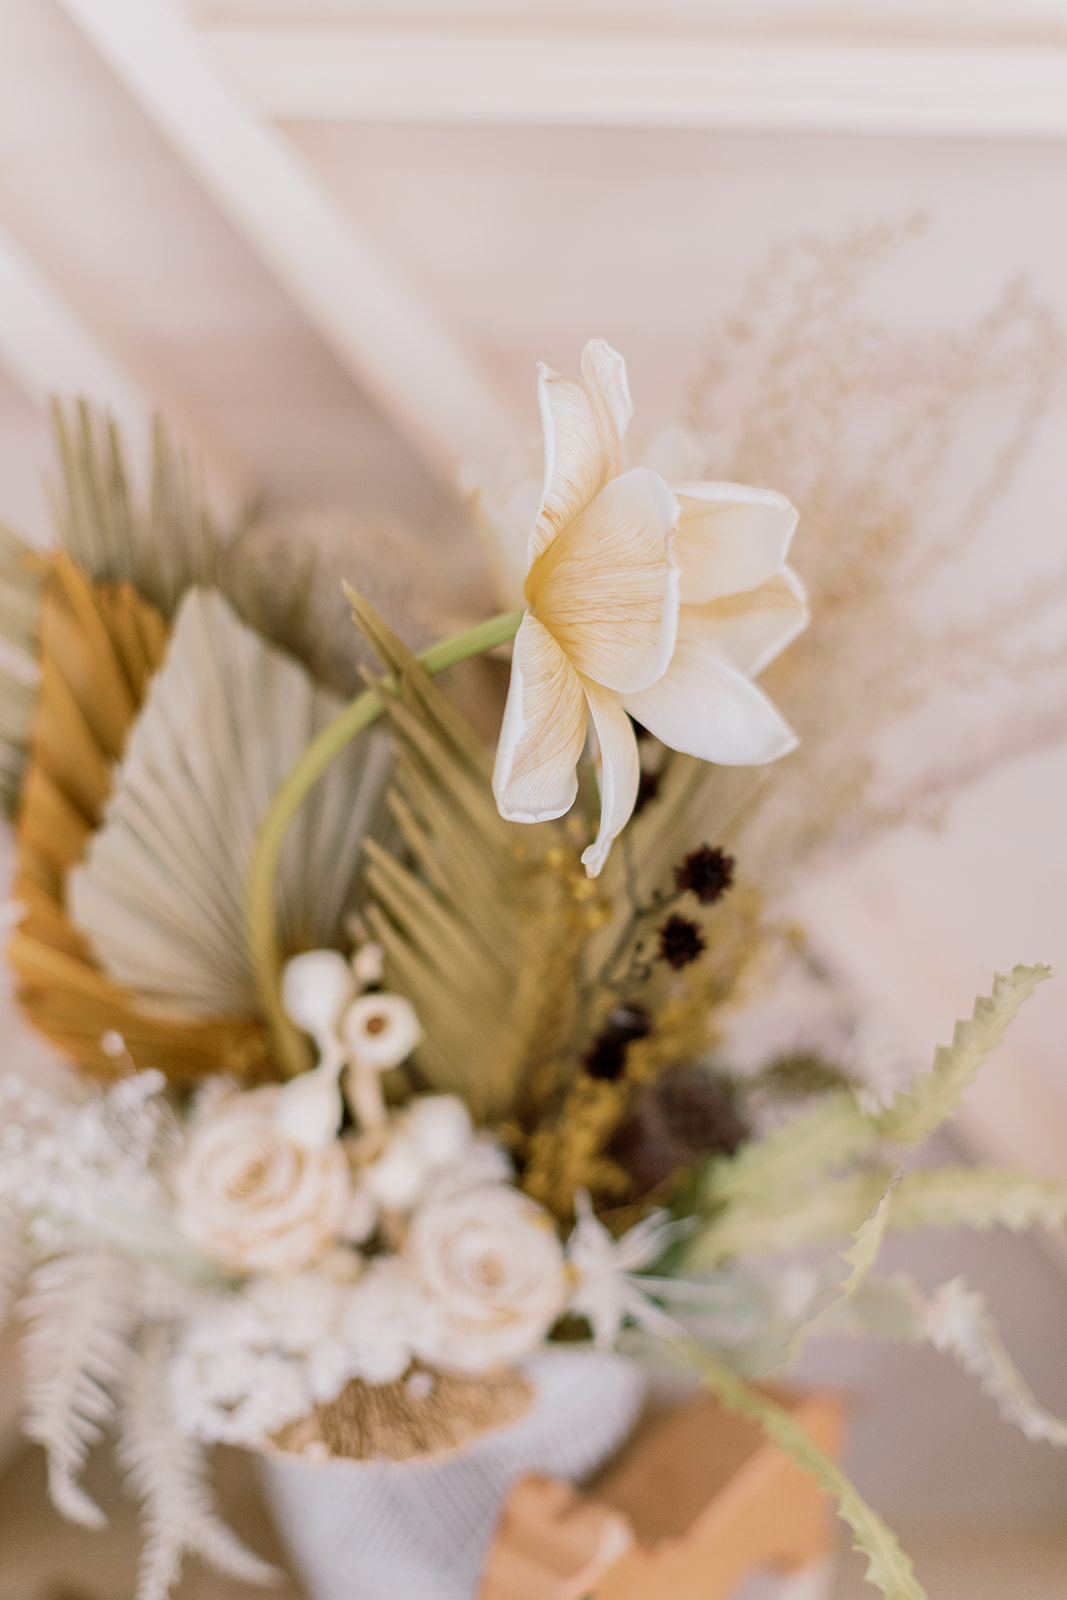
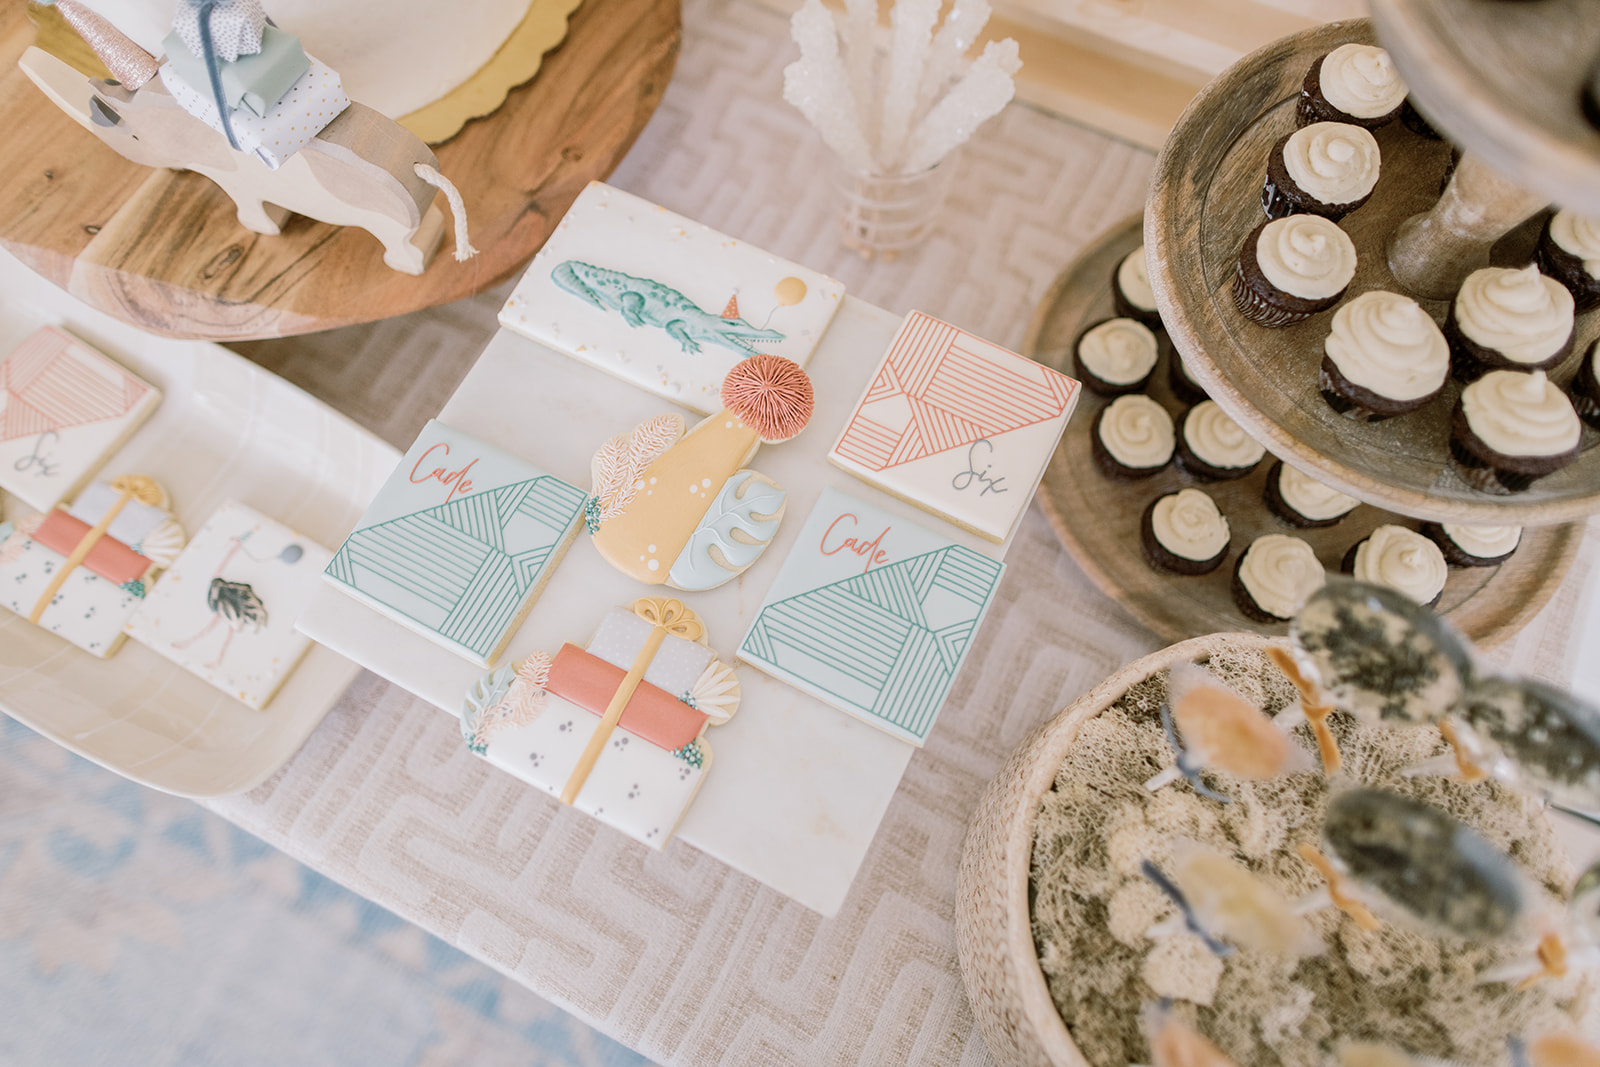
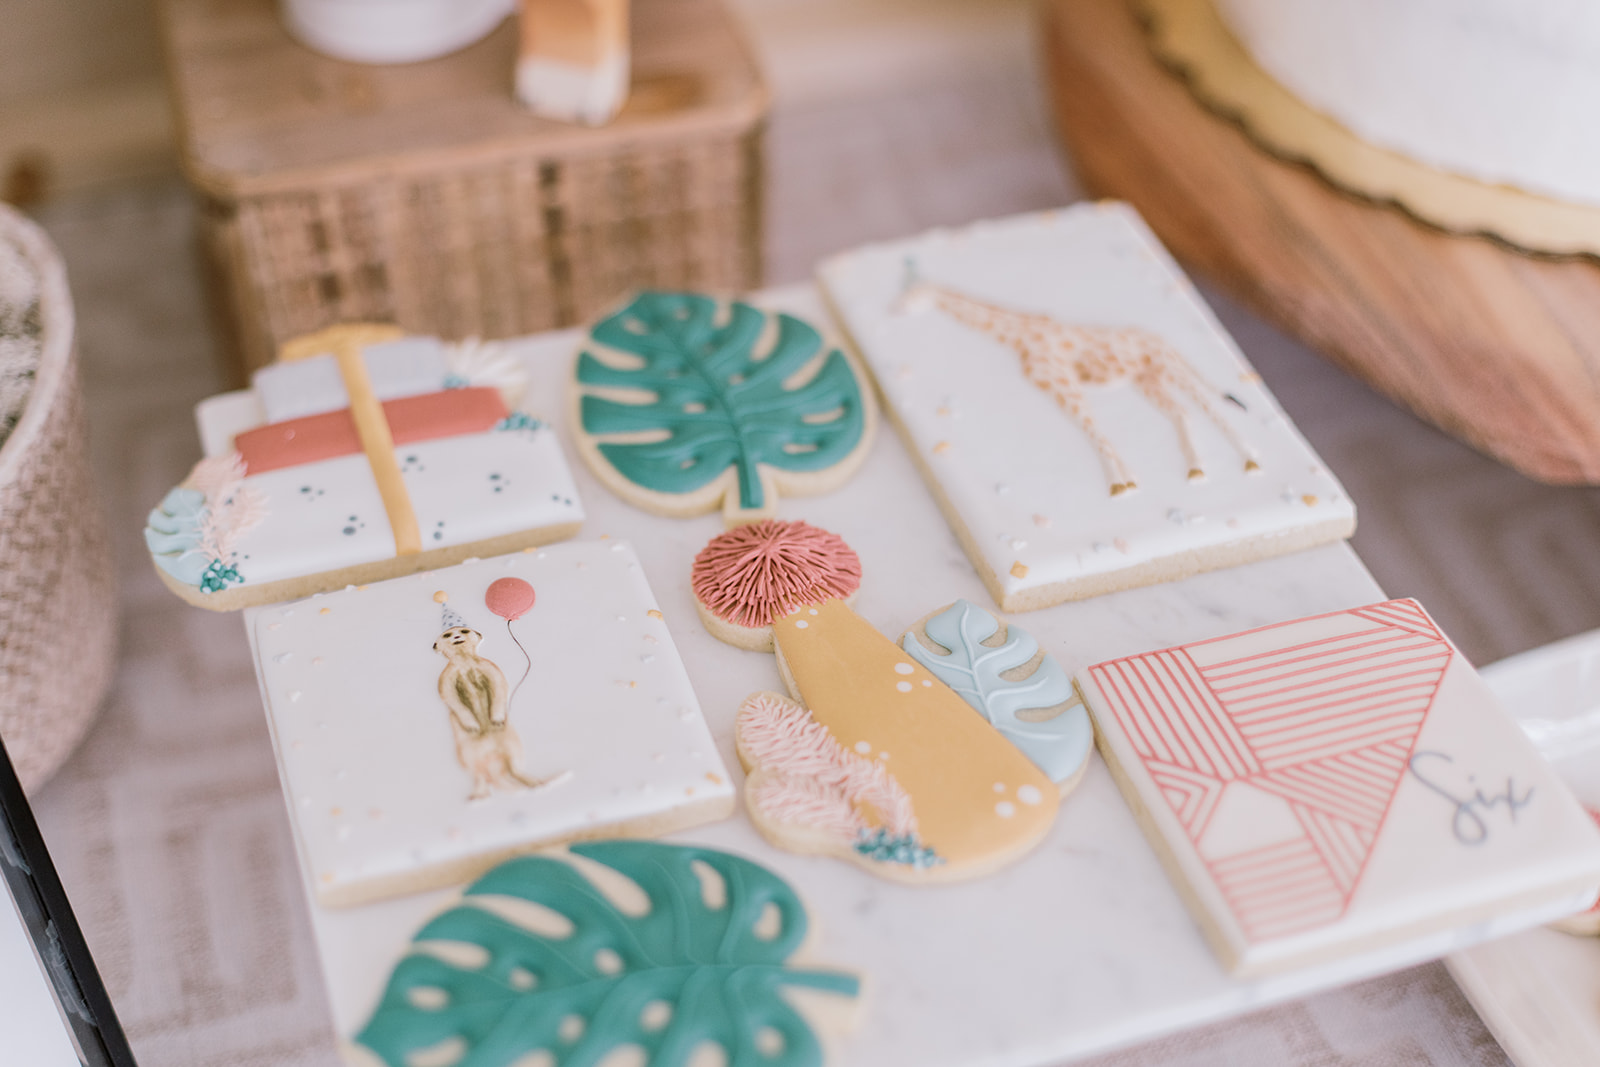
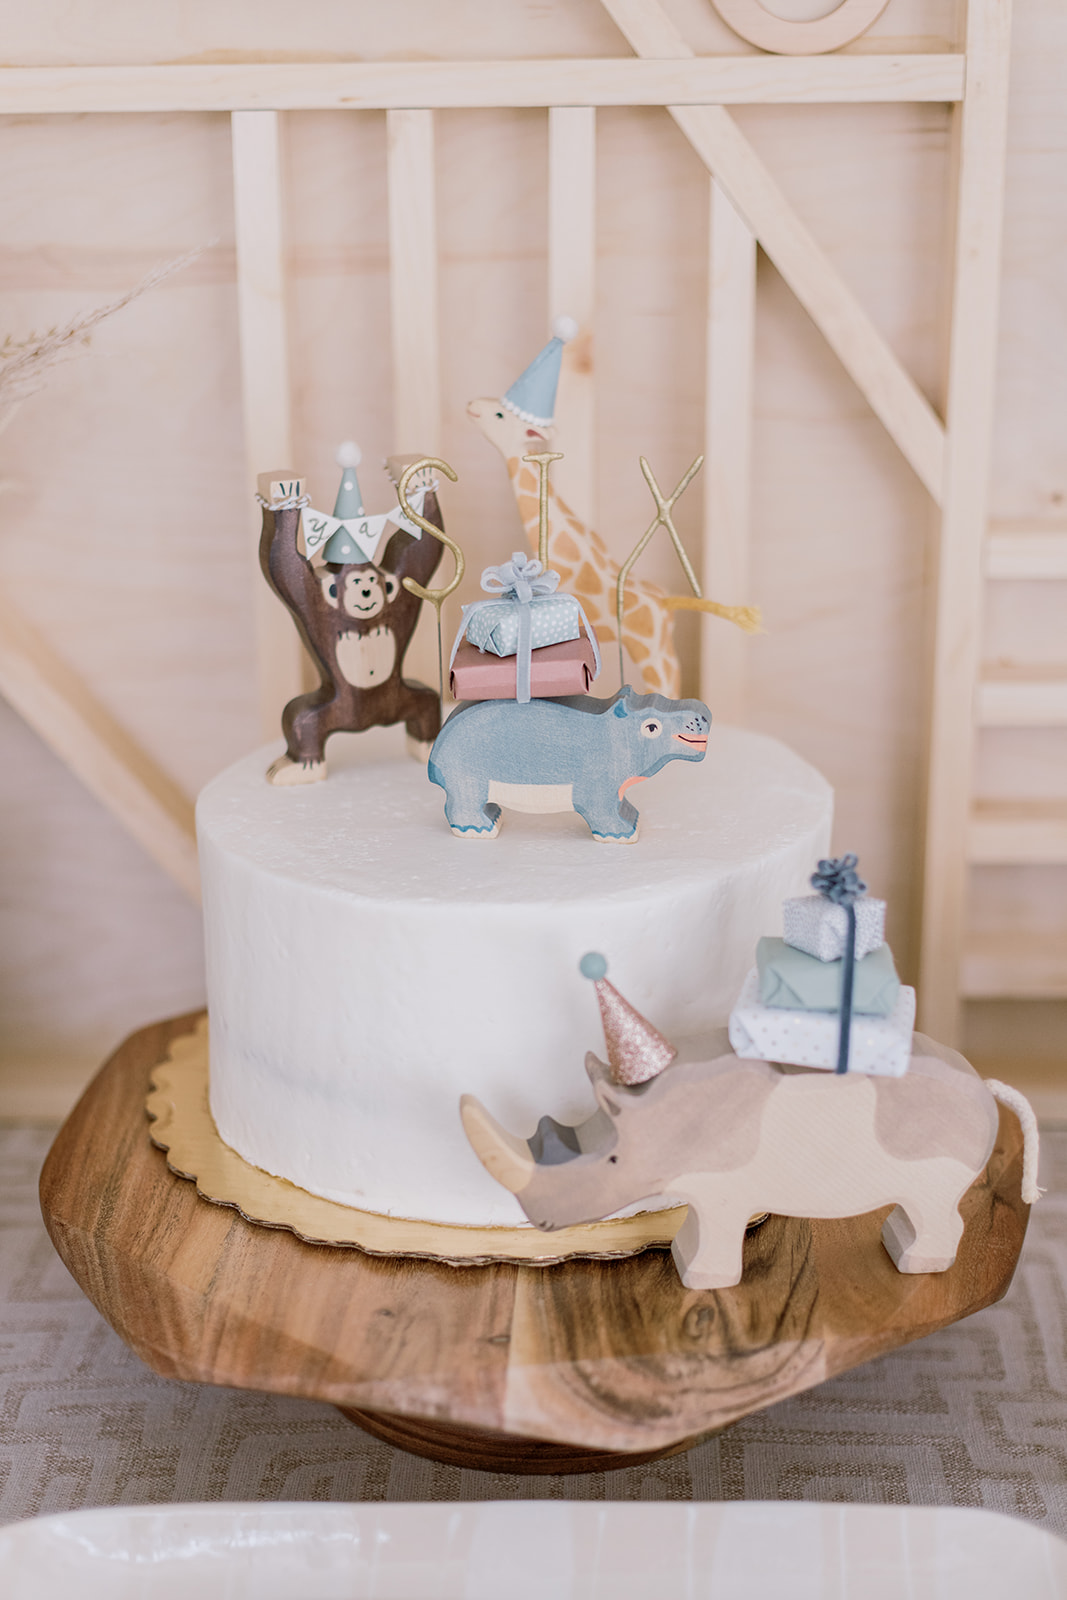
On the dessert table I centered the cake and surrounded it with Honey & Lou Baking Co’s adorable cookies. Eileen is so talented, I just adore her and it’s an honor to get to eat her works of art. I used these pots from Hobby Lobby and filled them with floral foam which I covered in natural moss. I used these to stick in the lollipops from Leccare (peach cobbler and spiced vanilla bean) and Sweet Caroline Confections (Black Hawaiian Sea Salt in size medium). I ordered a plain 10″ three tier vanilla buttercream cake from White’s Bakery here in town and decorated it with wooden animals (giraffe, monkey and hippo) and gold sparklers that spelled “SIX”.
I made some mini chocolate cupcakes because I found these adorable mini cupcake liners. I loved how this dessert table came together for this animal birthday party and the kiddos loved it too.
PARTY ANIMALS

Dressing up our wooden animals was a festive and inexpensive touch. I bought patterned paper at Hobby Lobby and 1 cm felt balls off Etsy (which were in cornflower blue, mint icicle, mustard, vanilla bean and khaki). Now it was really trial and error until I created a pattern I liked to make the mini party hats. Here’s a blog post I found useful although I ended up hand drawing mine to get the sizes I wanted, ie bigger / smaller depending on which animal I was making it for. I hot glued the hats on the animals because it peels off nicely without hurting the animals when the party is over.

I rolled up some card stock to make party blowers and made mini presents which were hot glued to the back of some of the animals. For the mini presents I used floral foam, cut them into tiny blocks using a paring knife and then wrapped those tiny blocks in card stock/printed scrapbook paper. Wrap them like you would a real present. I’m not sure how to describe how I made the bows on the top of the mini packages but I’ll do my best.
Cut about a 1″ piece of thin velvet ribbon (5 or 7 mm wide in blue, grey, a mustard gold) and dab a tiny drop of hot glue in the center of the piece of ribbon. Fold both ends into the middle which leaves you with two connected loops that look like a figure 8. Make 4 more cutting the last one in half after you hot glue it so you’ve got two single “loops”. Making the bow is really just stacking these loops one on top of another slightly off kilter making a criss cross wide X shape. Add the third figure 8 loop across the X so it looks like a snowflake. With a tiny dab of hot glue to the top of the stack add a single loop to the top to finish.
KID’S LUNCH TABLE
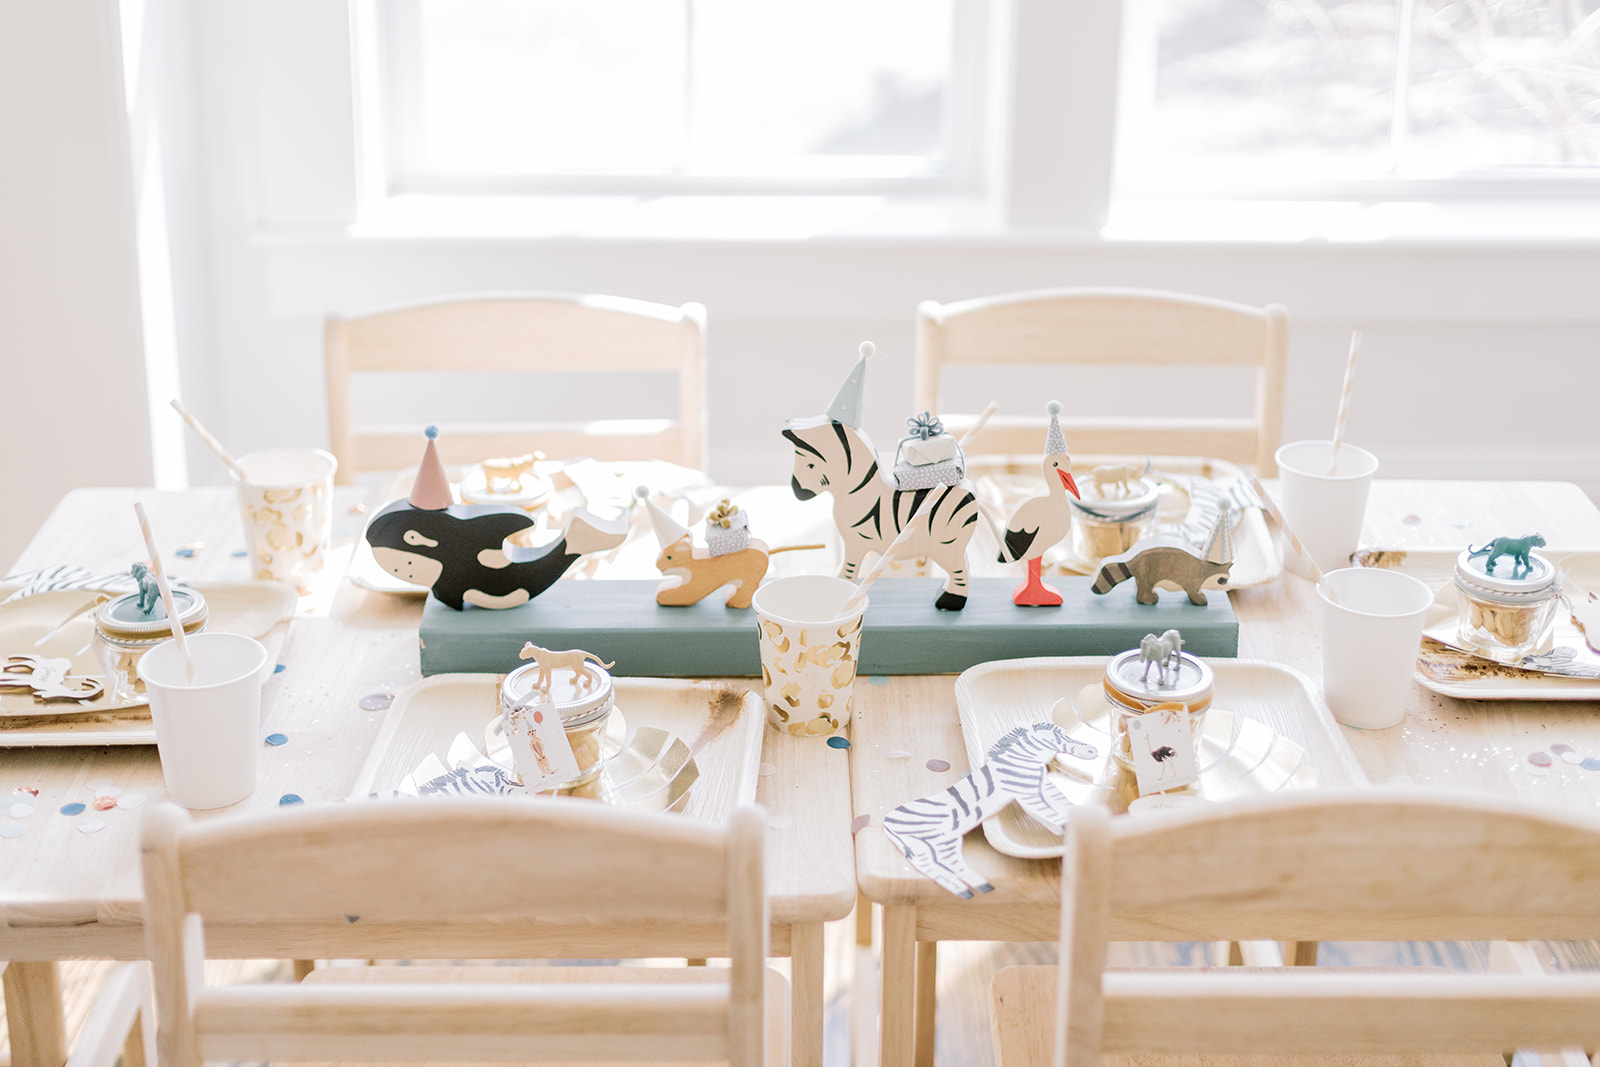
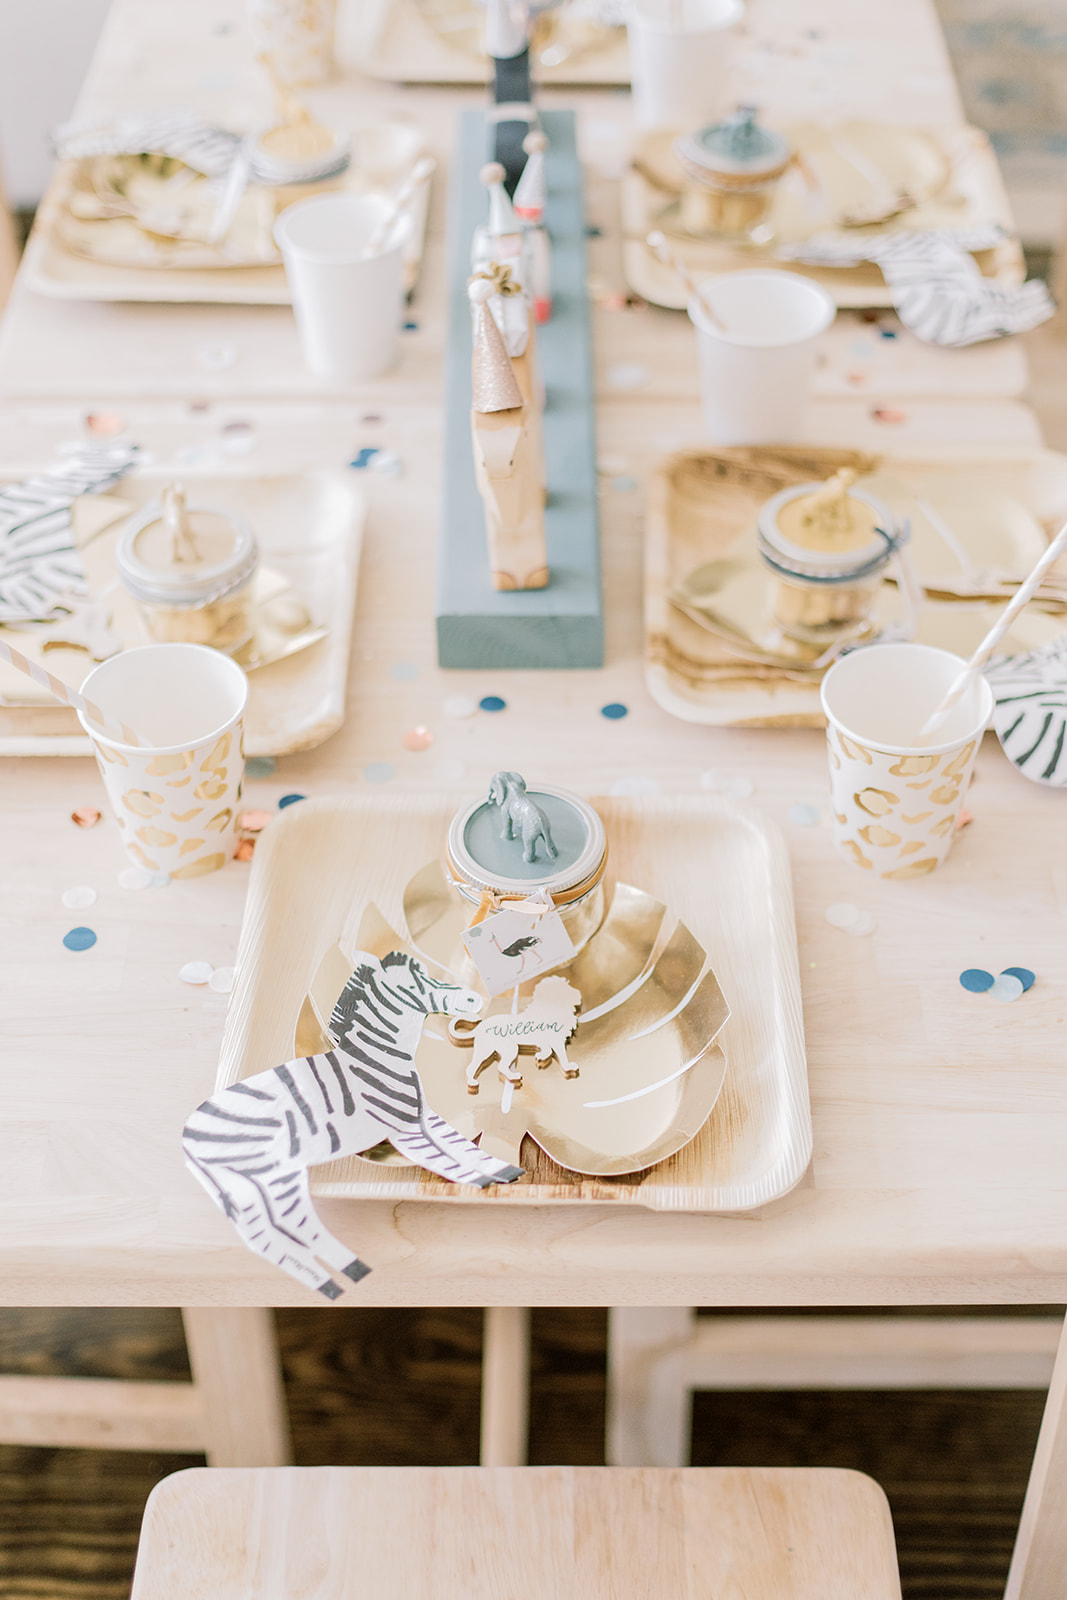
The dressed up animals made their way all around our house but I used the majority down the center of the kids lunch tables. I painted a 2 x 4 cut to about 24″ long and then used museum putty to set the animals in a line and help prevent them from tipping. They looked so cute.
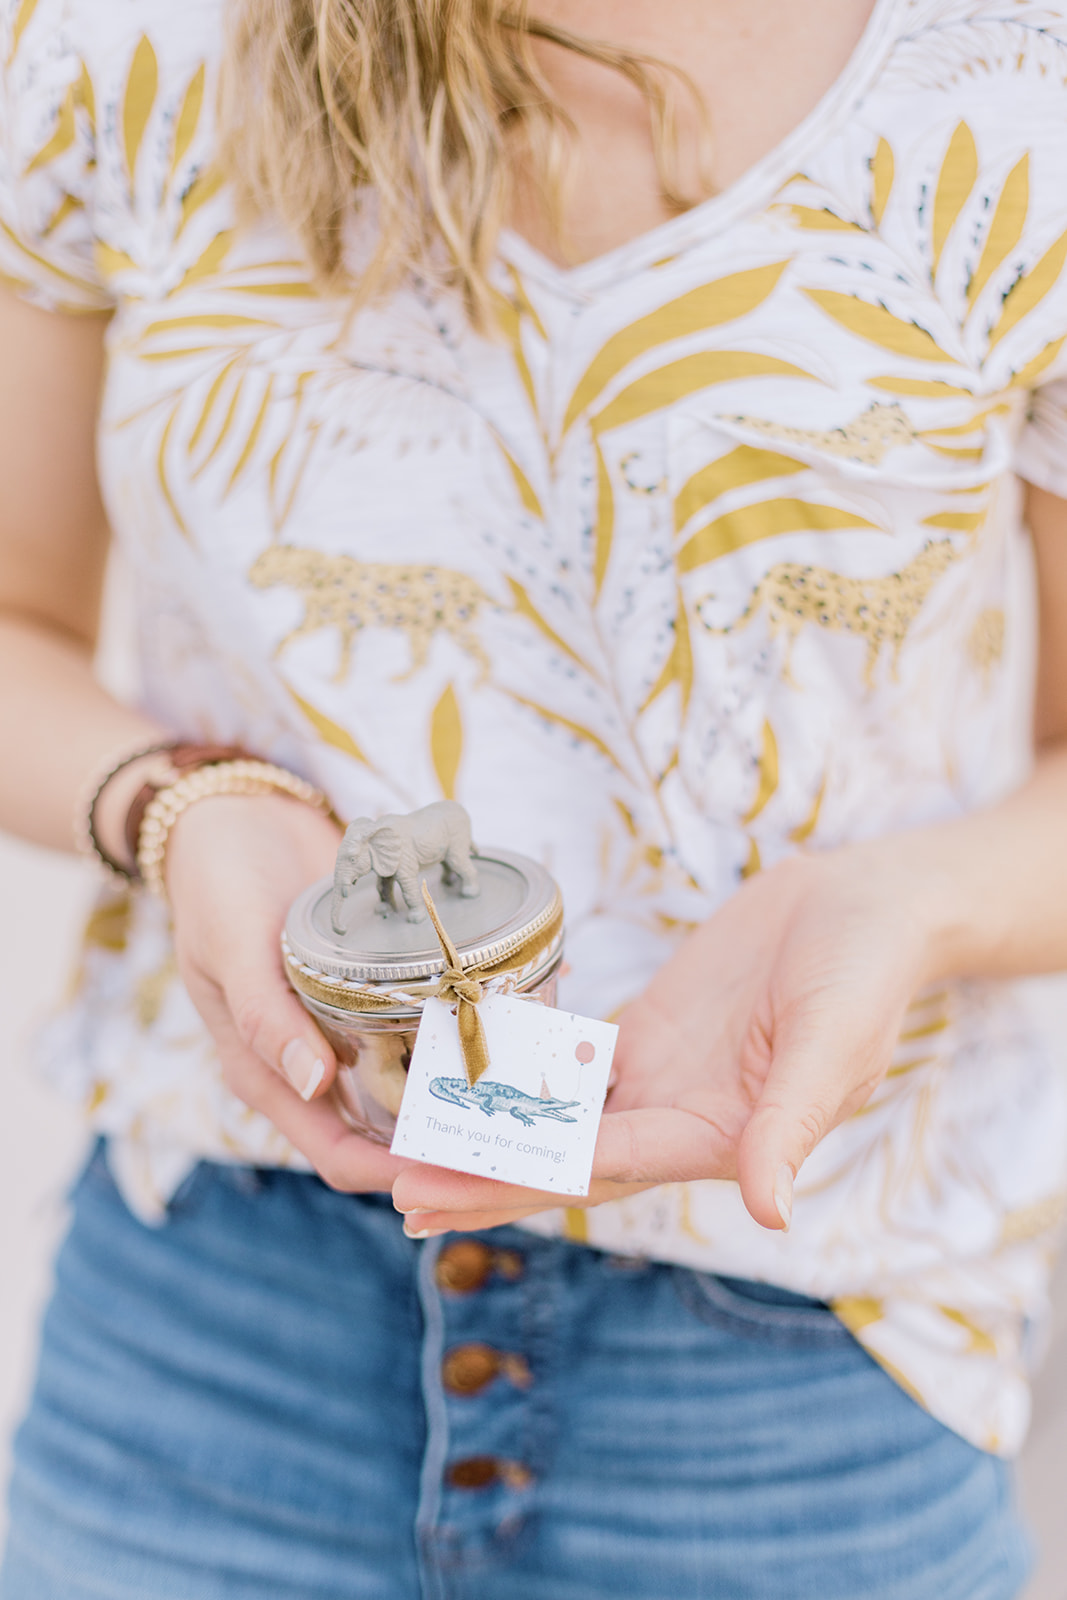
One adorable DIY project for the kids table was inspired by Hello Tiny Love’s animal party. I loved the animal crackers in a mason jar idea. I used a smaller mason jar and added a pretty velvet ribbon in addition to beige baking twine. I designed all the stationary and signage for the animal birthday party, if you’re interested I’ll have the design for sale. I hot glued the mini plastic animals to the lid but wished I had used gorilla glue because they popped off easily. Once the animals are glued to the lid, I painted just the animal and flat lid piece the colors of the party using acrylic paint and then sealed it with a gloss clear coat spray so it didn’t scratch.
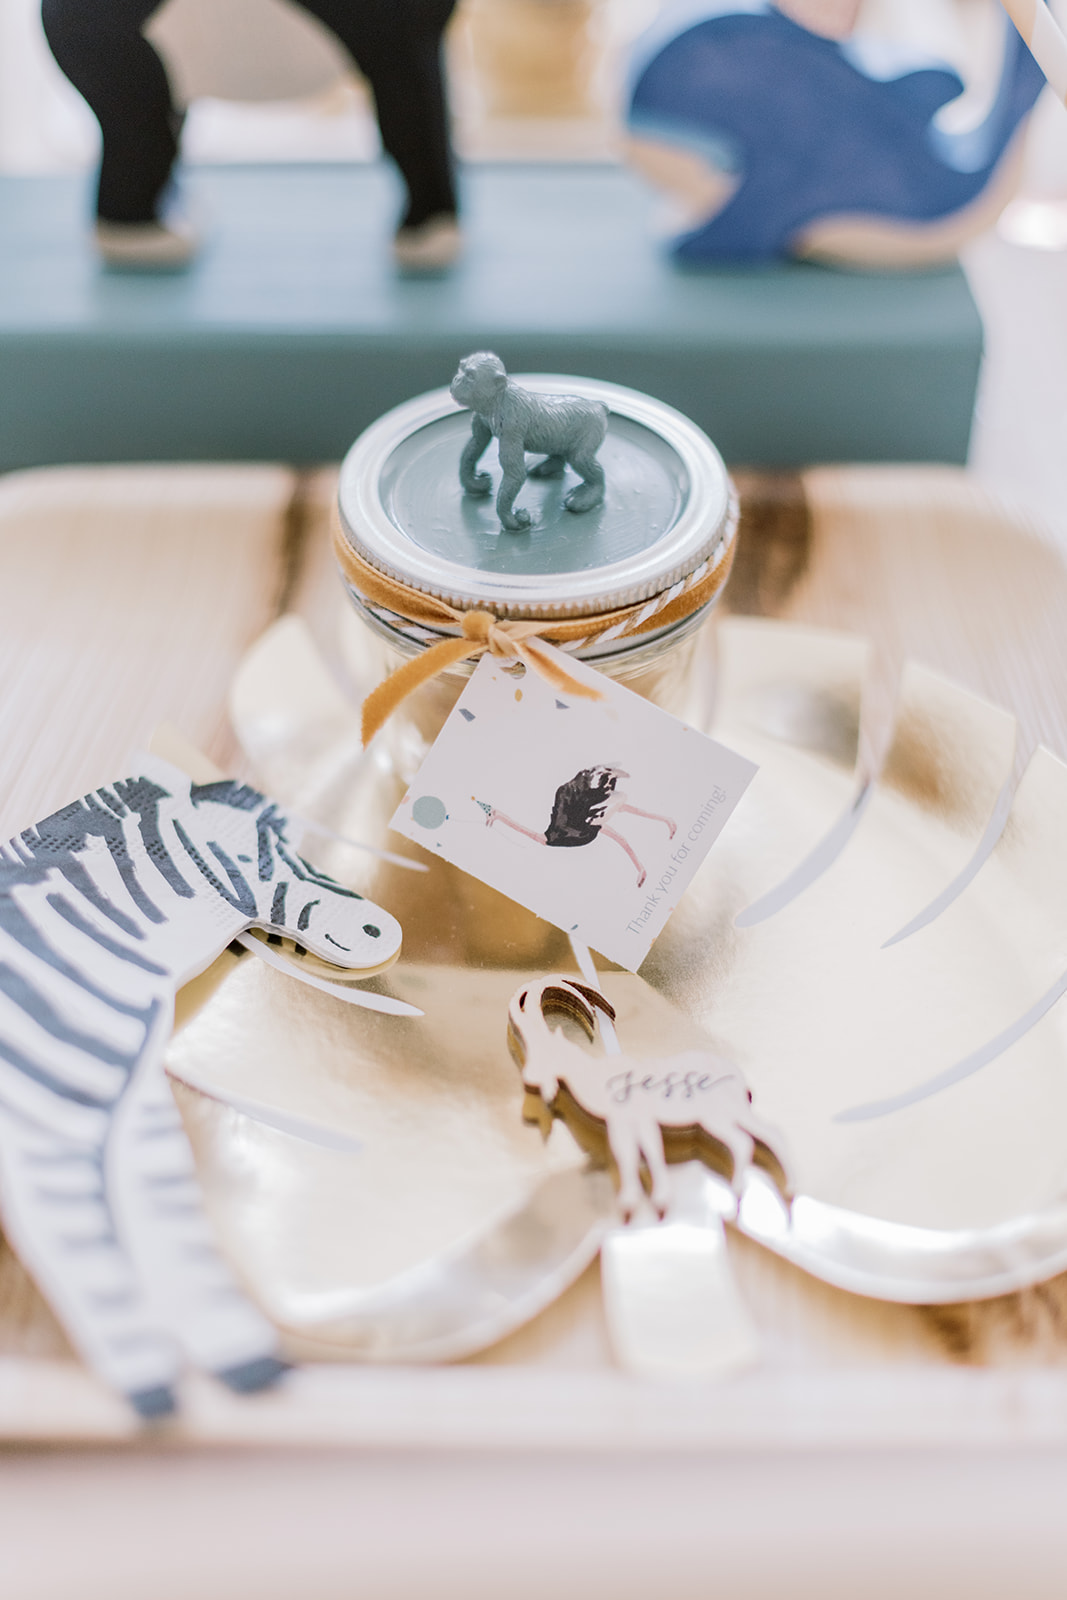
Gold palm plates were layered on real palm leaf plates which are both biodegradable and adorable. We used wood cutlery and paper straws. The zebra napkins were over-the-top cute and the animal cups were a fun find. I handmade confetti using a paper hole punch and tissue paper I had in our wrappings drawer. The cherry on top of this adorable kids table were the wood animal name tags with calligraphy by Madison Rae Photography. Of note: I used fine grit sandpaper to remove the darkened edges caused by the laser used to create these.
FEED THE BEASTS
We’ve found that buffet style party gatherings just work really well. We use the big kitchen island and chalk it full of food options. For this animal birthday party we had Chipotle cater and lined up everything on the island. In addition we had an alligator platter of fruits/cheese/veggies and a hummus lion all courtesy of Pinterest inspiration.
PARTY FAVORS
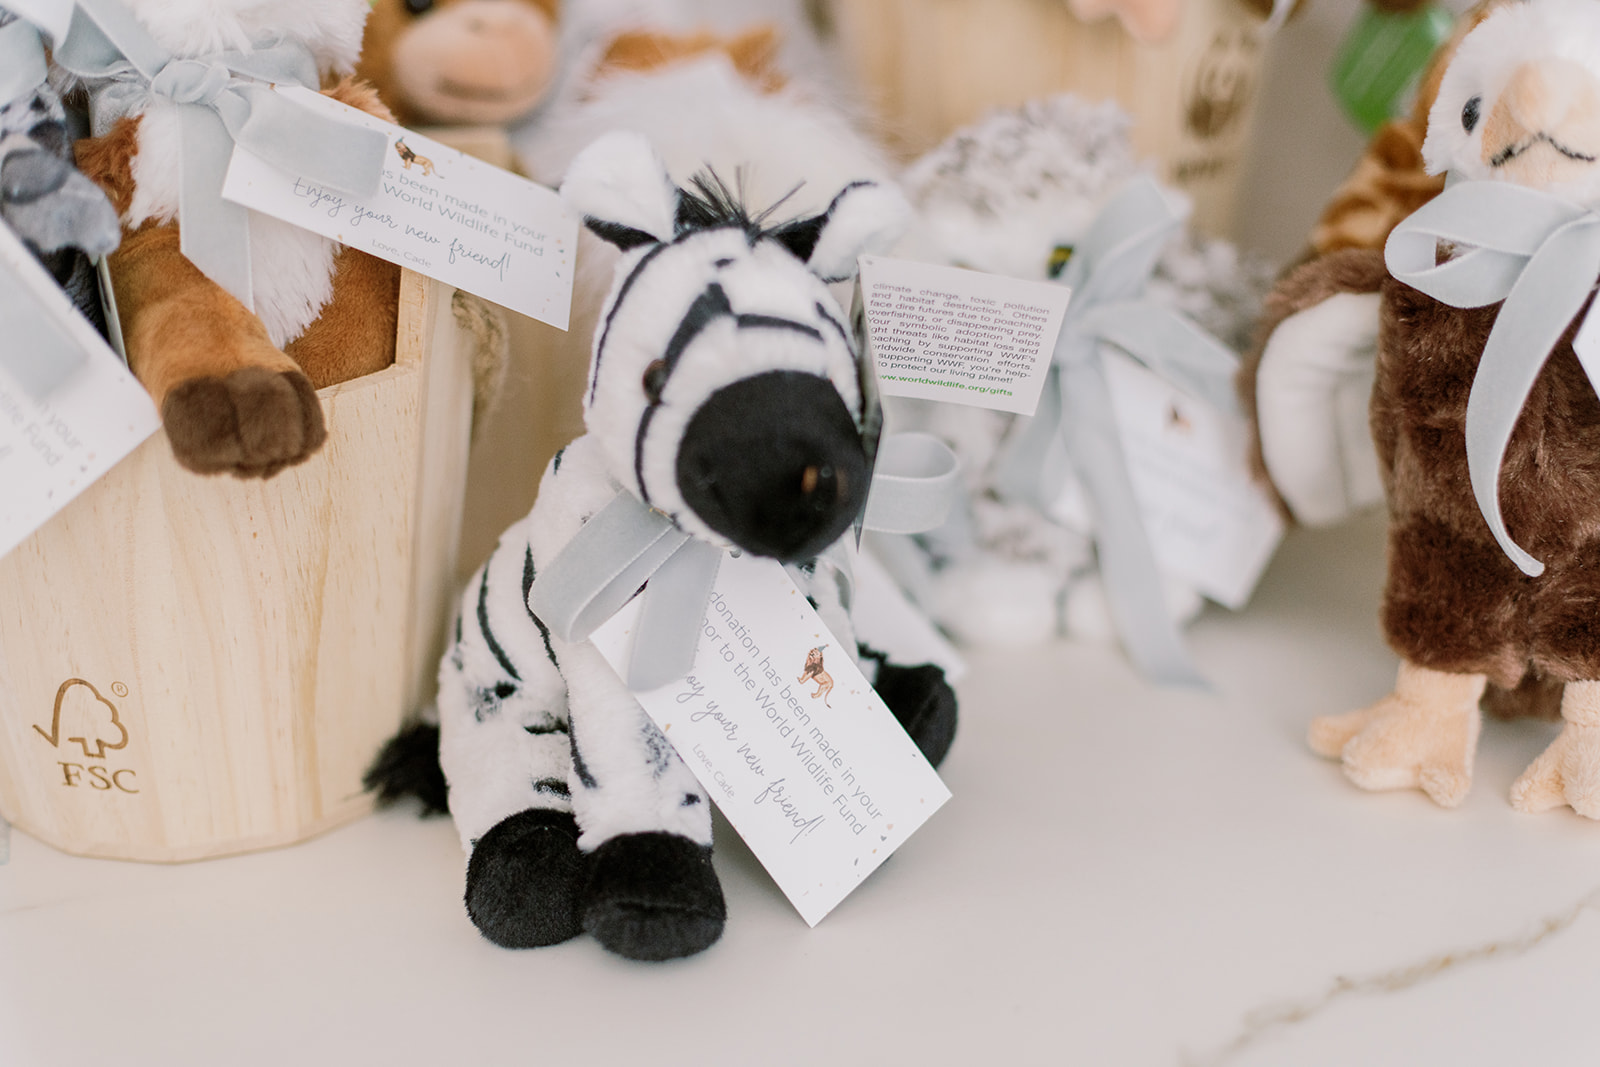
Rather than putting a goody bag together this time around, we decided to gift each child a unique stuffed animal. We got the “stuffies” from the World Wildlife Fund–from narwhals to cotton top Tamarin, these are not your ordinary stuffed animals. You hand select endangered animals of your liking and though far from inexpensive, it goes to a good cause and is tax deductible.
KEVIN THE MAGICIAN
And last but not least, probably the highlight of the party for the kiddos was the magician we hired. Kevin the Magician was wonderful. His brother is actually a coworker of my husband and we first met him at the company holiday party last year. If you’re in New England, he is so funny and had the kids laughing and squealing in excitement the whole time. Here’s to laughing and squeals in all of our futures and healing and health throughout our world. I hope you enjoyed Cade’s animal birthday party.
SOURCES
Photography: Ruth Eileen Photography
Cookies: Honey & Lou Baking Co
Calligraphy: Madison Rae Photography
Florals: Fiori Florals
Catering: Chipotle
Magician: Kevin the Magician
Kid’s Tables: International Concepts Unfinished Table & Chairs
Balloons: Etsy
Invitations & Signage: Send me an email, I made these custom
Lollipops: Leccare
Wooden Animals: Holtztiger
Party Favors: World Wildlife Fund