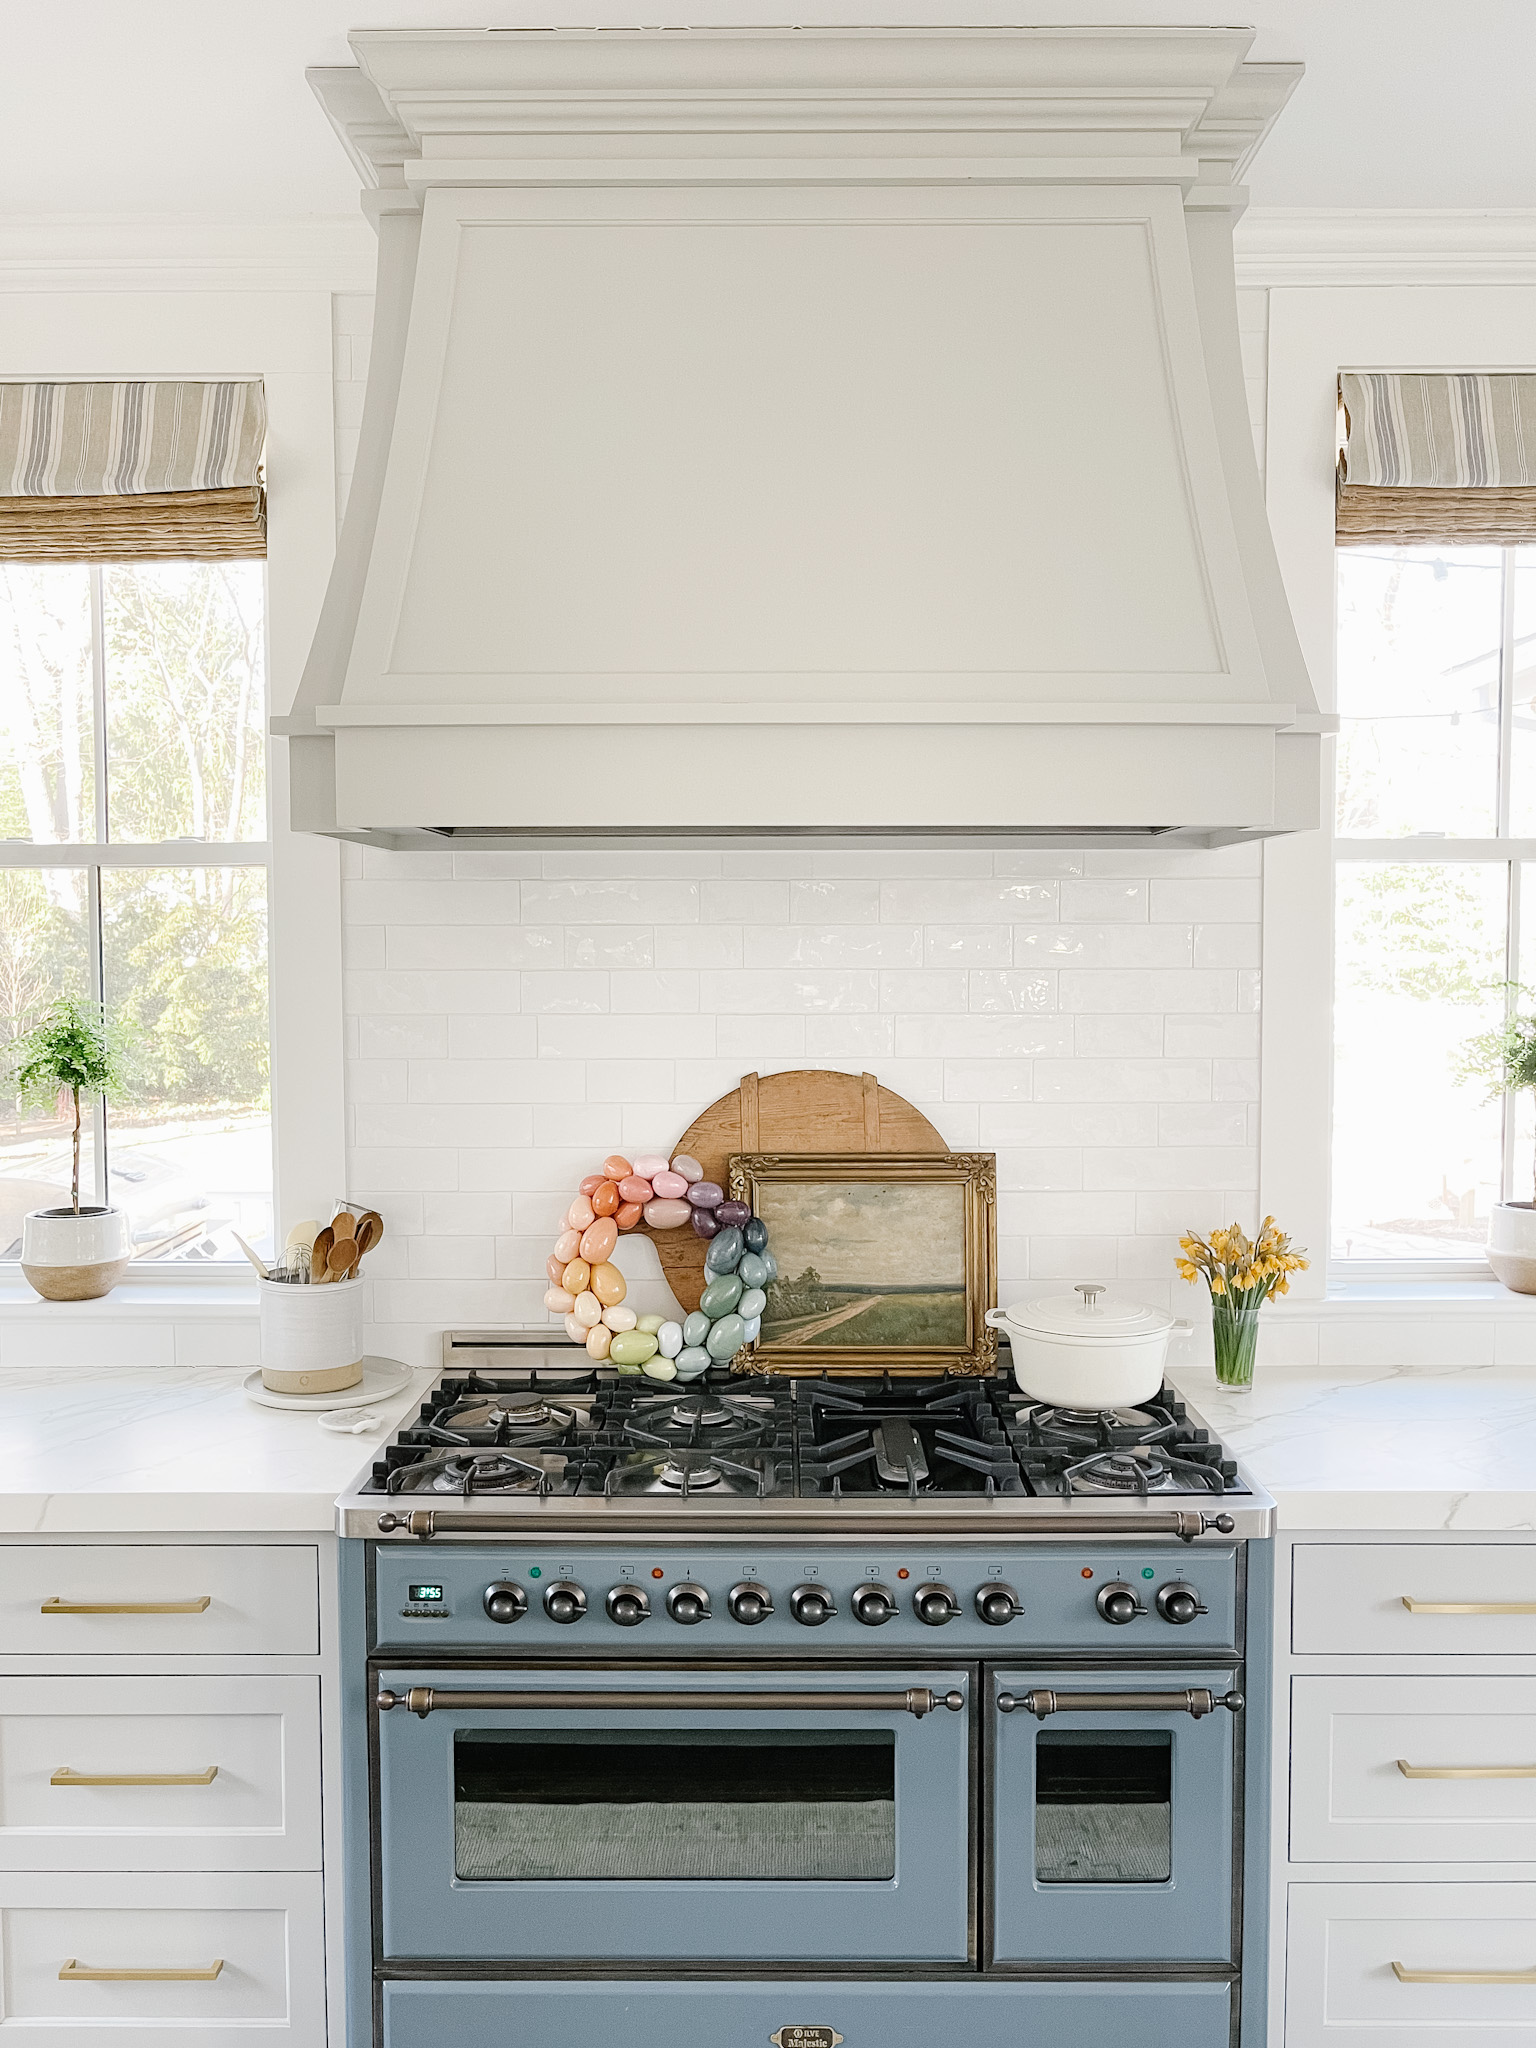
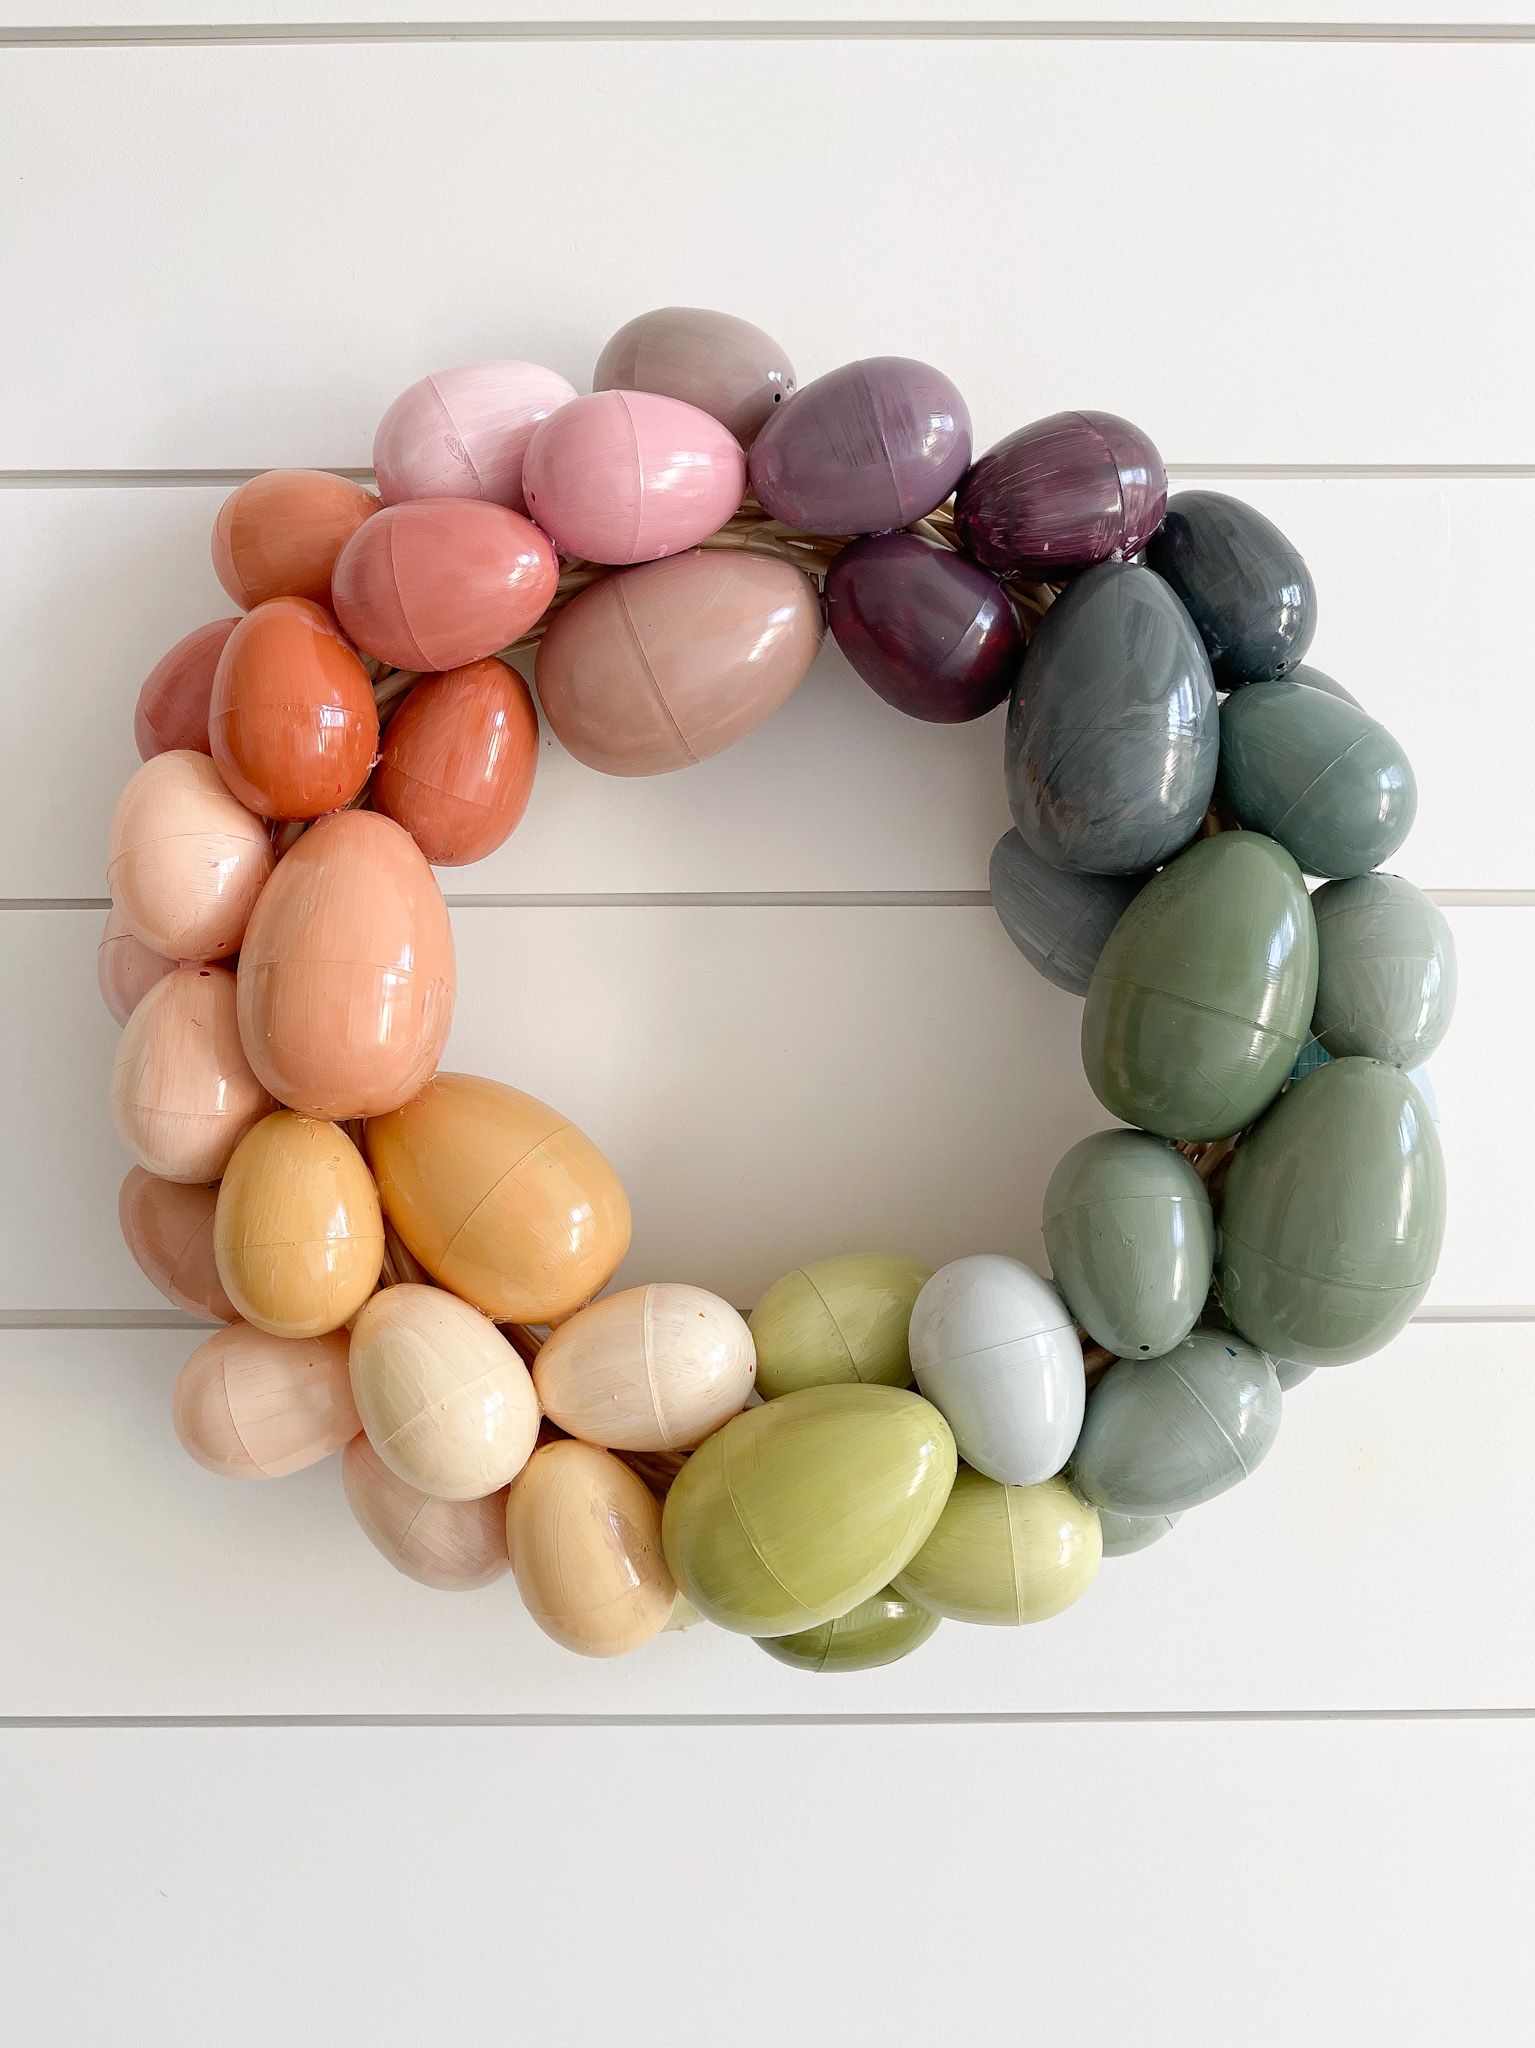
This plastic egg wreath can be made for $5 and is a great way to add some Easter to your decor. I originally made it for the kiddo’s playroom but they all loved it in the kitchen so it’s taken up residence behind the range. This plastic egg wreath is a great way to reuse old plastic eggs from years past and turn them into a festive Easter wreath. Painting the plastic eggs with acrylic paints allows you to mute the color of your wreath so it isn’t so bright or neon like most plastic eggs out there.
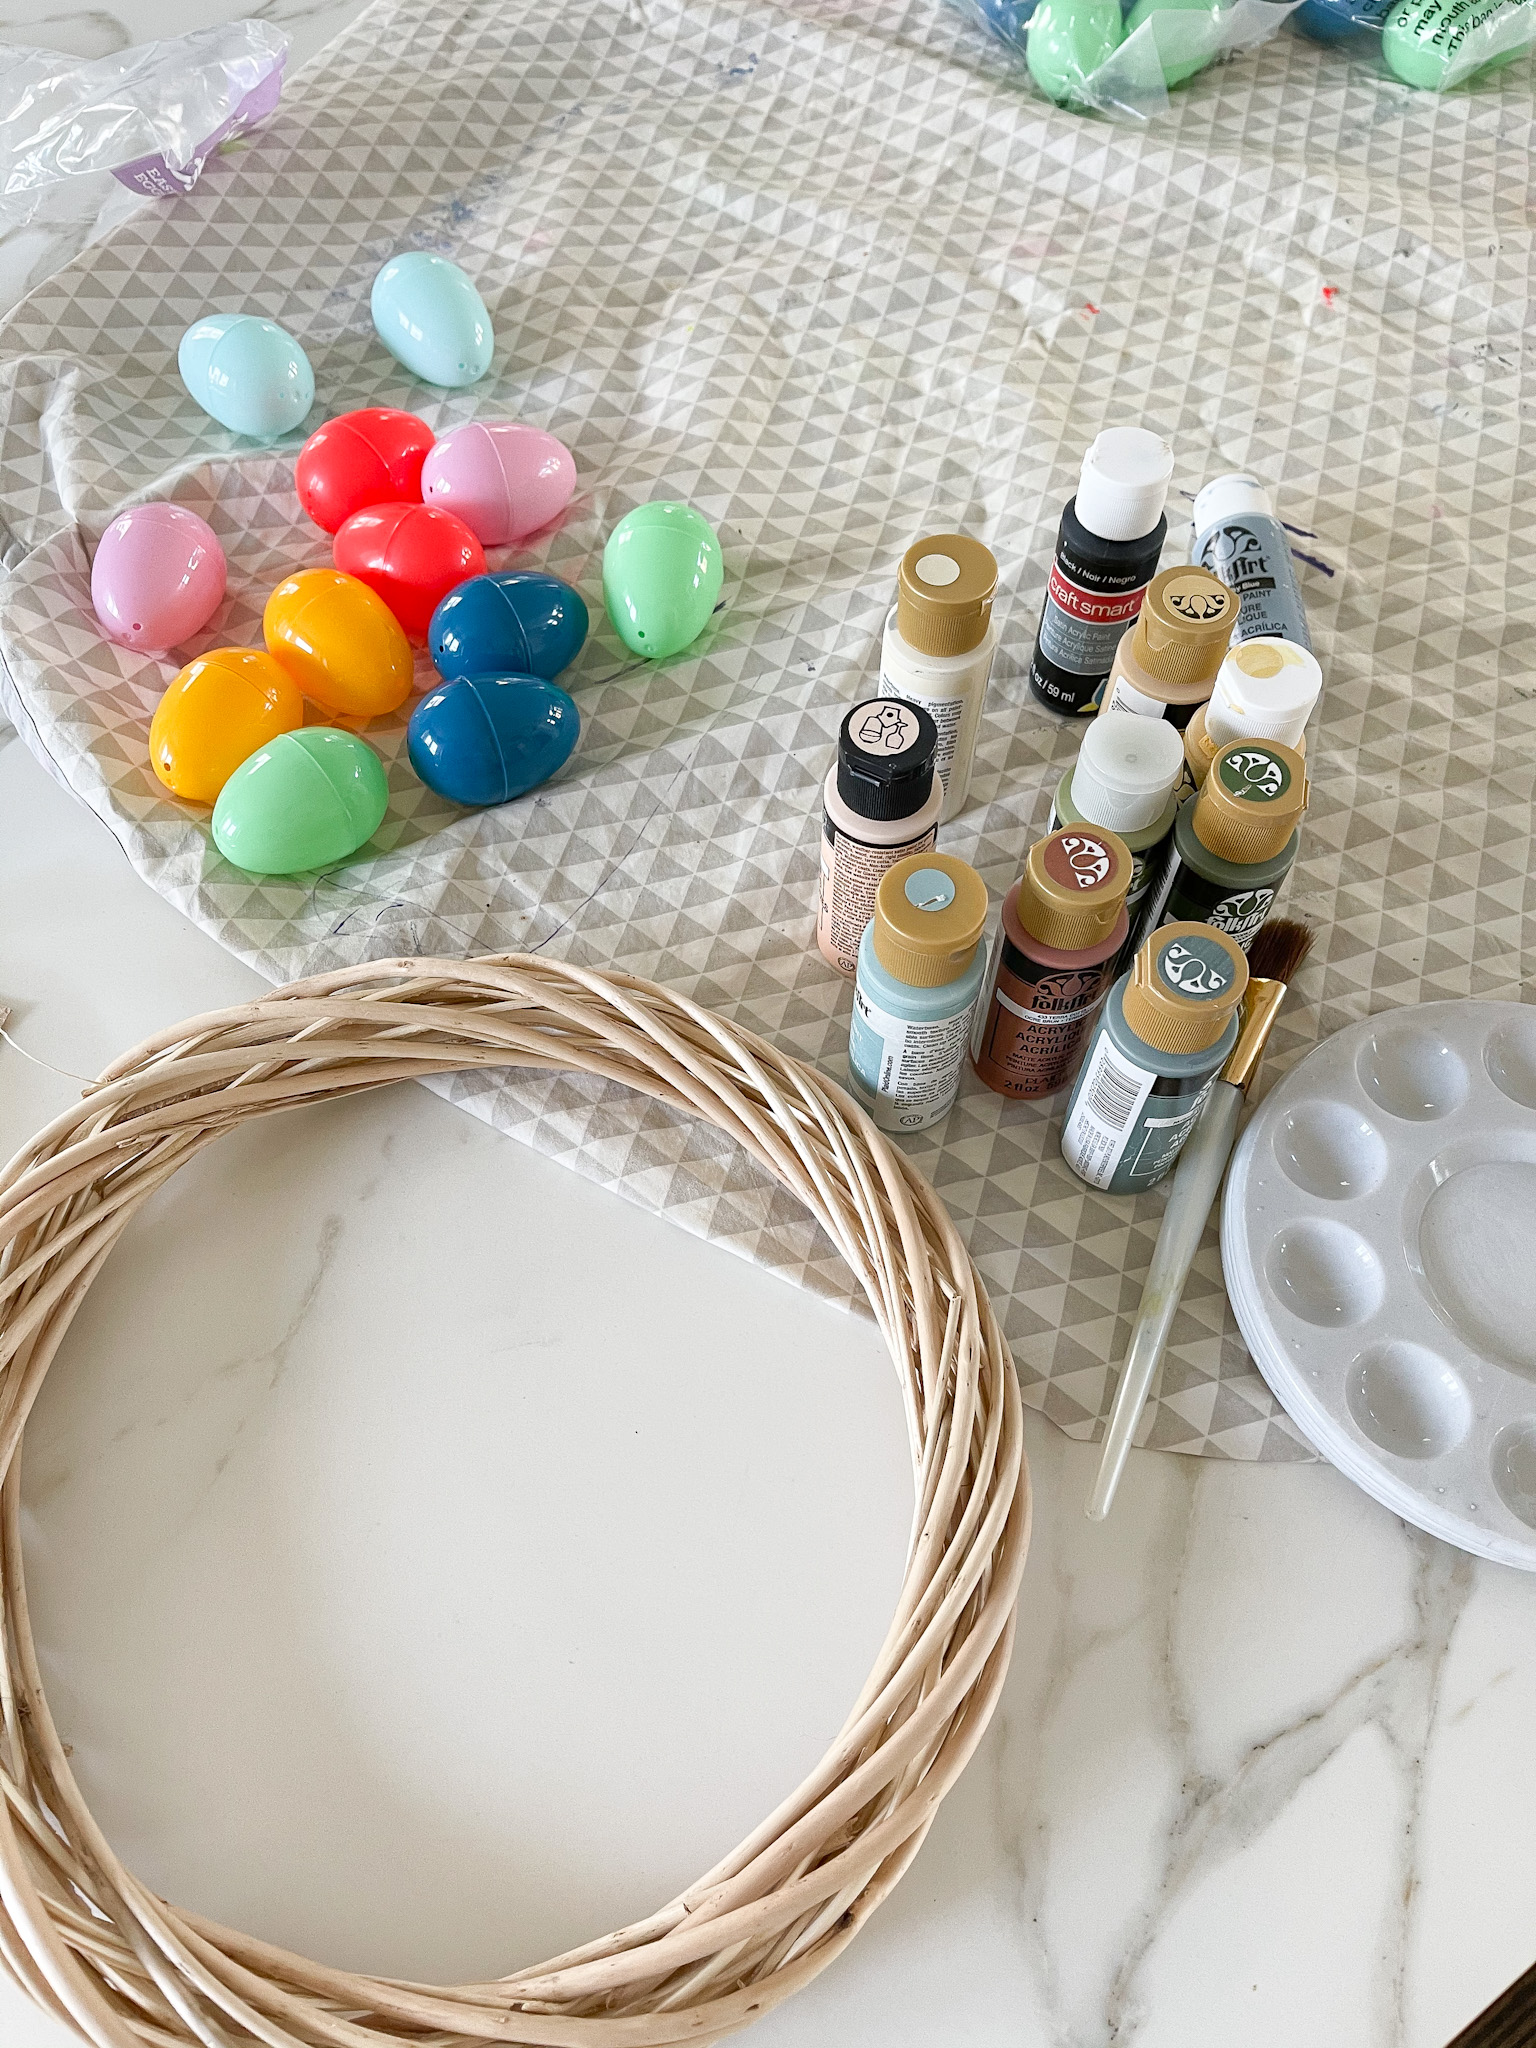
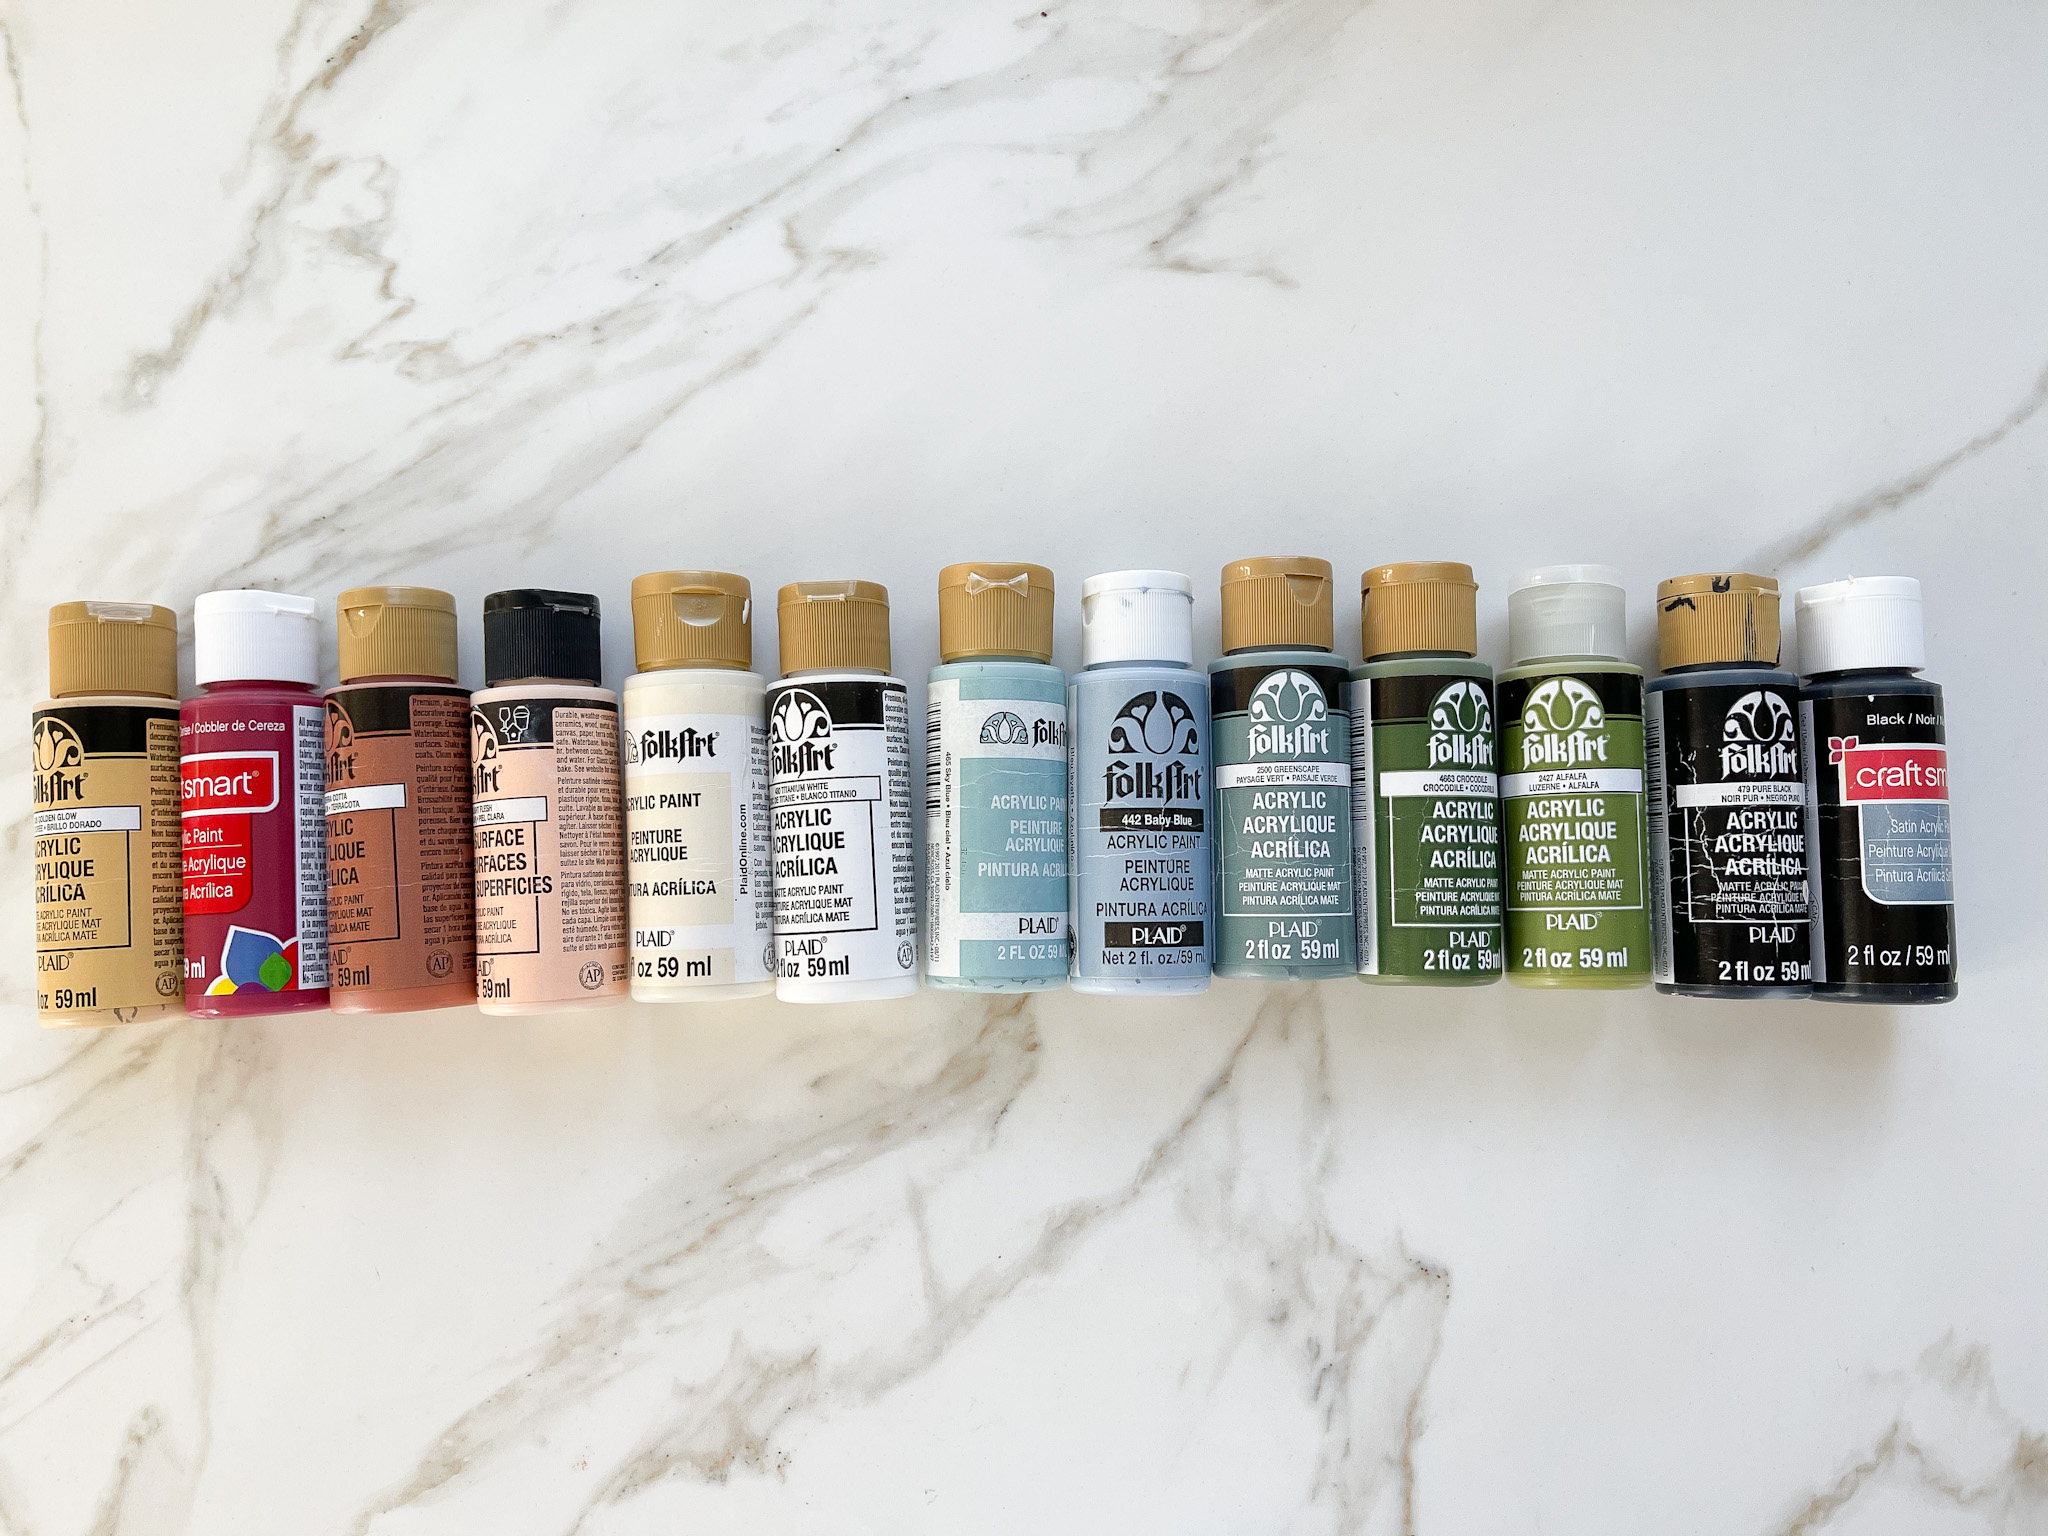
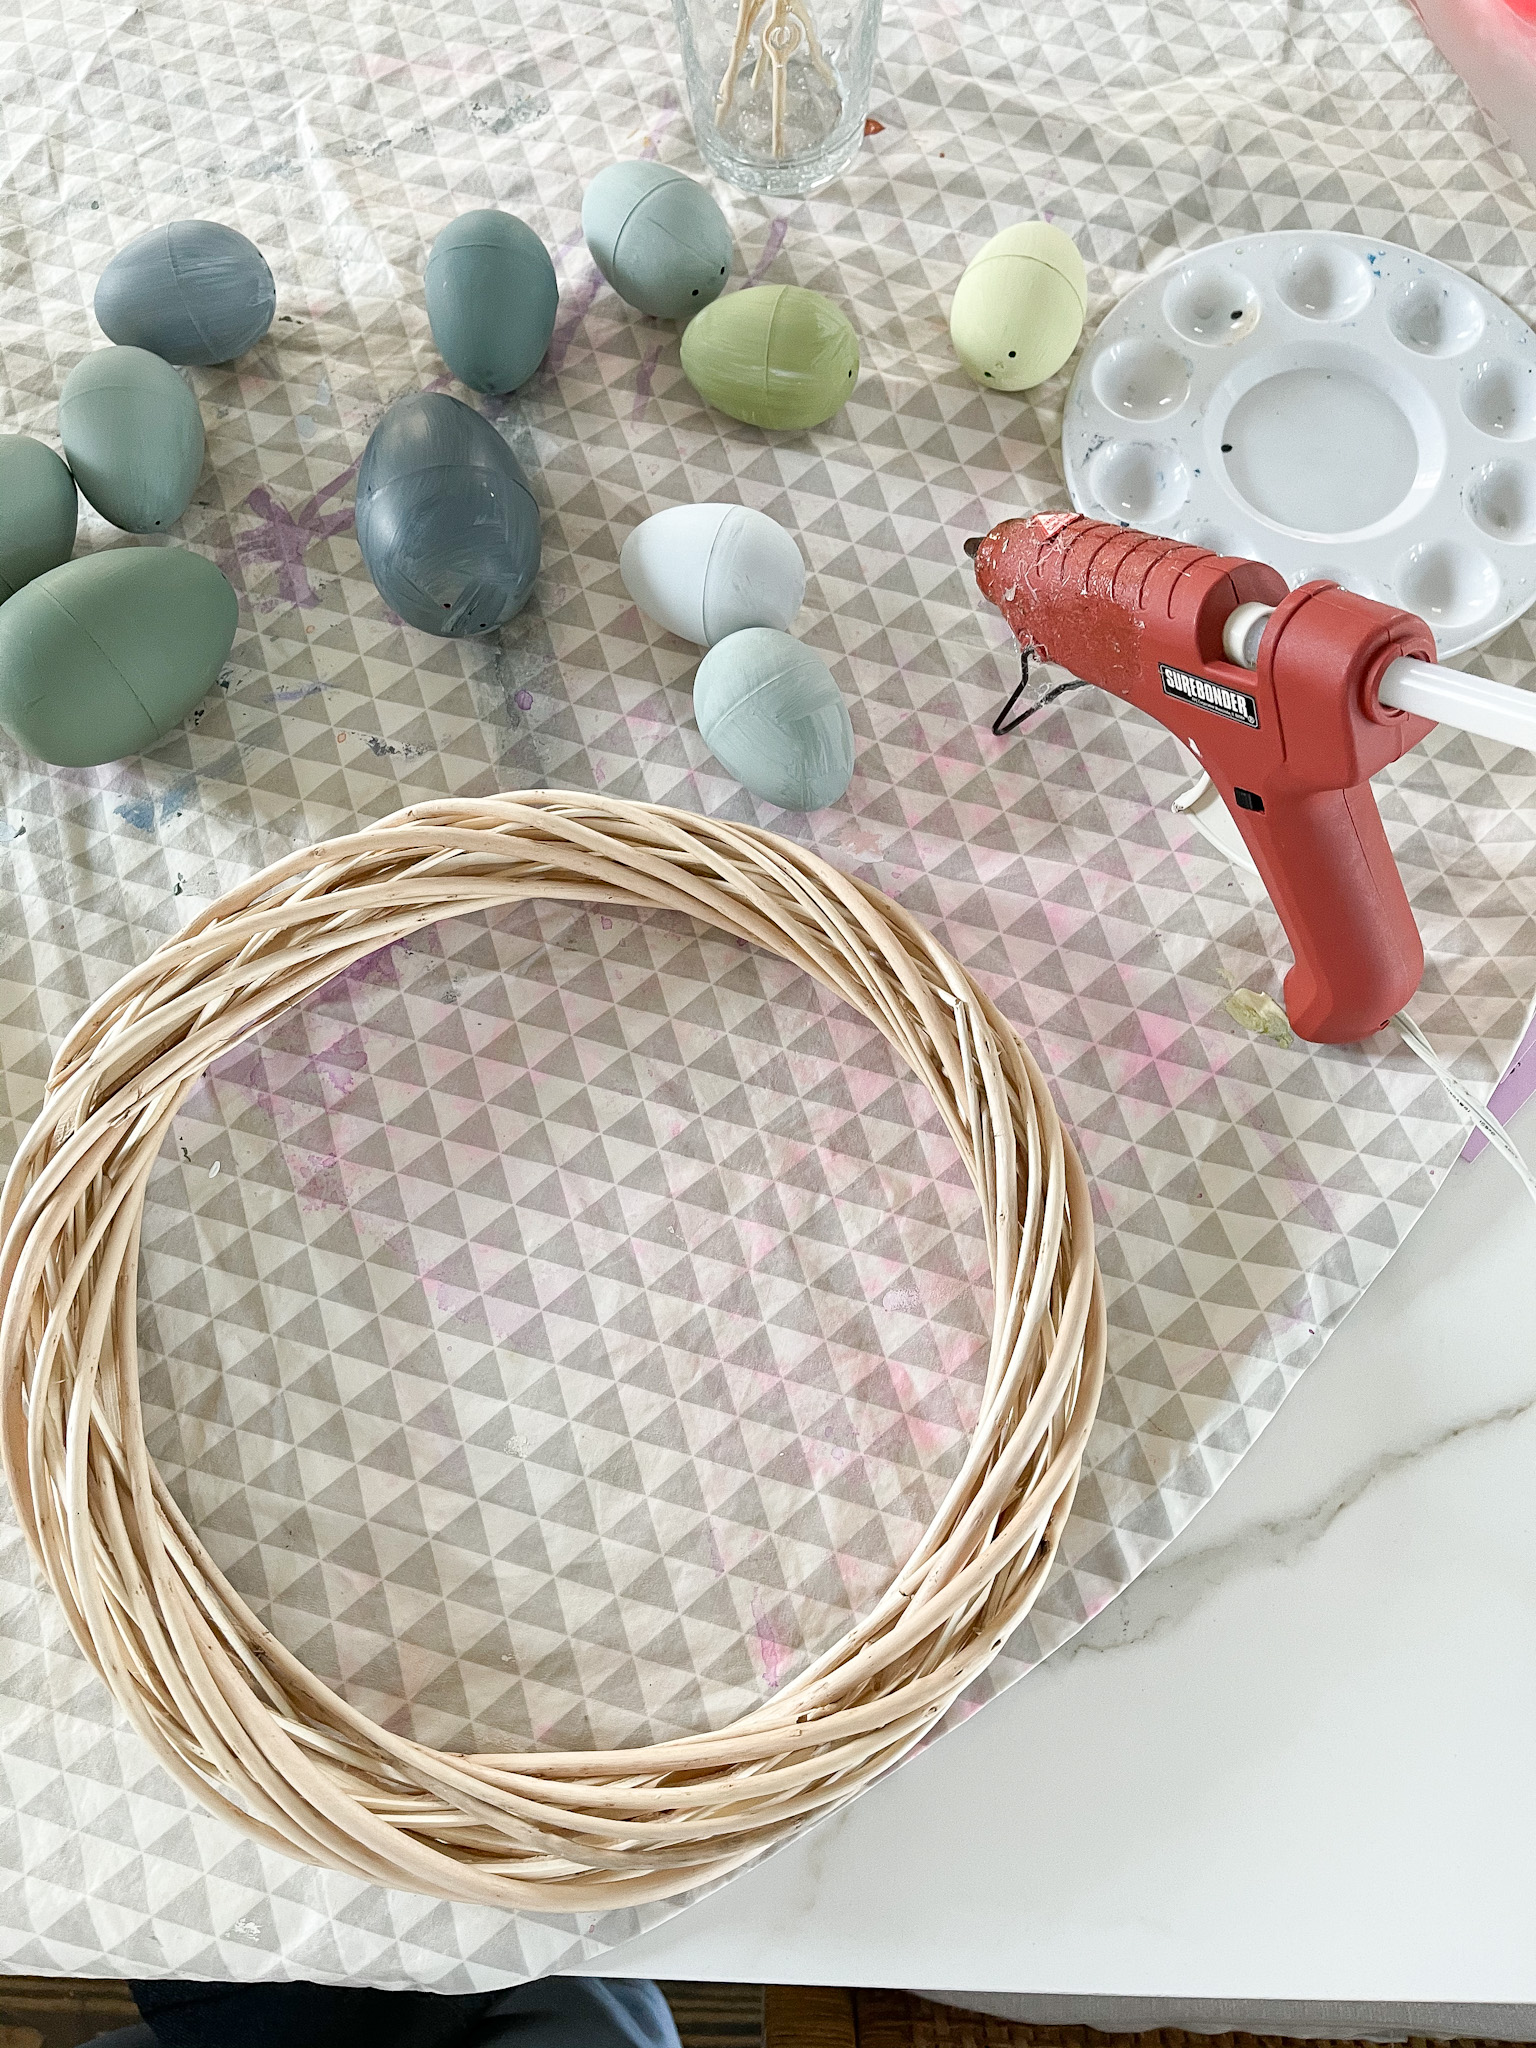
I used only acrylic paint I had on hand and two different sizes of plastic eggs from Target (the 48 count of smaller plastic eggs and a 12 count of larger eggs) I picked them up in the Easter aisle at Target for $3 for the big bag and $1 for the smaller bag. The wreath frame is roughly 11″ and from the dollar store.
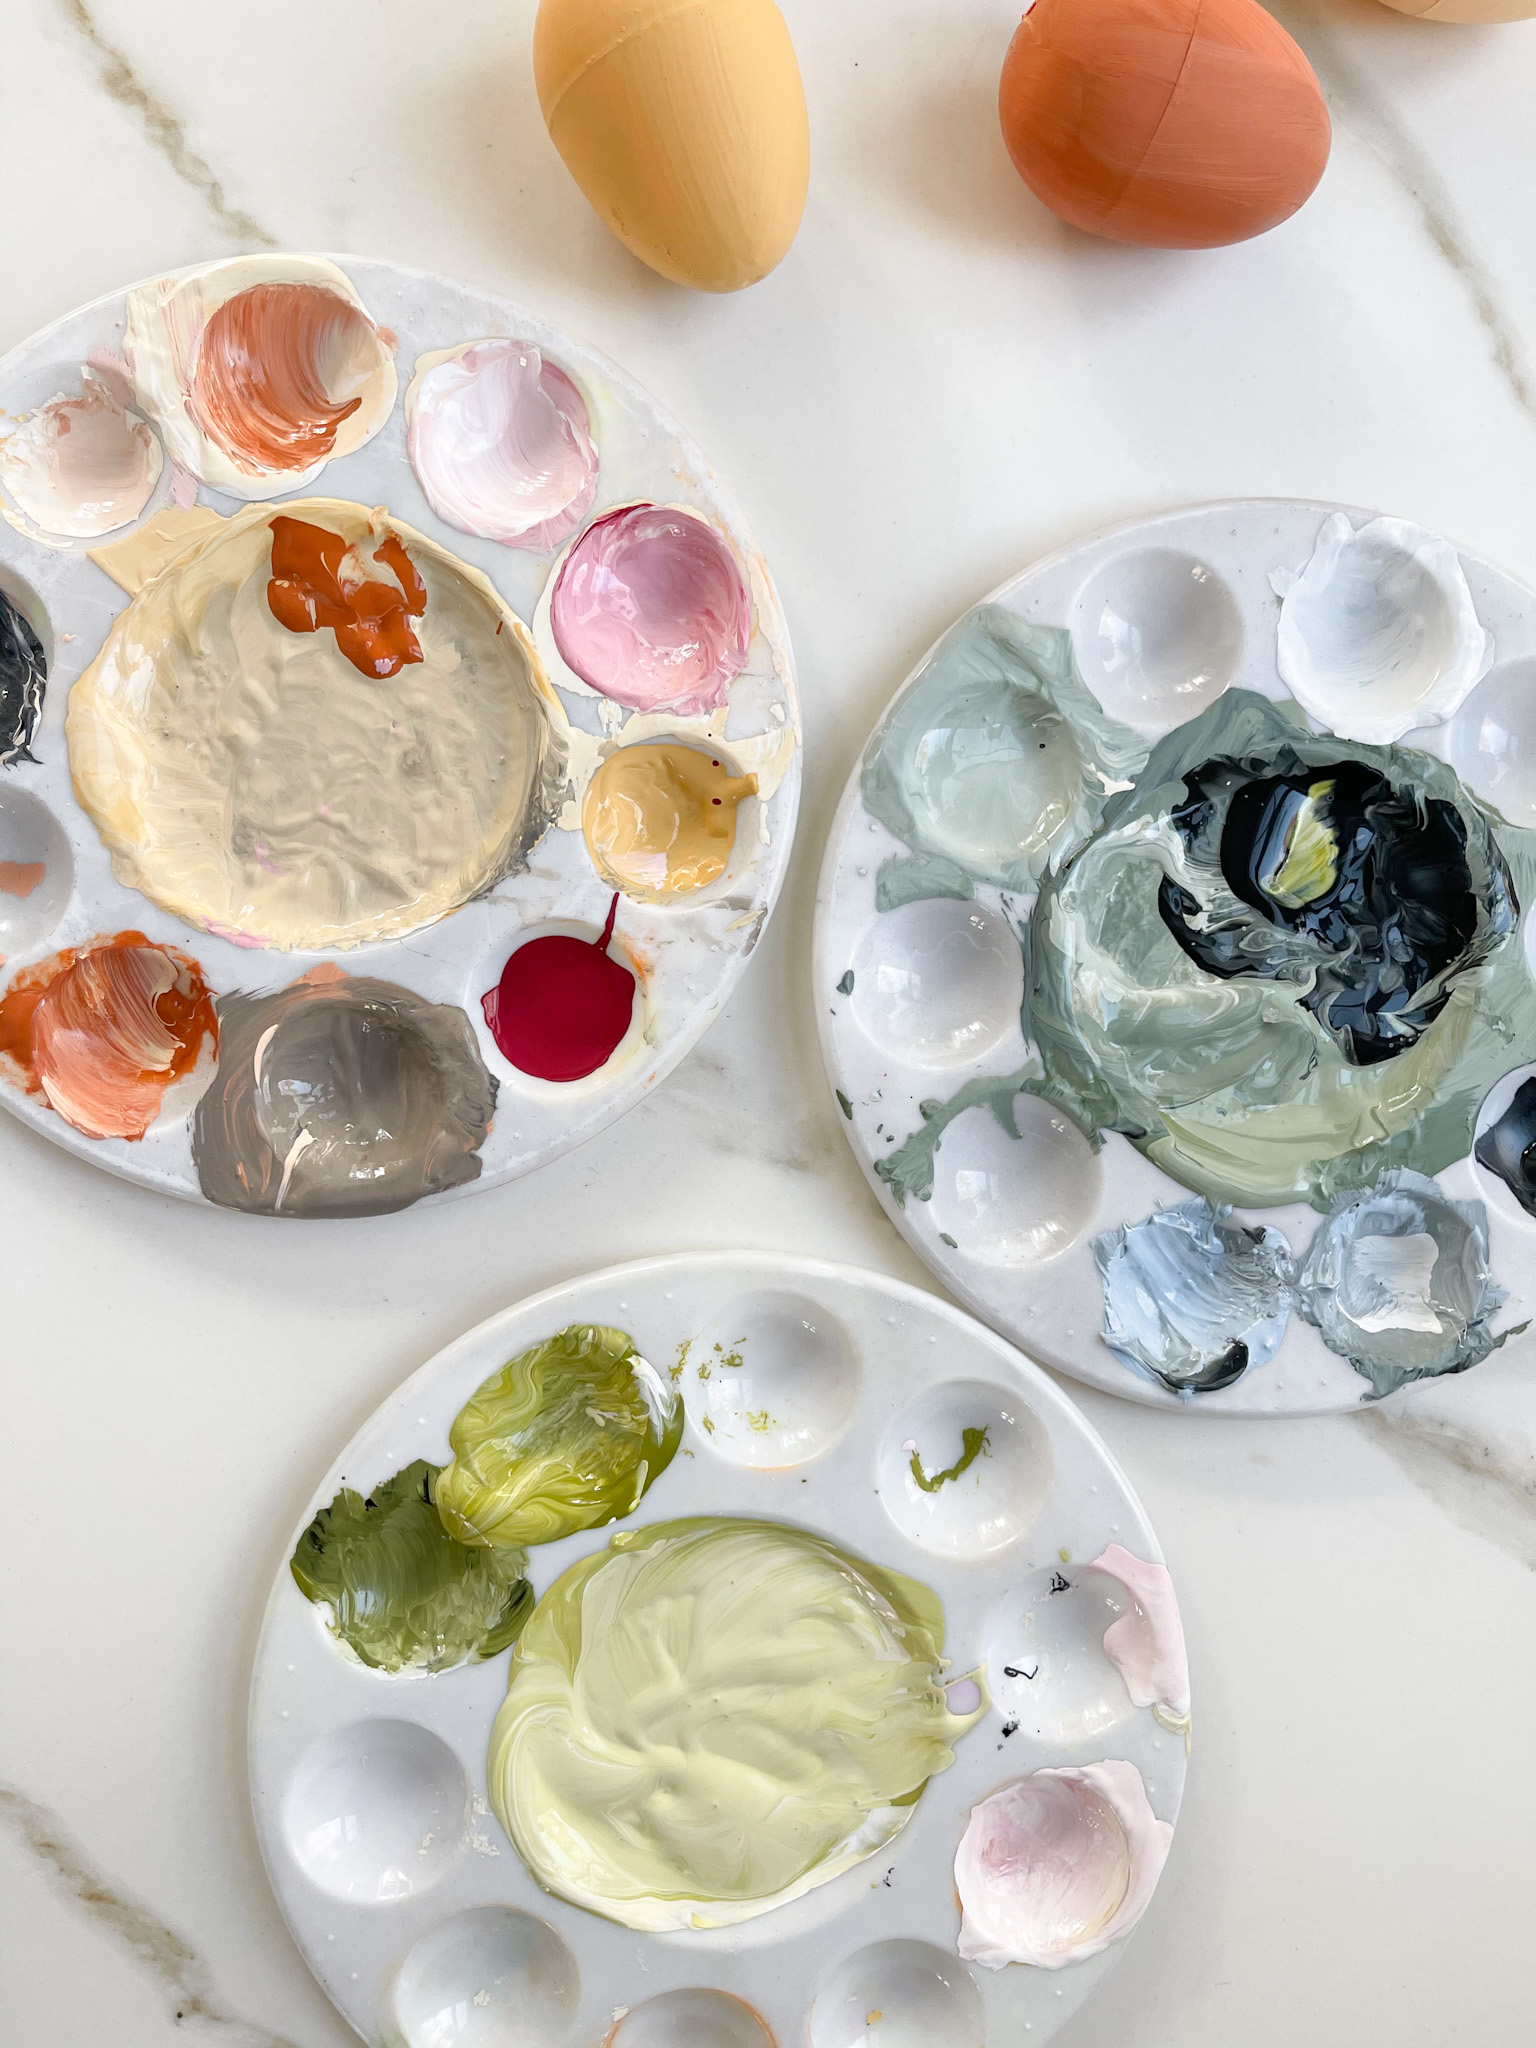
Start by prepping your surface (in my case the kitchen counters) with a mat or towel so you can mix your paint shades without worry. I use an old mat we use to put under the high chair for baby meal time messes.
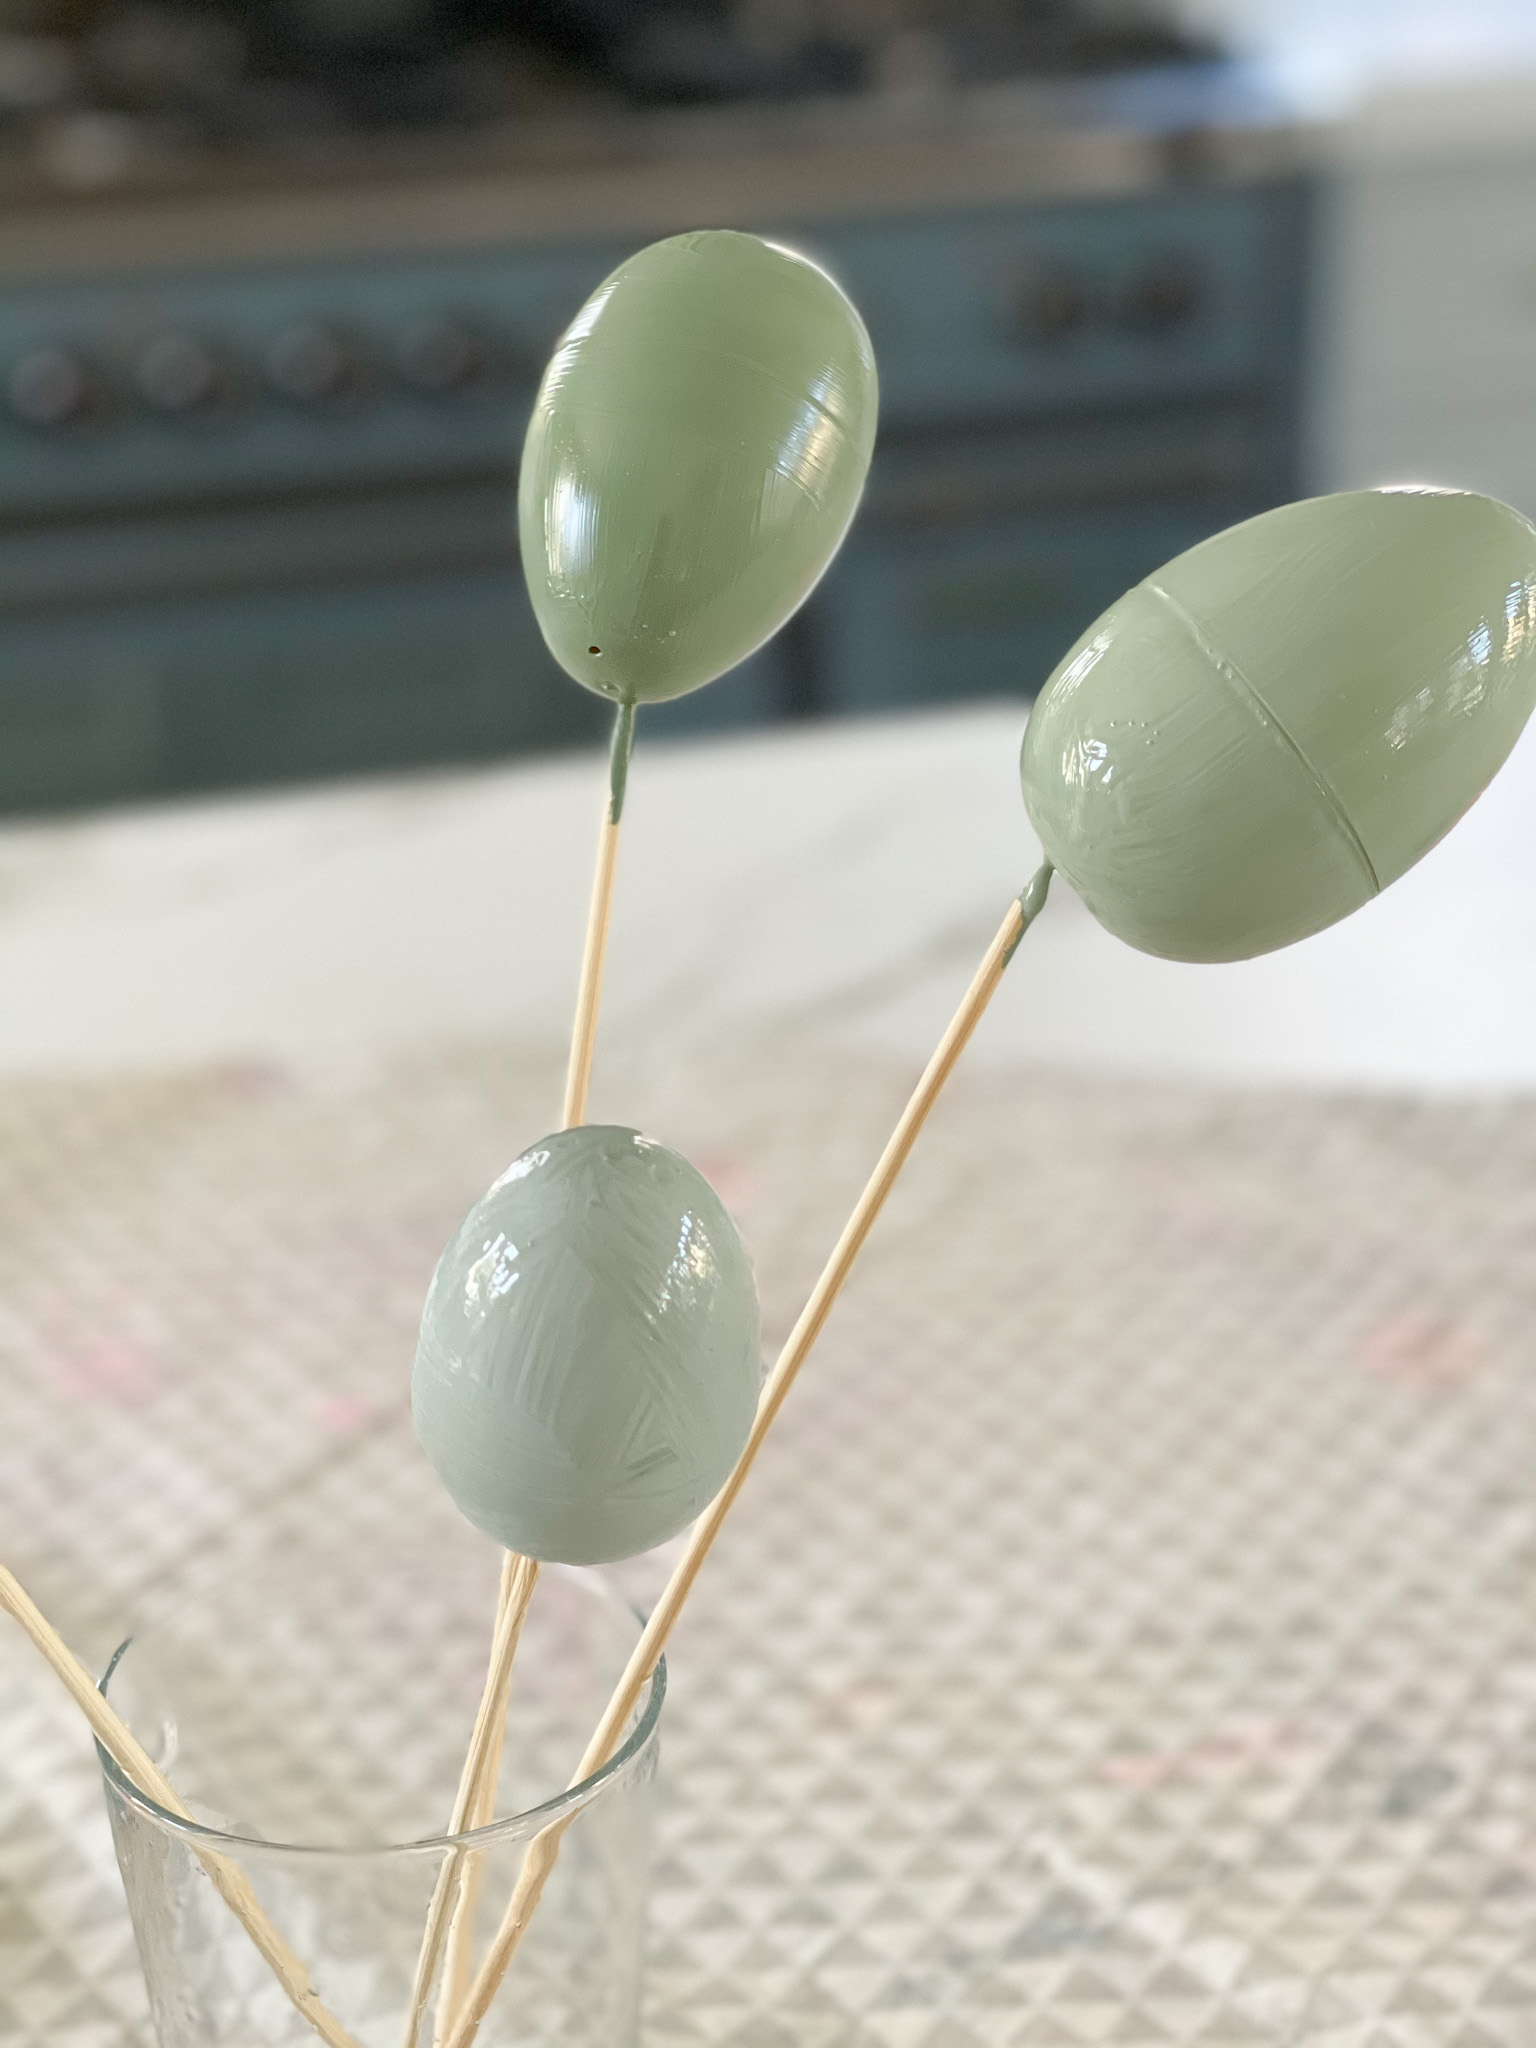
I used two kitchen glasses that I could put the painted egg/skewer in once it was painted to dry without touching anything. The plastic eggs have holes in them that you can stick the pointy edge of a skewer in. The skewer doesn’t go all the way in and if you paint too hard the egg can (and likely will) come off the skewer, this happened a few times but if I was careful, I could paint my egg without issue.
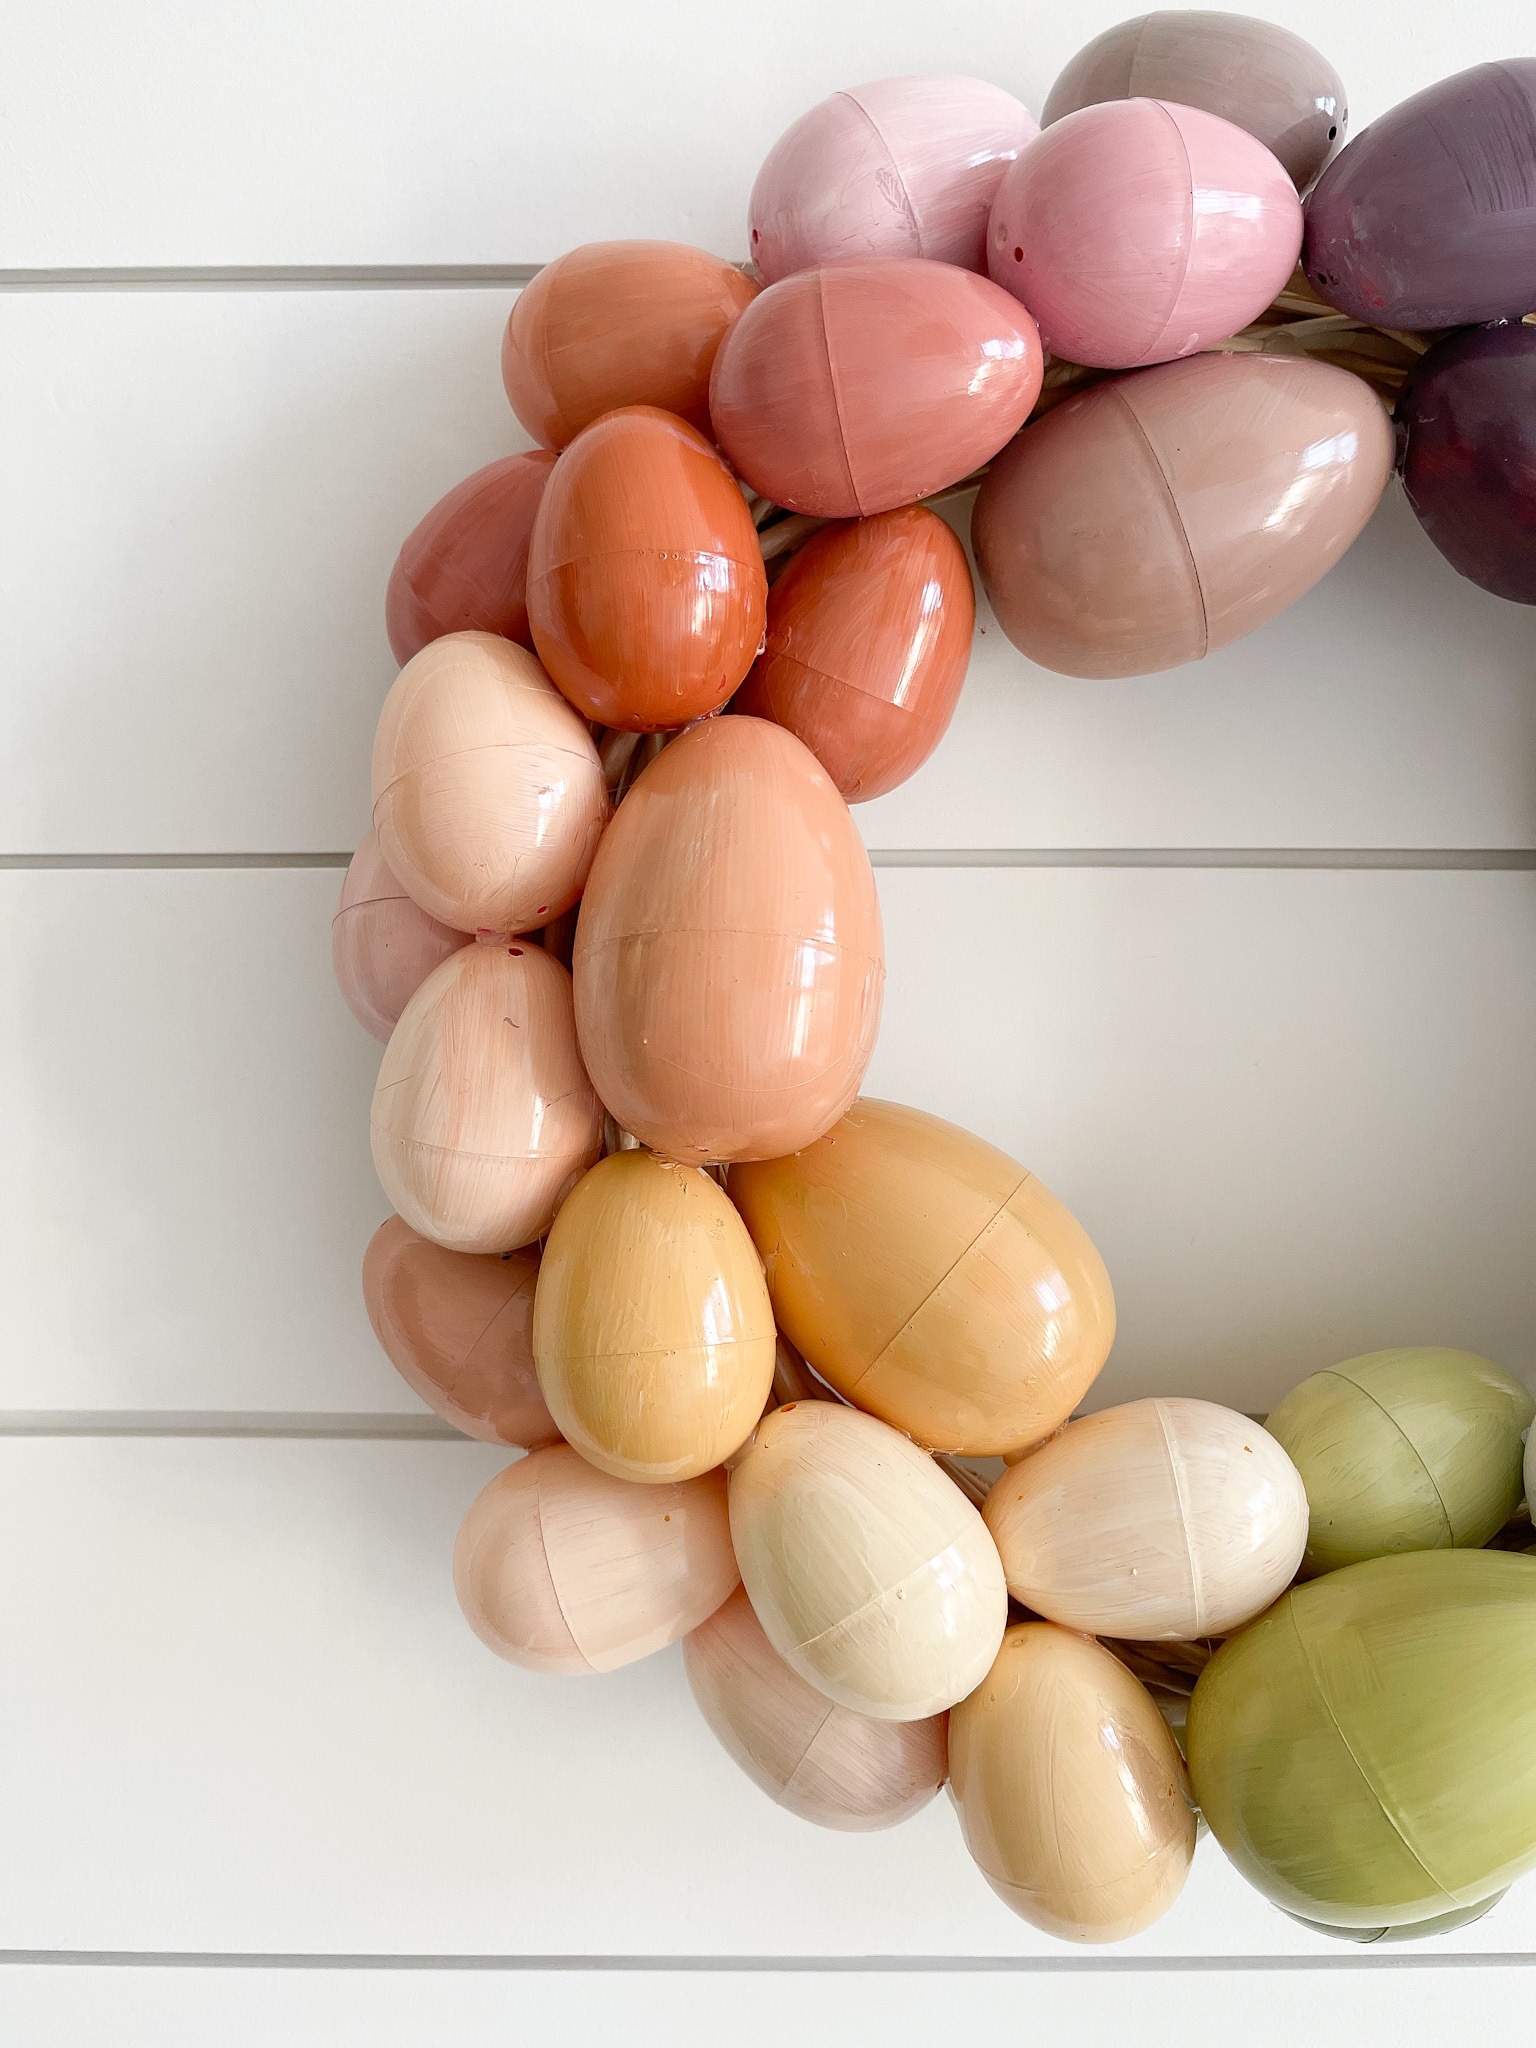
These are not perfect once painted. You can see the plastic egg seam and the holes in the egg. But it’s still adorable and the benefit of a plastic egg over wood (which I considered using) is the weight of the finished wreath and the cost. The wooden egg wreath I made a few years ago keeps pulling a command hook off the wall, crashing to the floor and breaking.
MIXING COLORS
Once I got a color I liked, I painted an egg or two and then added white to 1/2 of it and grey / black to the other which made a lighter and darker shade. I kept “diluting” that color down with more white paint to get the graduation in color tones you see.
Eventually I worked my way through a muted version of the rainbow. The key is lots of mixing paint and staying with more muted tones. I liked seeing the brush strokes of different paint shades and the chalky look to the painted egg once dry. Now acrylic paint chips off plastic easily so you’ll want to use a clear protector coat over it once you’re finished putting the wreath together. I didn’t realize I only had gloss clear spray. If you like the matte look, buy a matte clear spray.
GLUING ON THE EGGS
I started with my blue tones and worked my way through the rainbow in one direction changing the angle of the eggs and mixing large and small for a layered look. Be careful with the hot glue because if a string of the hot glue falls onto an egg, it can pull some paint off.
Isn’t this such a festive and happy spring Easter egg wreath!? Perfect for spring and a thoughtful way to use what you have or make something at a low cost point. Happy Easter! Now scroll down for some more beautiful wreath ideas.


 Back To Home Tour
bookmarked!!, I love your blog!