
HOME TOUR
Who doesn’t love before and afters? I sure do because it’s a glimpse at what was next to what is possible. It’s inspiring and can help give you ideas for your own space. Bedrooms are often overlooked because they usually aren’t seen by outsiders and that gives us less incentive to pull them together. But who doesn’t love a room you can just fall into when you’re at your most tired? We were able to transform this bedroom into a modern, lovely space with accessories like new bedding, lighting and the accent wall. You don’t have to take down walls to get big results. I have a handy husband who pulled off the woodwork with ease. It was time consuming but less difficult than some other designs we’ve tackled. Without adeau, a bedroom update with Serena & Lily.
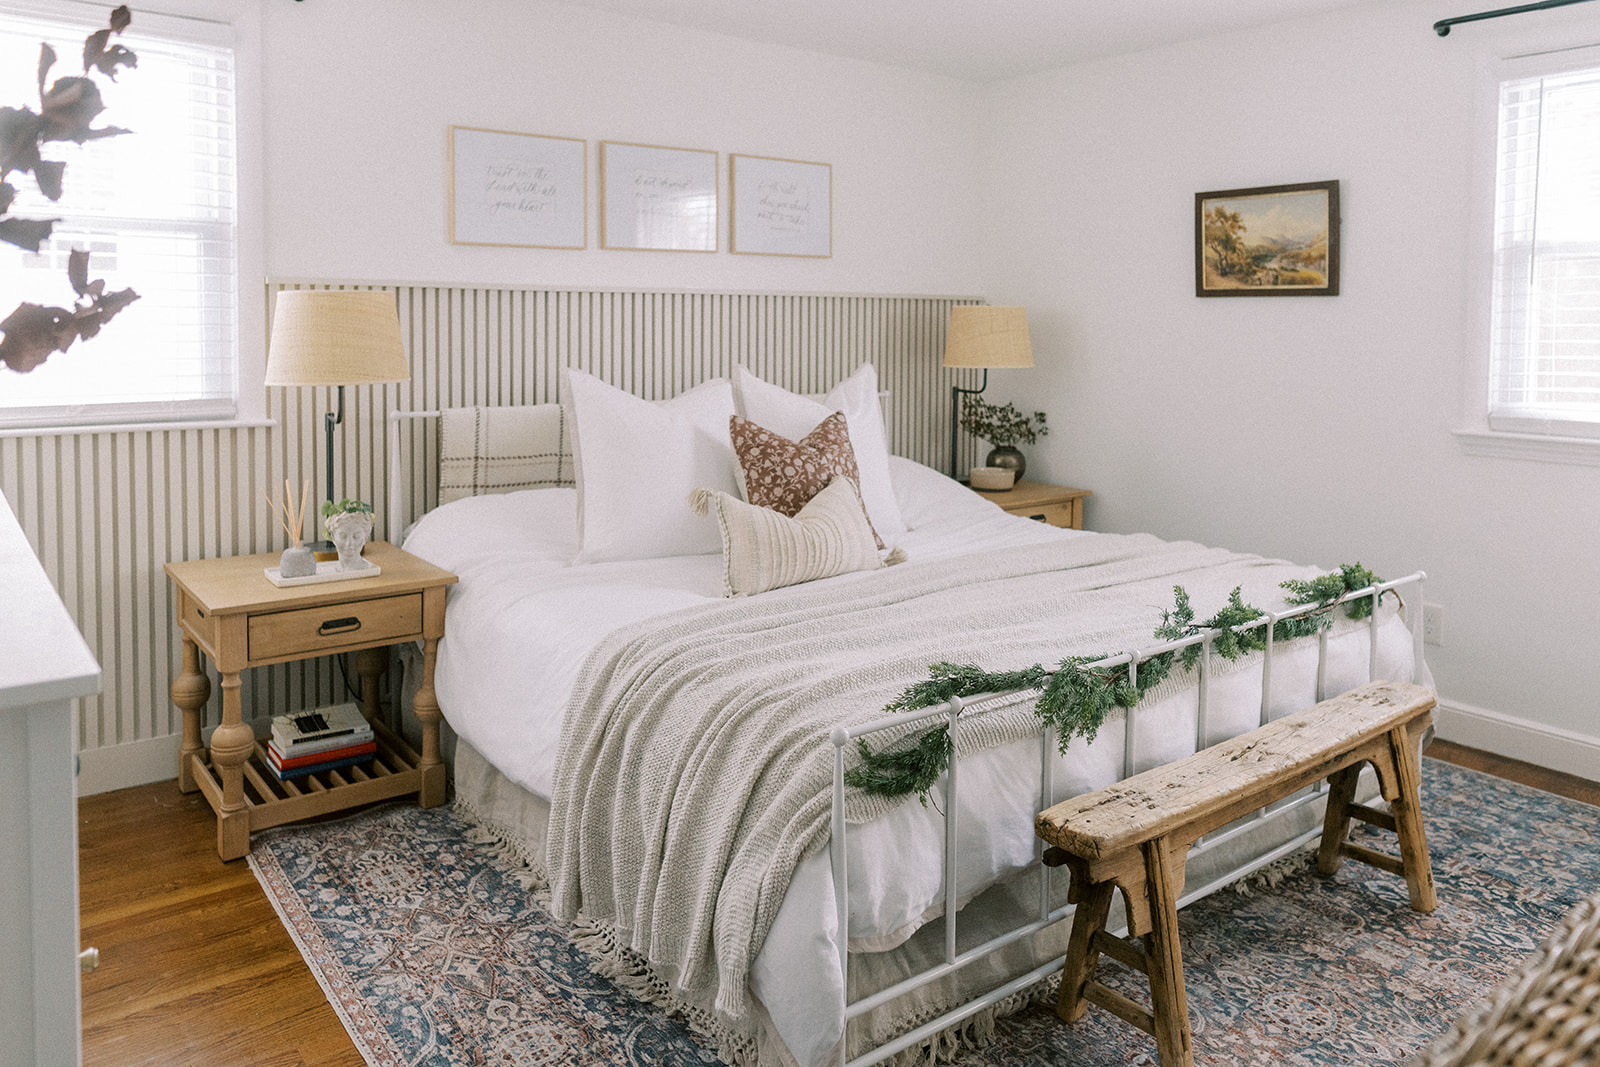
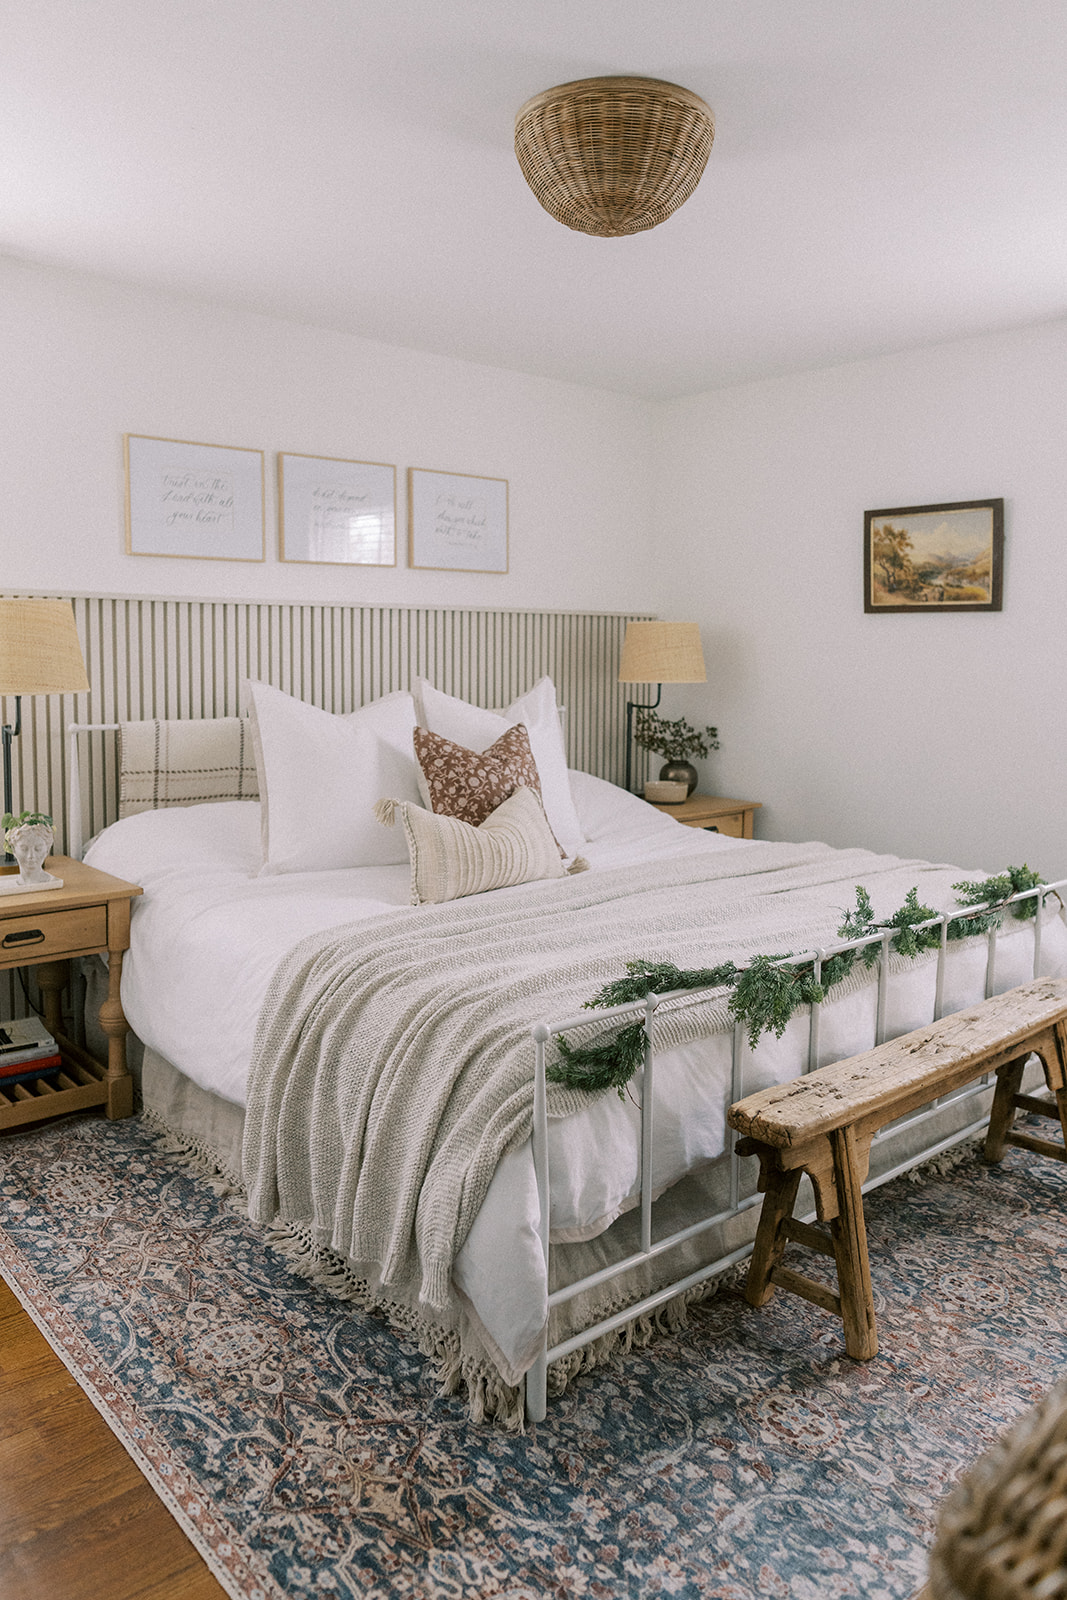
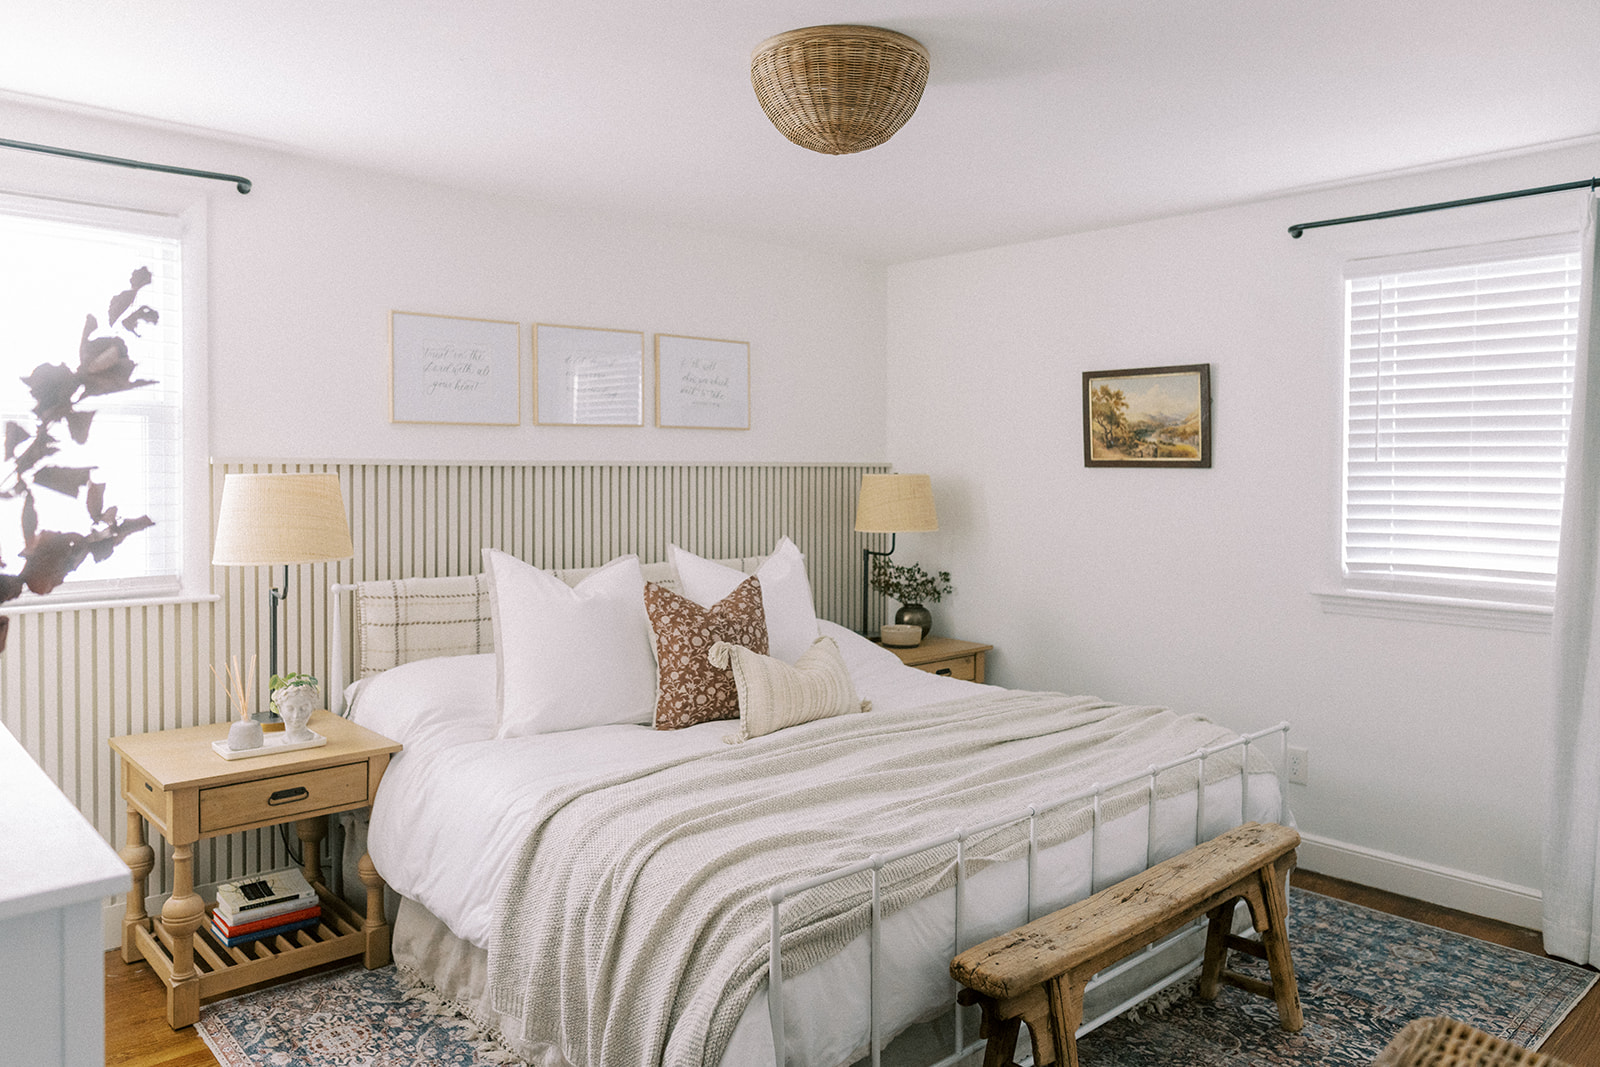
THE AFTER


THE BEFORE
And here’s where we started. A regular bedroom, not big, not small that was needing some lovely. The “before” pictures were taken at night before we began work on the slat wall.
FIGURING OUT THE LAYOUT
This is often the most challenging component of design because few of us have bedrooms with the perfect wall-to-window ratio. I feel like you’re always working around something. This one gave me a run for my money because I wanted symmetry. I wanted the room to feel grounded. When you entered this bedroom originally, the bed was on the wall to the right next to the closet. The only wall without windows or a closet was to the left when you entered and it was the wall that the door opened into with the dresser. Consequently, it wasn’t big enough for both the king size bed and two nightstands. This left me with two possible walls to work with and both walls had those windows off to the side. Each individual wall didn’t give me symmetry but the walls are mirror images of each other and it dawned on me that that was my symmetry.
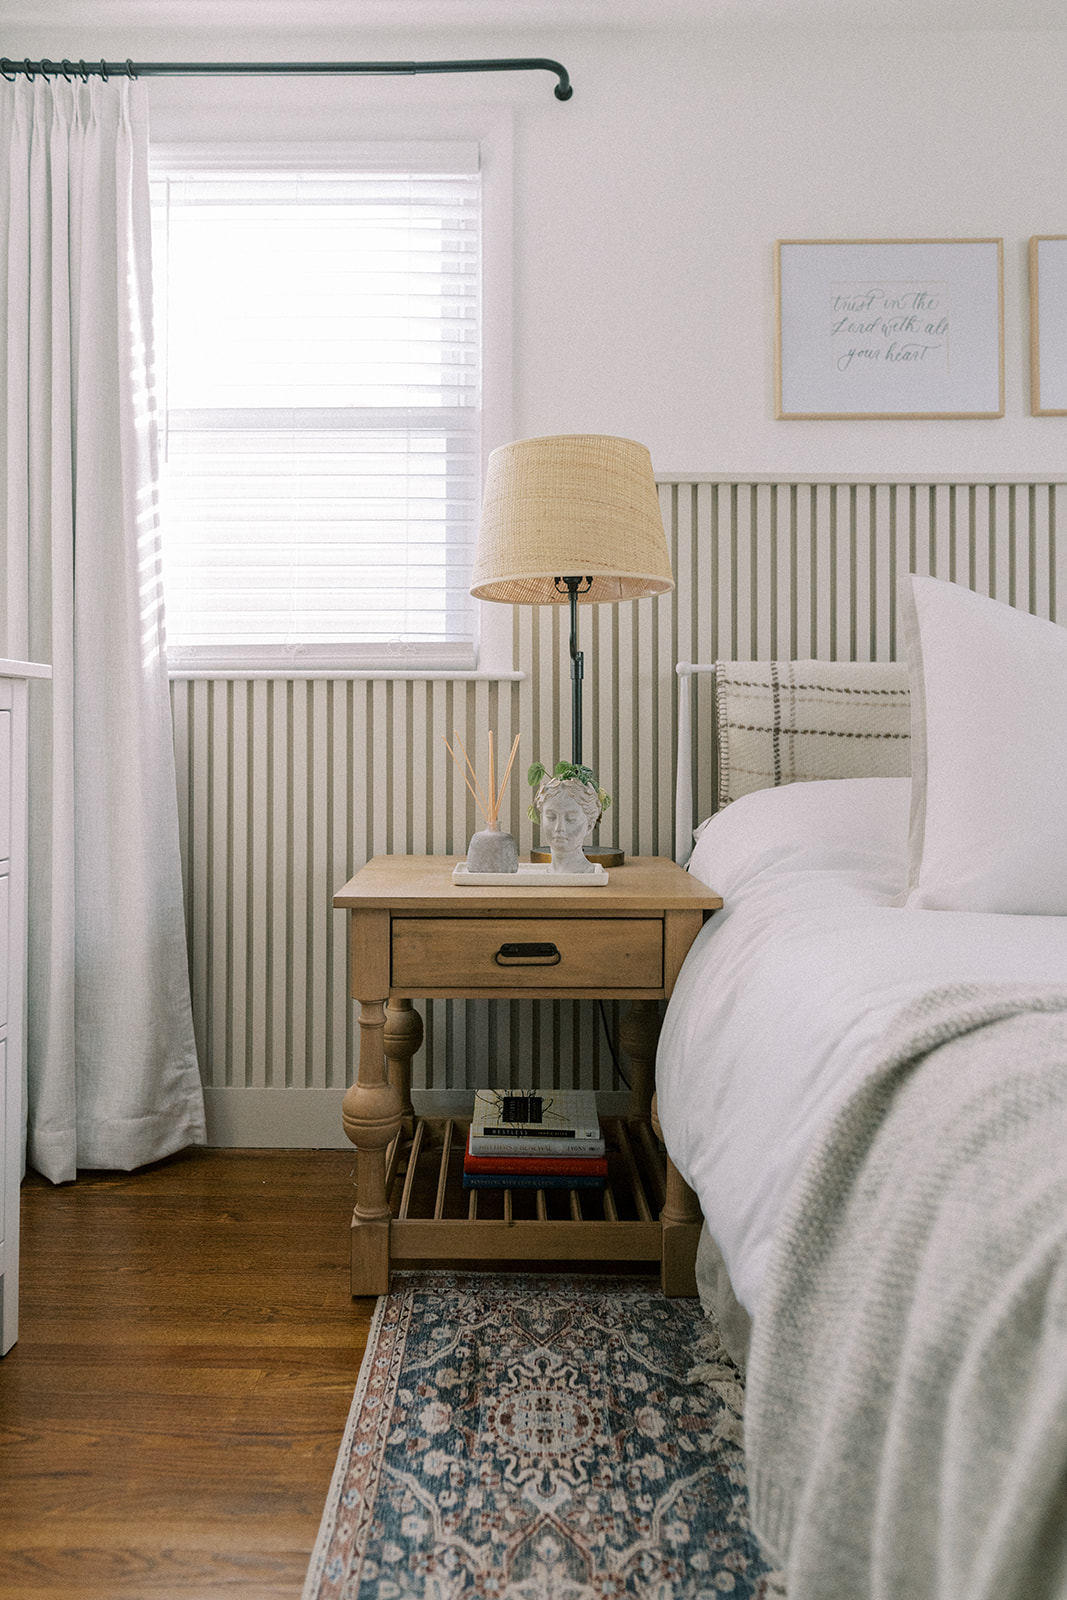
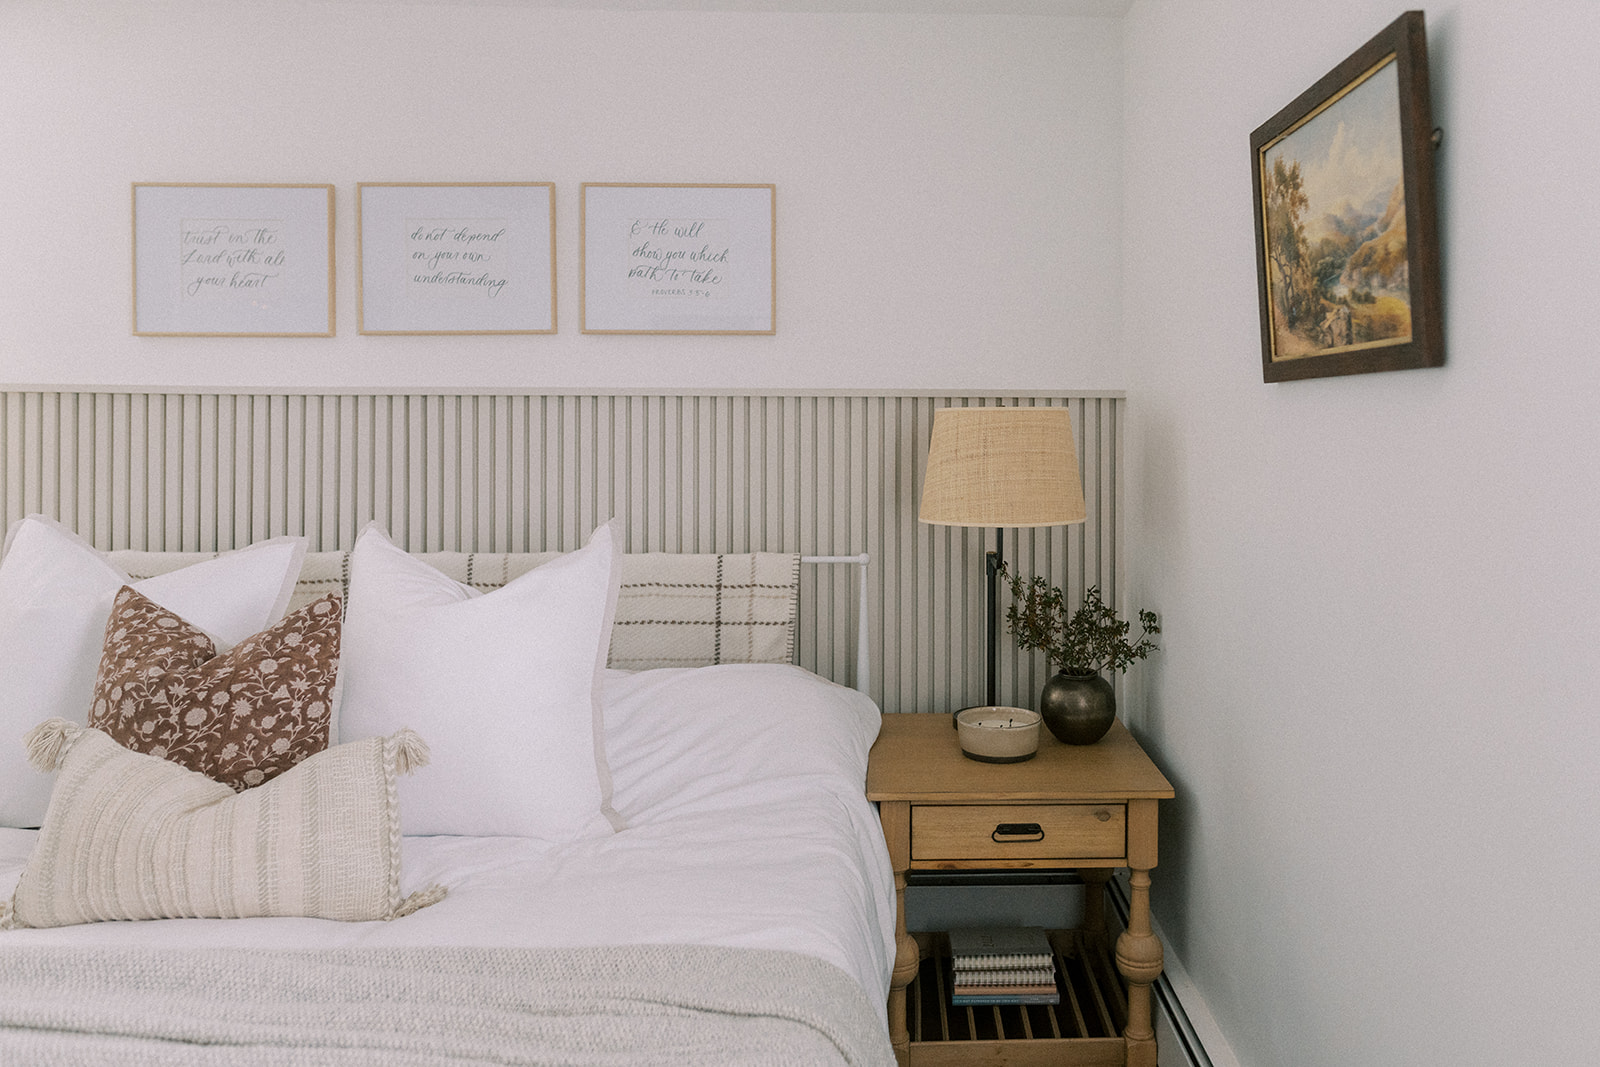
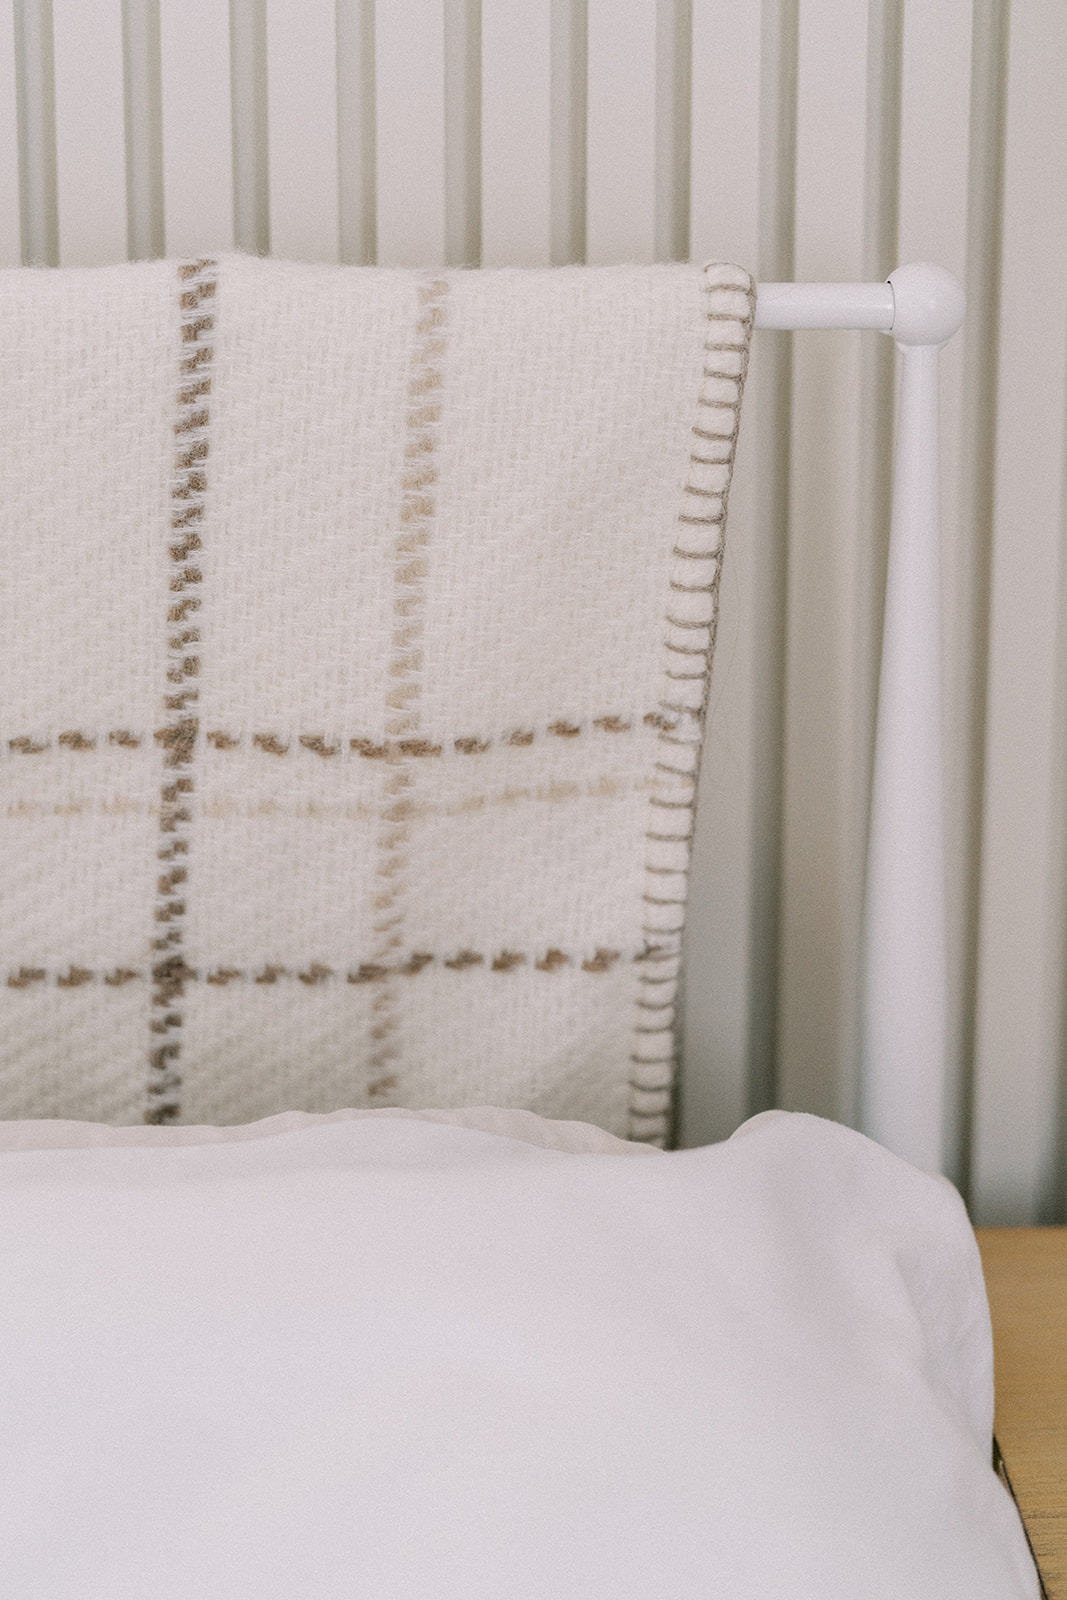
I liked the idea of walking into the room with the bed before you. It makes it the focal point and grounds the room. To do that effectively meant making that wall special, different than the rest in the room so the bed felt anchored. Hence the slat wall.
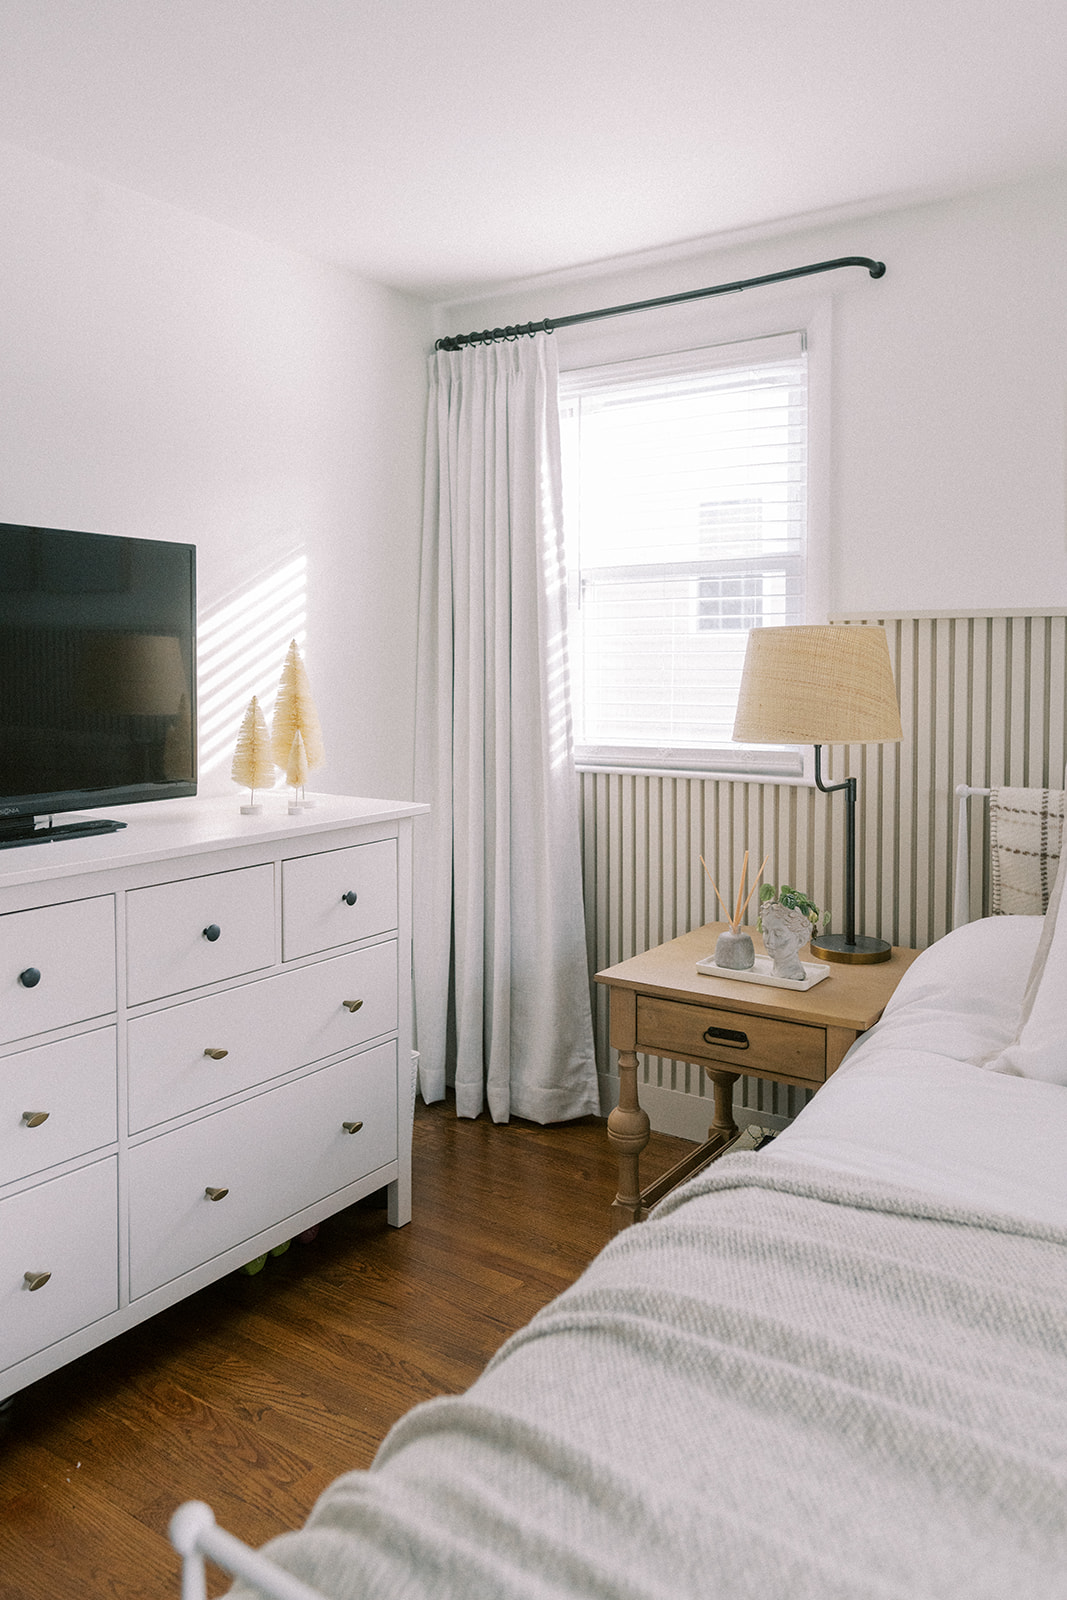
Pulling together the two walls you see when you enter created the symmetry I was after and we did this by uniting the two walls through the placement of the curtains (color beige/white) and new french return curtain rods. Now when you walk in, the windows have only one curtain panel on the side of the window closest to the wall which makes the two opposite windows look joined. This also freed up the need for a curtain panel right behind the side table which would have felt awkward. We extended the curtain rod further on the side closest the wall so that when open, the panel blocks less window. It also makes the windows feel wider.
WHITE WALLS
Prior to starting work on the slat wall, we painted the whole room white. Benjamin Moore Chantilly Lace (my favorite!) eggshell finish on the walls and flat on the ceiling. The baseboard and window trim was already white and I left it as is as my intention had been to paint the window trim and closet doors the same color as the accent wall. On the wall we were going to be installing the slats, we only painted the upper portion of the wall.
SLAT WALL
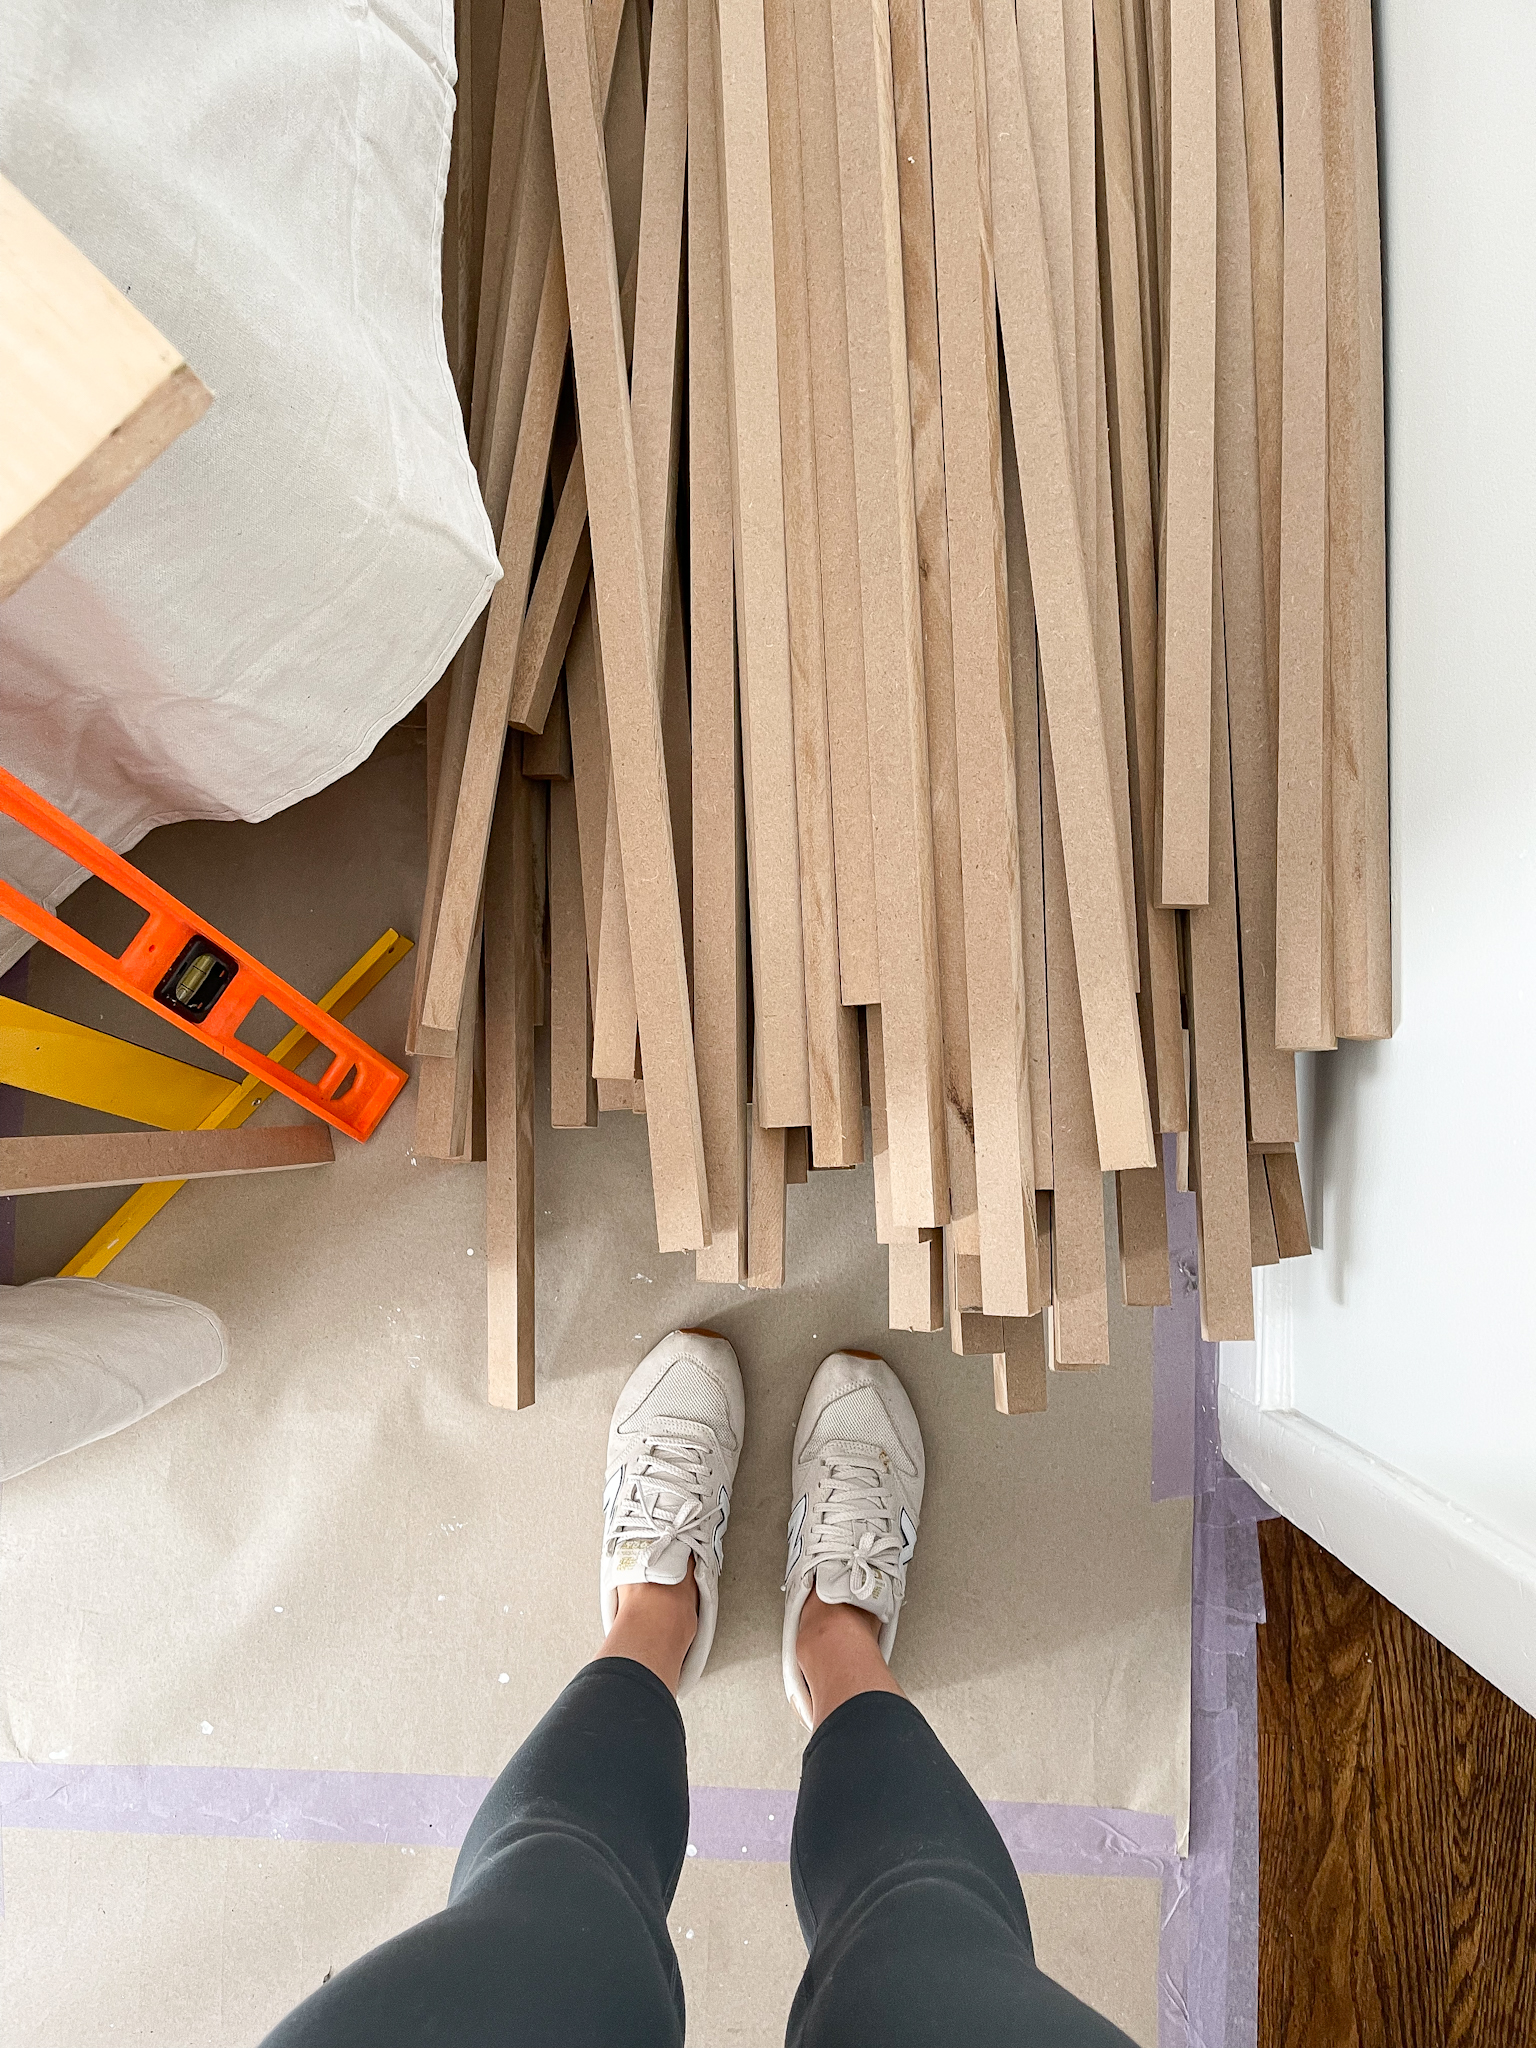
The most time consuming aspect of this bedroom design but also the most impactful was the slat wall. We started with a single 3/4″ x 4′ x 8′ mdf board that our friend Dave cut into 1″ x 48″ long pieces. He has a fancy saw which made the process much easier for Matt. I pre painted the slats on three sides before Matt nailed them (the 1″ side of the board) to the wall in order to make the painting easier. We spaced the slats 1/2″ apart so what you’re seeing across the wall is 1″ wide pieces of mdf spaced 1/2″ apart and repeated. Prior to installing the slats, Matt took off the decorative trim underneath the window and the baseboard. He ran a new board (a 1″ x 6″ x 8″ select board from Home Depot) across the wall to serve as baseboard. It is a better quality board than their common board, flat on the top and easier to run the slats into. We used a combo of wood glue on the back of the slats and finishing nails.
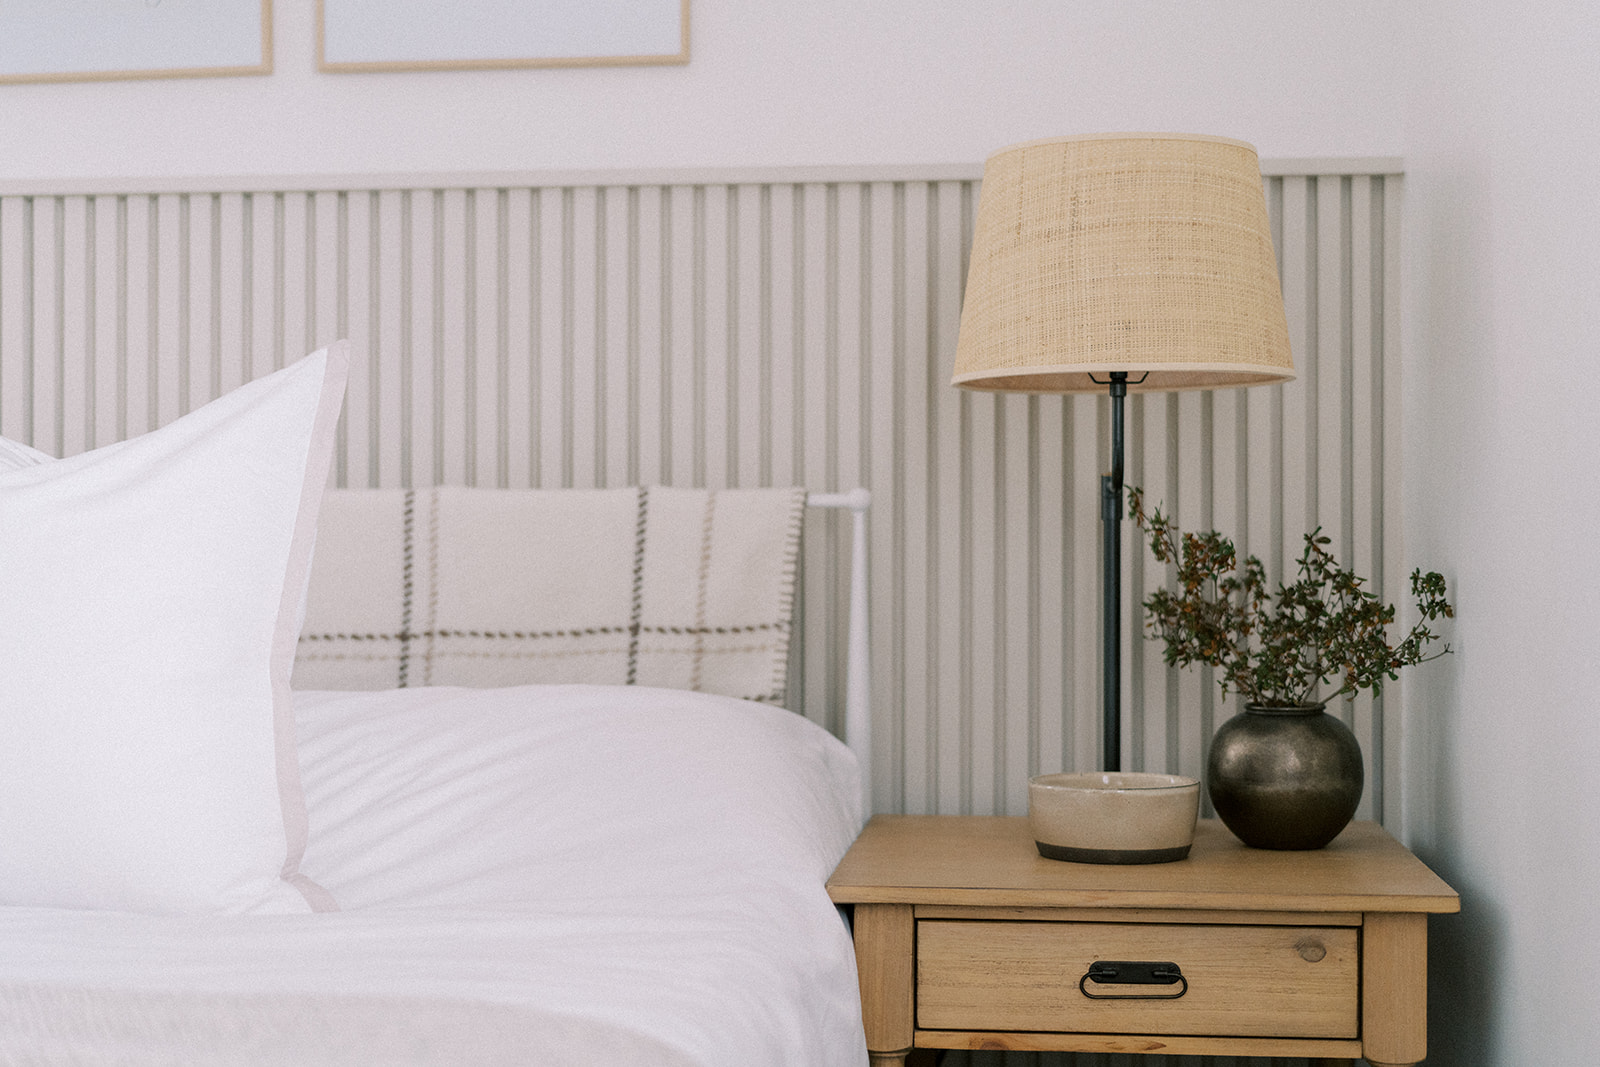
The slats are painted BM Alaskan Skies in satin. My new favorite color. I used a regular paint brush to paint the slats and then once they were installed (and nail holes chalked and sanded) used the same brush to paint a final coat on the slats and the wall between the slats. You can save yourself time if you pre paint the wall behind the slats the color of the slats but our wall was already pretty close in color so I knew it wouldn’t take but one finishing coat to cover.
BEDDING
To save money we used all the furnishings we had at our disposal, including the rug I had last year in our living room. I then worked with Serena & Lily favorites to update the space. I had wanted to upholster a headboard for this bedroom but didn’t have the time or budget. So I got the look by simply draping the beautiful Stratton Alpaca Throw in ivory / natural over the railing. This blanket on sale is far more reasonable than a new bed and acts as a dual purpose–grab it when you just want to cozy up on the bed and watch a movie. It has a subtle, versatile pattern that brings detail to the bed without overpowering it.
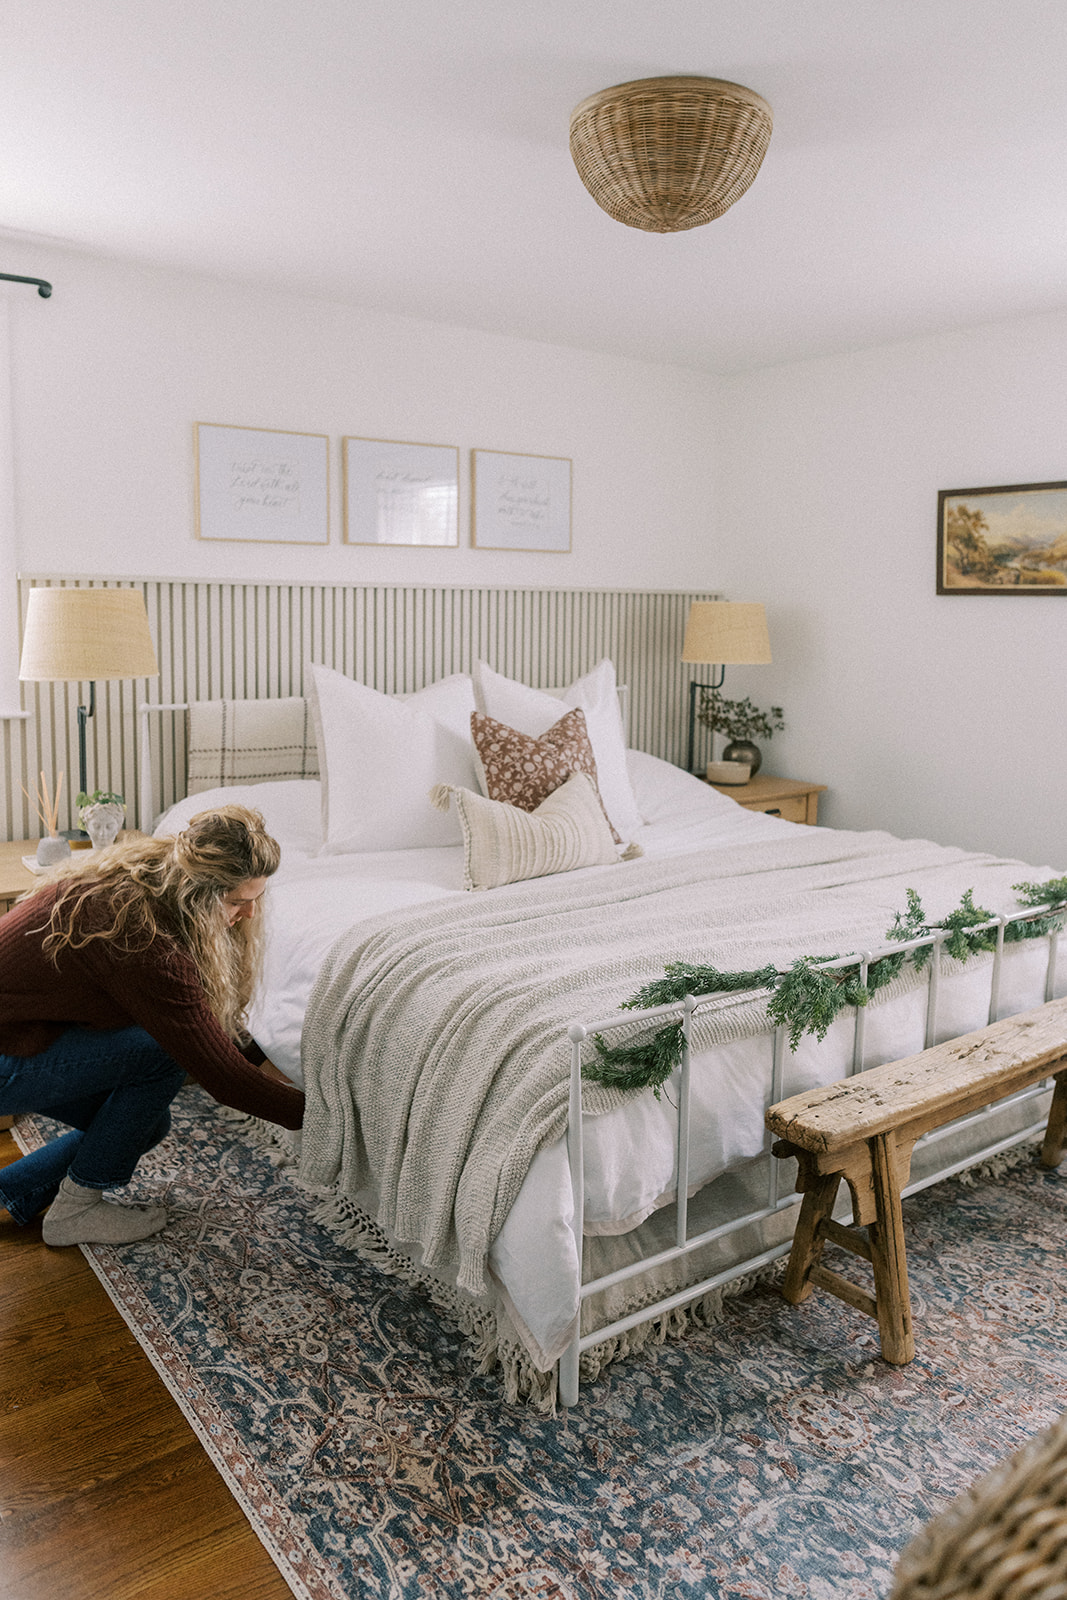
Investing in quality bedding can make a big difference in pulling a space together too. I love love the Border Frame Duvet Cover in color Sand and coordinating Euro Shams. Rather than use the coordinating bedskirt, I went with the Macrame Bedskirt because it matches the top blanket beautifully and the accent wall. Pull your colors through your room to tie the design together. The same linen color comes through in the Ridge Stripe Pillow in sand which is on clearance. Get it while you still can as it’s a beautiful find for a bedroom update with Serena & Lily.
LIGHTING
Another huge area of improvement in a space is lighting. We replaced the “boob” light with this gorgeous Santa Barbara flush mount in the small size. The table lamps are the lovely, vintage-inspired Montpellier Table lamps with the woven shade to bring in warmth to the white room. These also tie in the black french return curtain rods with their delicate metal frame and help keep a more modern aesthetic in the room.
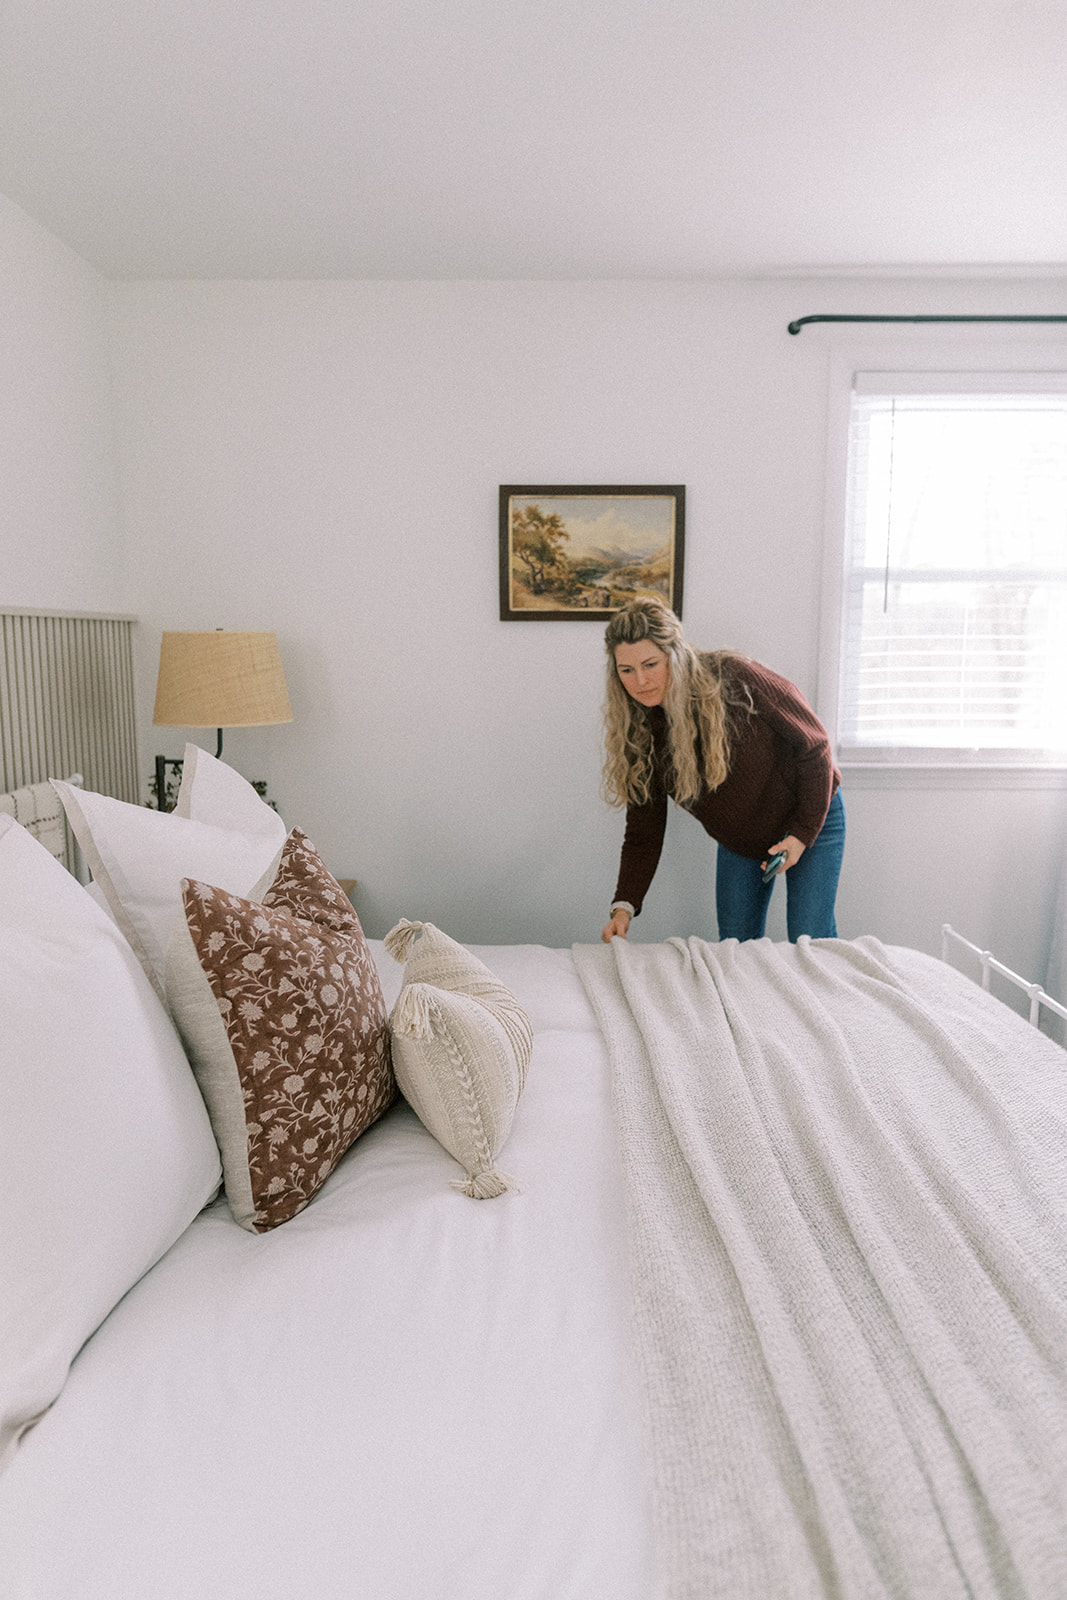
Let’s take one more side by side look at the BEFORE and AFTER because it’s just too good! I hope you’ve enjoyed this bedroom update with Serena & Lily. They’re having a big sale right now too! This post is sponsored by Serena & Lily, a brand I love. The lovely after pictures were taken by the talented Ruth Eileen Photography.

| 1. Balboa Flush Mount | 2. Border Duvet Set | 3. Hand-Knotted Rug | 4. Macrame Bed Skirt | 5. Montpellier Table Lamp | 6. Border Euro Sham | 7. Pillow | 8. Bedside Table | 9. Dresser | 10. Throw |

 comment share
Leave a Reply
Want to join the discussion?Feel free to contribute!