
HOME TOUR
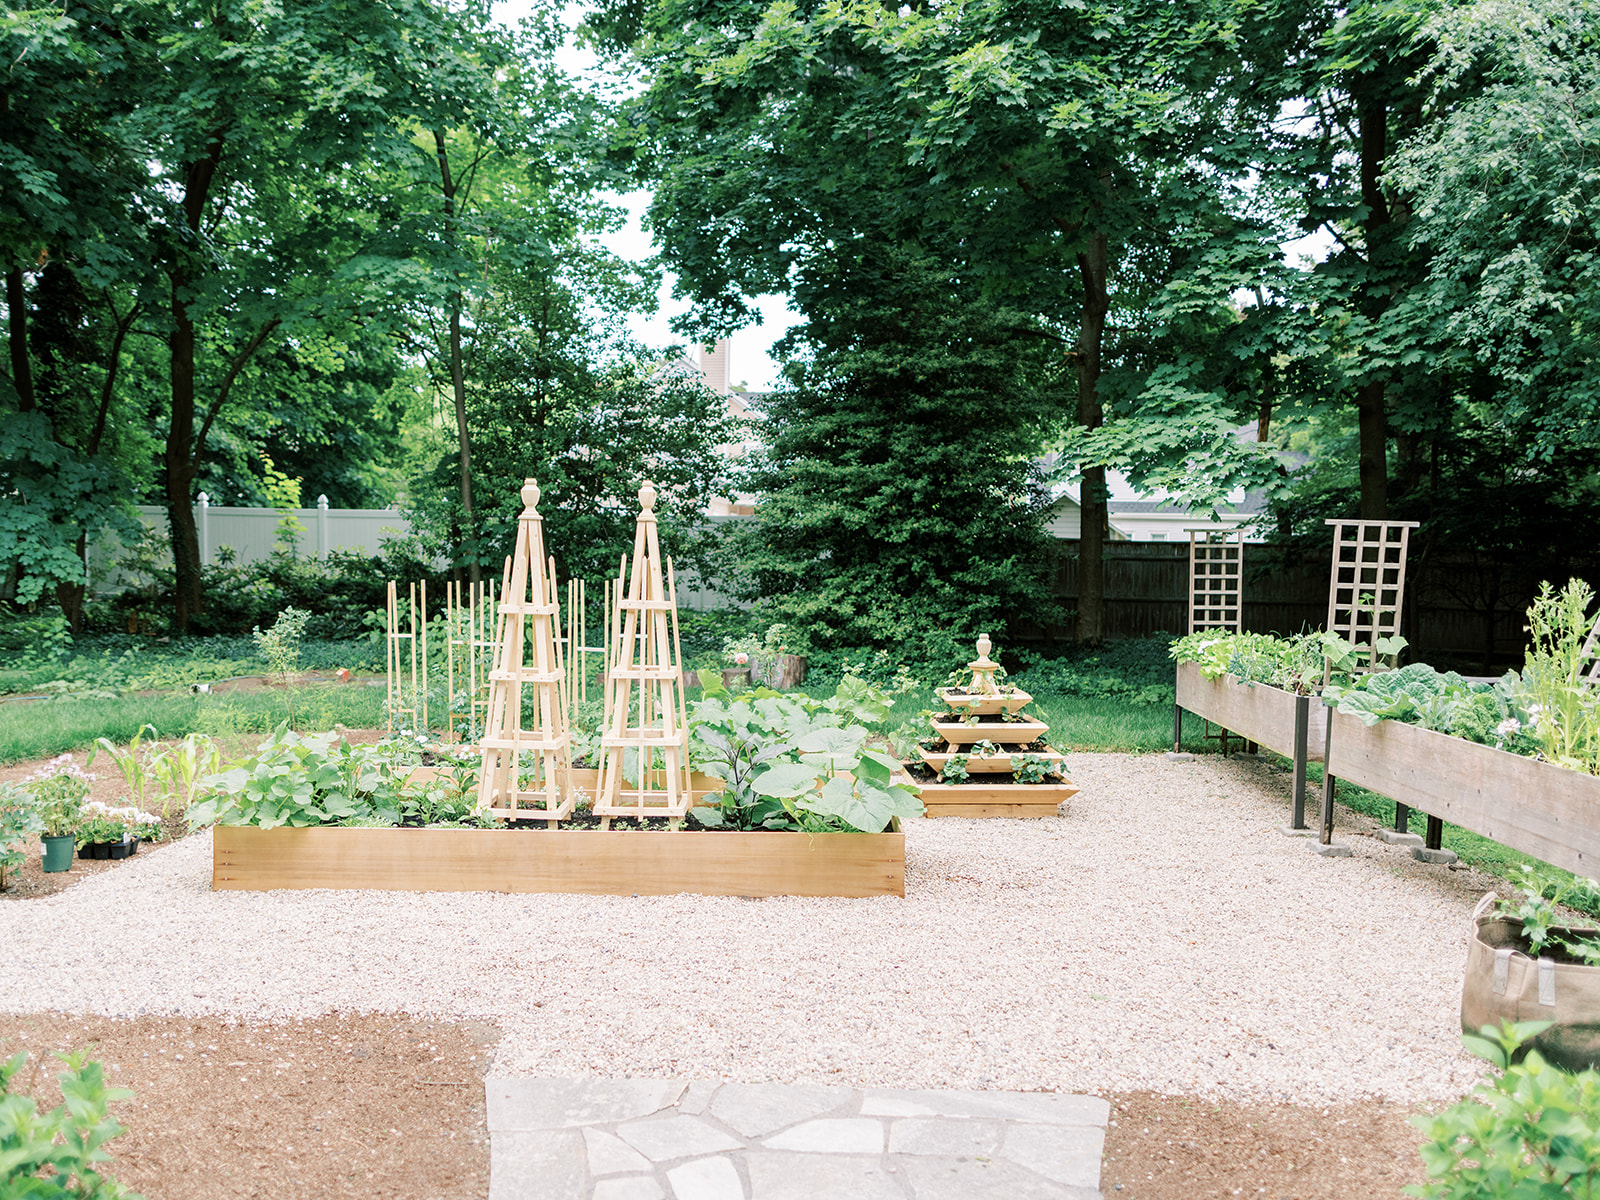
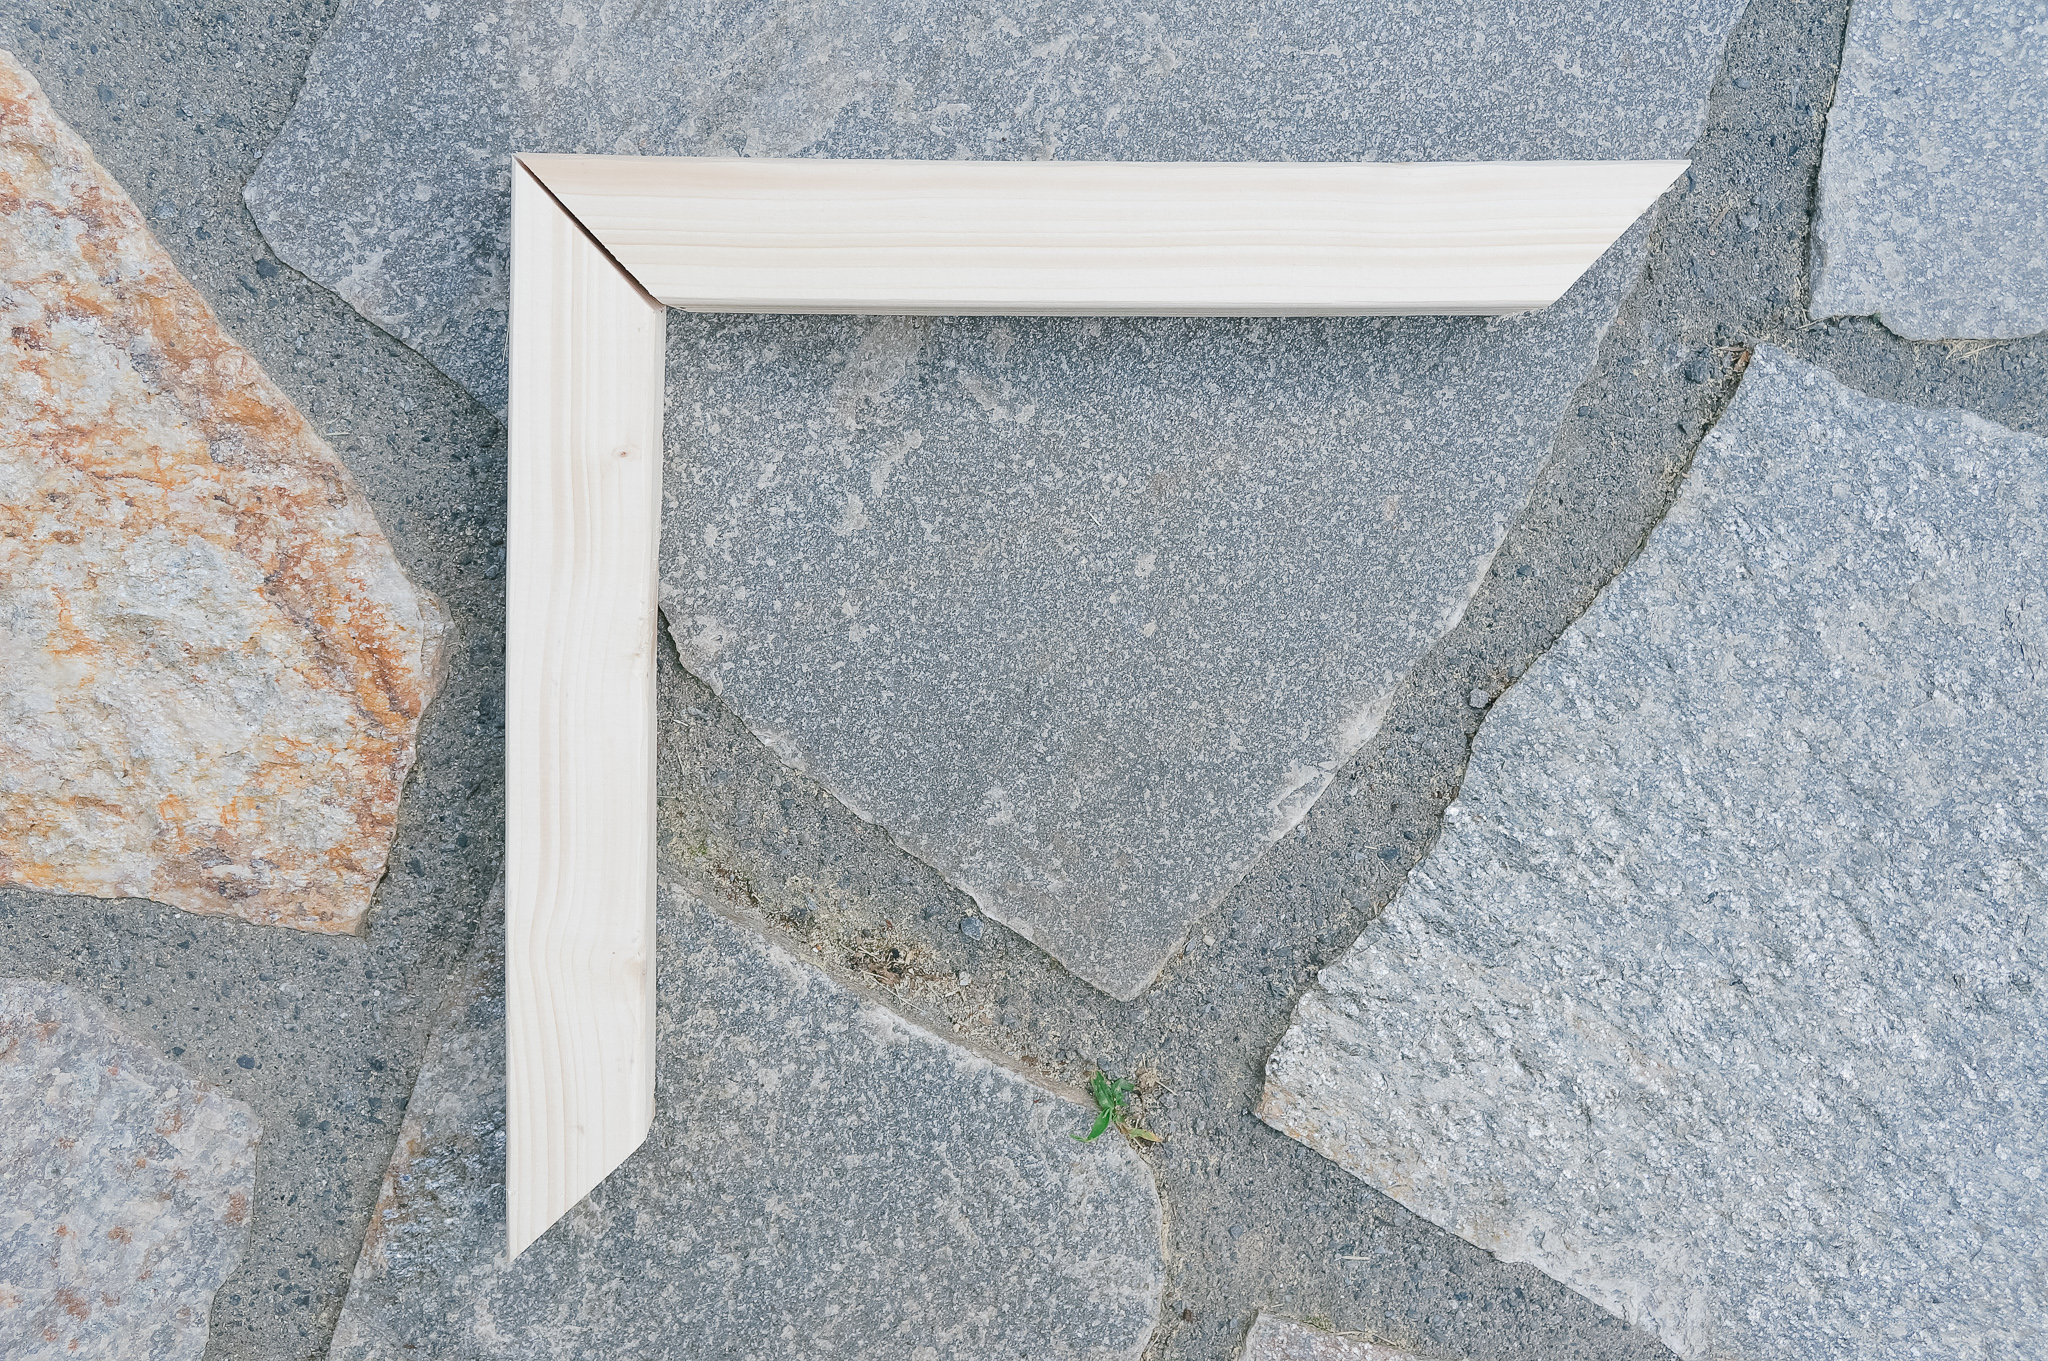
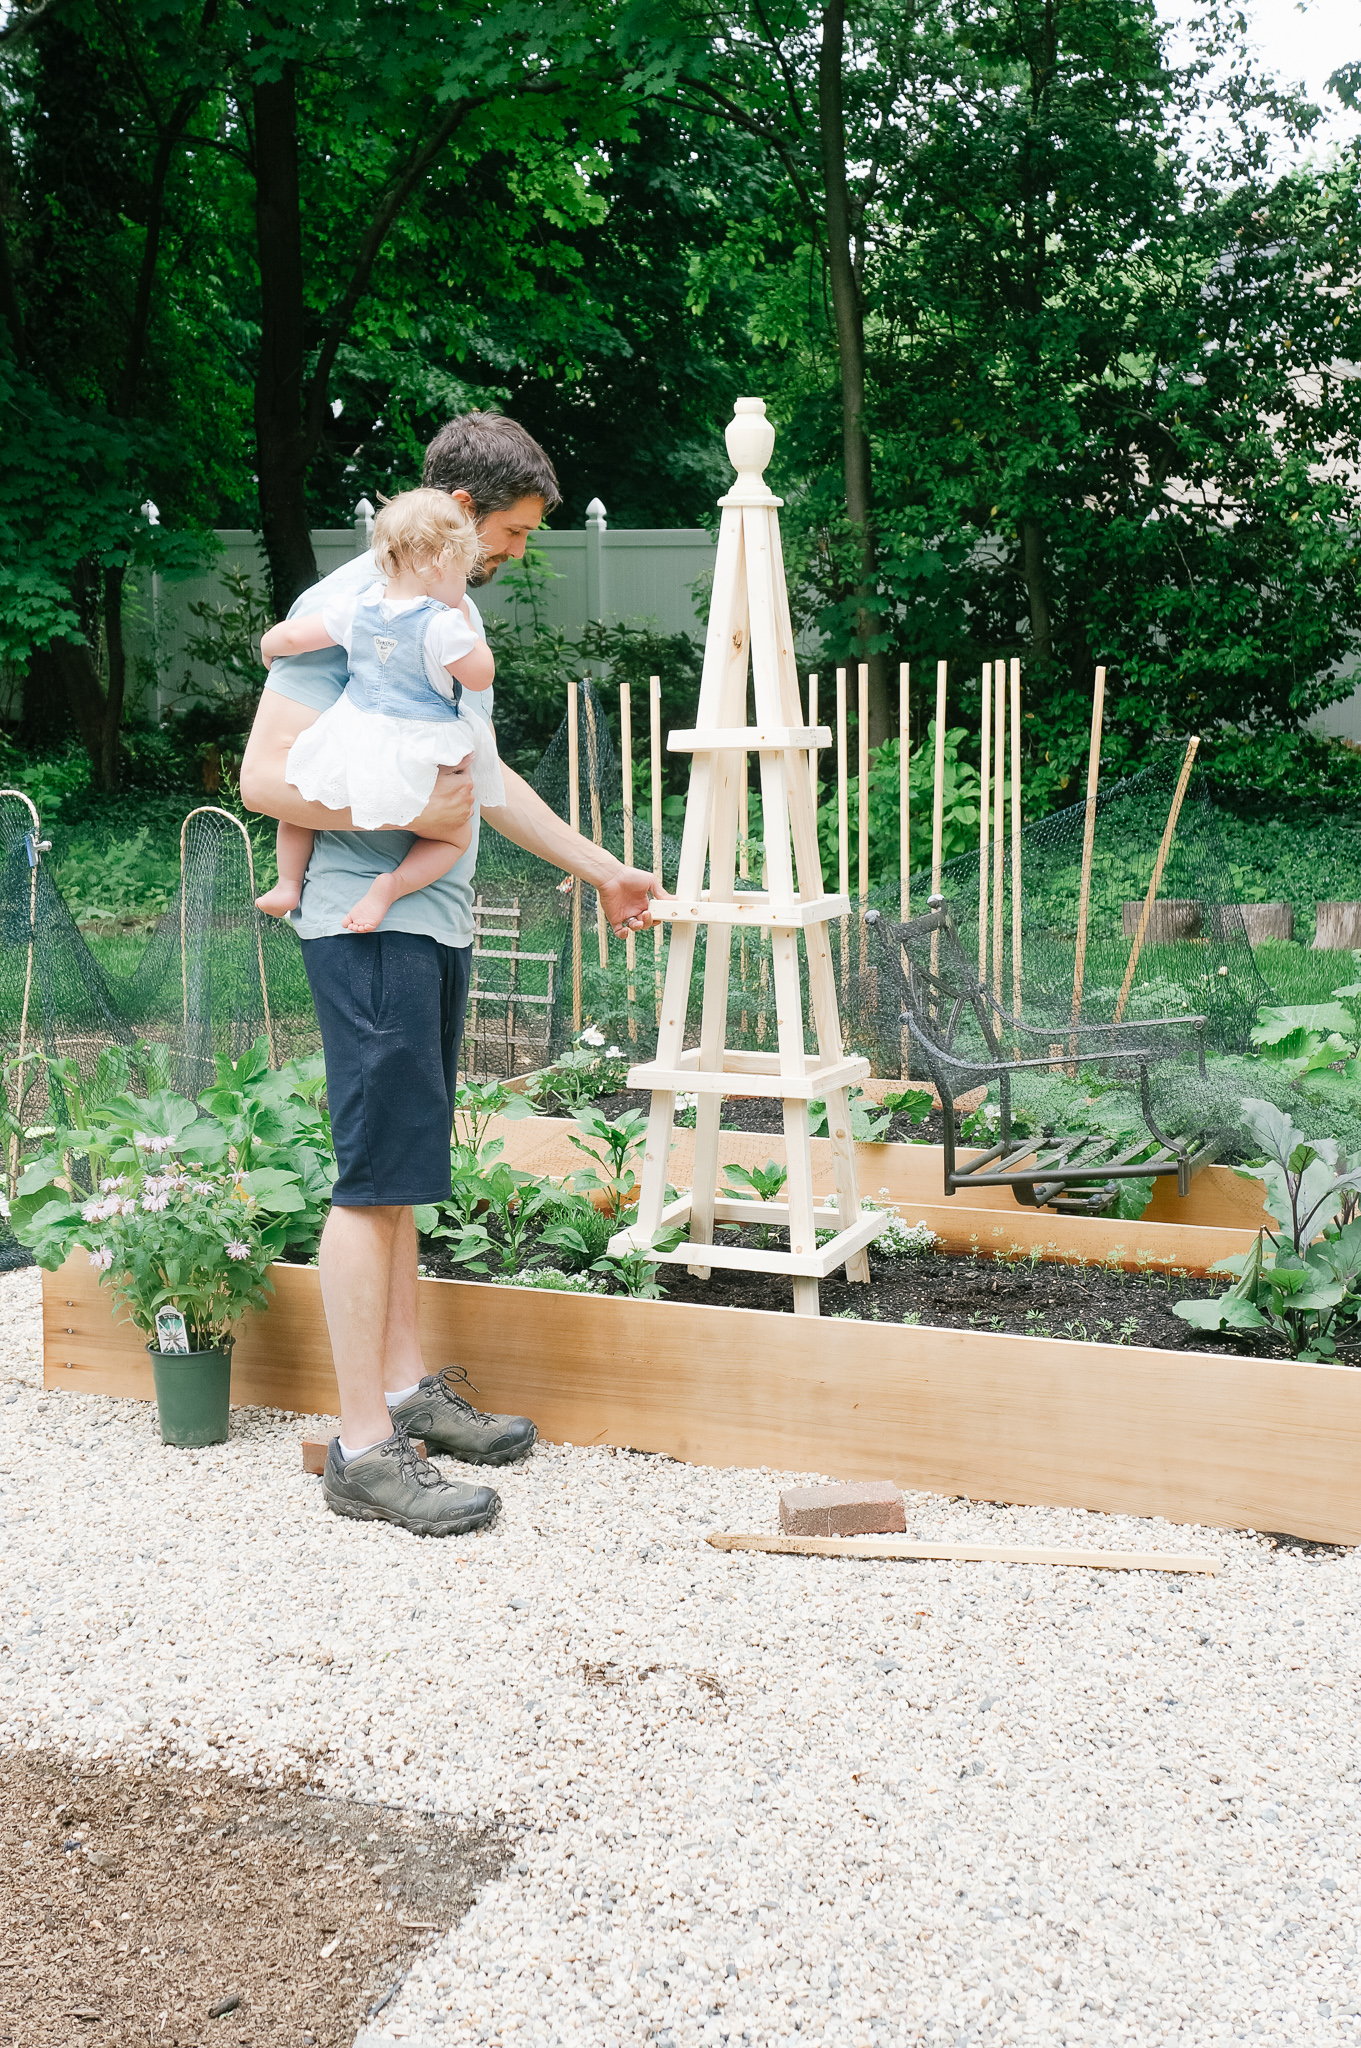
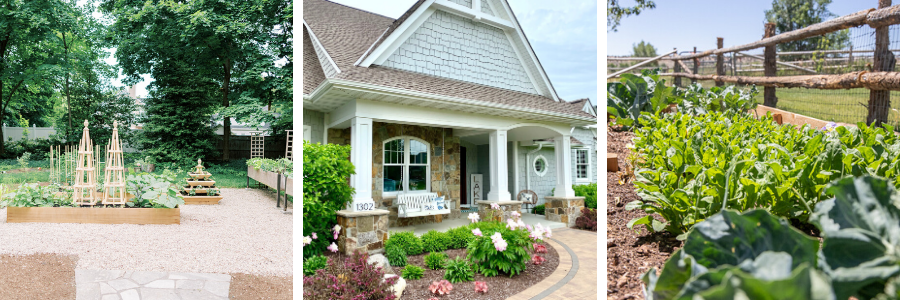
As I excitedly wait for the installation of my new office (aka she shed, mom pad, hideout, etc) I’m thrilled to be able to share where we’re at with our garden design and DIY trellis plans. You can see some highlights of the backyard landscaping here. Hubby has been hard at work building some beautiful raised cedar beds, wood tomato trellises, those stunning bean triangle trellises and the most glorious strawberry bed you ever did seen. I love the natural wood elements in the garden, especially because the garden fence and arbor will be white, and the garden shed might be white, still pondering that one.
I think they’ll weather well and create a softness to the garden. They balance out your eye as it surveys all that’s growing in there. It’s like having blue pillows on a couch and tying it together with a blue throw on a neighboring chair, it creates a continuity that is equally important outside as in.
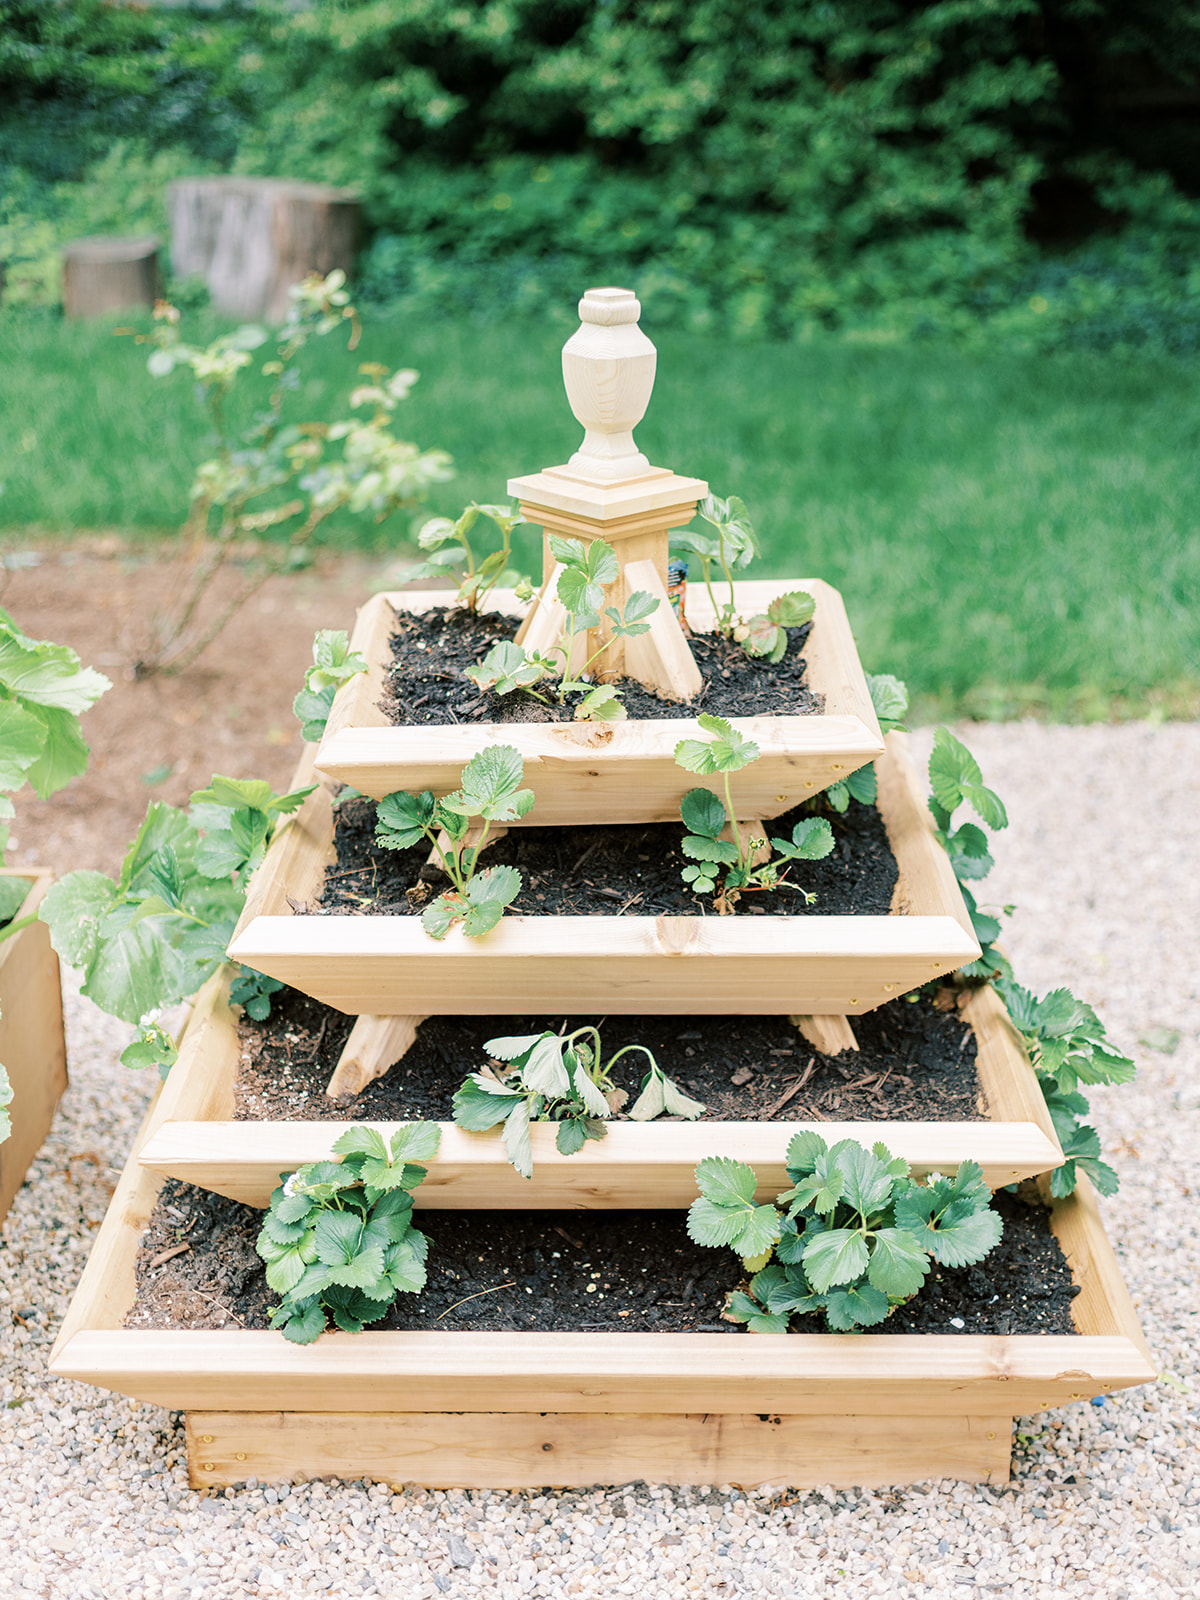
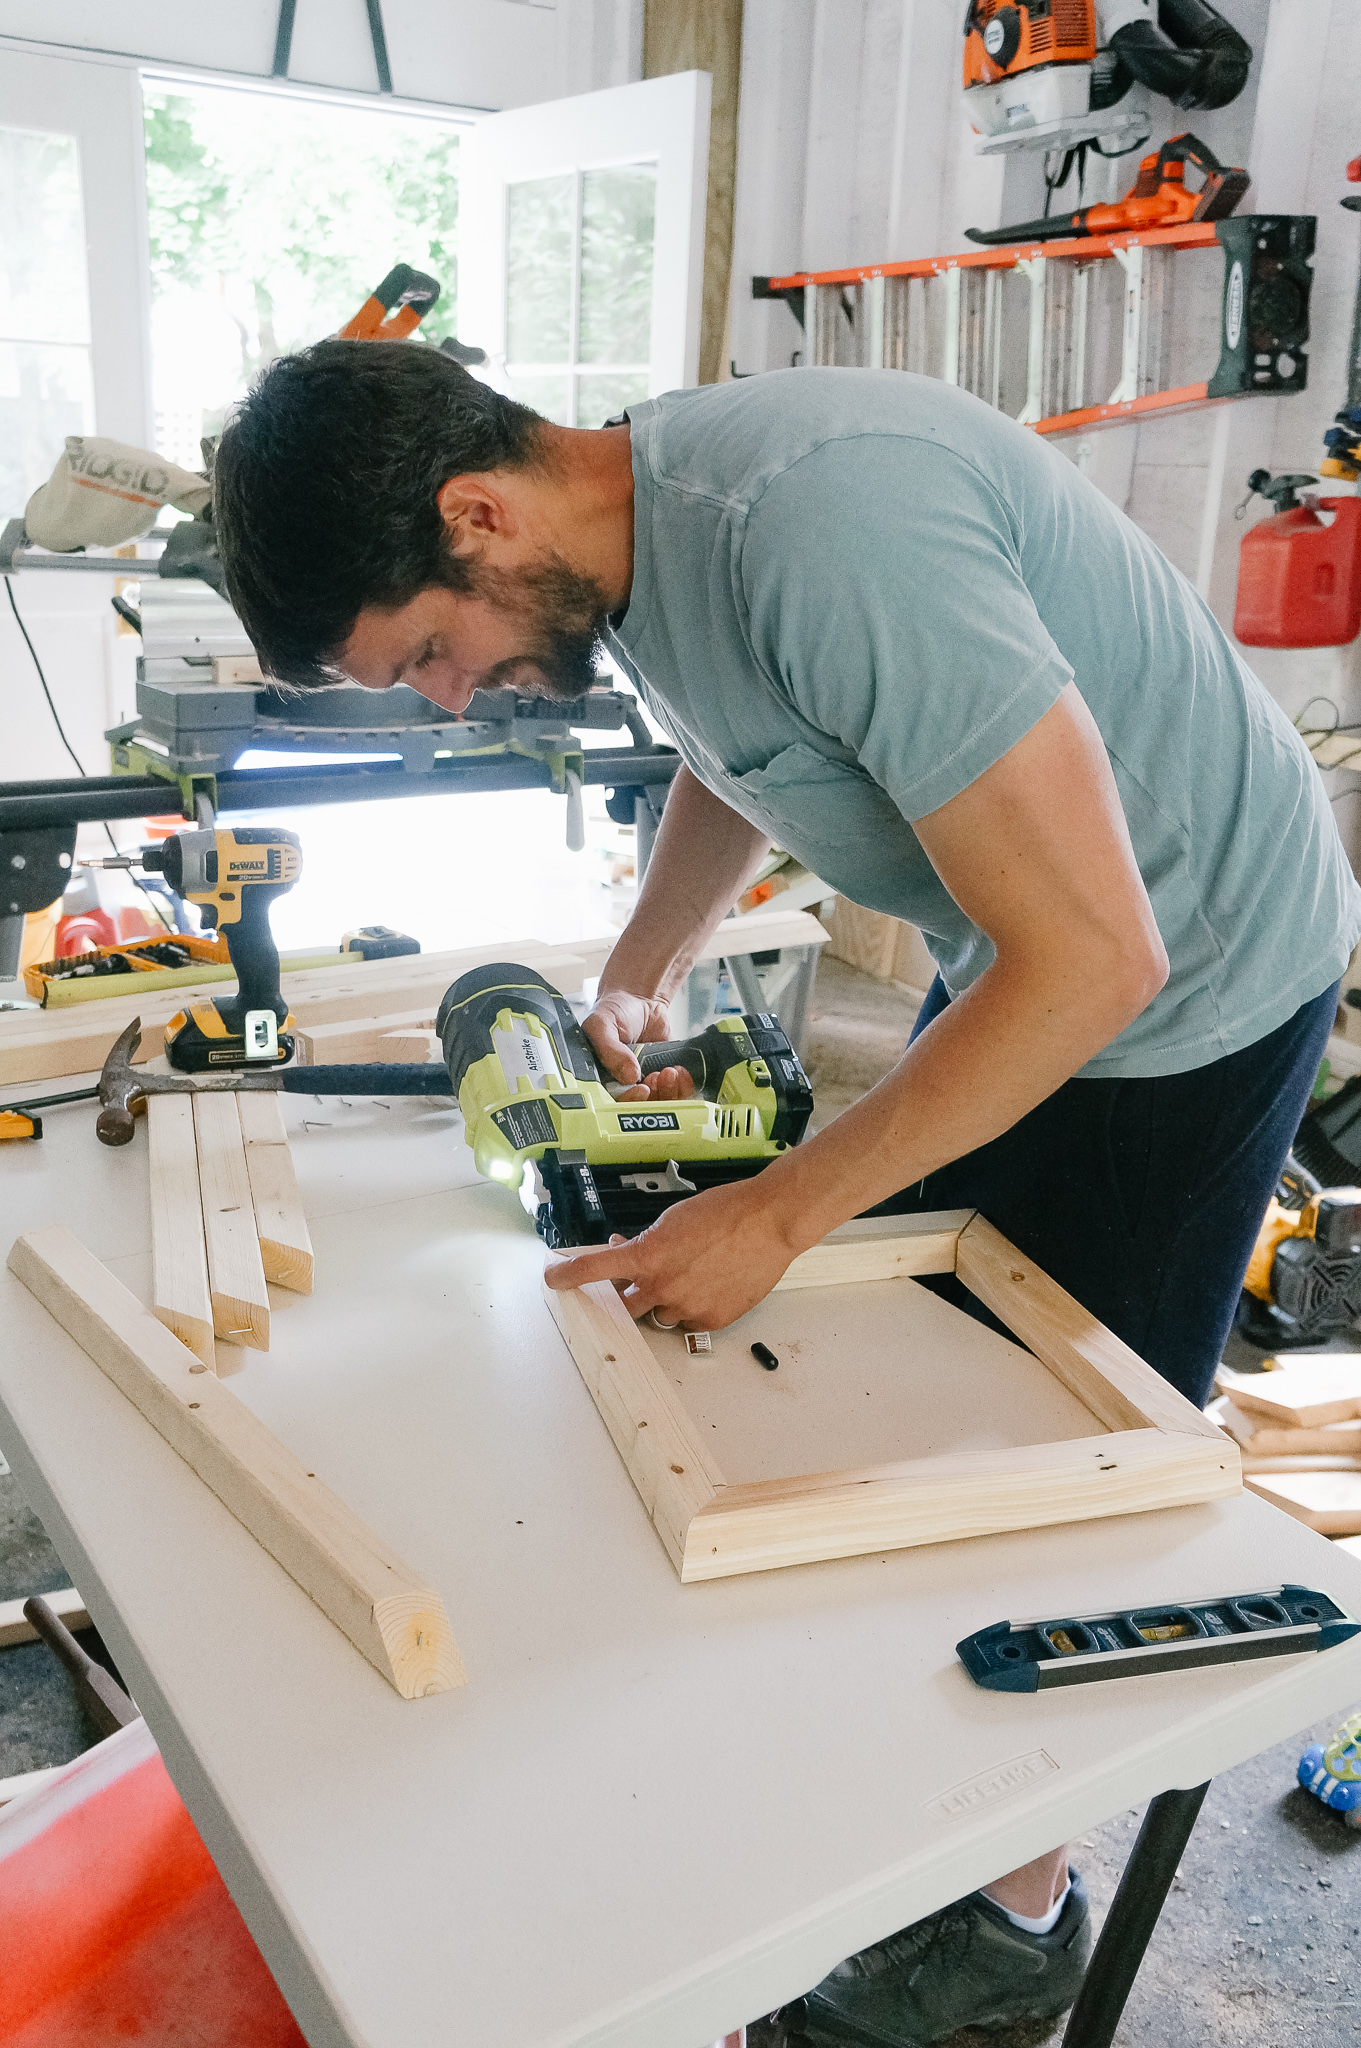
The strawberry bed is lovely. We bought these plans on Etsy and they were well written and easy to follow, we highly recommend them. I only marginally helped by holding a few boards together so really this is hubby’s work.


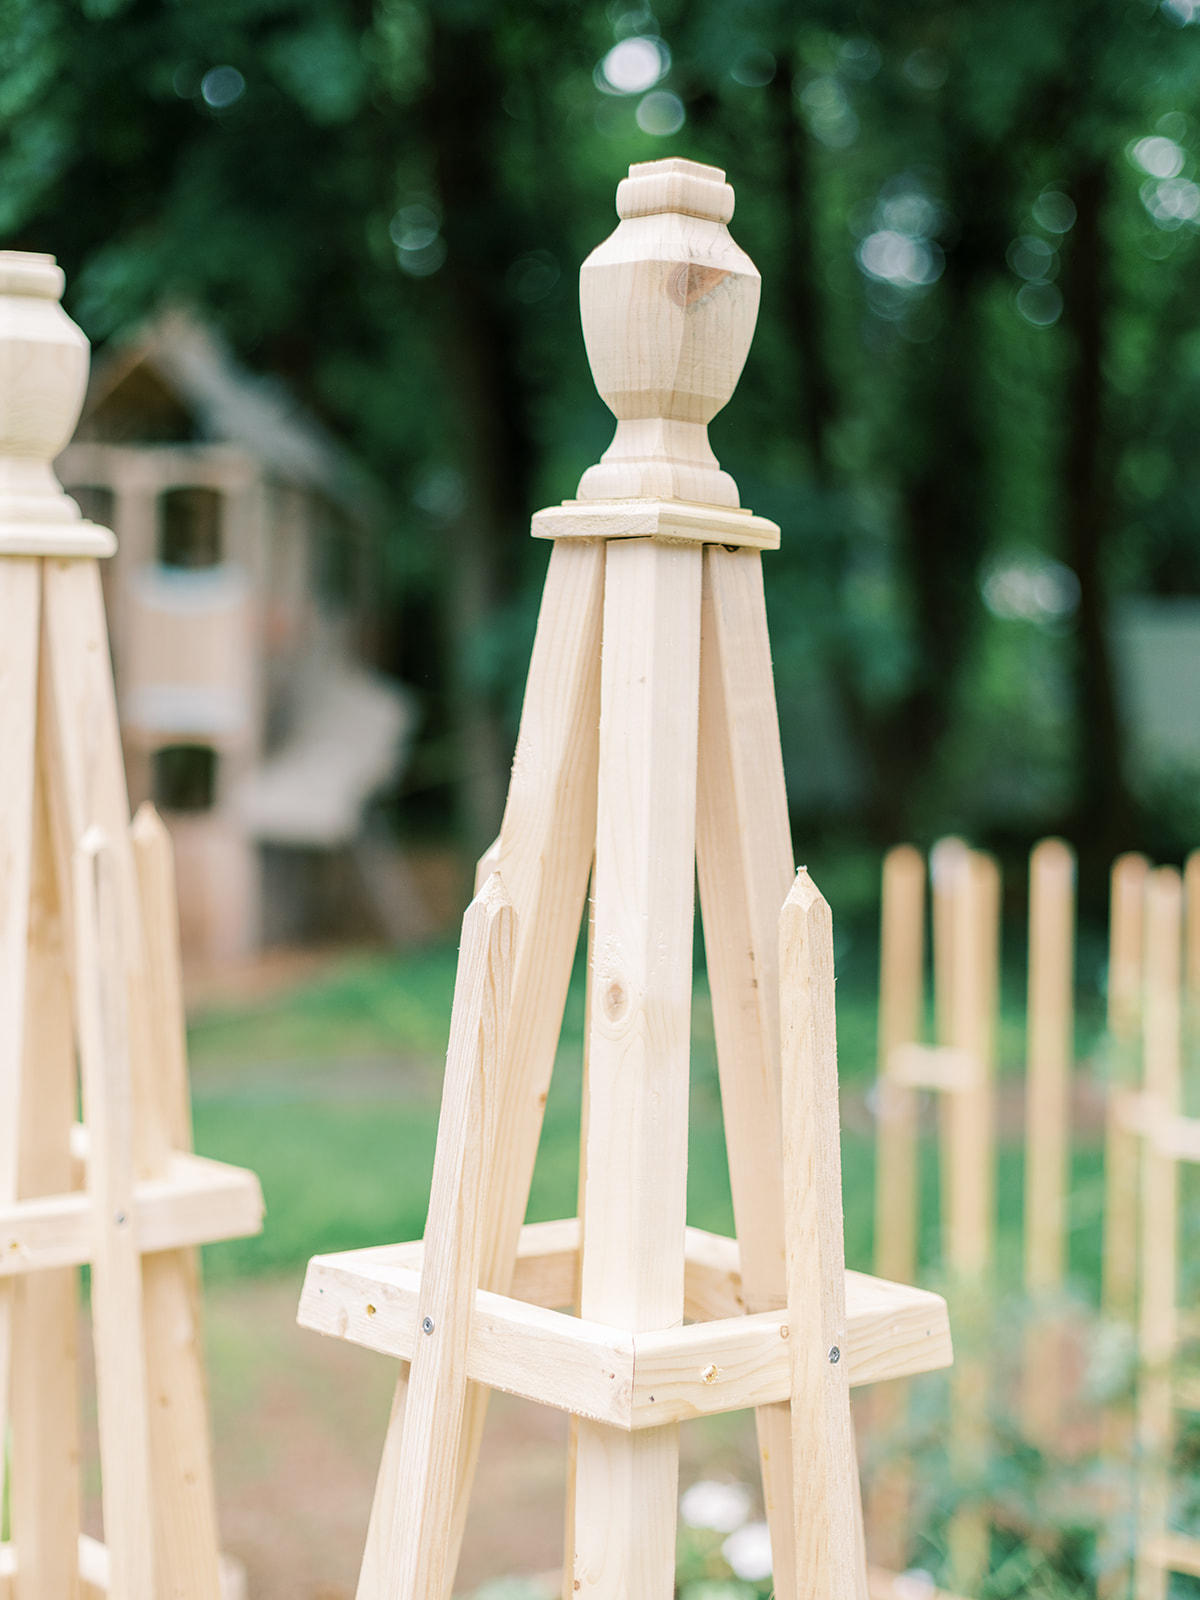
I take credit for finding them though. One thing we added was a decorative wood pyramid post cap (which would traditionally be used in decking) to the 4 x 4 post sticking up from the center of the pyramid and on which you add the finial. This adds a decorative element that is really pretty. Note that we did use a different finial than the plans call for because we were tying in the finials on the triangle trellis.
Planting strawberries in a stacked fashion allows you to cram more in a tiny footprint because they can drape down. It makes harvesting strawberries easier too.
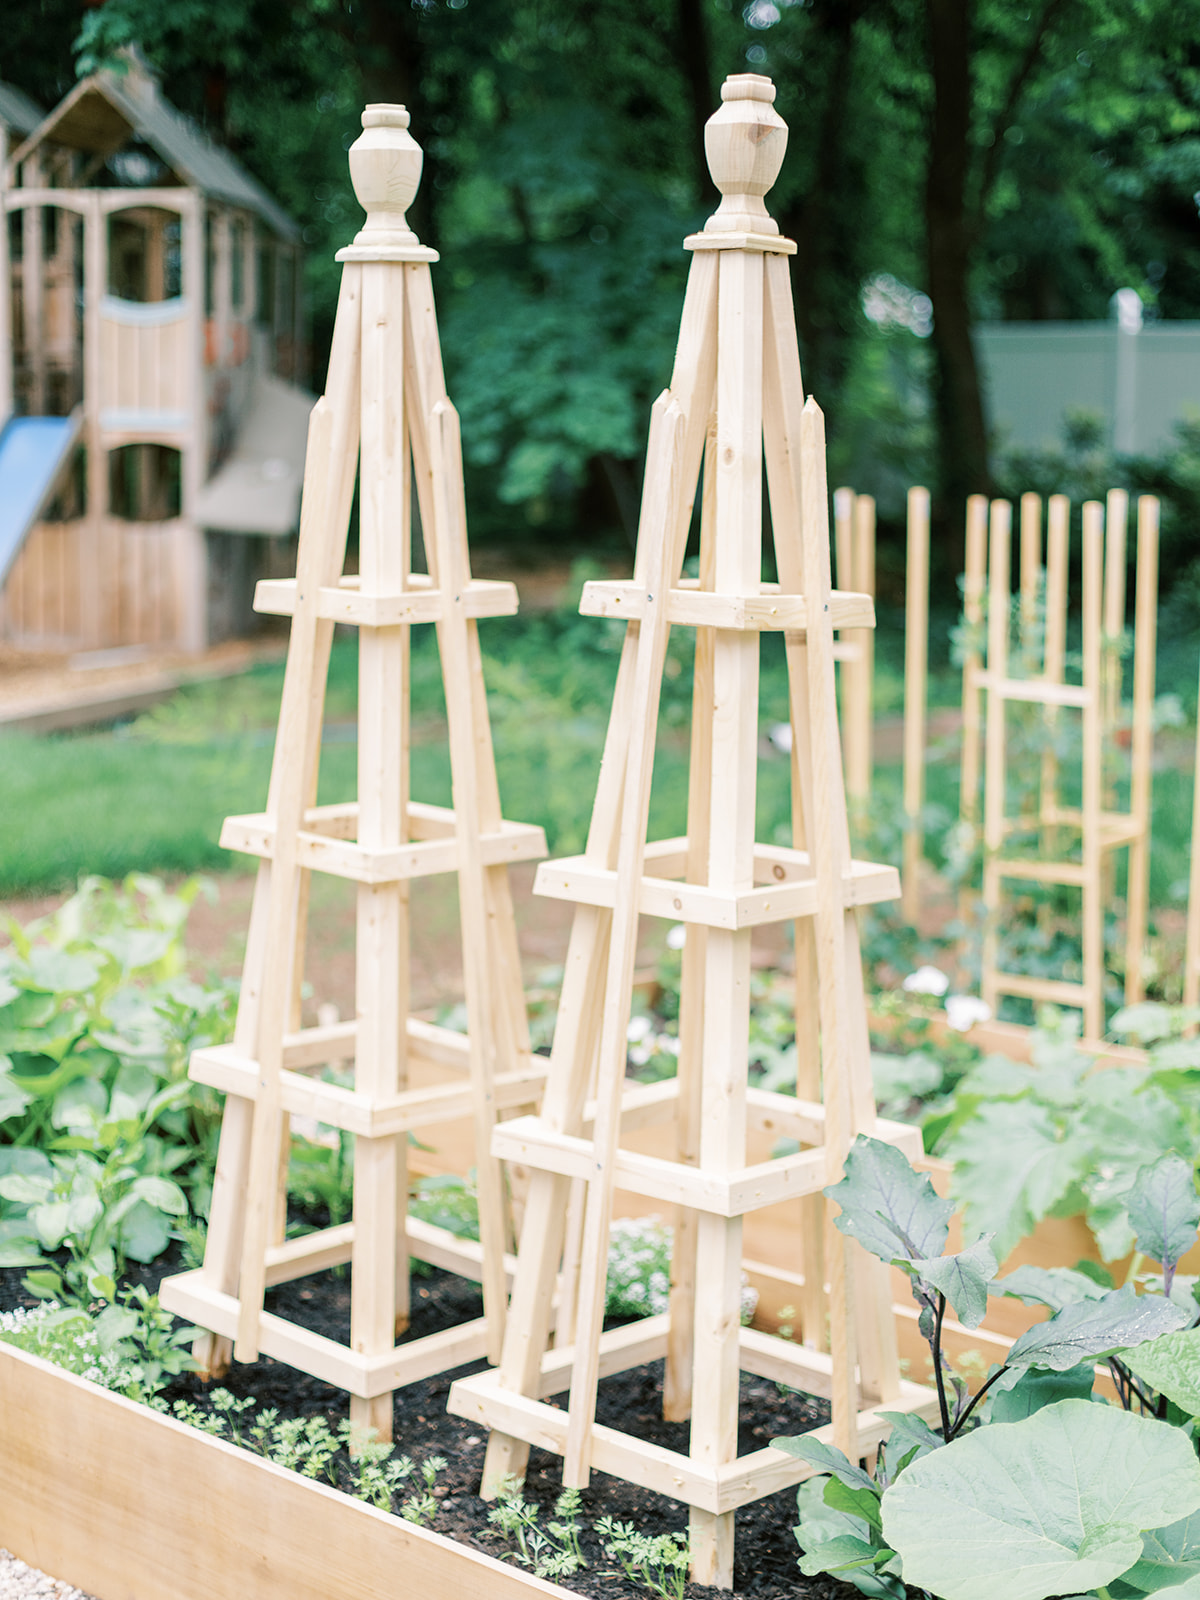
For the tomato trellises (you can see them sticking out behind the triangle ones in the picture above), I found these organic wood 1 x 1″ stakes at Home Depot. Matt used a rubber mallet to pound them into the ground evenly and then, after measuring the distance between them, cut up a stake into smaller pieces to act as supports for the growing tomato plants. He used a nail gun to nail them between the stakes. The nice thing about this DIY method is we can add rungs as the plants grow.
For the cedar wood beds, hubby bought the best cedar he could find and attached them using wooden 4×4 wooden stake in each corner. They are 3′ wide and 10′ long, 12″ high. Easy and truly beautiful, we filled the beds with good soil and I can already tell the difference in how the plants are growing compared to last year.
Triangle Trellis DIY
There were so many questions about these guys when I showed them on Instagram stories earlier this week and for good reason. They add dimension, practicality and a loveliness to a garden and can be made for sooooo much less than you can buy them. Considering these suckers sell for hundreds of dollars online and you can actually make them for chunk change–that alone is a pretty convincing argument for building them yourself. But in addition, you’re able to customize them to your needs.
They were certainly not on our radar to build until we went to the garden center to buy some and cringed at the price. Instead, the wood furring we used is only $1 for an 8 ft board. That’s like $6 for the majority of the trellis not including the decorative elements. Matt took out his phone to take pictures of their trellis convinced he could make them himself. He analyzed how they assembled the thing and then we did a little Pinteresting. I loved how my friend at Sarah at She Loves Dearly did hers. Her plans gave us a direction to head but were too big for our garden beds. We followed a good bit of her steps but tweaked them occasionally to suit our garden. Now I tried to capture pictures of Matt working but was on baby duty so there aren’t many of the actual process below. I think we’re going to make another and record it.
SUPPLIES (for 1 trellis)
Wood Octagon Finial (this one came in a 6 pack online, you’ll need 1 per trellis)
3/4″ x 3/4″ x 4 ft Wood Garden Stake (4 per trellis)
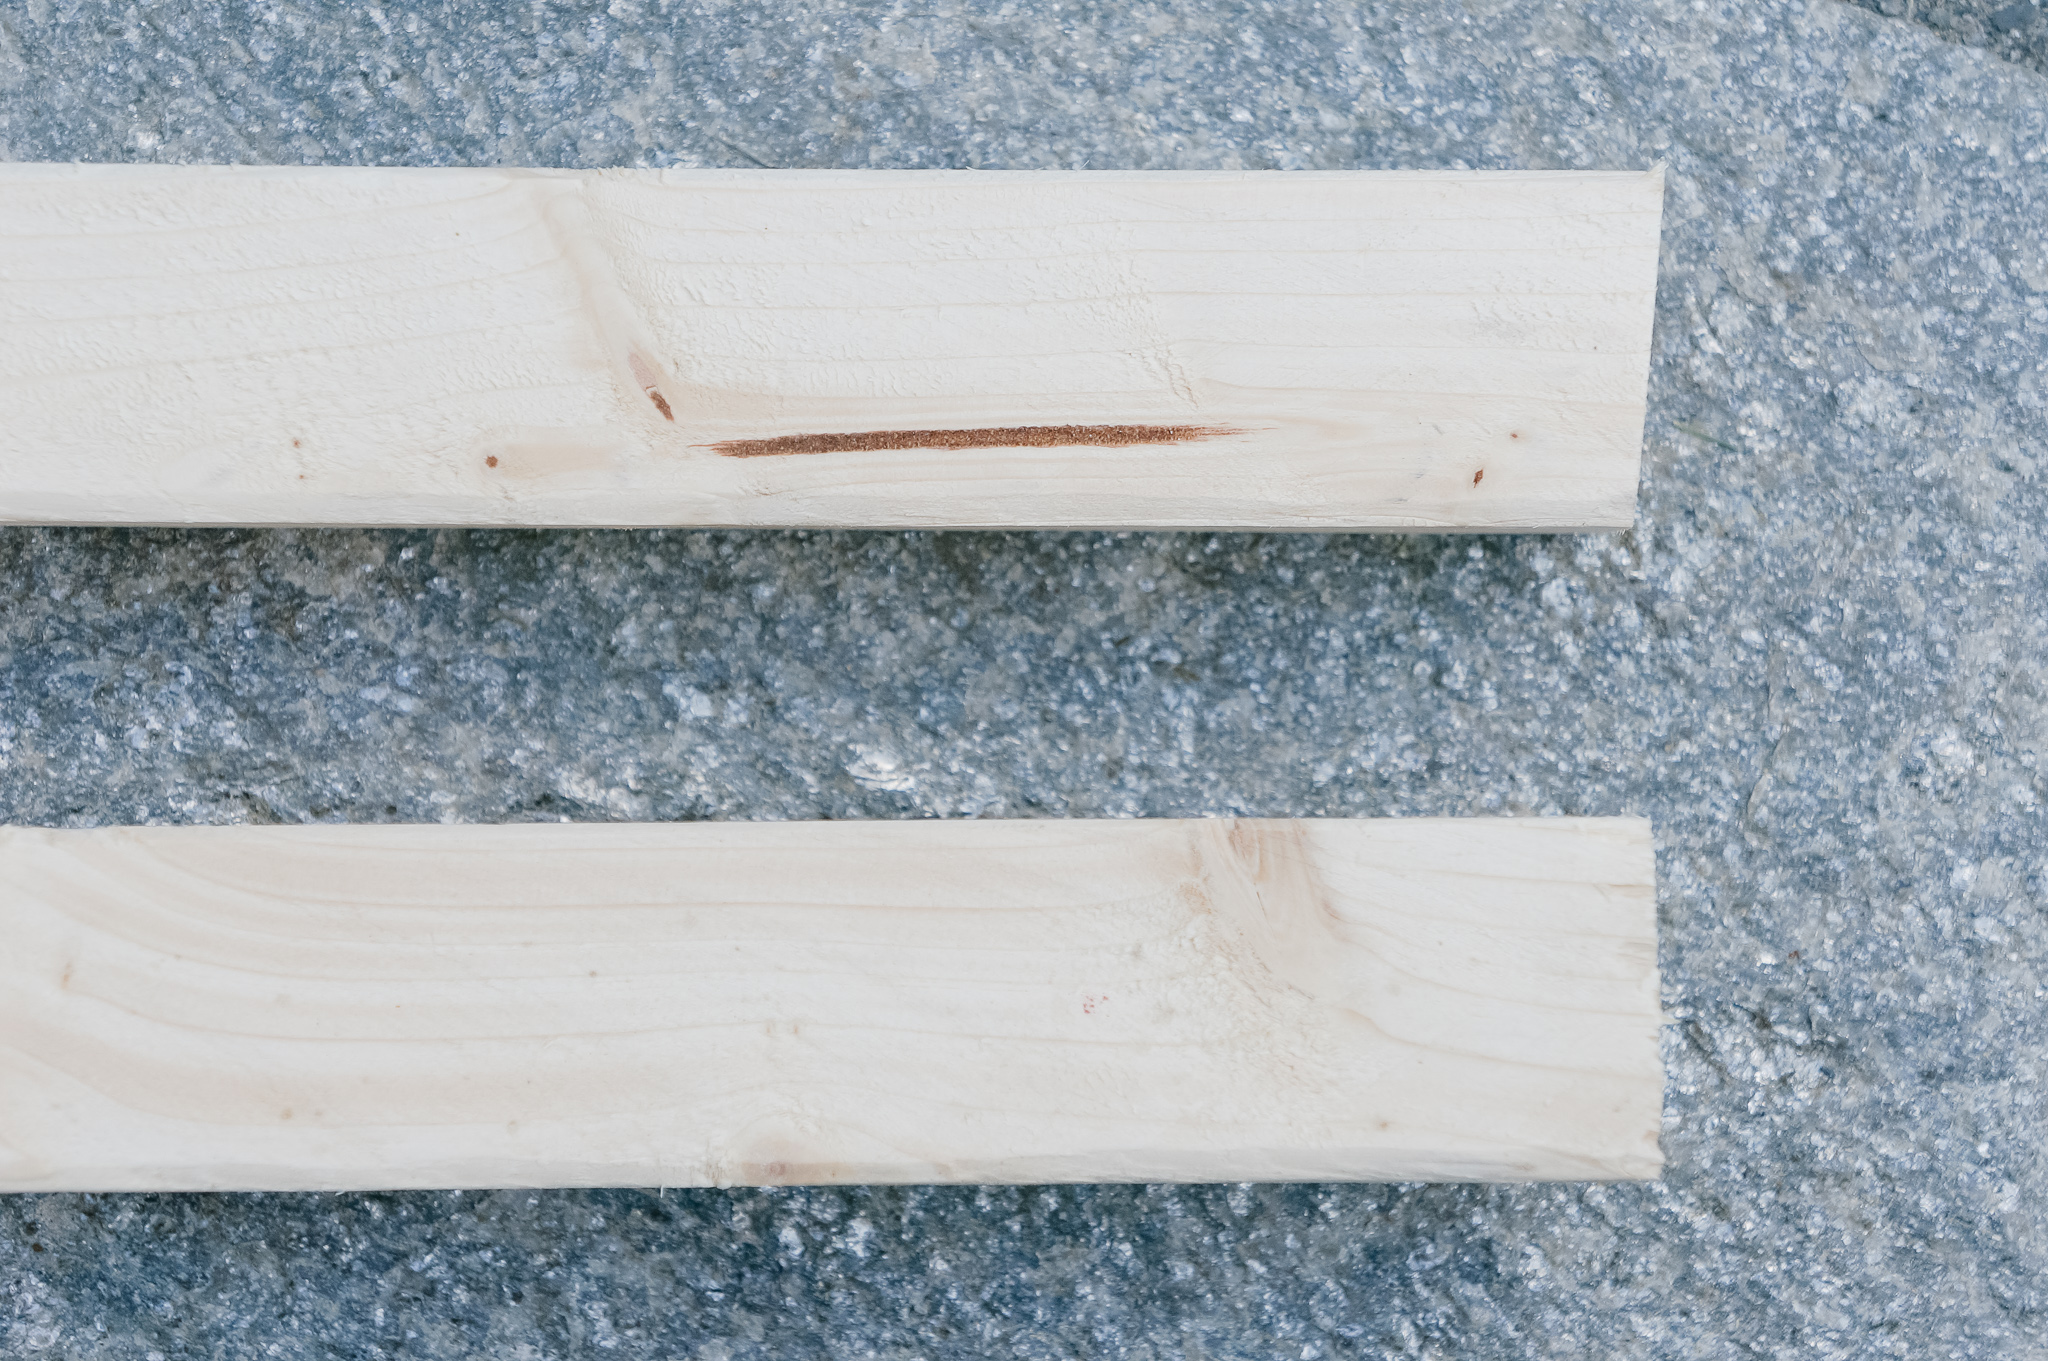
2 in x 2 in x 8 ft Furring Strip Board Lumbar (6 per trellis)
4 x 4″ Flat Finial Base (1 per trellis)
Compound miter saw* (I asked Matt if you could make this with a hand saw and he said it would be near impossible because you need to cut the boards at consistent angles to fit pieces together. Perhaps a circular saw but it would be difficult, clearly this is a big expense if you don’t already have one so I’d ask friends or consider renting one. Really any wood working project requires the use of a compound miter saw)
2 1/2″ Deck Screws (these ones are yellow in color so they blend nicely into the wood)
1 1/4″ Screws (8 total)
Drill
Tape Measure
Pencil
Level
INSTRUCTIONS
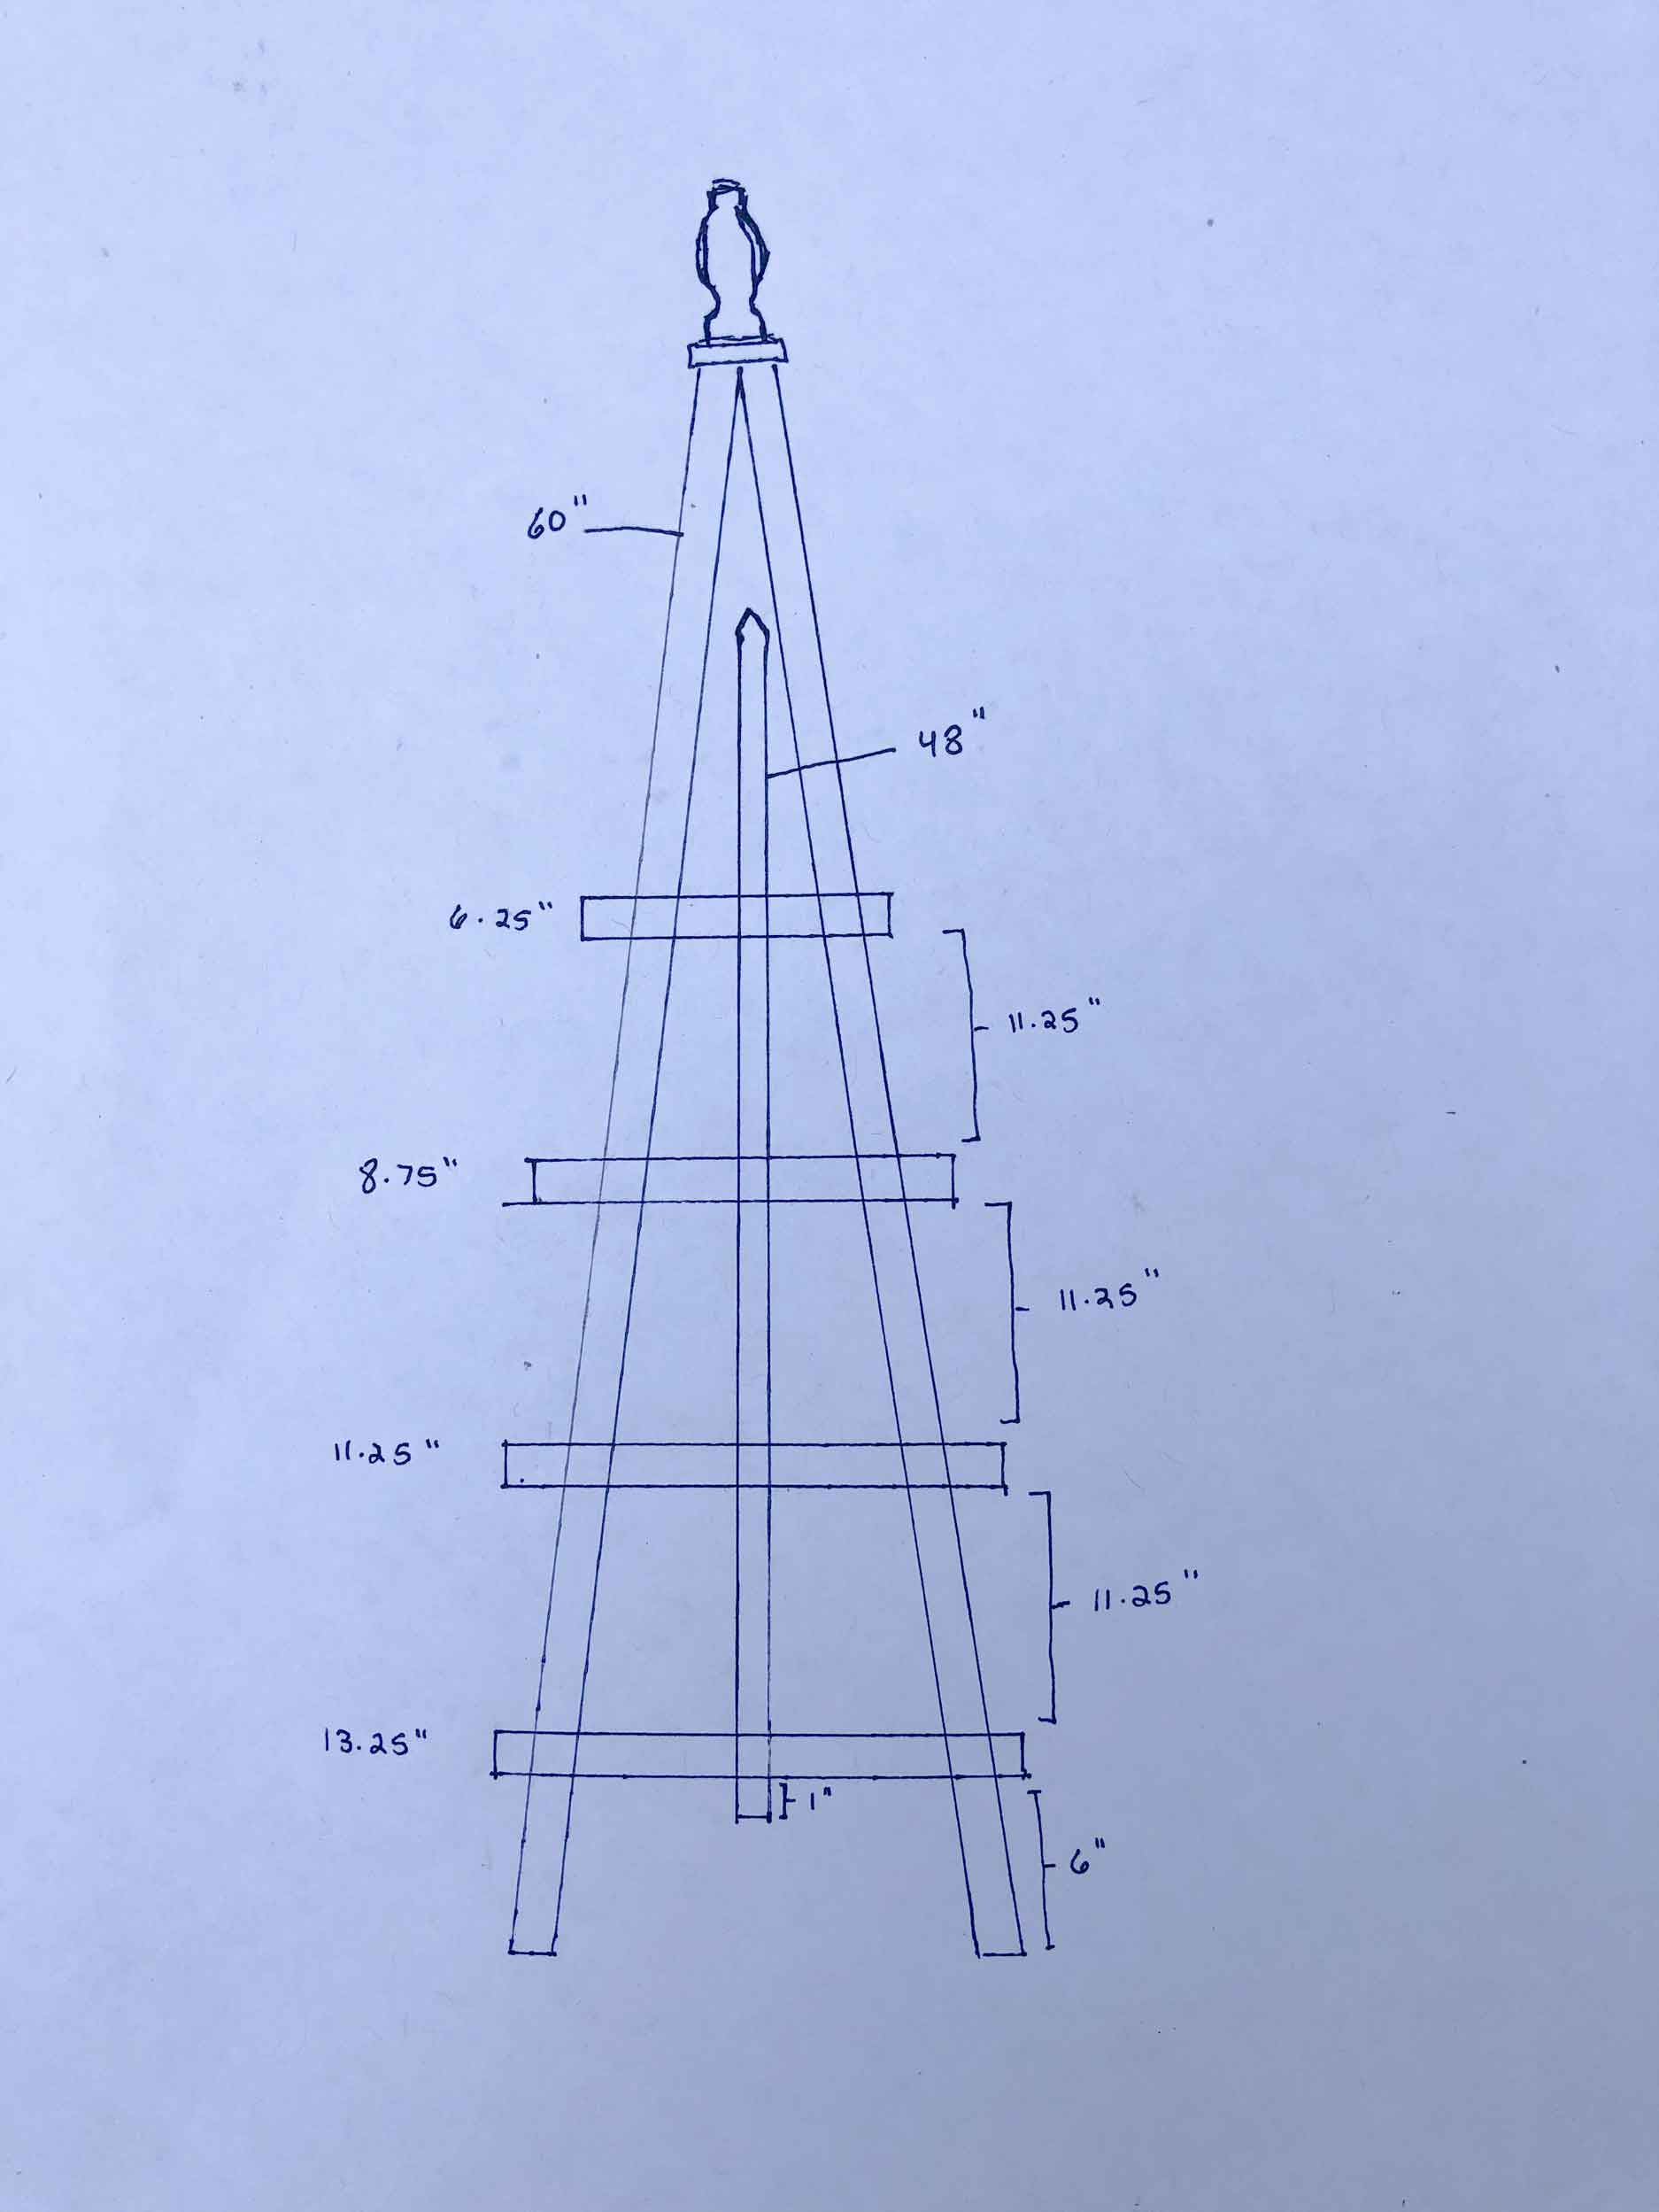
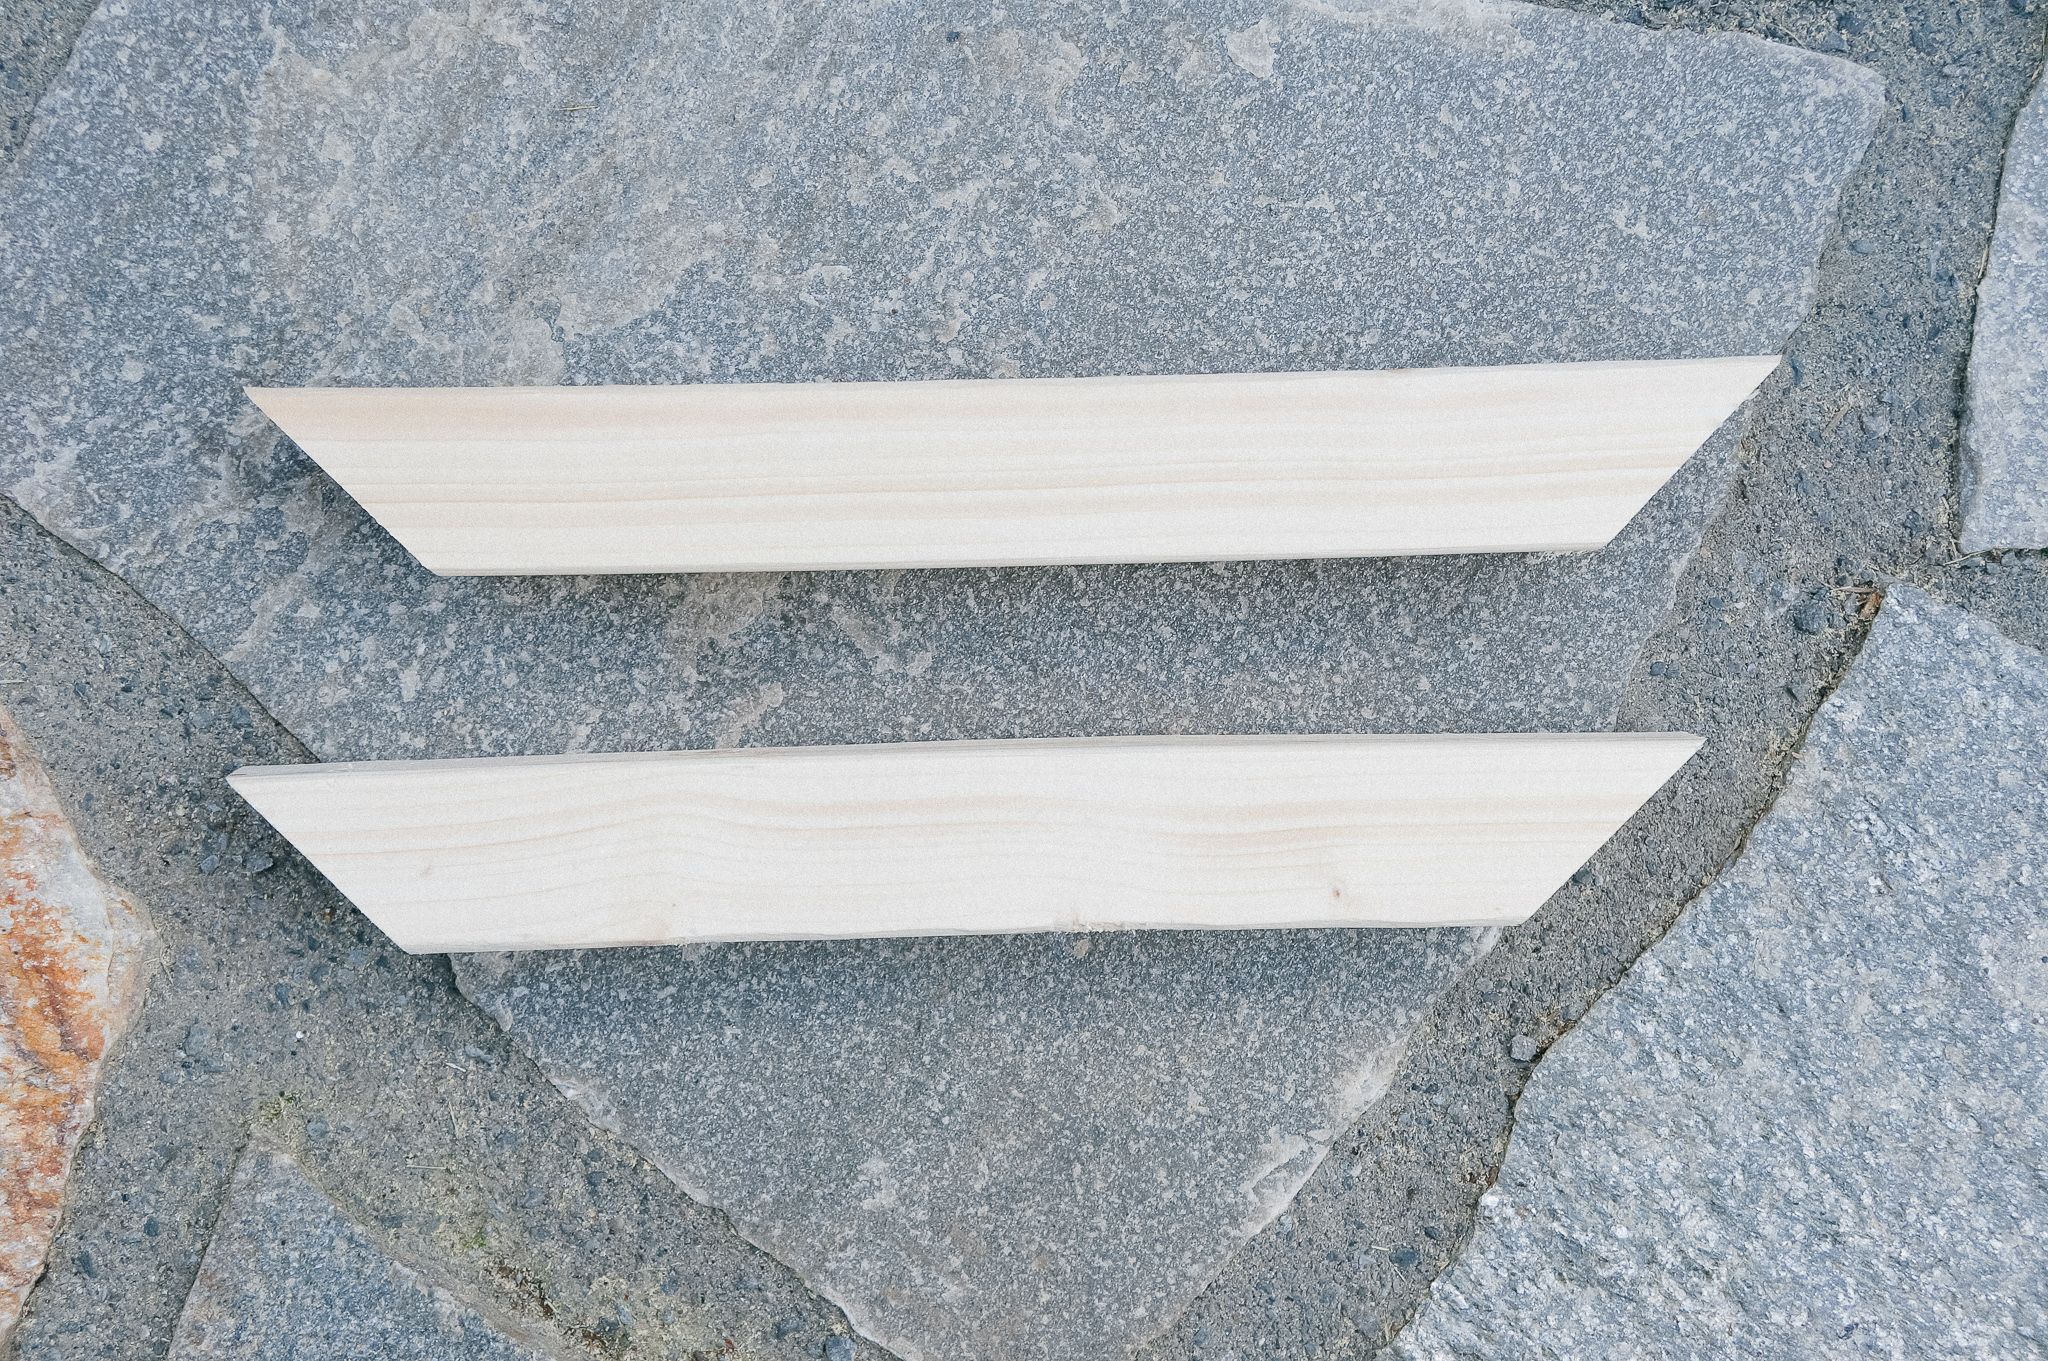
For the legs of the trellis, cut four 8 ft furring strip boards to 5 ft long using a compound miter saw.
Then set the saw for a 5 degree bevel, 5 degree miter.
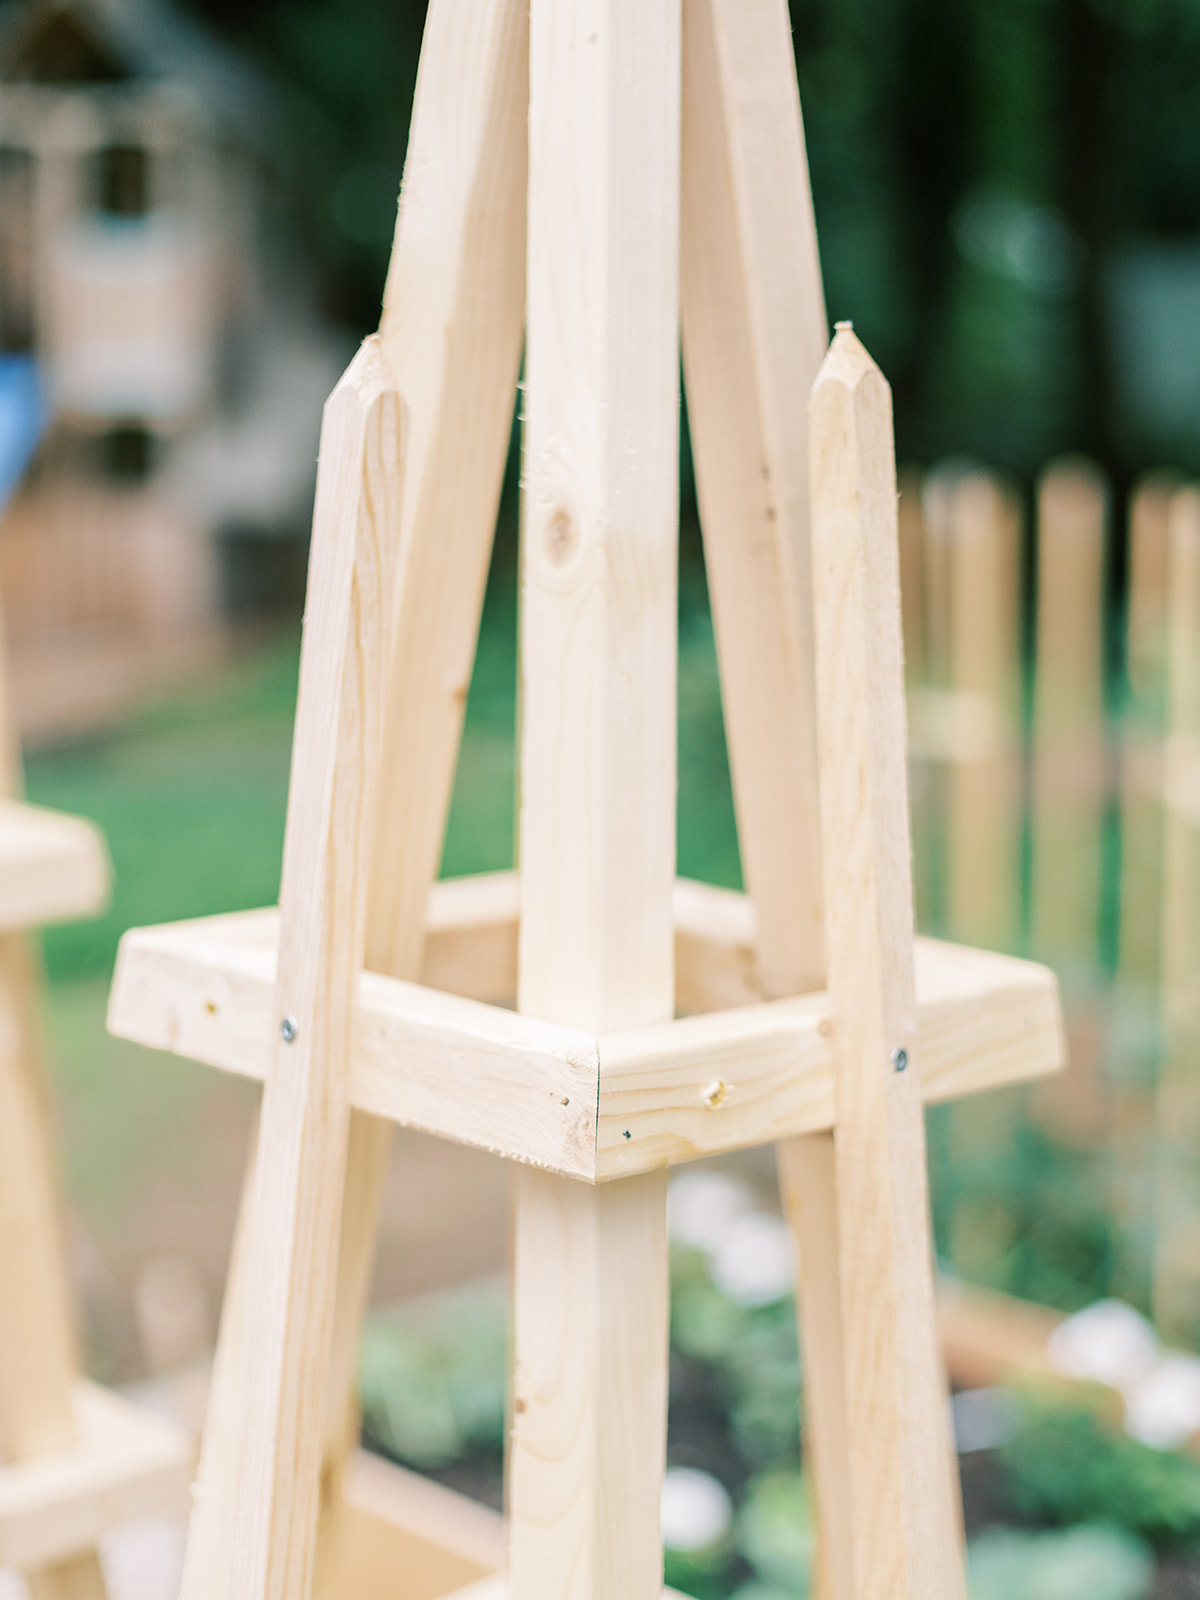
Now cut the right side of each board again with the saw set to the angle above. Slide the board all the way down to the right and cut the other end of the board. (The reason you cut these the way you do is because you are making a pyramid, you’re taking these four boards and leaning them all together at the top and because they are cut at this particular angle, where they come together at the top forms a flat surface.) It looks like there’s barely been a cut made, you can see in the picture below, the top board has been cut the bottom board has not.
On the bottom side of the flat finial base, using a pencil, draw a dividing line down the center, rotate 90 degrees and draw another so you’re left with a large cross of four equal quadrants drawn on the bottom of the flat finial base. One at a time, place each leg into one of the four squares drawn on the bottom so it is inside one of the squares and touching the center of the finial base. Screw in place straight down from the top of the finial base into the leg. Repeat this for all four legs. They will all be touching and form a square.
Now to assemble the squares that will surround the legs.
Set the saw at a 5 degree bevel, 45 degree miter.
Using the remaining 2″ x 2″ x 8 ft furring boards make a cut with the angle set above on the right side of the board.

Measure then from the top part of the cut, 13 1/4″ and mark with your pencil carrying the mark down the back side of the board. Roll the board towards you twice, you should see your pencil mark. Slide the board to the right, make the cut so the blade hits the pencil mark at the bottom of the board. Repeat this three more times to makes one square.
Connect the four pieces together using a nail gun. This is the largest square and will be the closest to the bottom on your triangle trellis. Now you’ll need to make three more square frames, each one will be slightly smaller so as to fit higher up on the pyramid.
For the next square, repeat the steps above but measure 11 1/4″ from your cut.
For the next square, repeat the steps above but measure 8 3/4″ from your cut.
For the final square, repeat the steps above but measure 6 1/4″ from your cut.
Assembling the Trellis
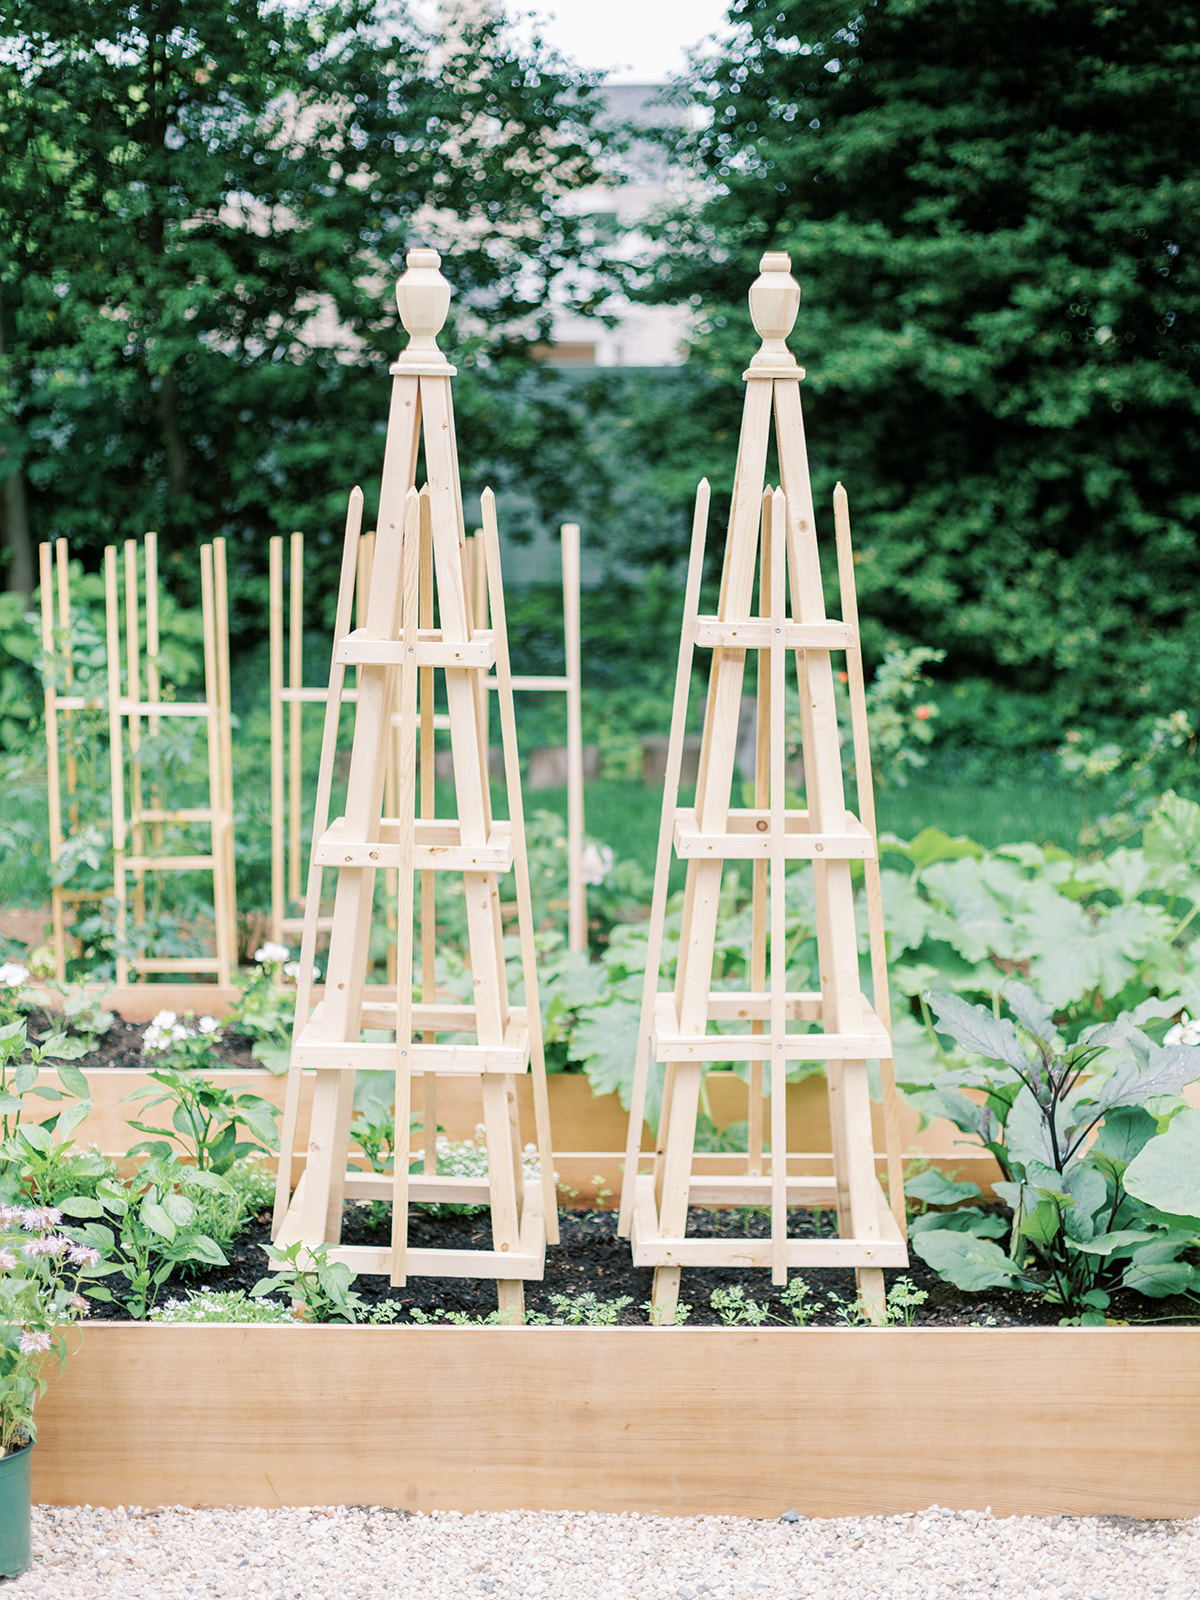
Slip the largest square frame over the top of the pyramid it should sit about 6″ off the ground. Place a screw in each corner to hold it to the legs.
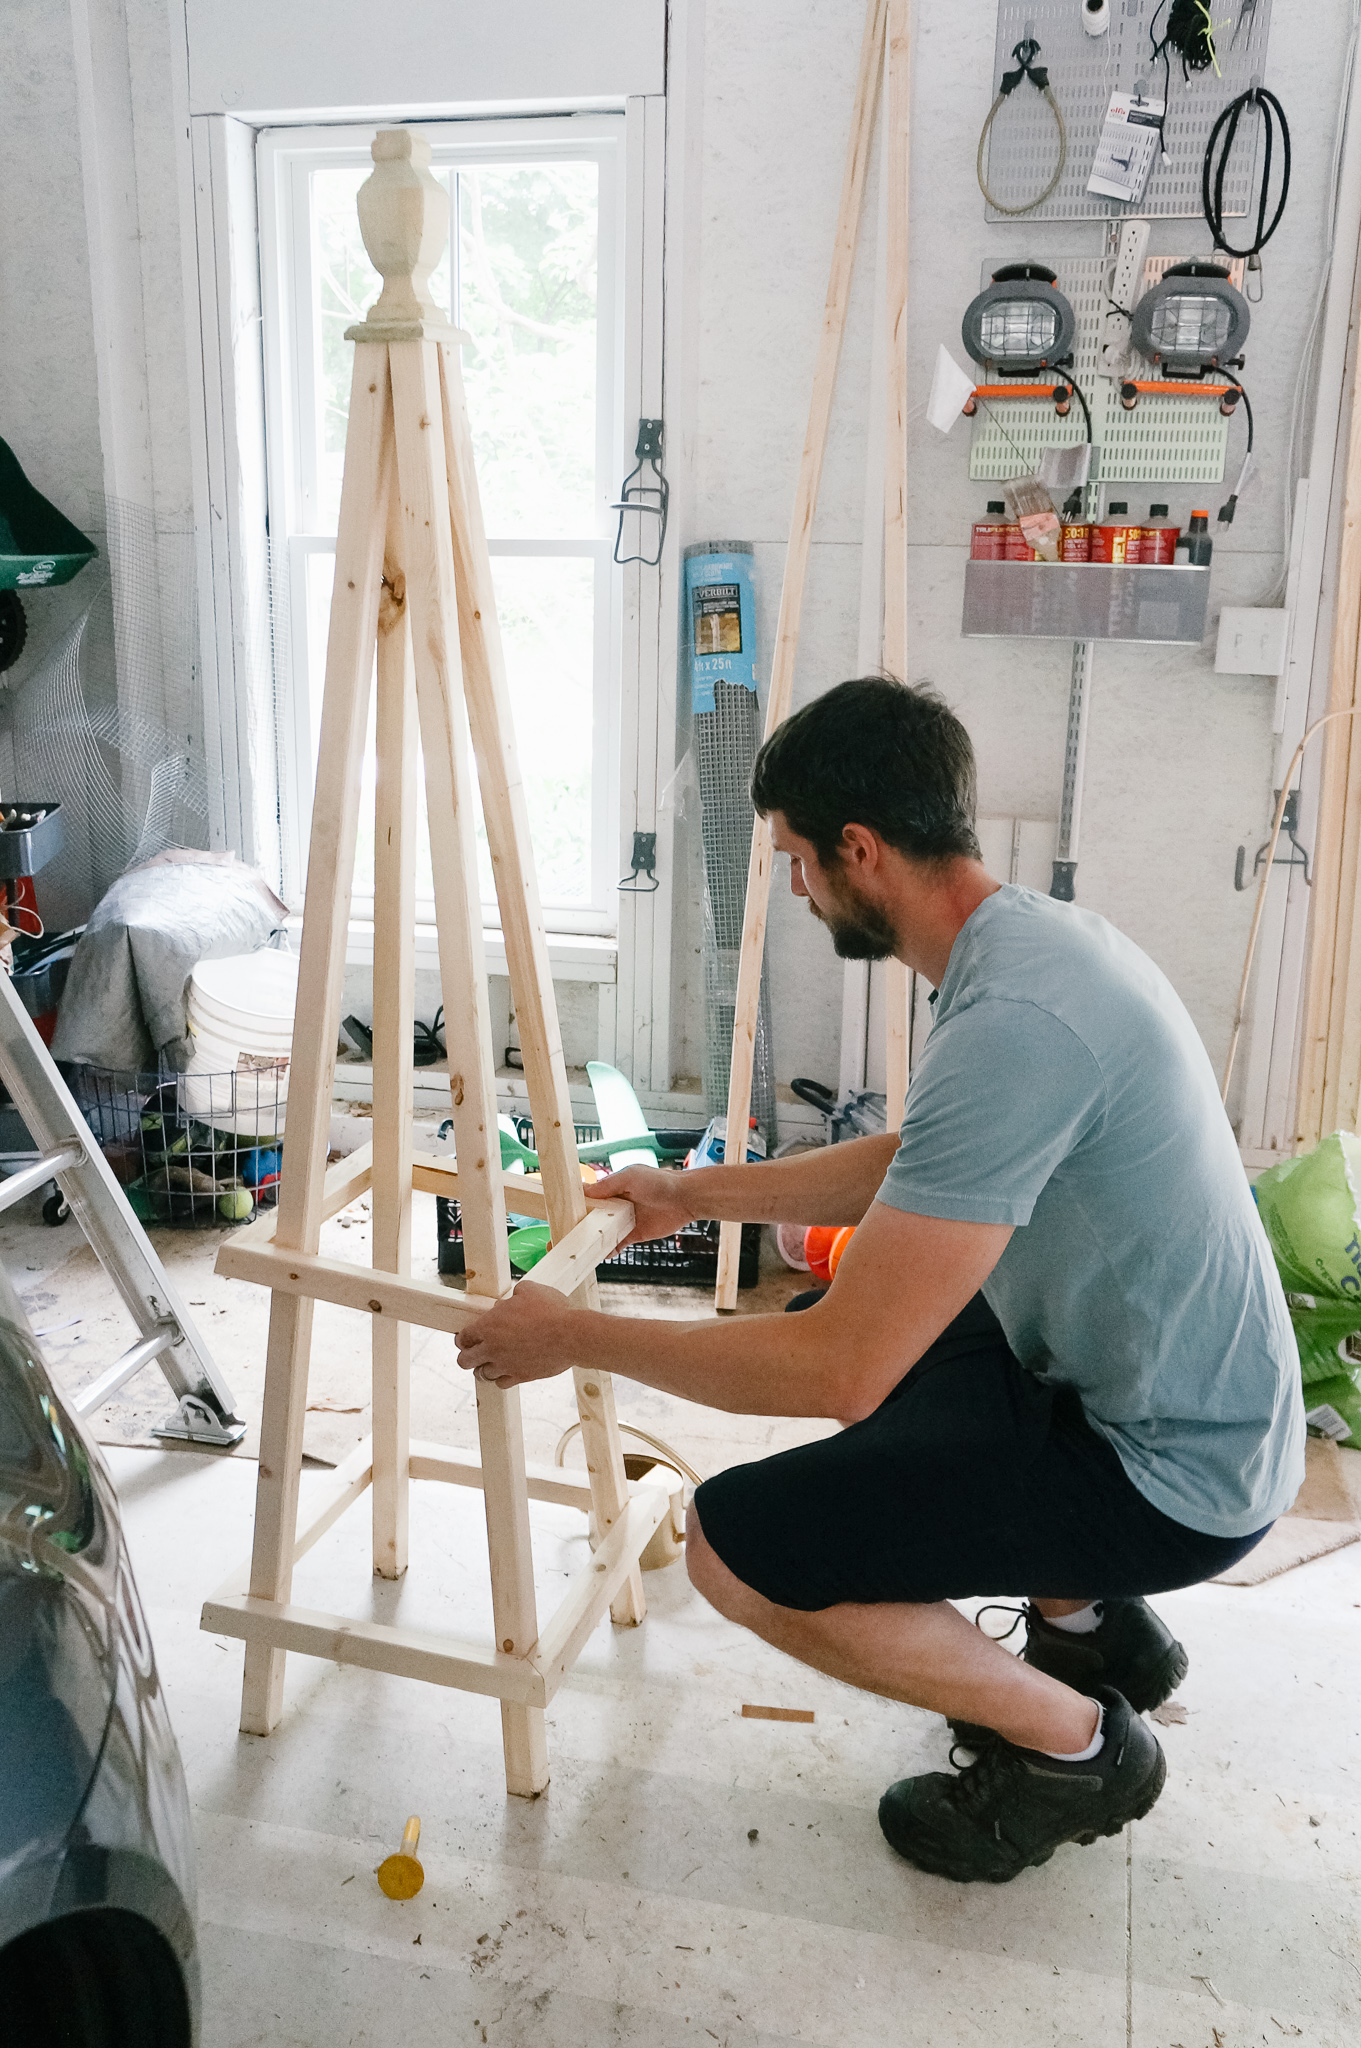
Slip the next square frame over the pyramid, it should rest about 11 1/4″ from the bottom square already in place. Drill one screw in each corner to hold this frame in place. Repeat this for the next square, 11 1/4″ from the previous, screw in place with one screw per leg. Use your level to make sure they are level. Matt would start the screw into the board so it was easier once we found the level place. We also stood back and did some eyeballing.
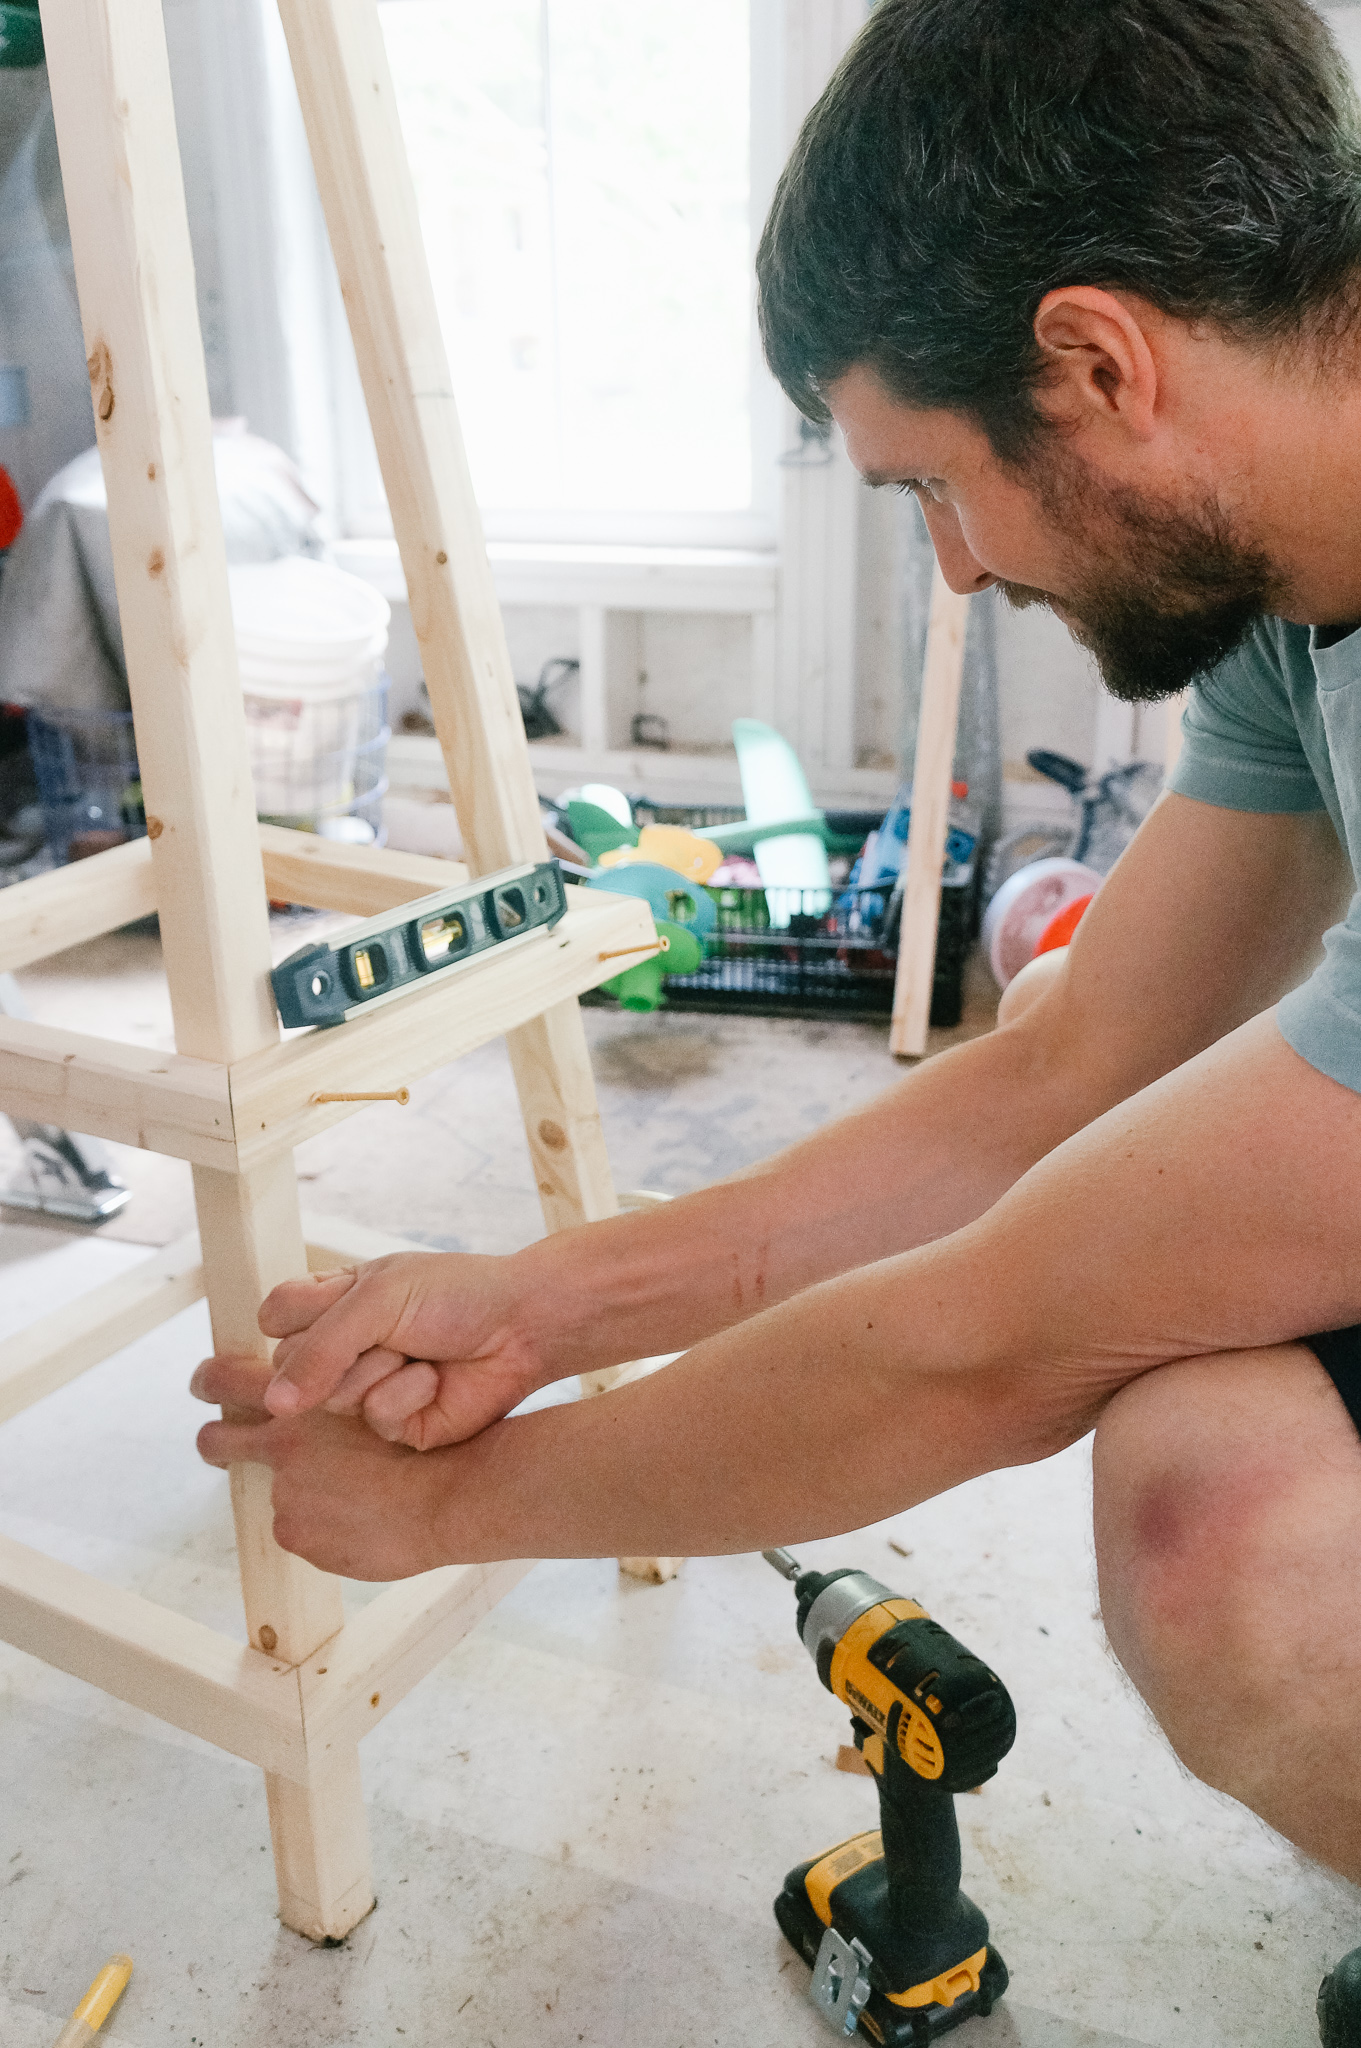
Sometimes one side needed to be pushed down to make them fit evenly. Once it looked right, he’d drill the screw the rest of the way into the leg to hold it in place. Repeat with the last square frame, the smallest, 11 1/4″ from the previous square.
Straight down the middle of each side, line up the 3/4″ x 3/4″ x 4 ft stake so the point is facing up towards the top and the bottom falls just an inch below the largest square on the trellis.
Using your 1 1/4″ screws, screw it onto the frame one screw at the top and one near the bottom. Repeat this for the other three sides. The finial base frame came with a predrilled hole in the center and the octagon finial came with a screw in the bottom, so you literally just screw that pretty finial on top and you’re done. They really are pretty.
I’m so thankful for Ruthie of Ruth Eileen Photography who captured the pretty pictures of our garden before a thunderstorm rolled through. Oh summertime in New England. But this isn’t the only garden fun for you, scroll down to see my friends garden ideas.
How to Start a Hydrangea Plant – Happy Happy Nester
Cut Flower Gardening – The Ginger Home
Most Common Garden Tools And Their Uses – Shabbyfufu
Unique Container Ideas For Garden Planting – Sanctuary Home Decor
How to Grow Fresh Tomatoes – My 100 Year Old Home
Simple Tips from a Green Thumber – Craftberry Bush
Make the Most of Your Small Garden – Most Lovely Things
How to Use Ornamental Grasses in Your Landscaping – The Happy Housie
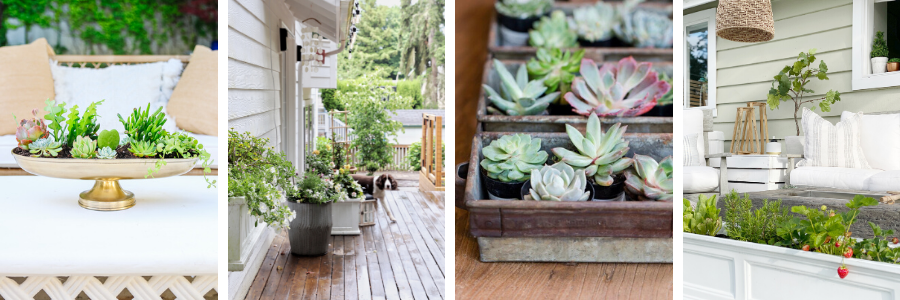
Anthropologie-Inspired Succulent Planter – Modern Glam
3 Tips For Creating Window Boxes and Planters – Lemon Grove Lane
DIY Succulent Garden Cake – My Sweet Savannah
Small Space Gardening – Dreaming of Homemaking
Garden Design and Trellis DIY – Finding Lovely
Lake House Garden with Peonies – Styled With Lace
How to Fill A Raised Garden Bed and Save Soil – Twelve on Main

 comment share
[…] Garden Design and Trells DIY – Finding Lovely […]
[…] Garden Design and Trellis DIY – Finding Lovely […]
[…] Garden Design and Trellis DIY – Finding Lovely […]
[…] Garden Design and Trellis DIY – Finding Lovely […]
[…] literally could not pin this garden design diy and inspiration fast […]
[…] of the tried and true ways to grow up is to use a trellis. This DIY garden trellis from ‘Finding Lovely‘, is exactly that, lovely! But it also can be used to grow vine vegetables in between regular […]
[…] Last year, where the peas and beans are in this year’s plan, was 6 tomato plants. We love tomatoes but that was overboard. I thought I gave them enough room but they so entwined themselves that they almost became an impenetrable wall. The boys called it “the land of the tomato.” It was so hard to harvest that the tomatoes were rotting on the vine. This year, we’re taking them out of the garden entirely, planting them in special pots on our deck to free up a significant amount of space in the garden. We also had tremendous success with zucchini and eggplant. So we reduced them down–the eggplant down from 2 to 1 plant and the zucchini from 4 to 1. If you’re interested in our trellis design, here is the link to that post. […]
[…] Add a natural wood element to your garden with these adorable DIY trellis to plant your favorite herbs and everything you ever desired. Follow this plan and build some rustic cedar garden bed, wooden tomato trellises, glorious strawberry trellises, and much more! All you need is a wood octagon finial, wood garden stake, furring strip board lumber, flat finial base, drill, tape measure, level, etc. findinglovely […]
[…] éprouvés de grandir est d’utiliser un treillis. Ce treillis de jardin bricolage de ‘Trouver belle‘, c’est exactement ça, adorable ! Mais il peut également être utilisé pour cultiver […]
[…] Wege, um erwachsen werden ist ein Spalier zu verwenden. Dieses DIY-Gartenspalier von ‚Schön finden‚, ist genau das, schön! Es kann aber auch verwendet werden, um zwischen den regulären […]
[…] out this DIY for making a gorgeous wooden strawberry bed and trellis for small […]
[…] éprouvés de Grandir ceci pour utiliser le treillis. Ce treillis de jardin bricolage de ‘Trouvez-le adorable‘, c’est vrai, adorable ! Mais il peut également être utilisé pour faire pousser des […]
[…] Garden Design and Trellis DIY – Finding Lovely […]
[…] Triangular Bean Trellis DIY […]