
HOME TOUR
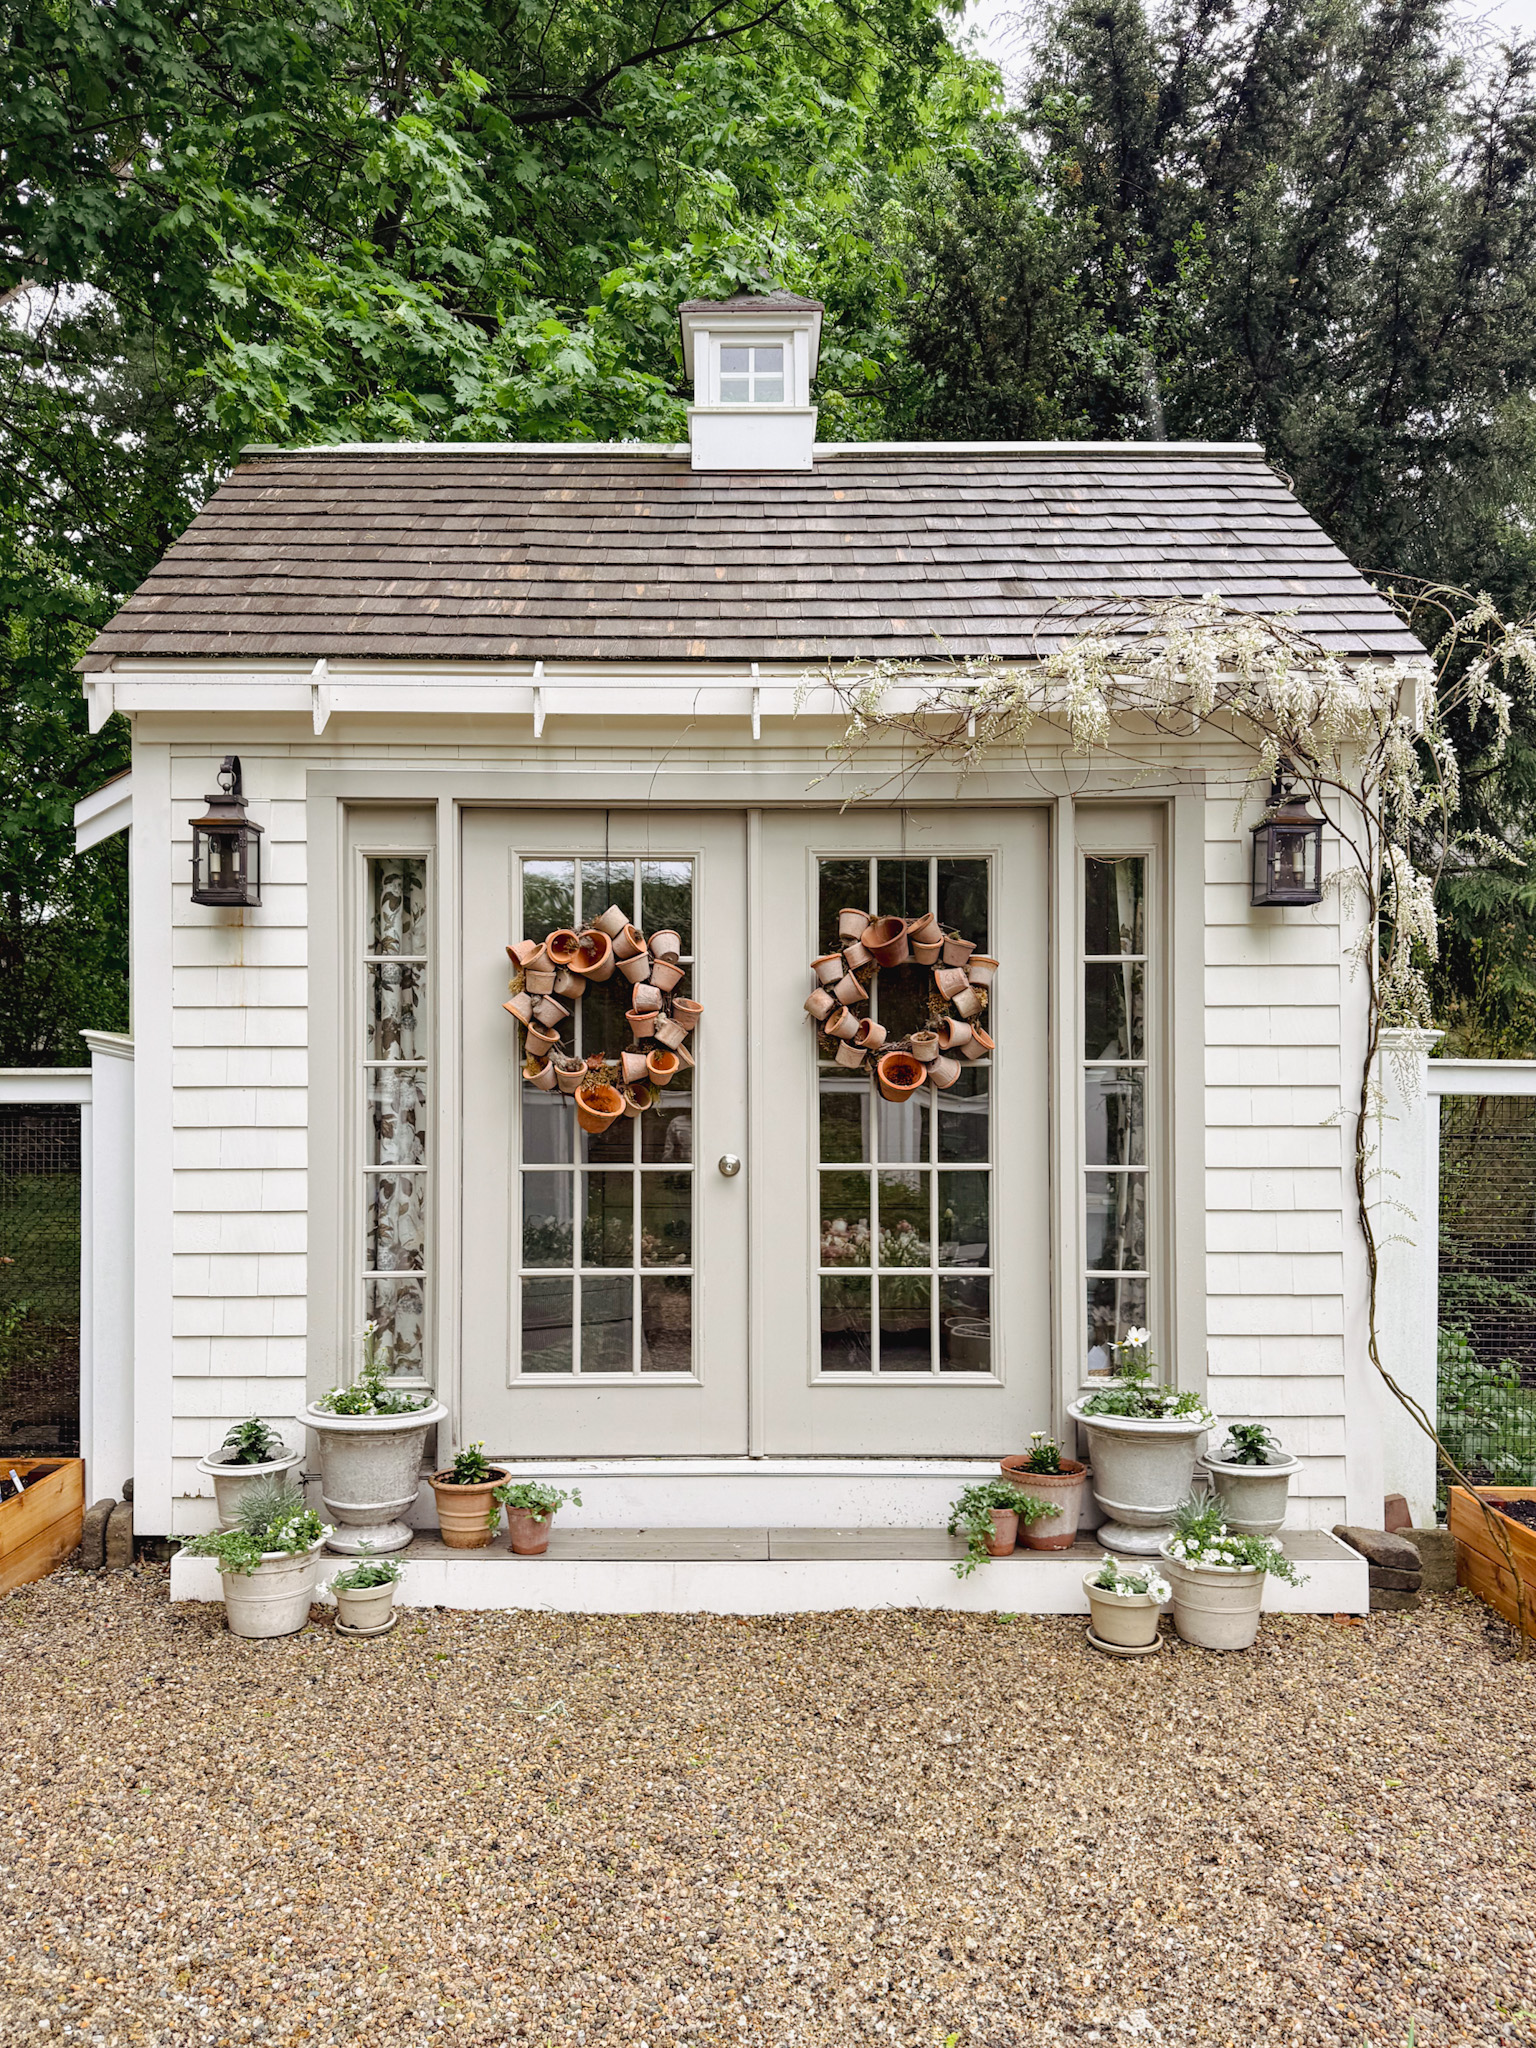
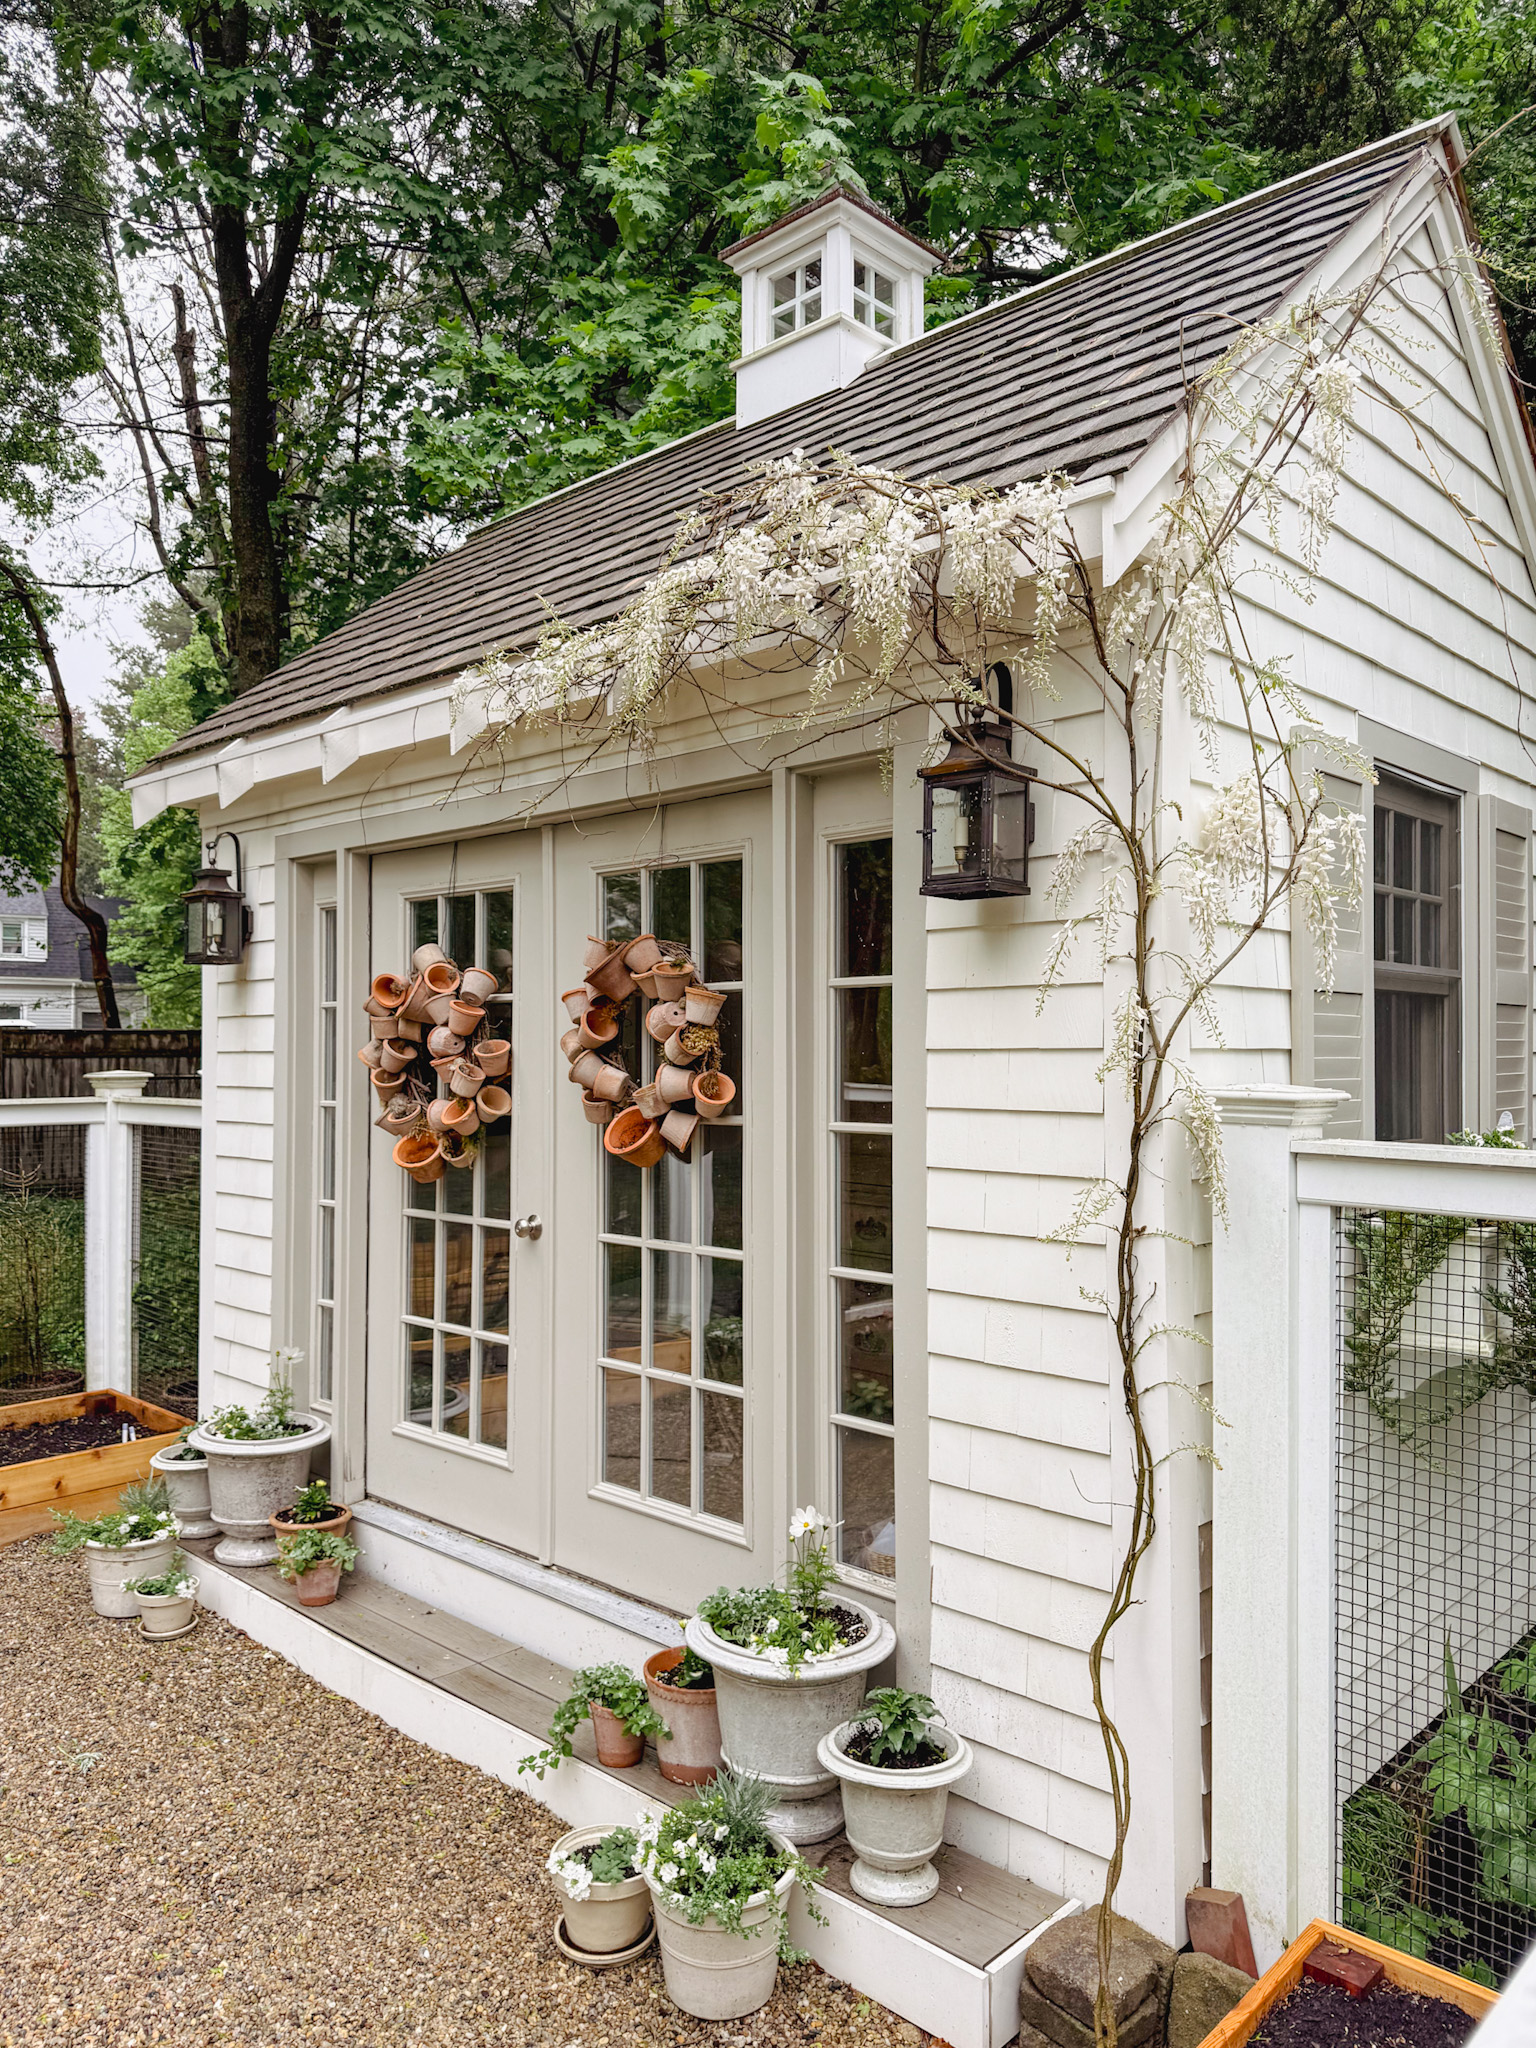
The bounty of the spring season is upon us. Everything has bursted brilliant green here in my zone 6b New England garden. My tulips are fading, the lilacs are perfuming the air and that means it is time to get my cottage garden planters planted. Last year there were so many questions about them that I want to get ahead of it and share what I am planting in each pot and how they look at the beginning. I may update this post with pictures as the plants grow and drape over the pots so you can see the progression. I also want to share what I am doing differently this year, why and how I keep the darn things watered.
COLOR SELECTIONS
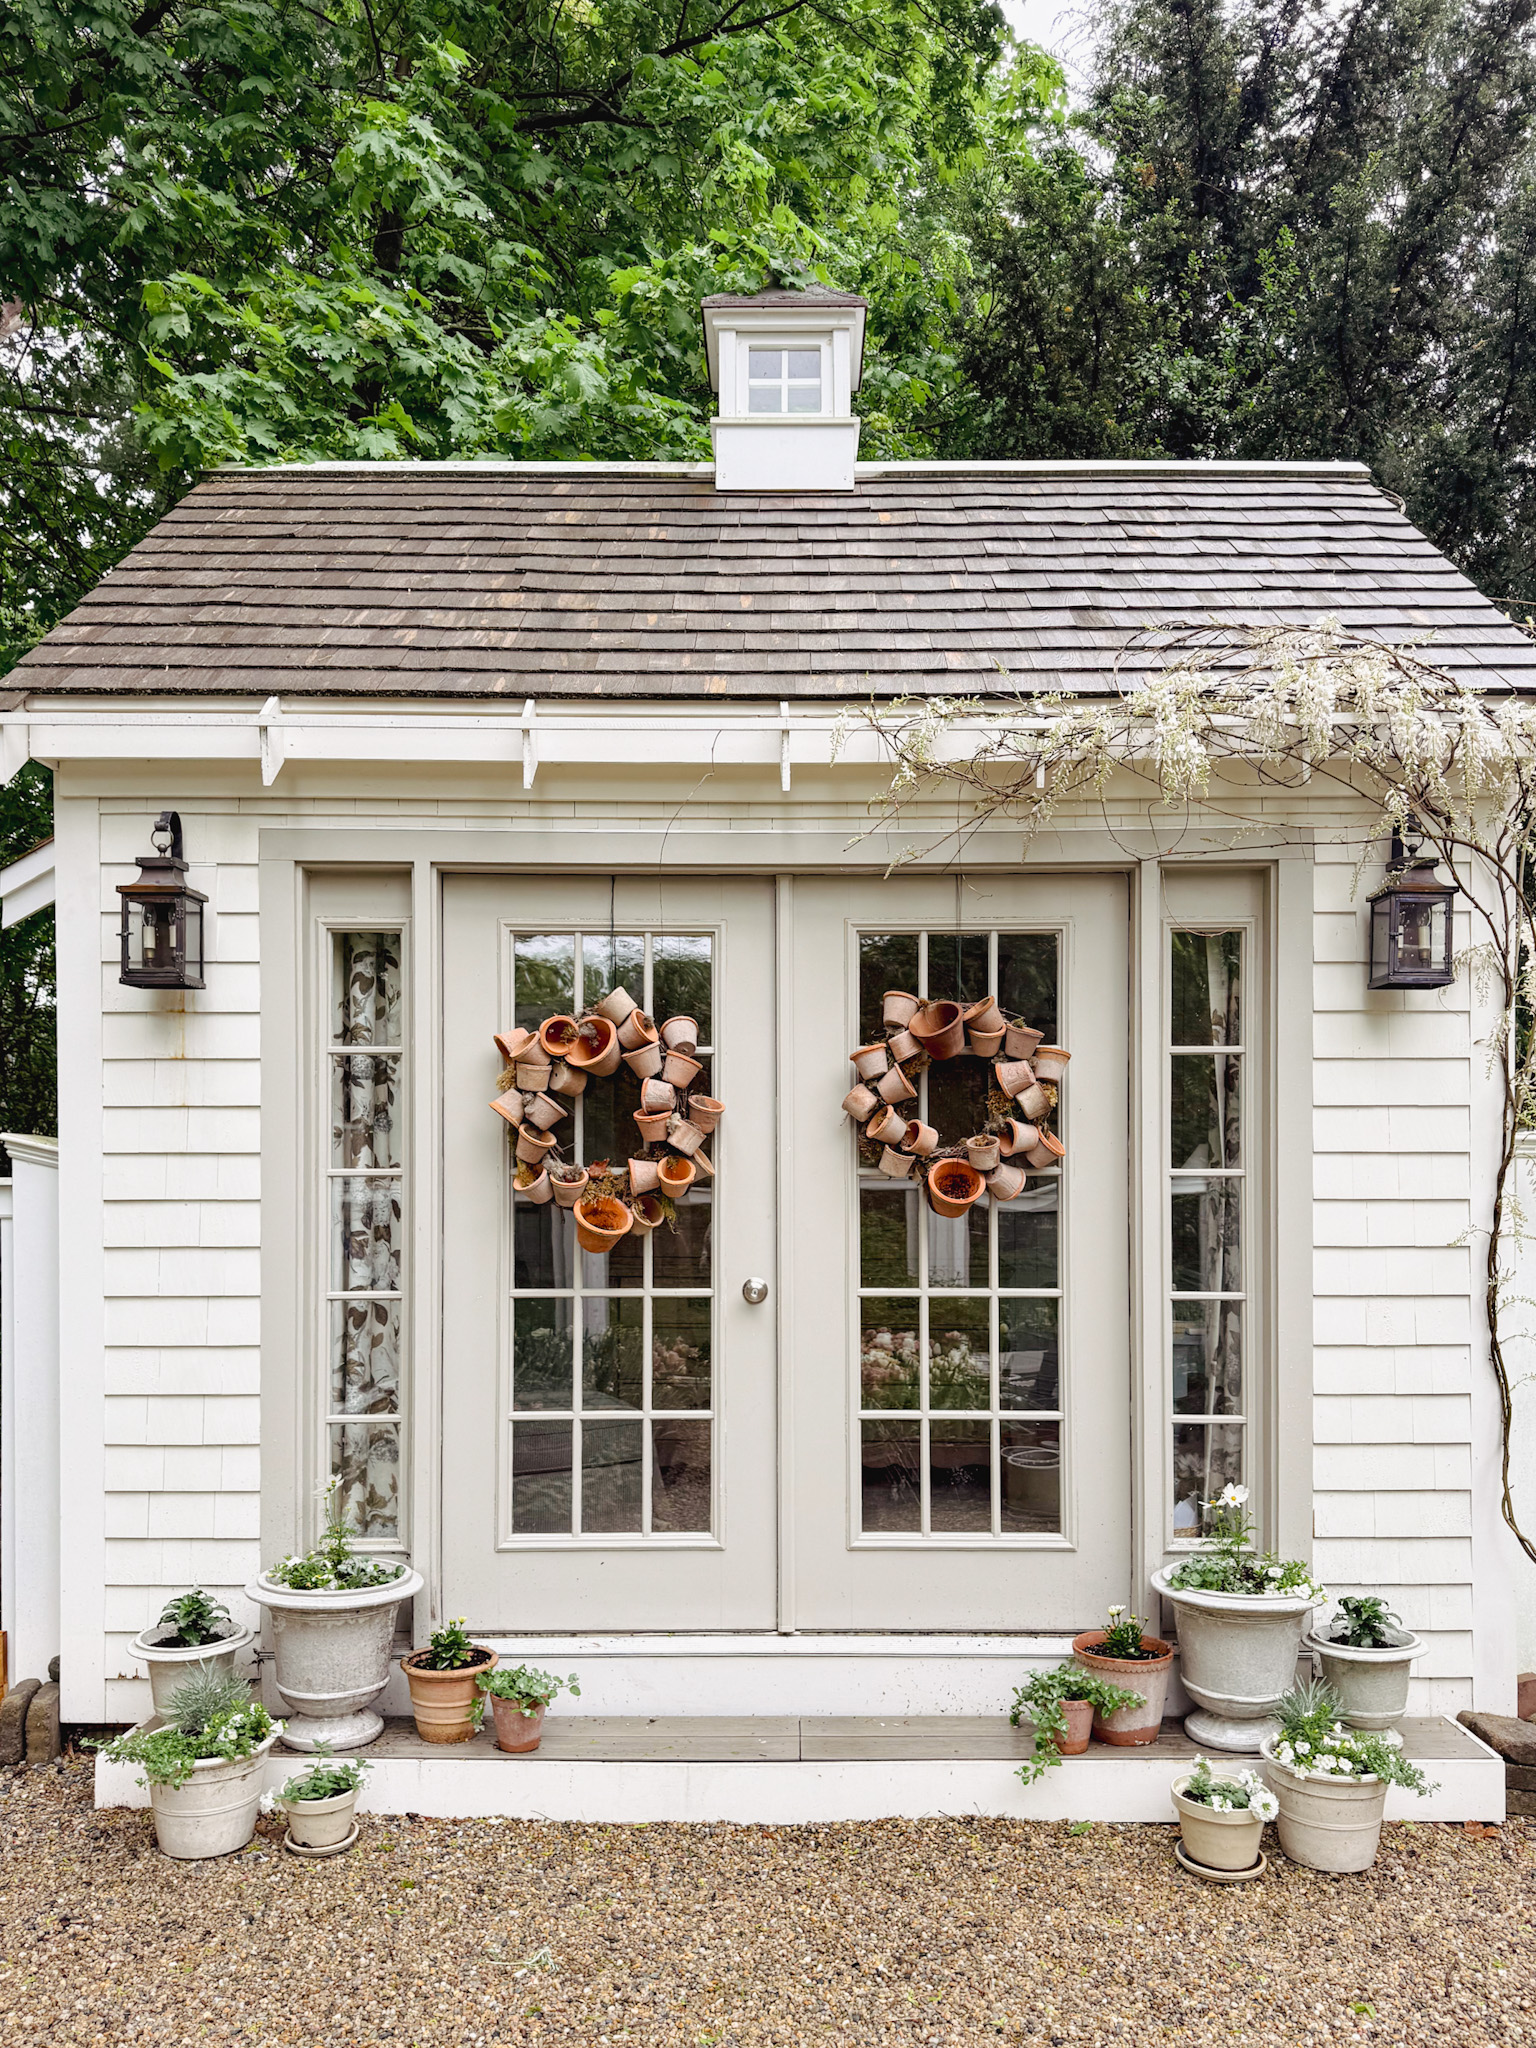
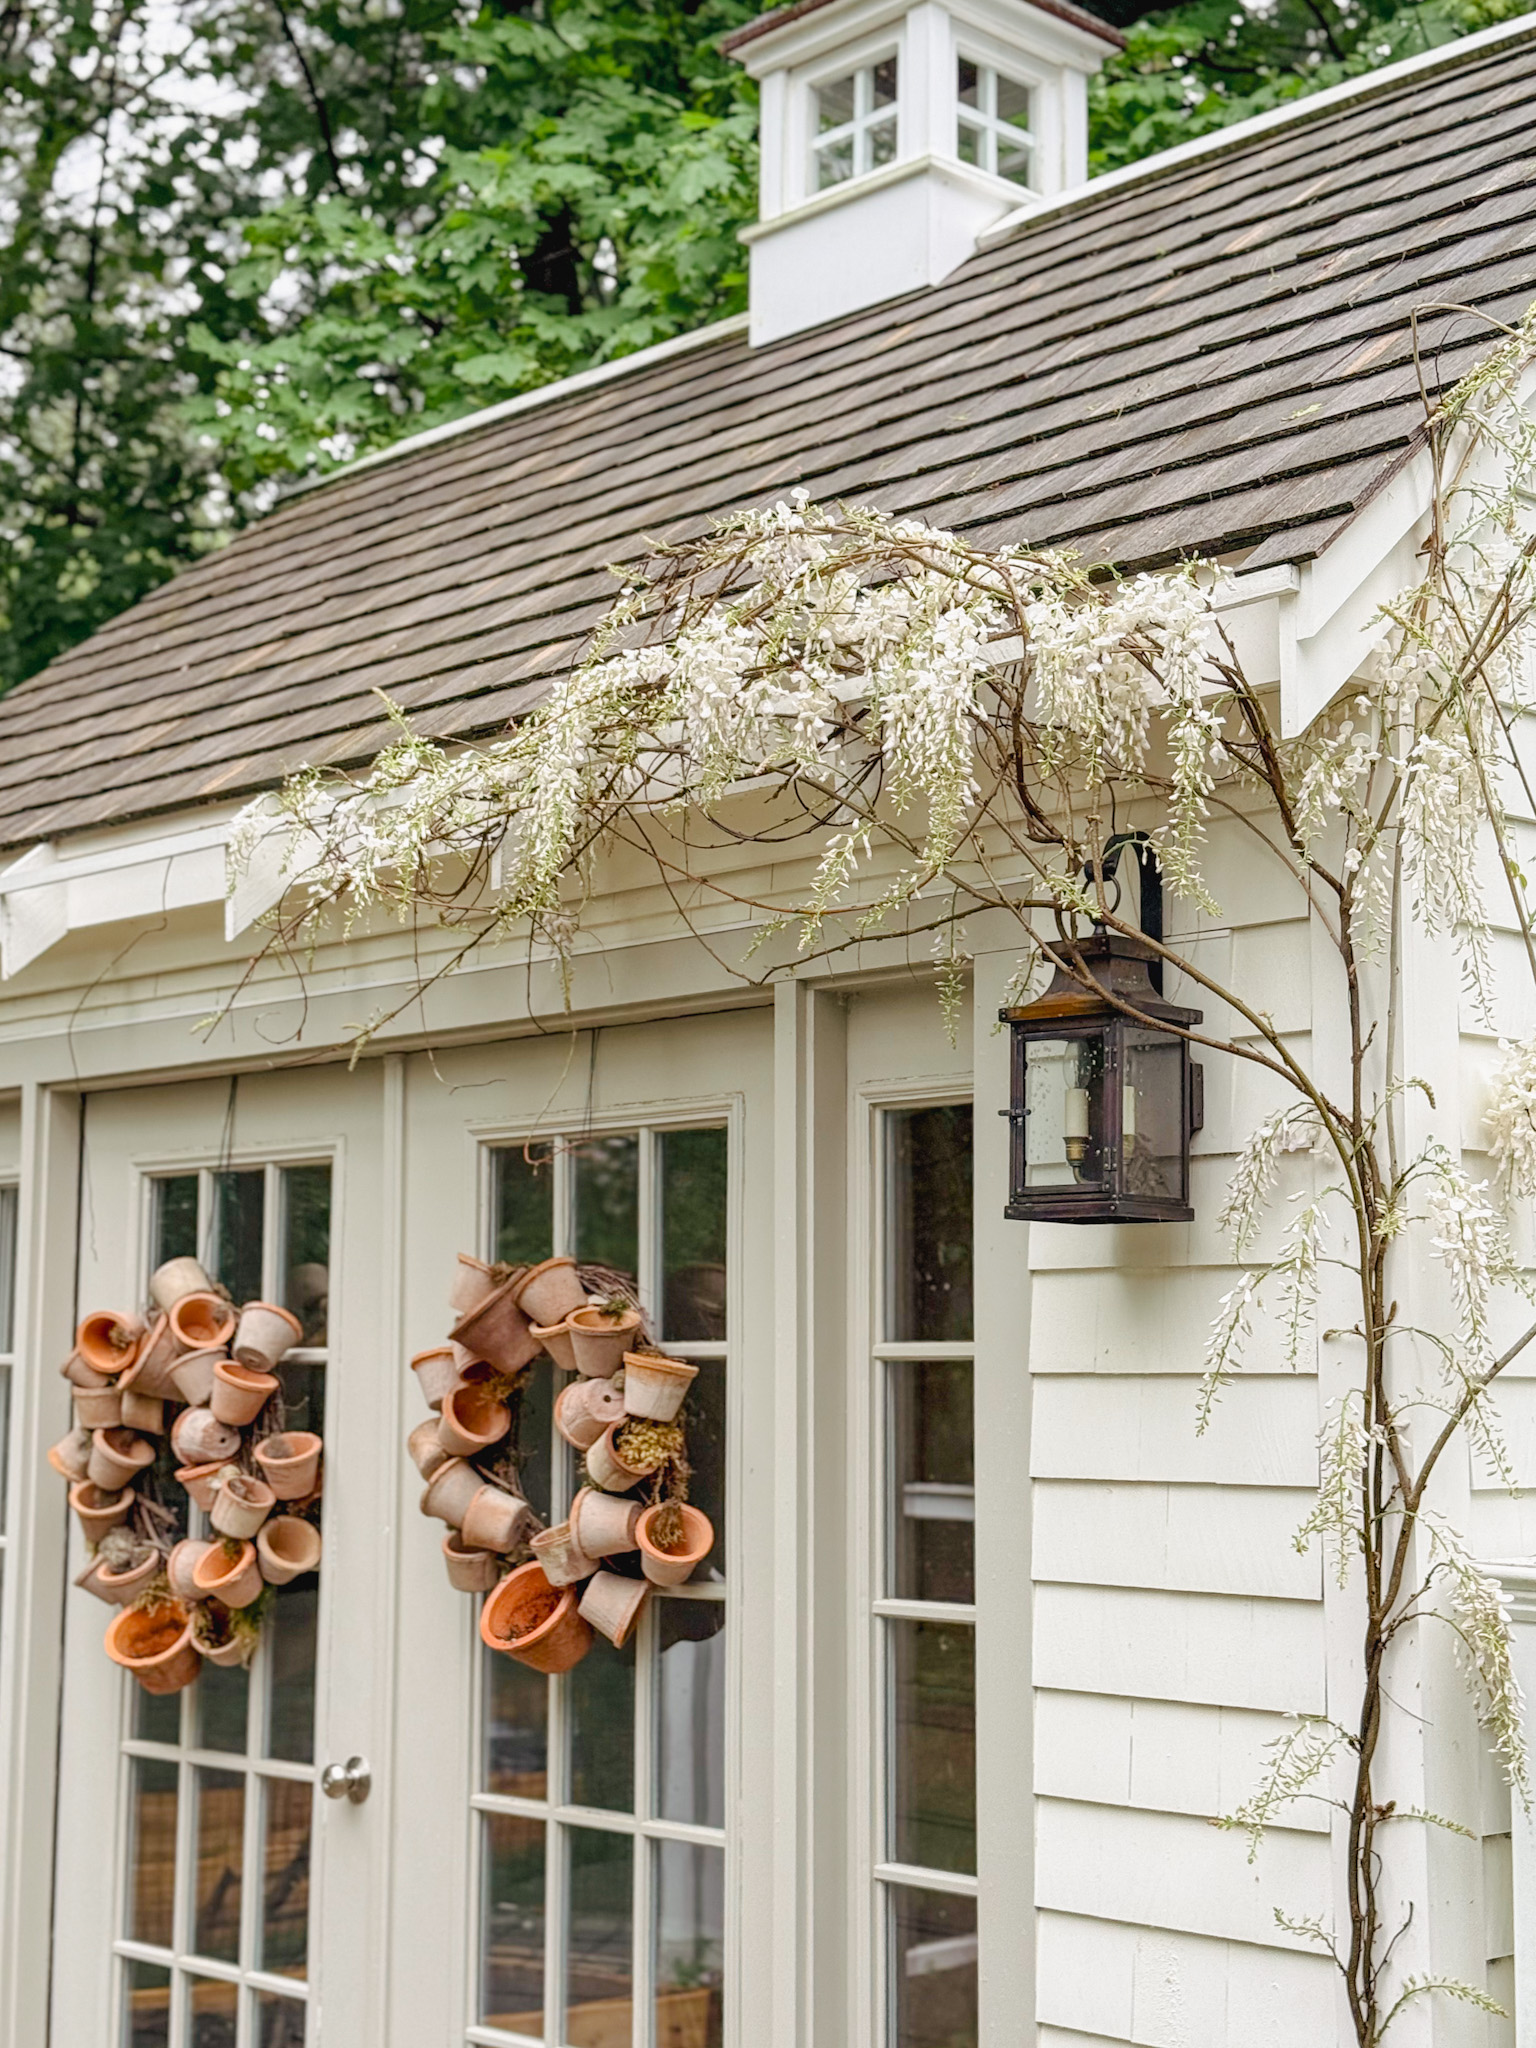
I always choose whites and different shades of green for my cottage garden pots. I like the way it looks against my she shed and with the white wisteria showing off this year, it just looks really lovely. Not a nursery visit goes by though, where I don’t get unwelcome comments (“you know they grow colors?”) from passerby’s acknowledging the white theme or “lack of color” in my cart. I have to bite my tongue because I want to sarcastically and dramatically gasp, “I just really love the color PINK!” Buy what you love and don’t let the comments persuade you otherwise. There is world famous garden in England that is planted in just shades of white and people make a pilgrimage to see it because it is so lovely. So yes, yes I am aware they do grow other colored flowers, I’m choosing to avoid them for this particular spot in my garden.
THE PLANTERS
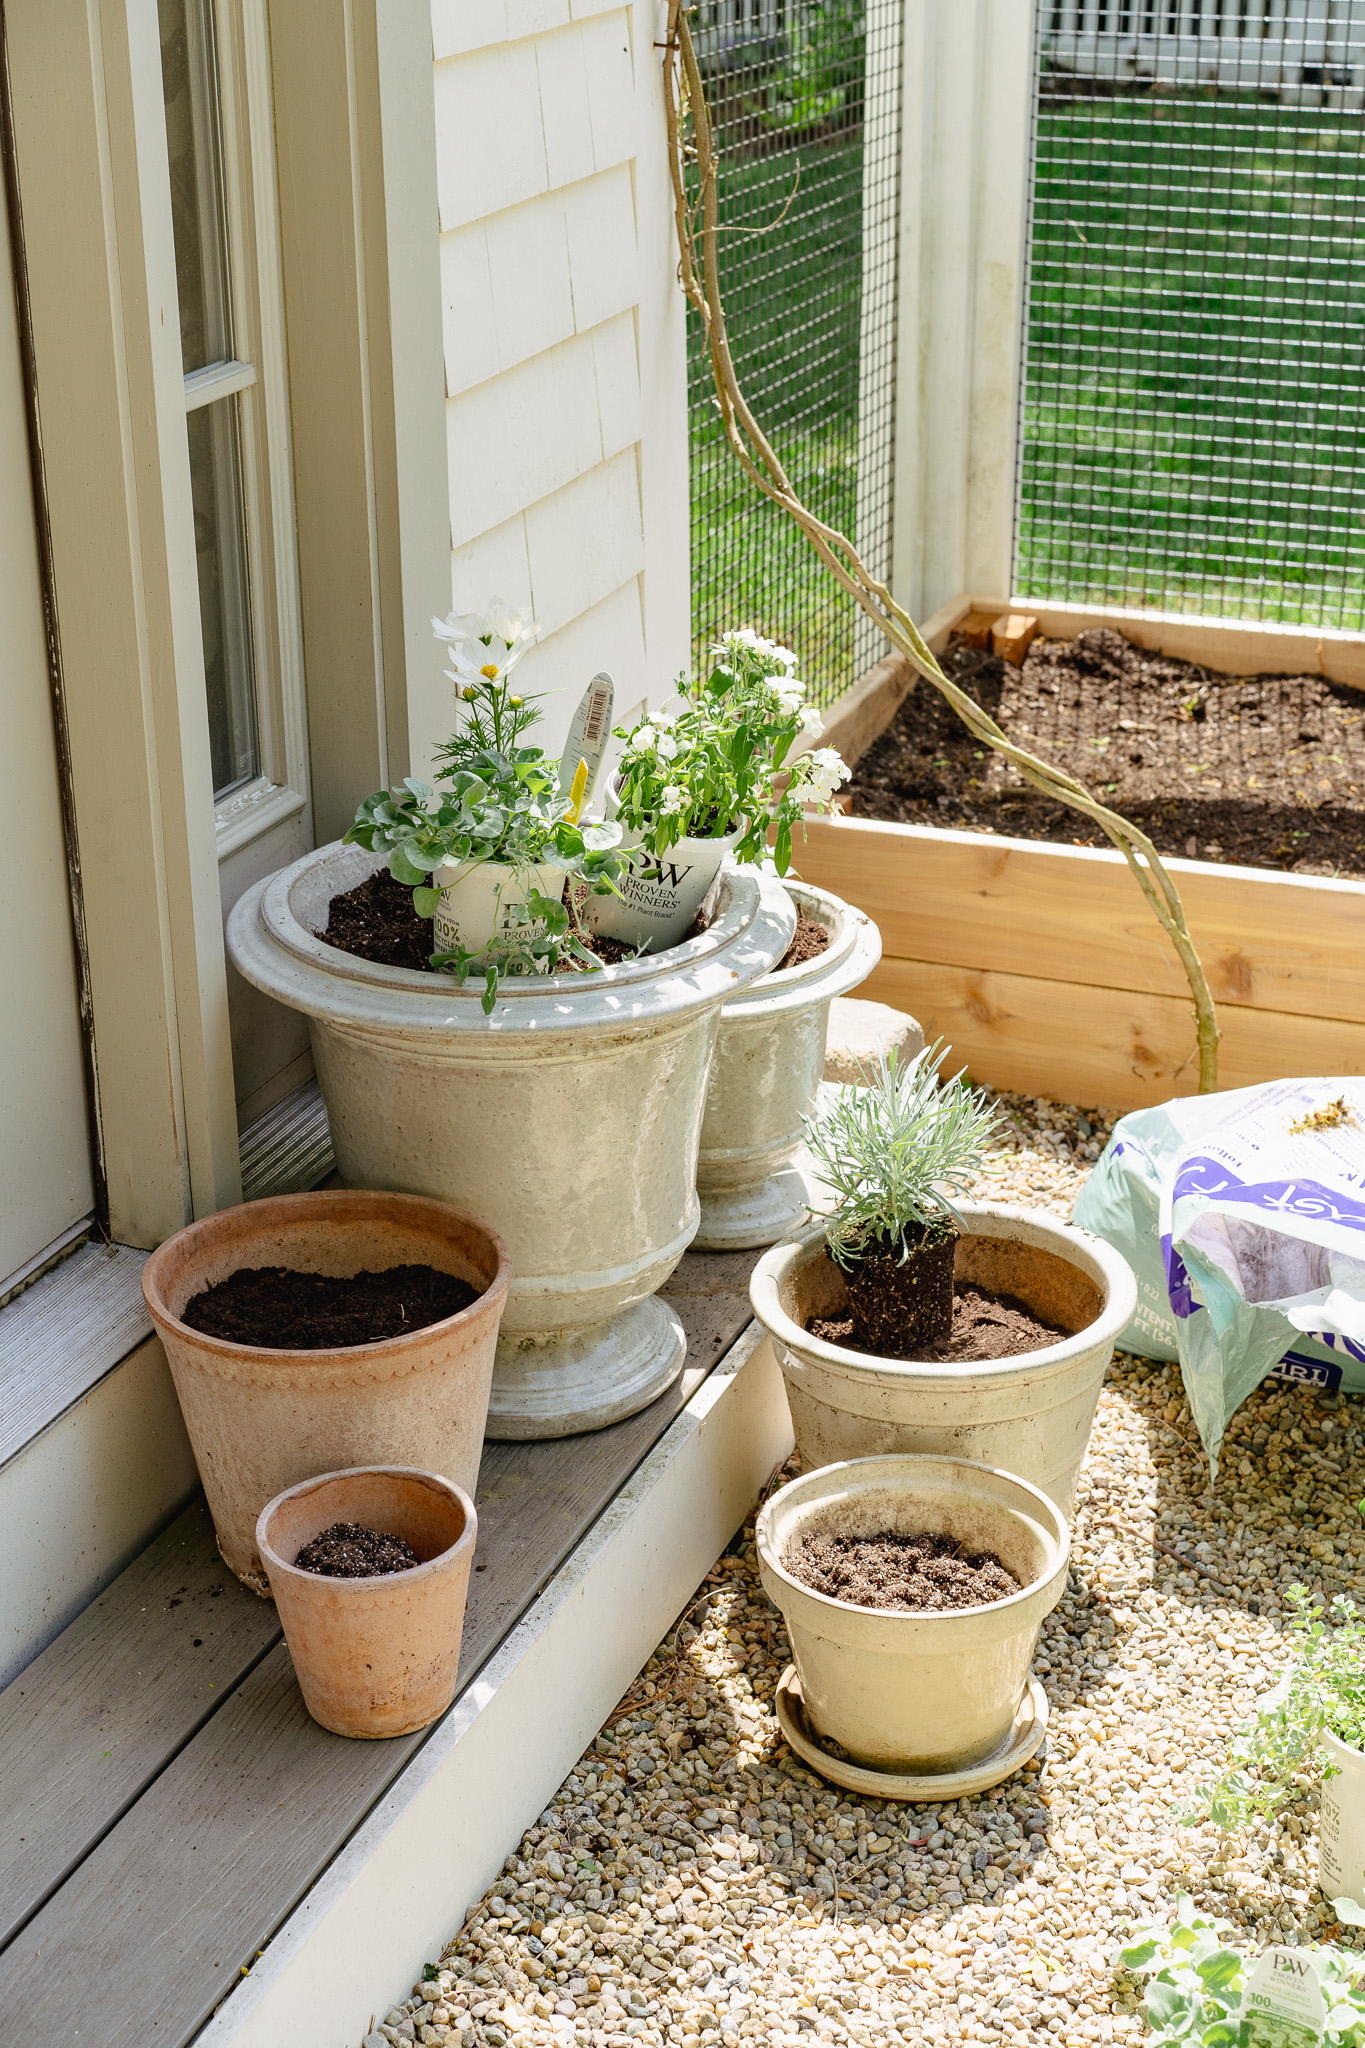
These have been an investment years in the making because big ceramic pots are costly, although scroll below because I found some big ones for $60!!! You can get the look for less always, especially with resin planters, I just knew that I was making purchases for the long haul in this part of my garden. We bring them in before it freezes and store them in our garage over the winter. The ceramic urns are from Terrain and still available in the 17″ size here and in the 12″ size here. I have these two sizes on the step of my she shed. These ones from Walmart have a nice color and texture and are frost-proof. The non-urn ceramic ones come from our local nursery. I found similar ones here and these pretty fluted ones here.
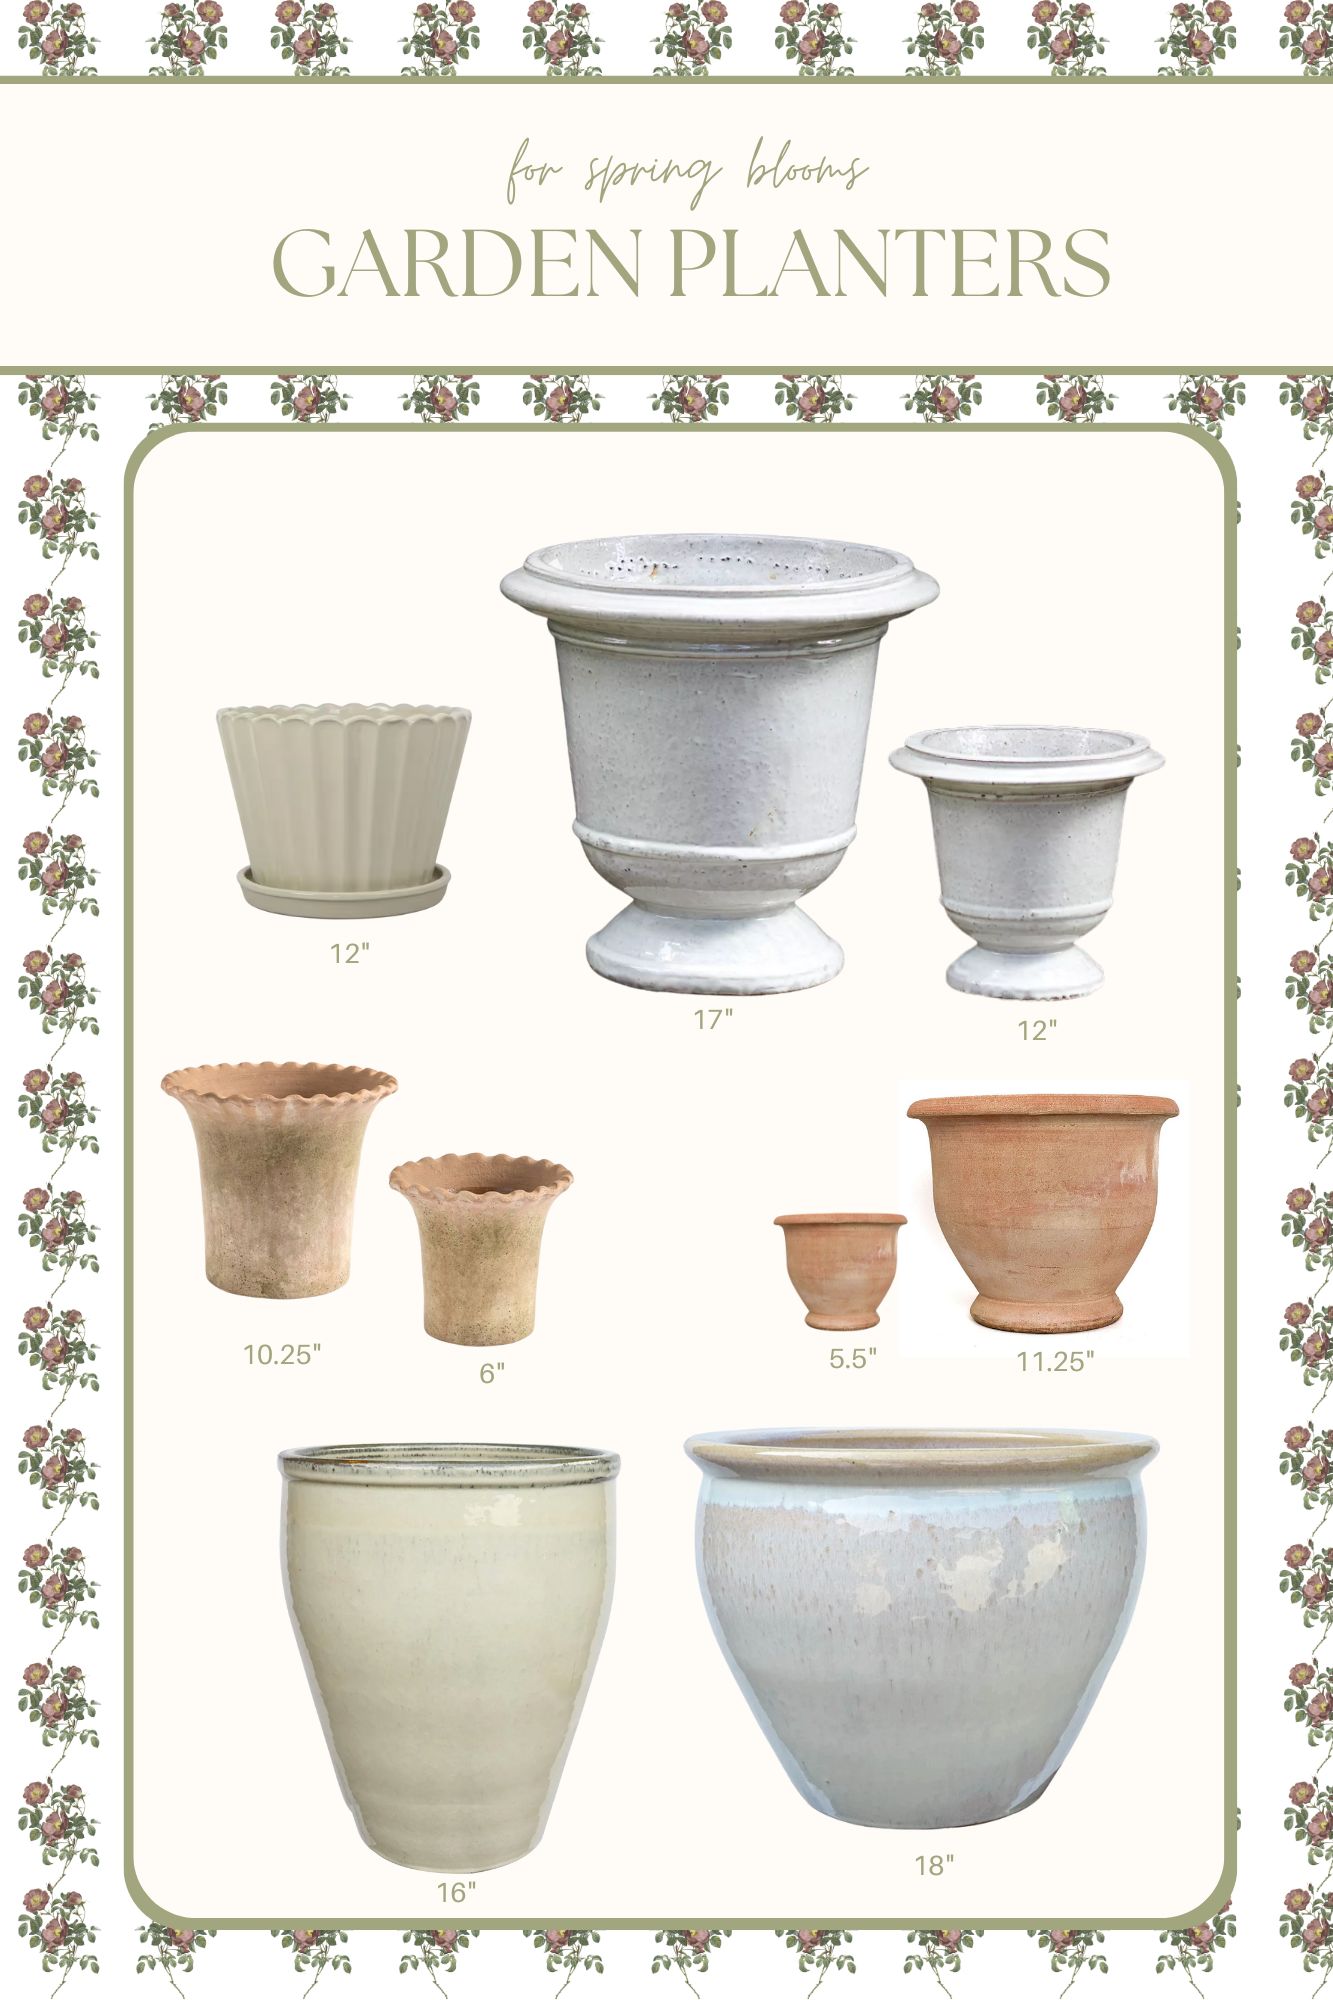
| 12″ Fluted Pot | 17″ Ceramic Urn | 12″ Ceramic Urn | 10.25″ Ruffle Terra Cotta Pot | 6″ Ruffle Terra Cotta Pot | 5.5″ Terra Cotta Urn | 11.25″ Terra Cotta Urn | 16″ Ceramic Pot | 18″ Extra Large Ceramic Pot |
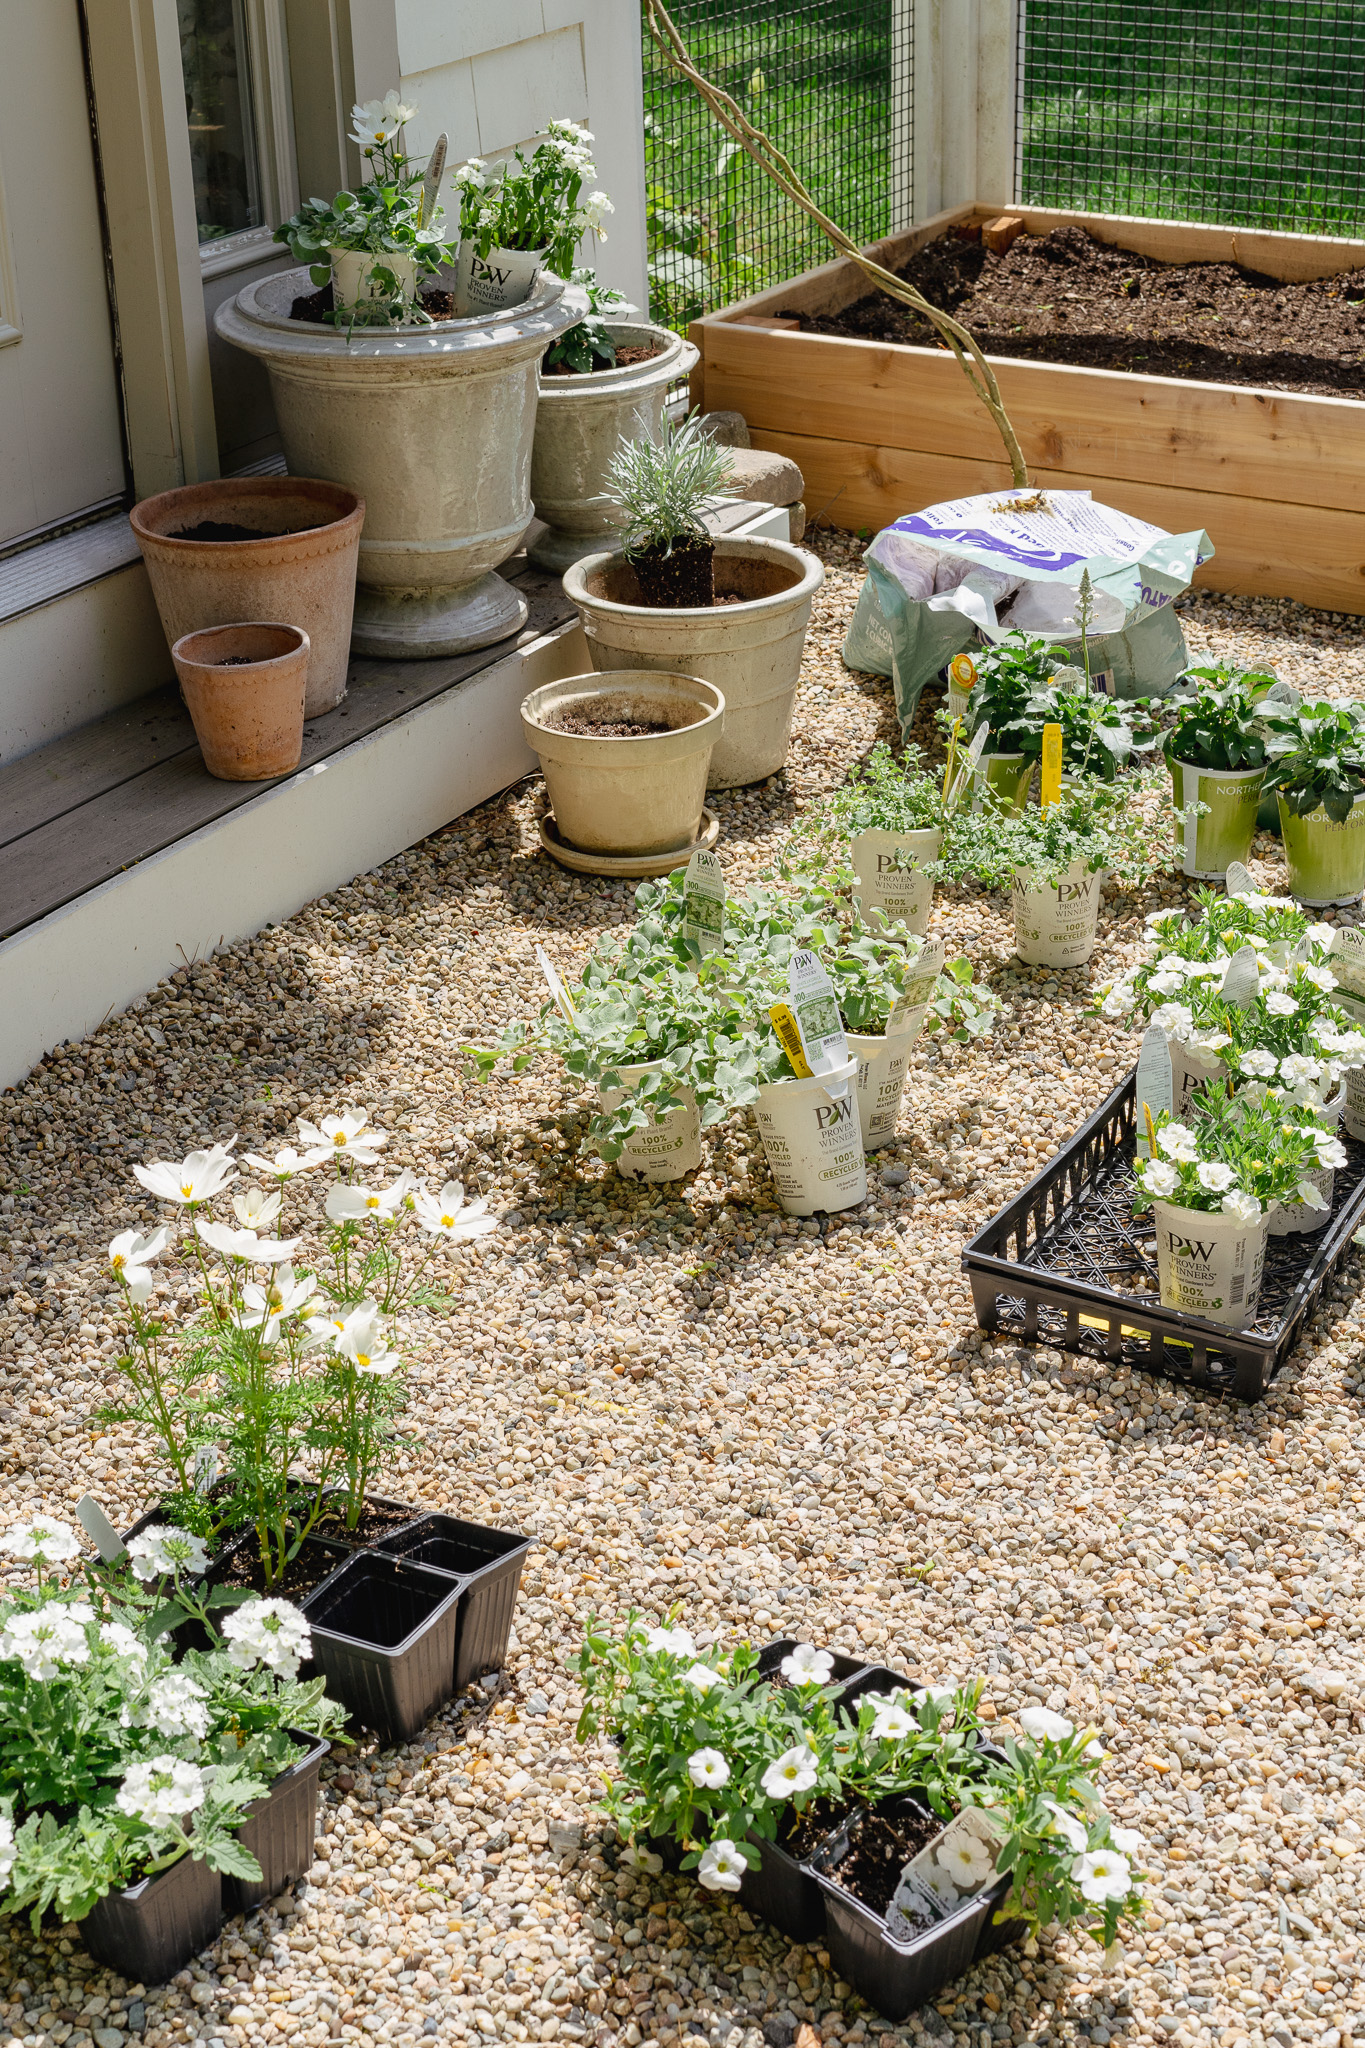
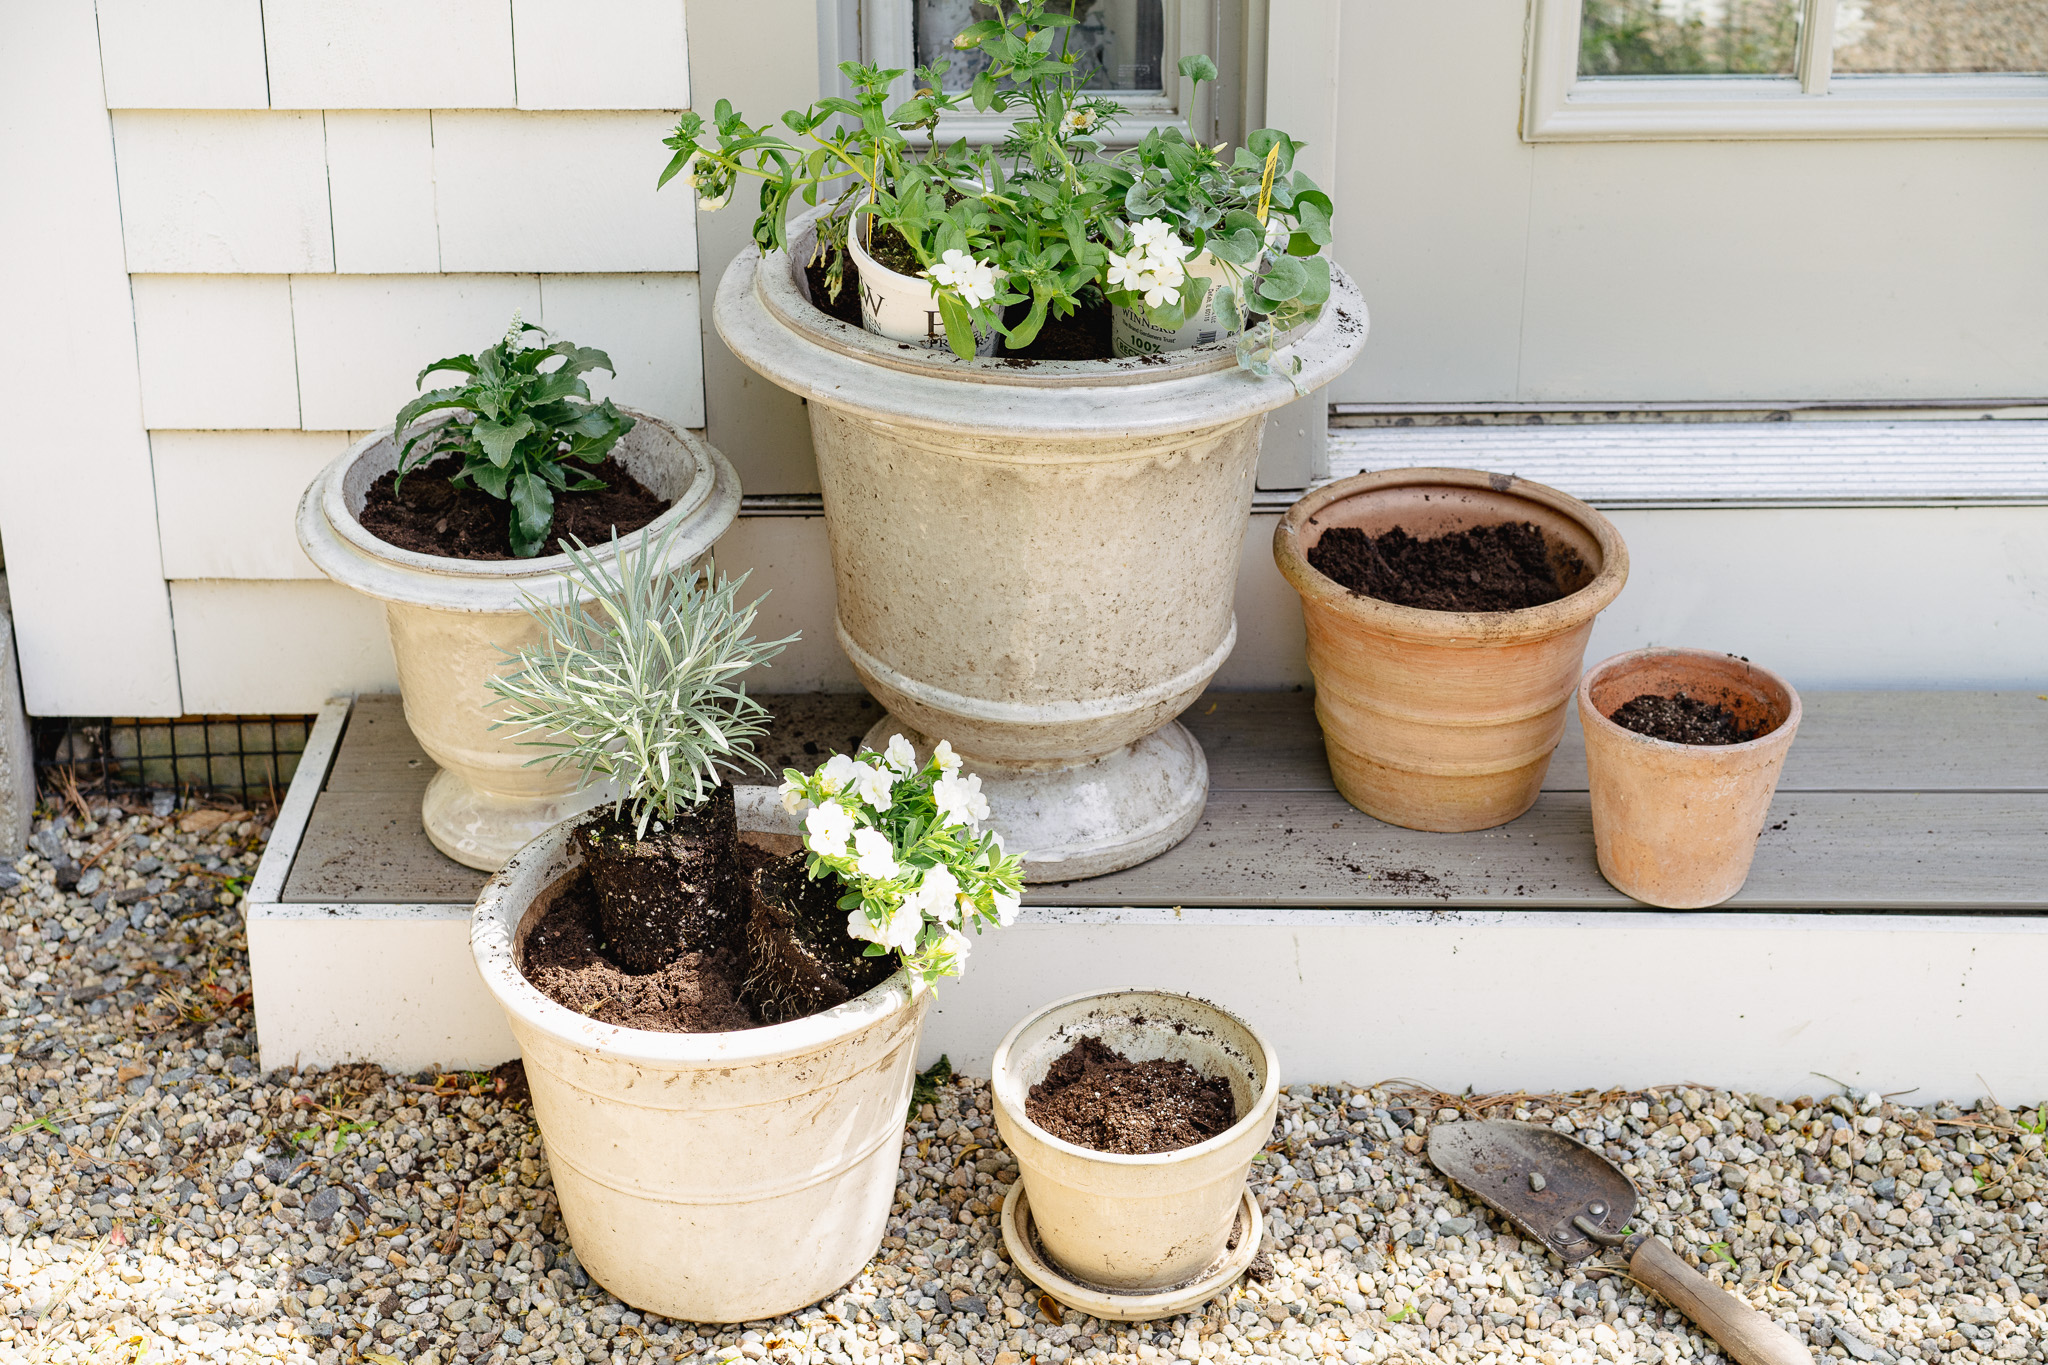
WHAT I PLANTED
I planted the same flowers and greenery on both sides, mirror images of each other. Starting in the very biggest planter, the 17″ Urn.
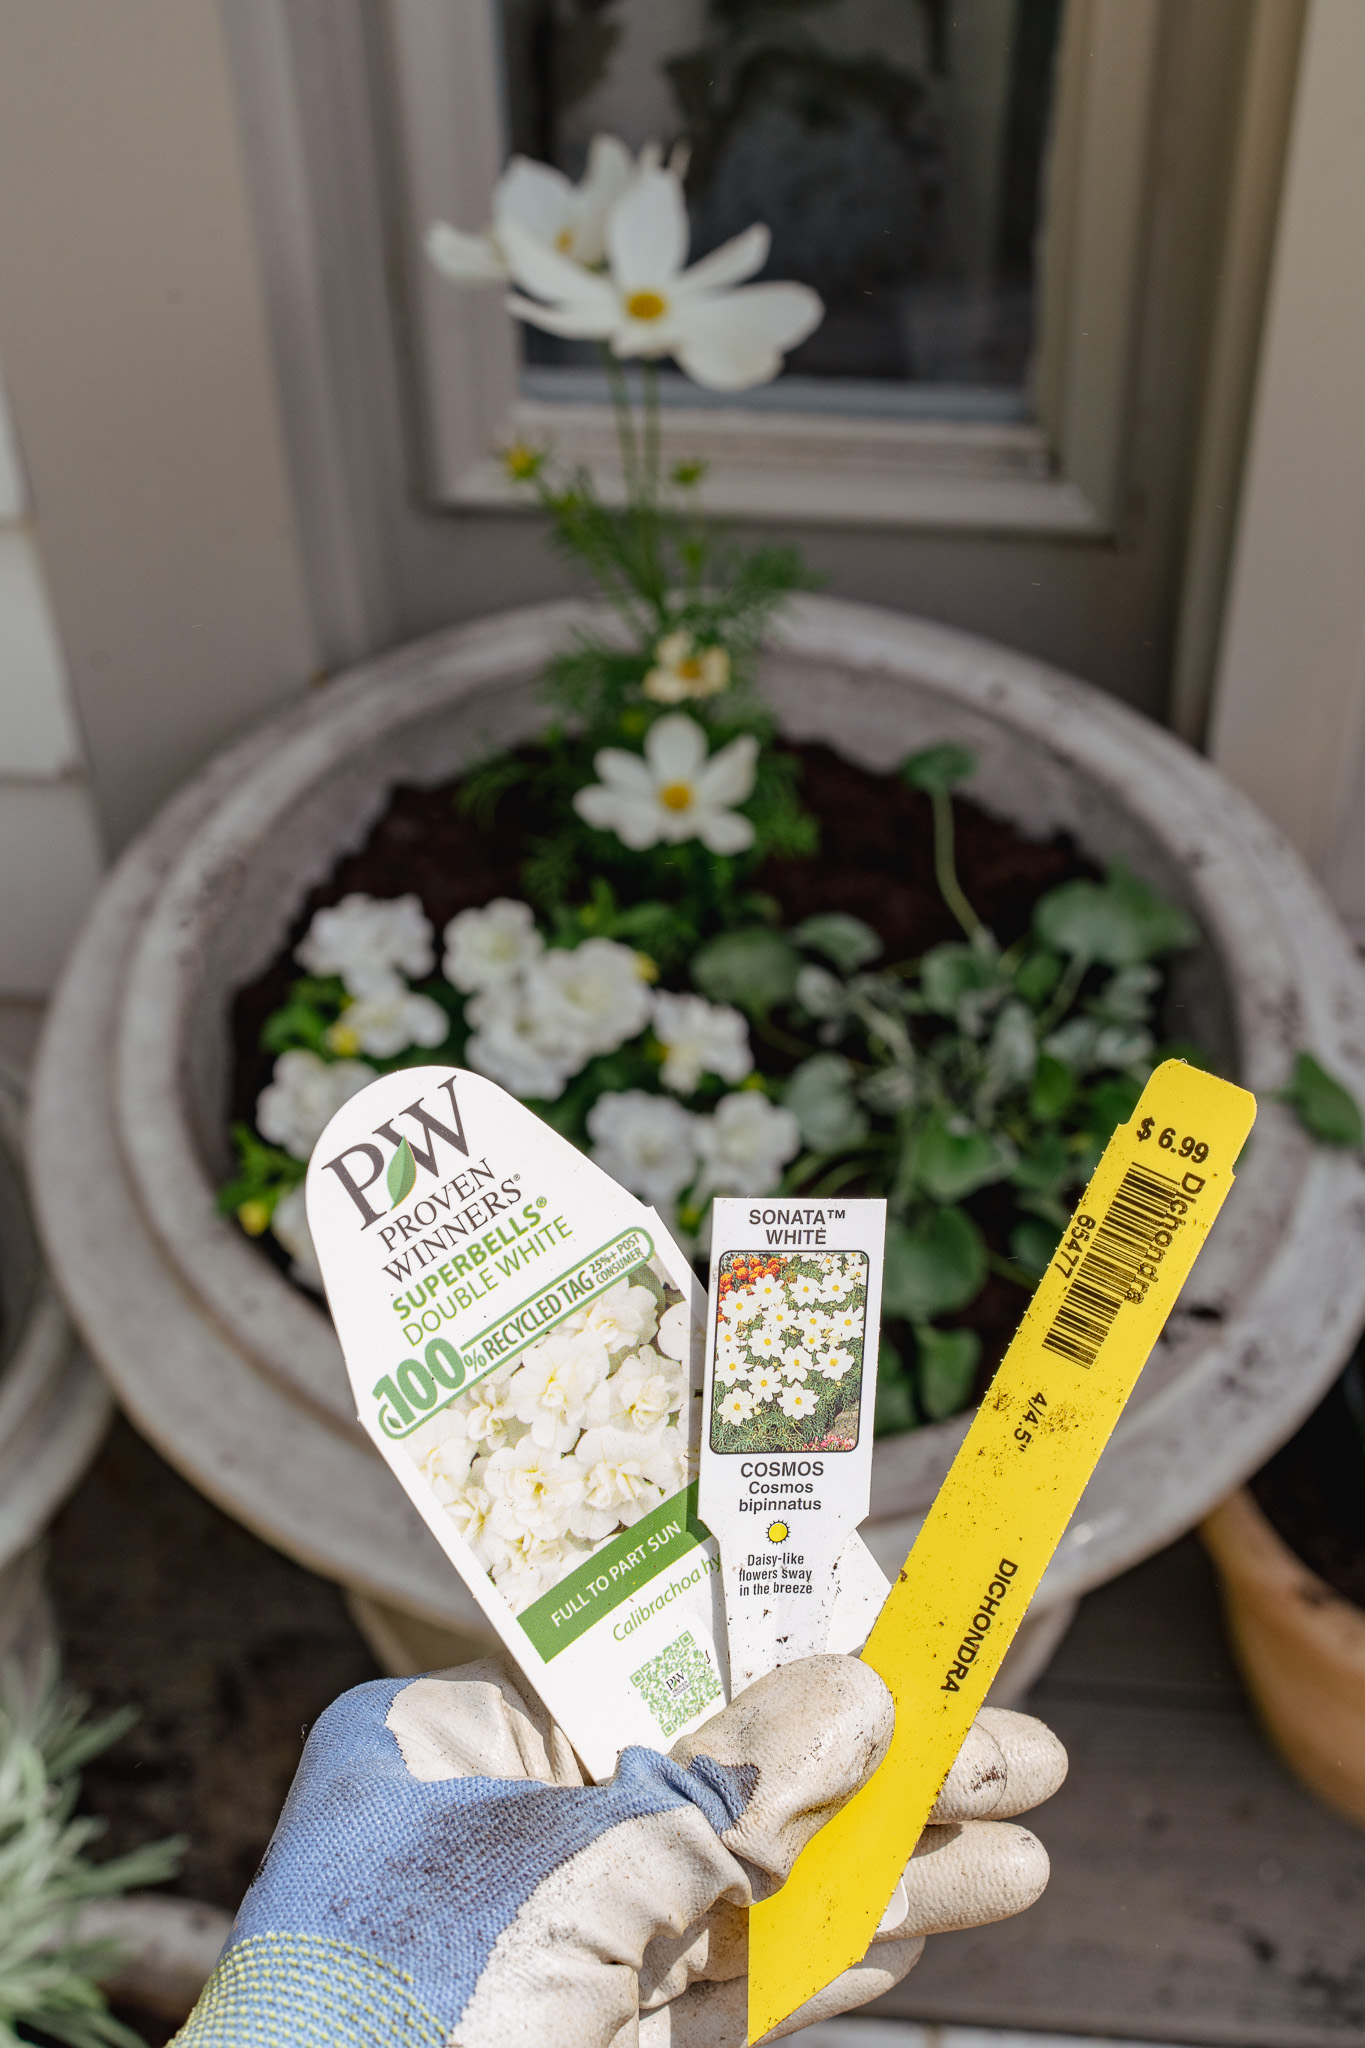
The superhero in my pots is the ruffley Calibrachoa, also called million bells or trailing petunia because of their prolific, bell-shaped flowers and their similarity to petunias. I love these guys. In the center back of the pot is a white Cosmo which will get tall and the dusty green trailing plant is Dichondra. These are one of my favorites because as they grow they tumble out of the pot and the color of the leaves are so pretty. These form a triangle shape in my pot, with the cosmos growing high, the Calibrachoa getting bushy and spilling over the side and the Dichondra trailing out the other side.
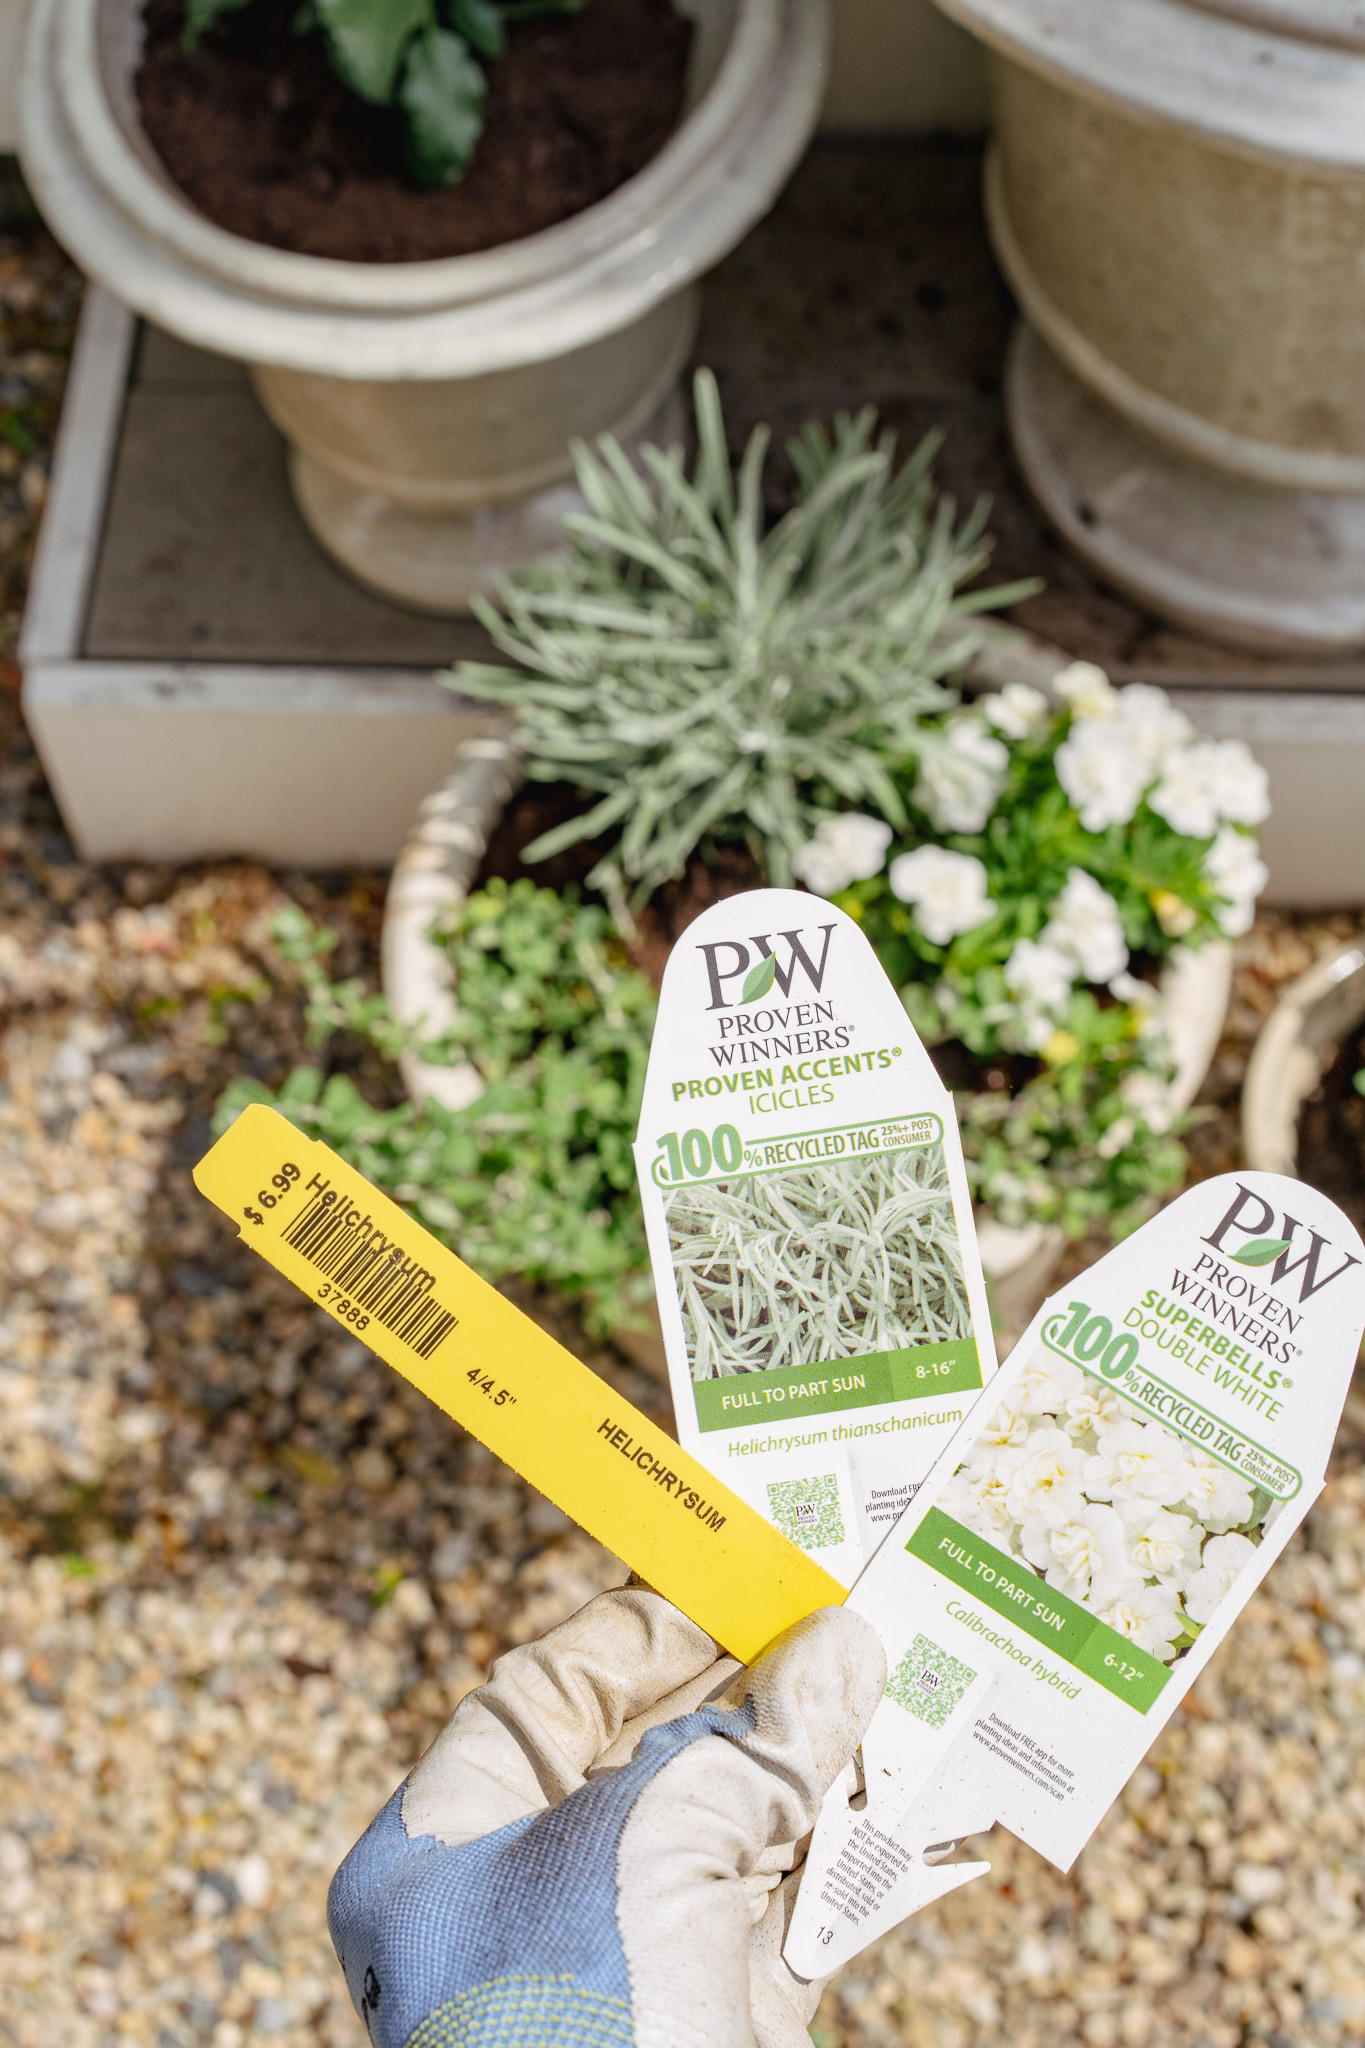
The second largest ceramic pot on the pea gravel has Helichrysum, Helichrysum thianschanicurn and more Calibrachoa. The Helichrysium thianschanicurn adds textural interest with its icicle-like spikes, the other kind of Helichrysum has finer leaves and it drapes nicely. I purposely use more Calibrachoa because it ties the grouping together. The smaller ceramic pot next to it is planted with a single white Verbena.
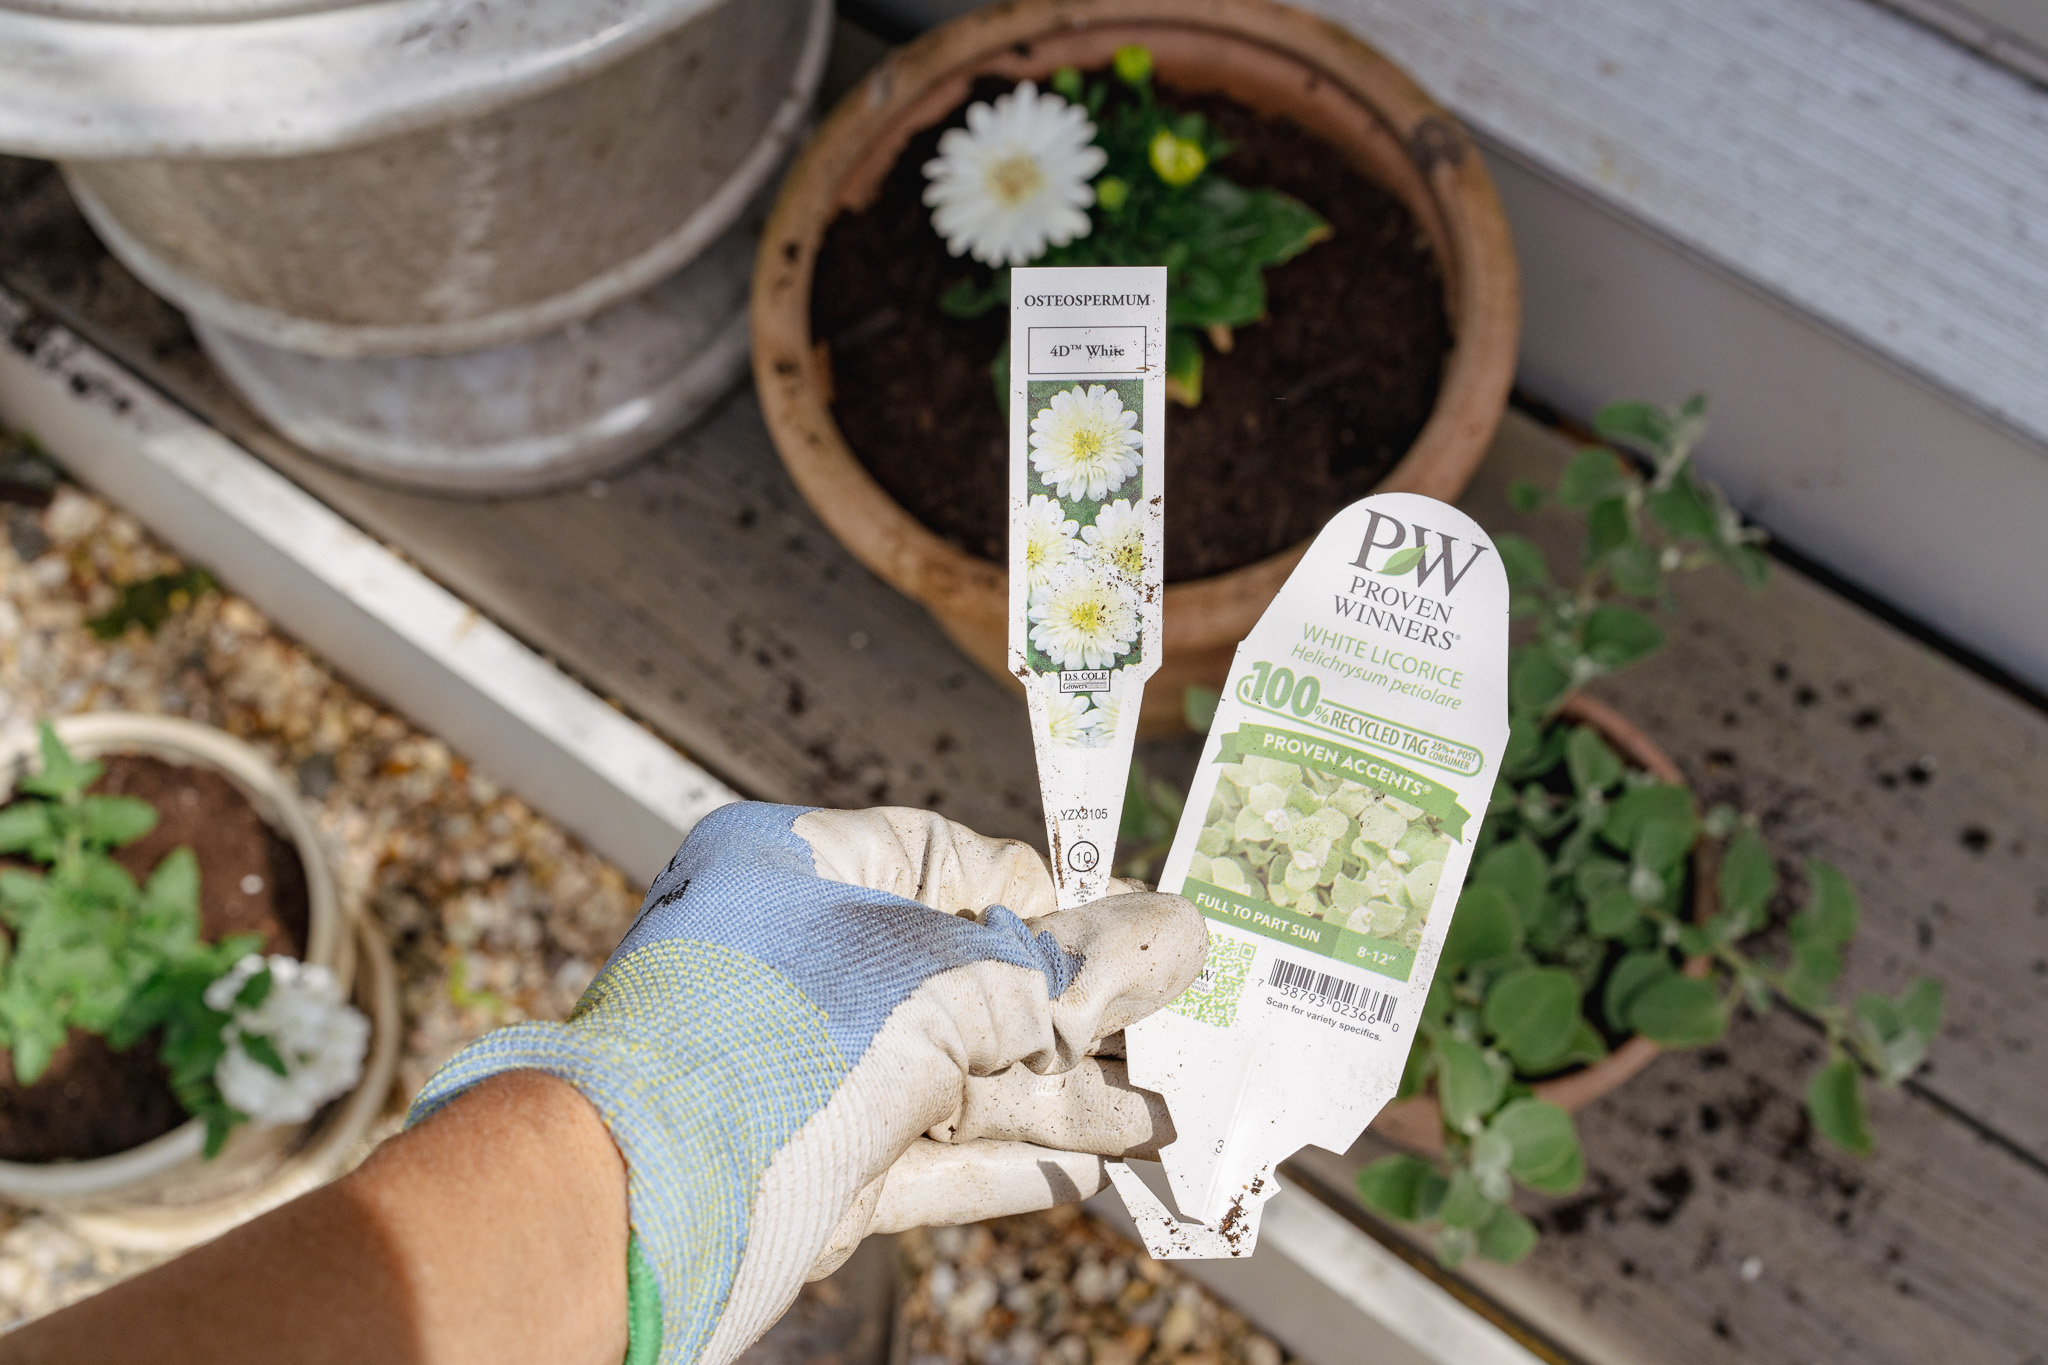
The two terra cotta pots next to the large Urn planter have a single white Osteospermum and next to it in the smaller pot, Helichrysum petiolore also known as White Licorice. To left of the big ceramic urn in the smaller ceramic urn on both sides of the french doors is a single white Salvia plant.
WHAT I’M DOING DIFFERENTLY
In years past I have planted a beautiful white Iceberg Rose bush in both of the biggest planters on my She Shed steps. I ripped those out last year and angrily got rid of the them. I was SO tired of battling caterpillars. No matter what I used and how much I painstakingly pinch them off the leaves, I ended up with an almost completely leaf-free rose bush by the end of the season. It never looked pretty and was a pain. I’m flying the white flag and trying white Cosmos this year for the height, prolific blooms and *hopefully* less insect damage.
WE USE A DRIP LINE
Spoiler alert, I do not hand water these pots. We invested in the Drip Works irrigations system for my entire cottage garden. It took Matt several hours to install the kits but the lines are thin, flexible and easy to maneuver and customize all around the garden. We bury the line in the pea gravel so it is barely noticeable coming off the garden bed next to the wisteria and the flowers thrive with consistent watering through the heat of summer.
Happy Planting Season! I hope this Cottage Garden Containers Planting Guide helps you pick out some lovely plants for the growing season ahead!

 comment share
Lifestyle
TOP PICKS
Leave a Reply
Want to join the discussion?Feel free to contribute!