
HOME TOUR
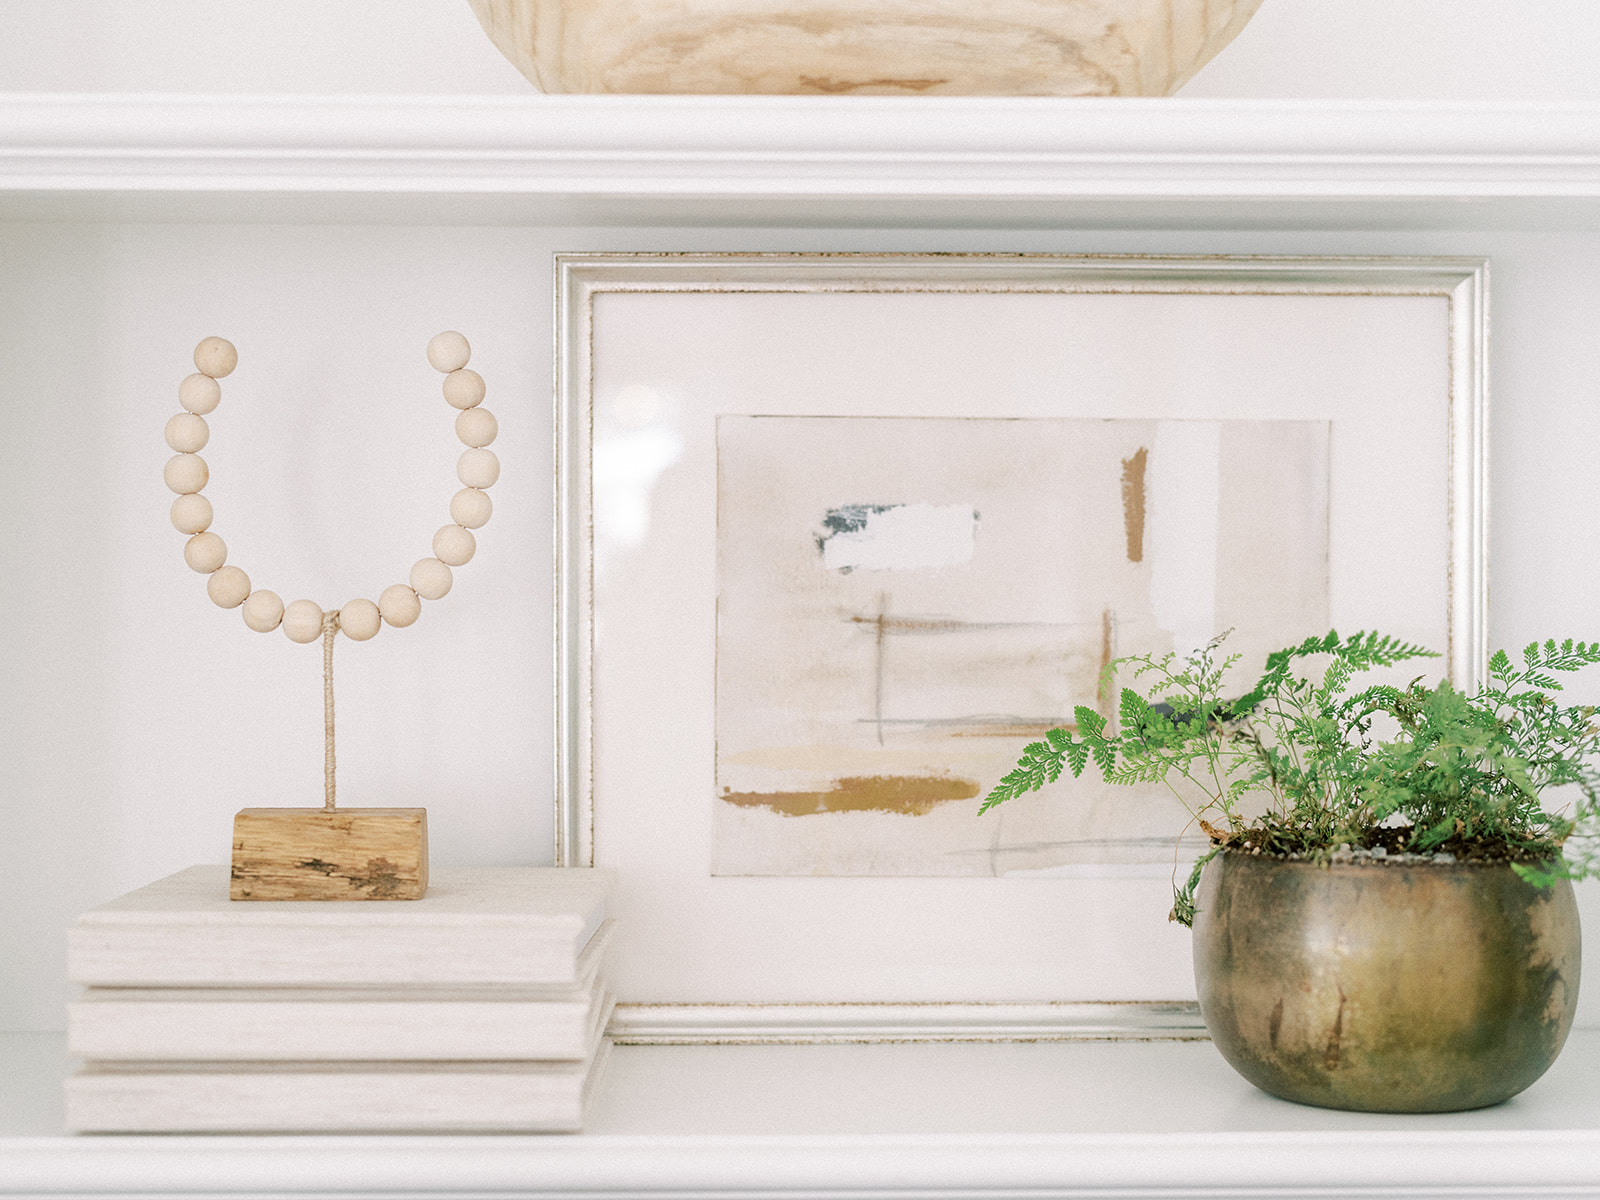
Styling bookshelves could be a past time. There are so many combinations, ways to layer textures and display sentimental treasures. Over the years, I’ve styled our family room bookshelves many different ways but love honoring symmetry in our space and balancing out wood tones. It hasn’t been changed up in awhile and I got a hankering to do so not too long ago. I got online to find some new treasures and headed to a few of my favorite shops. One object that I loved, the wood bead semicircle object was sold out. And the more I thought about it, the more I wanted something similar but my own. So I made it. And you can create a wood bead shelf object too.
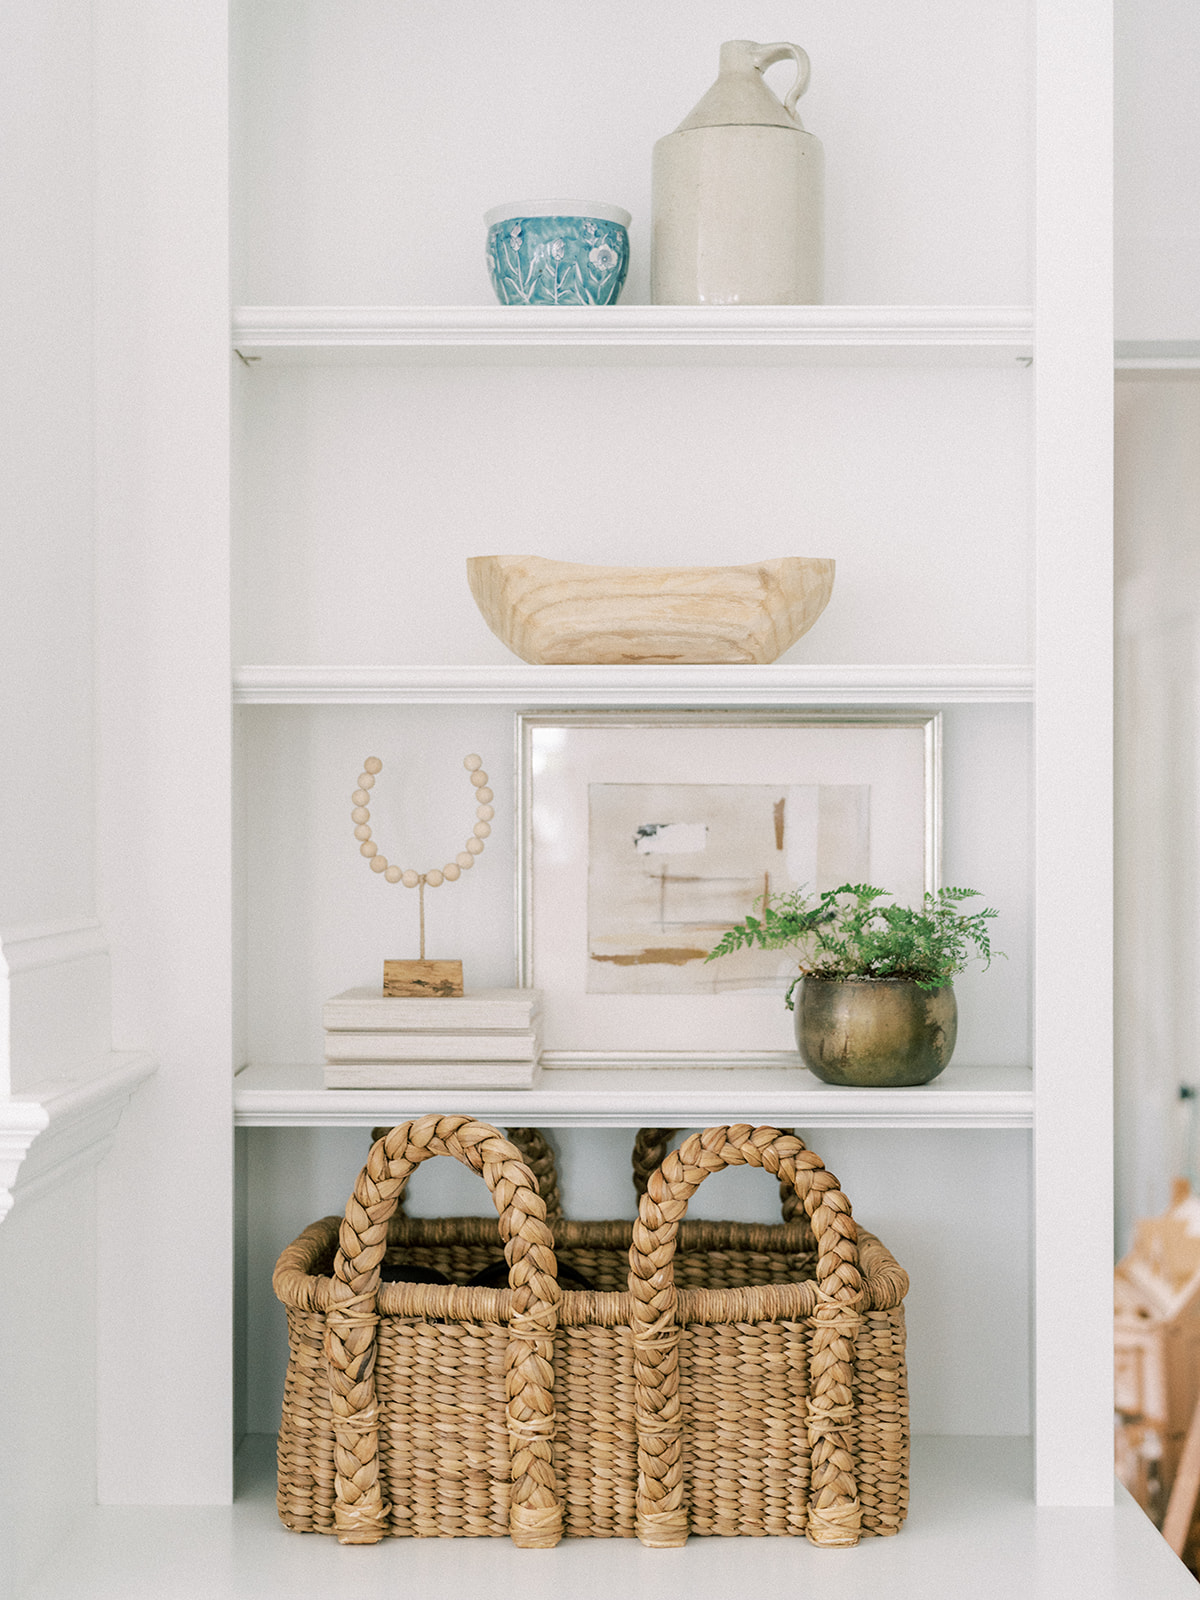
This piece is a stunner and you’d never guess how easy it is (with a few tools and some elbow grease). No one will be able to guess this is a DIY.
FINDING THE WIRE
When I told my hubby my idea–how I wanted to make a wood bead shelf object of my own but “Finding Lovely’s take on it,” he got his thinking hat on. That guy. He’s a big time keeper. I told him I needed wire that would hold its shape but could be bent. I showed him the wooden beads I wanted to string on it (leftover from a broken Christmas garland from a couple years ago) and my general ideas. And he went searching. His thought was “there’s gotta be some kind of wire in this old house to pull off my crazy wife’s idea.” And you know what that guy found? You’ll never guess! He was walking around the basement when an old paint can caught his eye.
Why not use the paint can handle? It’s sturdy but bendable, already kinda shaped in a semi circle and so many of us have paint cans lying around. It is an easy source of free wire. And if you don’t have any, Home Depot sells just an empty gallon paint can with handle for less than $5. And you know what! That paint can handle wire just so happened to be the exact diameter of my 20 mm (3/4″) natural wood bead’s holes. Talk about meant to be. Now fair warning, I have not tested every 20 mm bead out there and can’t guarantee the ones you buy will have the same hole size. I bought my beads in a bulk set like this off Amazon a few years ago.
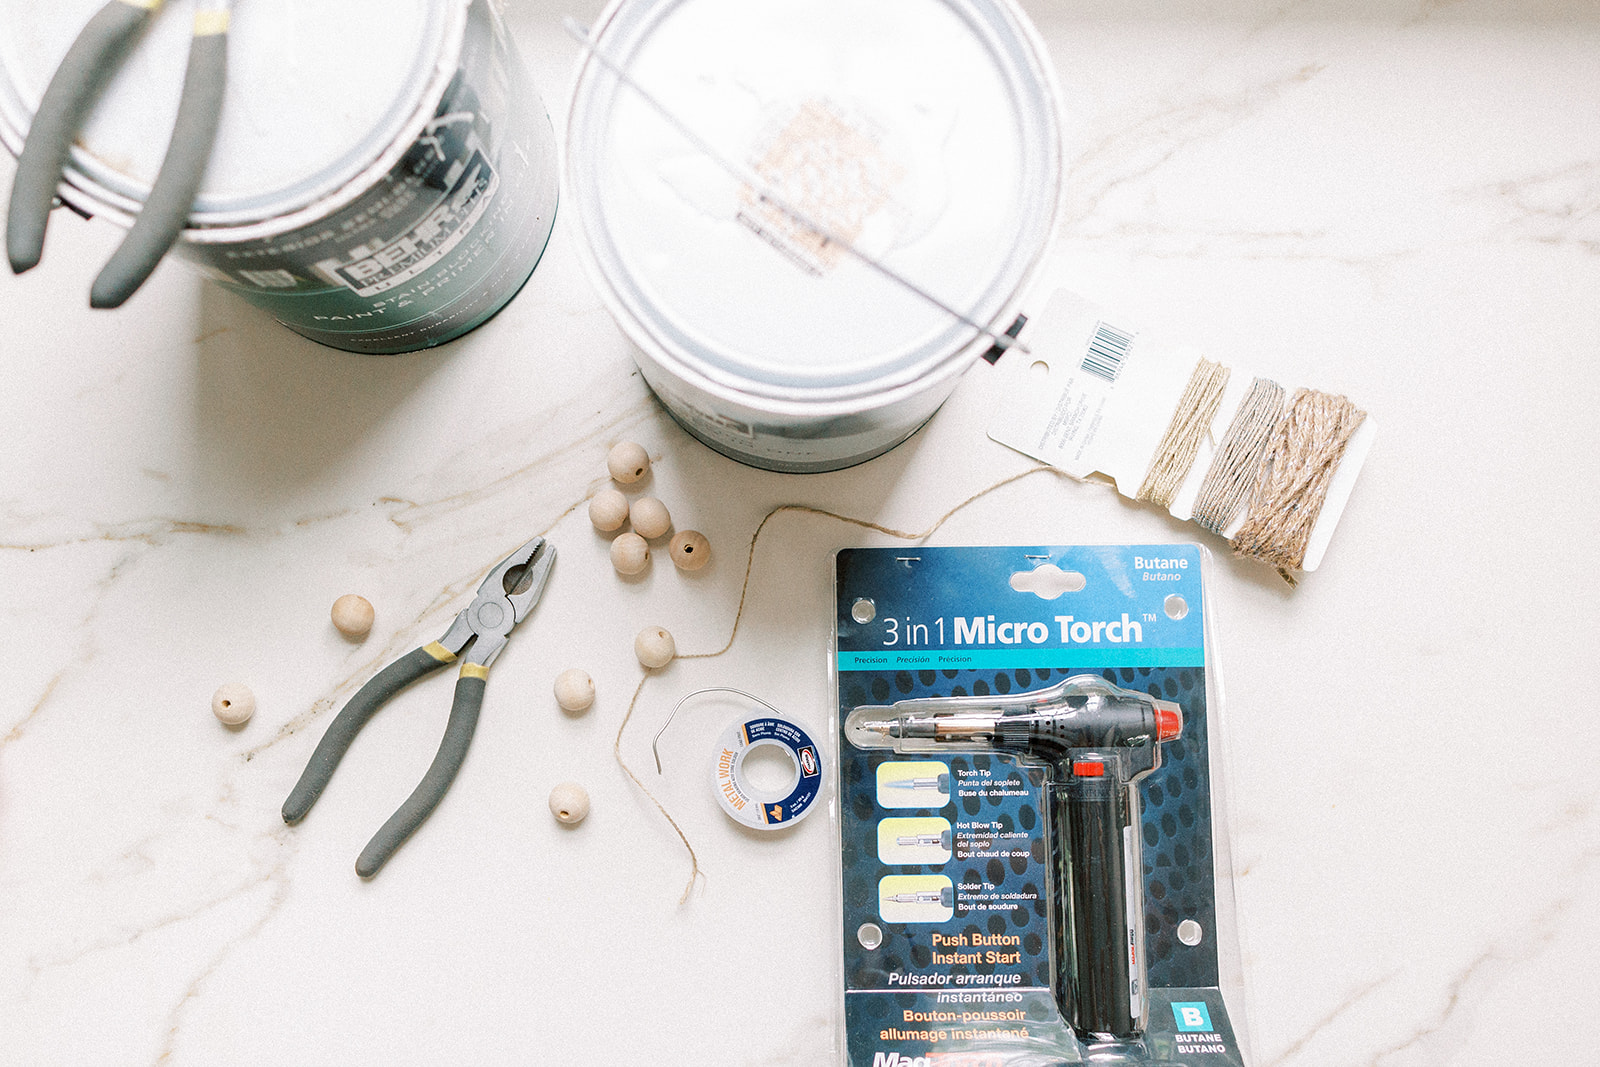
SUPPLIES
18 Wooden Beads (20 mm or 3/4″ in diameter)
High Leverage Side Cutting Pliers
Block of Wood (We used remnant reclaimed barnwood left over from our kitchen)
Drill Bit
Hot Glue
Butane Torch with Soldering Tip (depending on the torch you buy, you may need to purchase Butane separately)
CREATING THE SHAPE
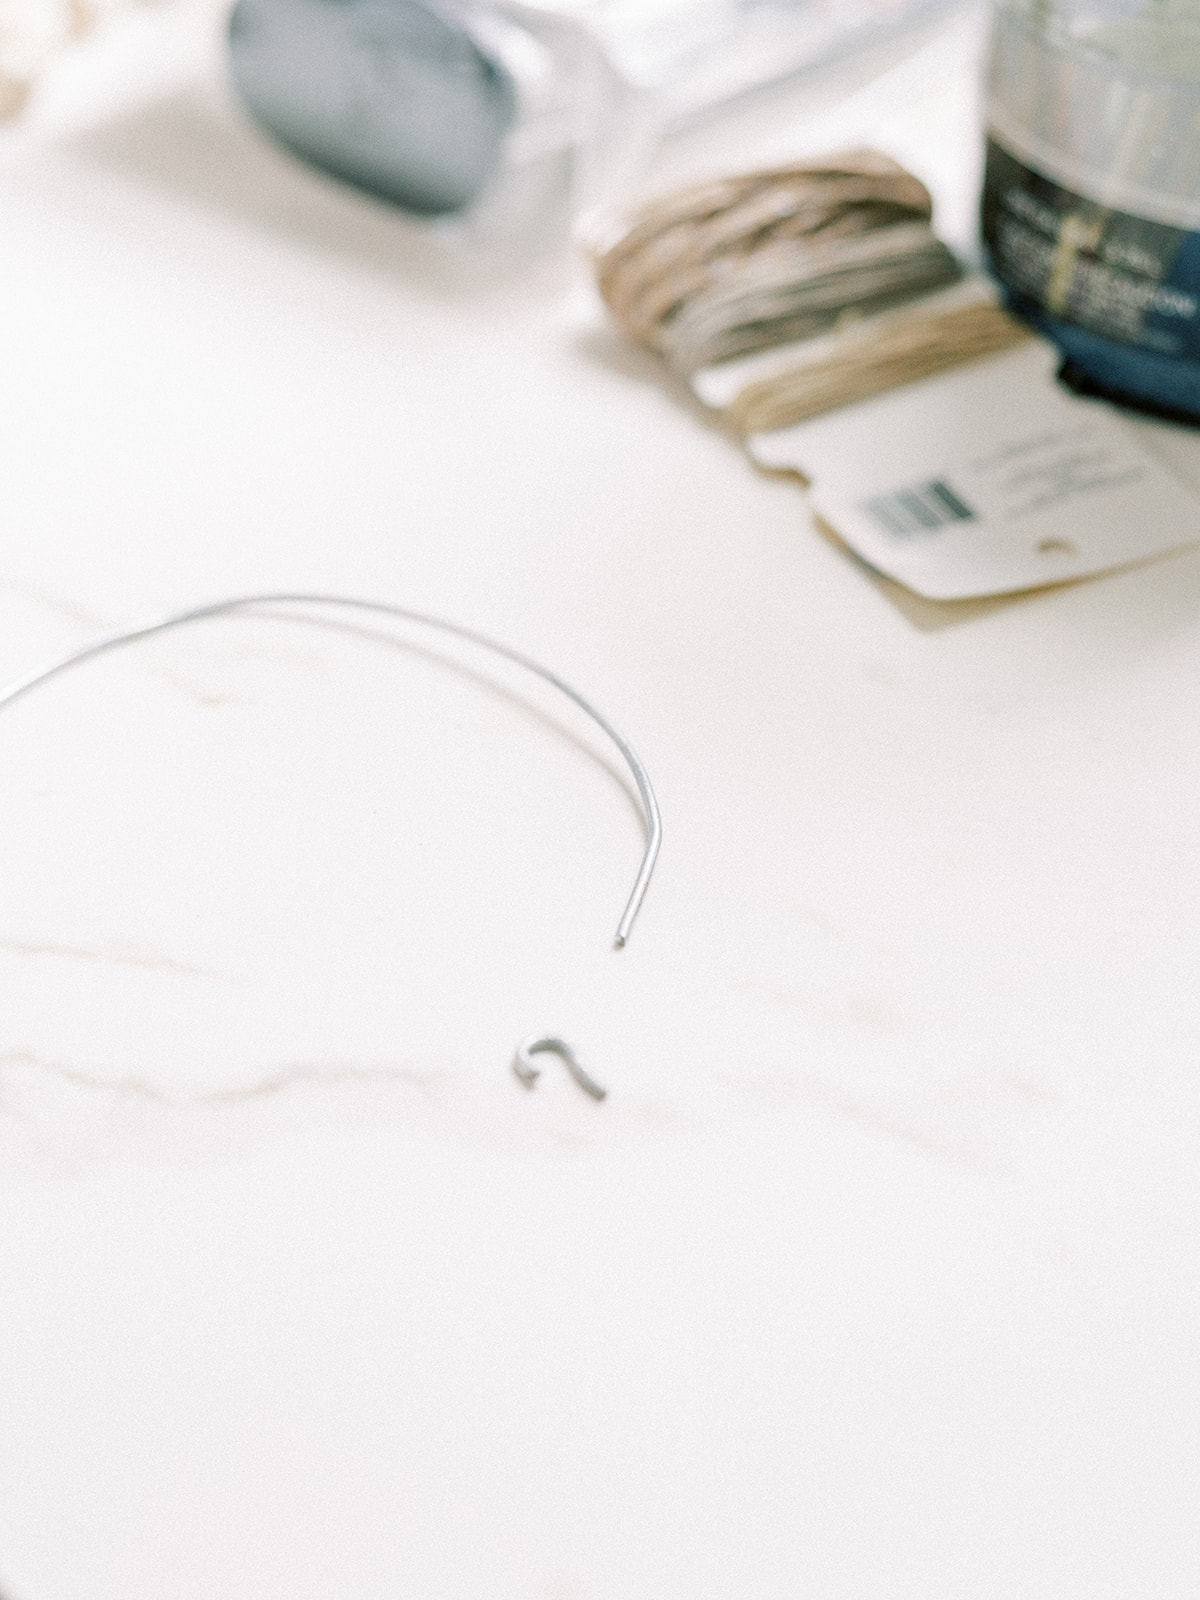
Matt bent one wire handle in a horseshoe shape clipping off the small loops (those ends that attached the handle to the paint can) with a wire clipper. It was about 5″ wide by 5″ tall.
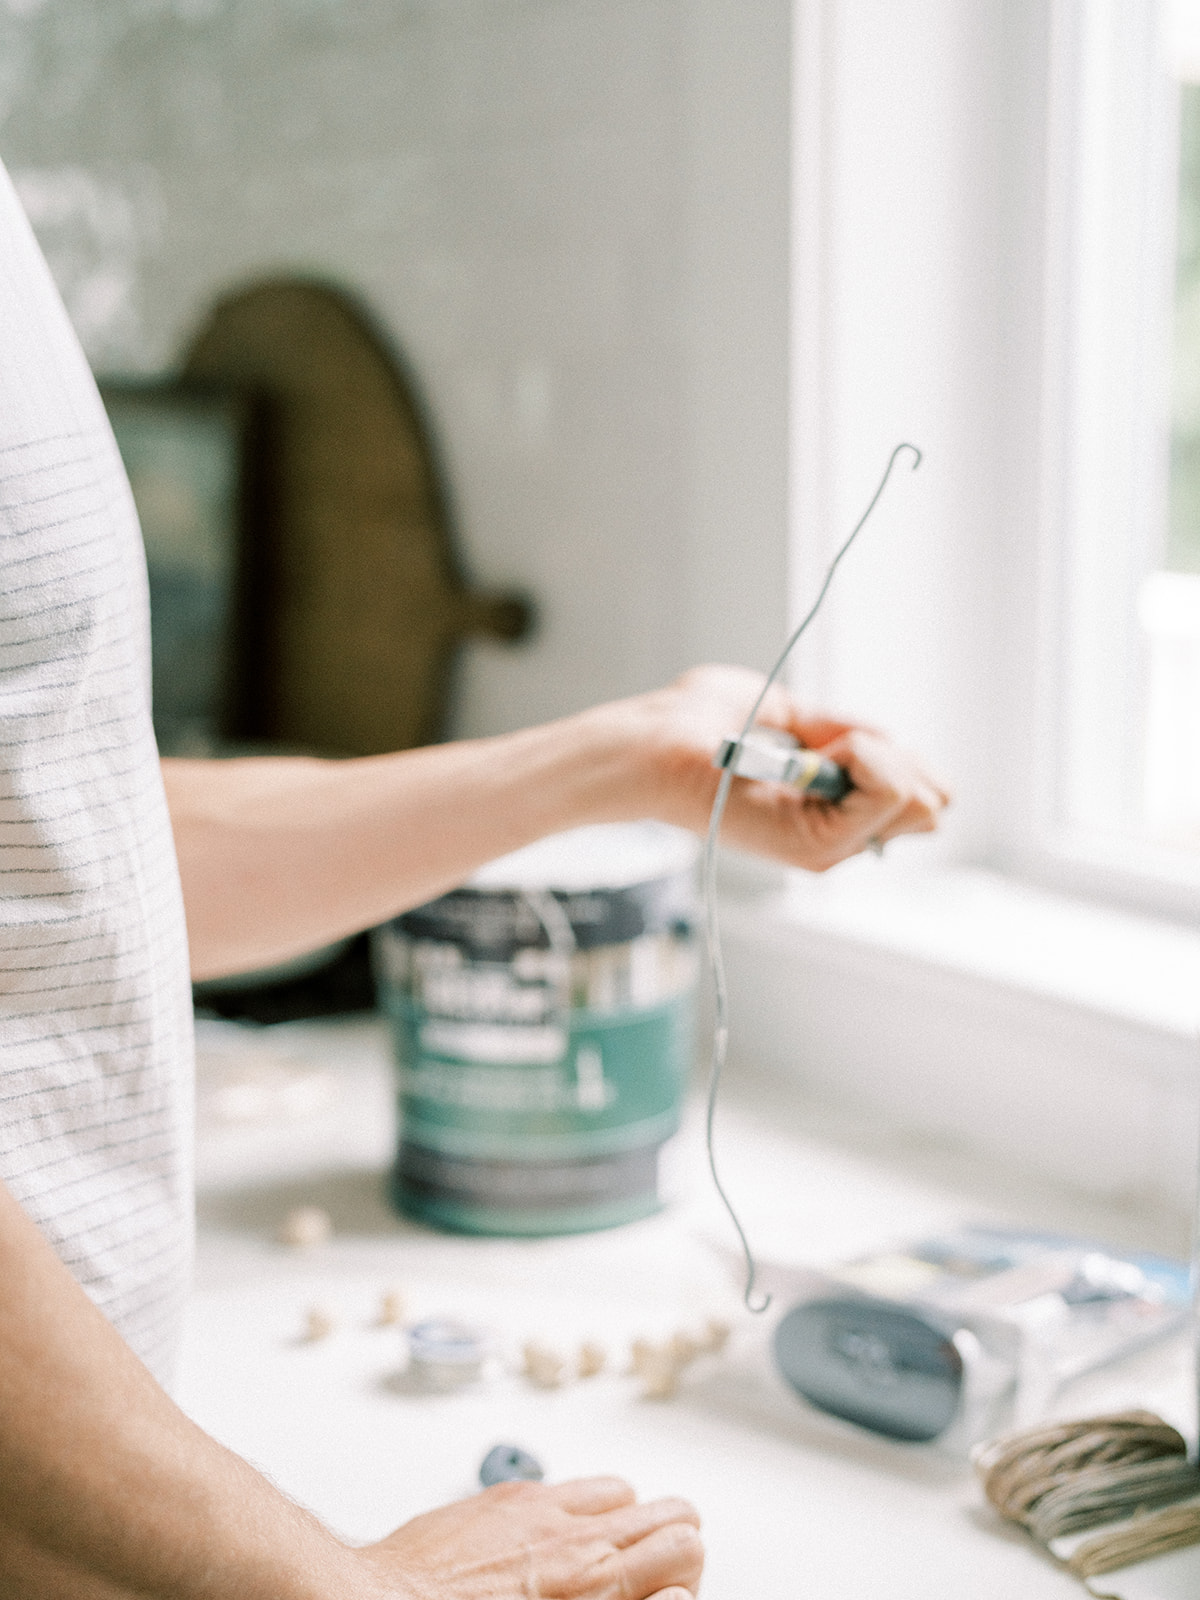
He then used another paint can wire handle, straightened it out, clipped off the small loop on just one end and used the other small loop to hang over the horseshoe shape he already made.
SOLDERING THE WIRE
Here’s where it took us a bit of time to figure out. Clearly the most appropriate method to attach metal to metal is soldering but who the heck has one of those fancy machines lying around. Ok maybe you do if you do metal work or jewelry making. But in my Norwegian stubbornness I said, “let’s just Gorilla Glue it.” That didn’t work, don’t try it. We even let the glue dry for a full 24 hrs. Ok what if we hot glue it? That didn’t work either. Sooo, long story short, we ended up buying an inexpensive butane torch and solder wire at the local hardware store in order to solder it. Haha! So even though I had hoped to make this with just what we had at home, I’m glad to have this useful little tool in our arsenal for future projects.


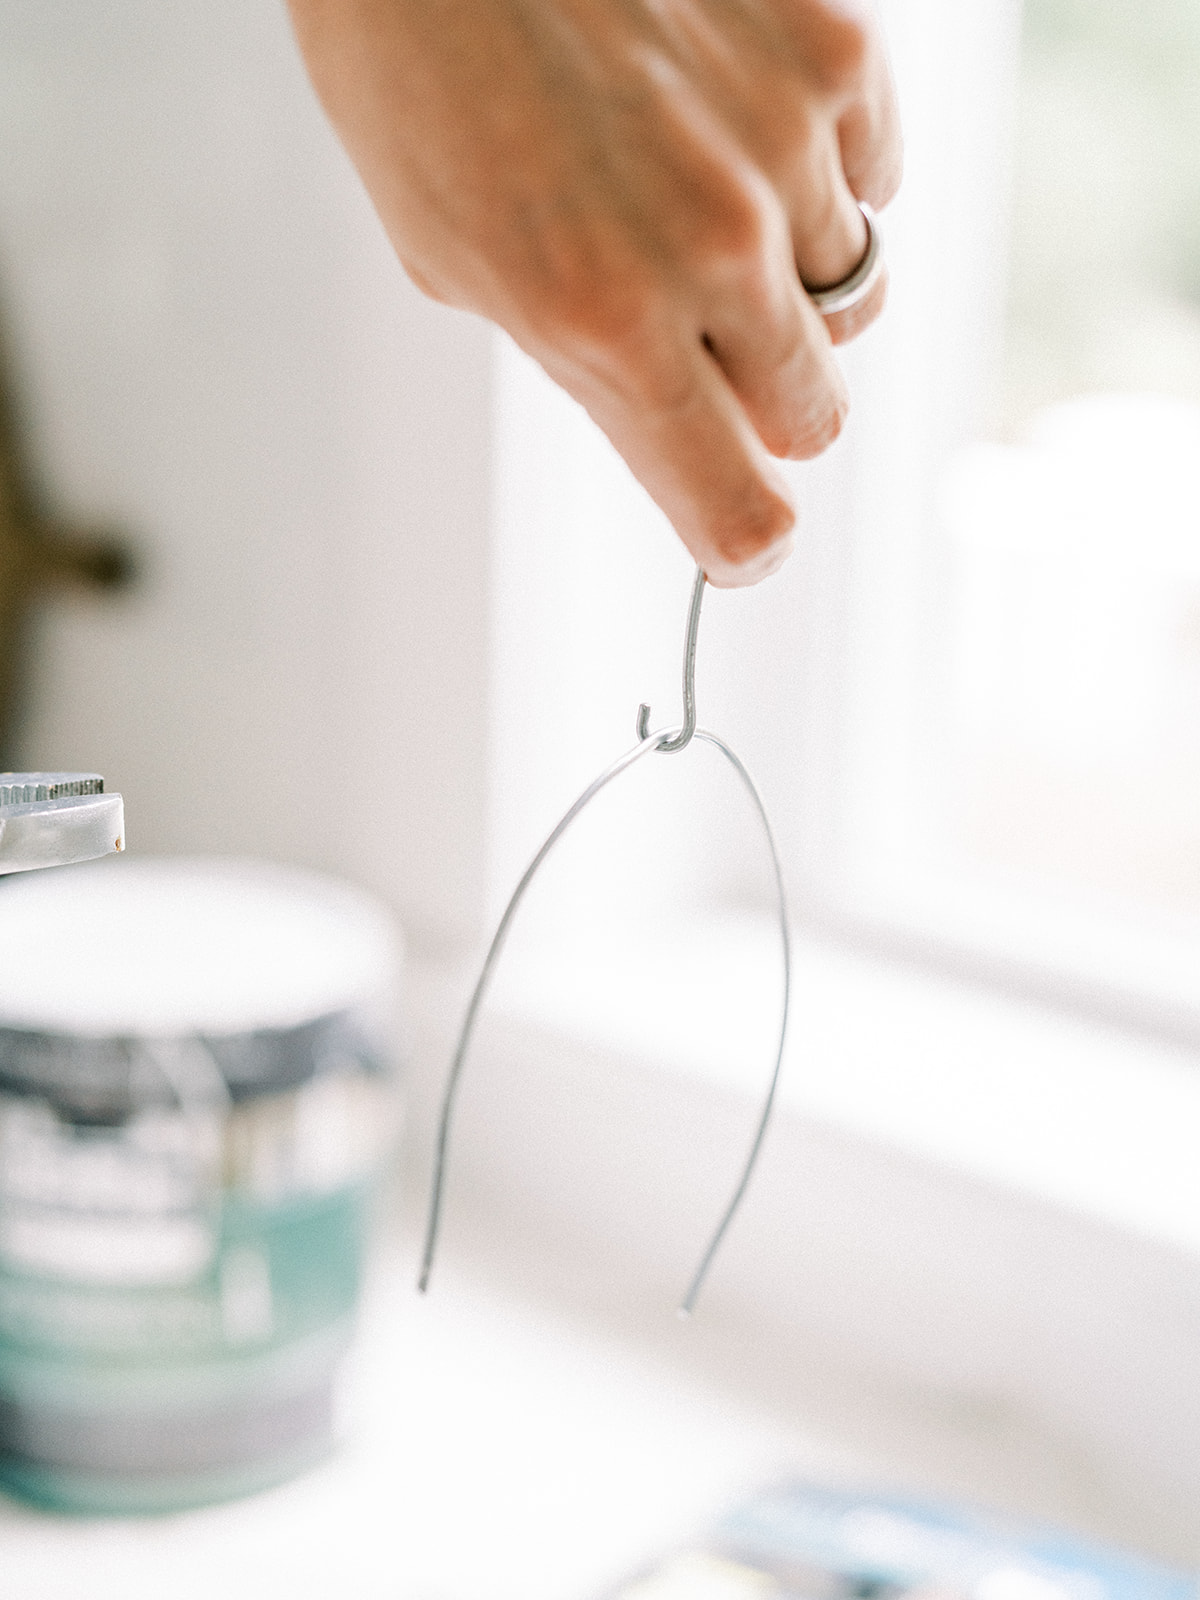
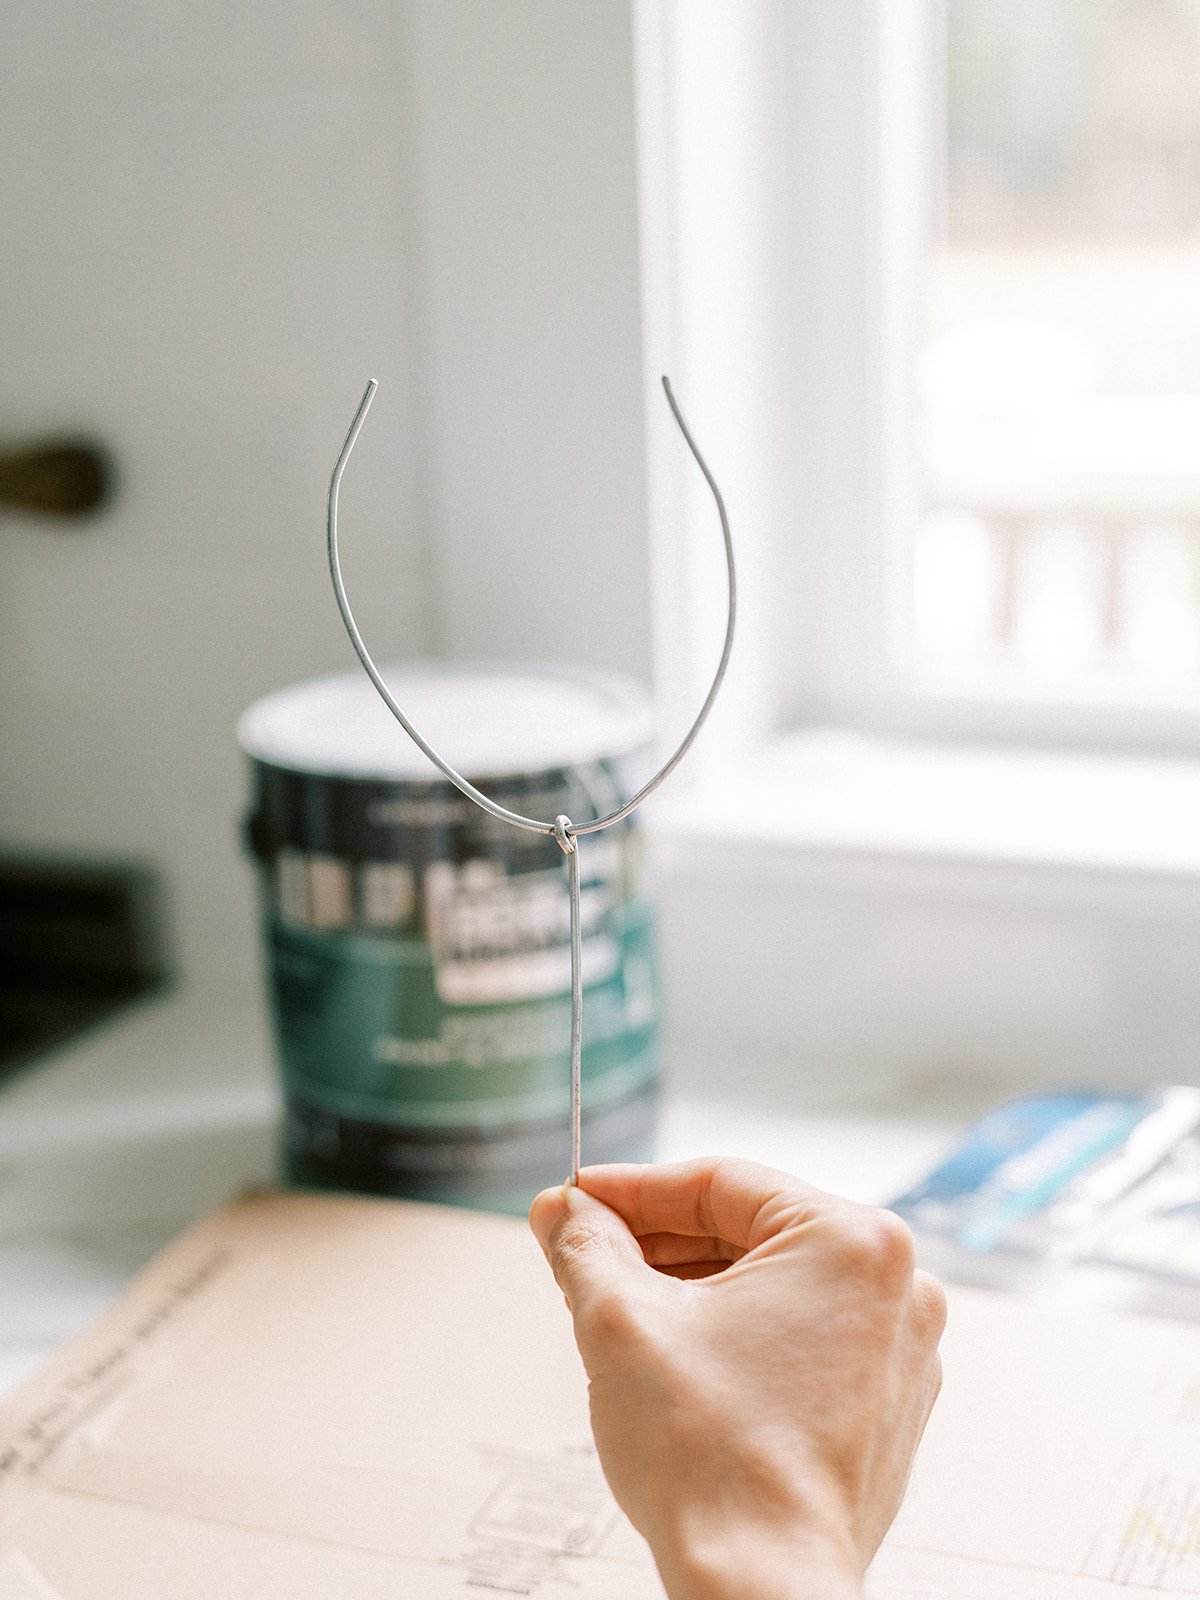
The goal of soldering the two wires together is to have a horseshoe metal shape attached to a metal stick. Once you eventually drill a hole in the piece of wood you intend to use as the base, it will slip inside and stand upright. We found it easiest to hold it upside down so the metal joint where the two wires come together didn’t move around much and we had a free hand, see pictures above.
SOLDERING TECHNIQUE
We watched a couple Youtube videos on soldering having never done it before. And ended up finding it most helpful to heat up the metal you want the solder to adhere to with the soldering end on your torch, which is what is happening in the picture above. We put the soldering tip of the torch into the hole or joint, the space that was left after Matt pinched the hook part of the metal stand around the horseshoe shape as tight as he could with pliers. The goal is to make that opening, where the metals touch, as small as possible.

Once the joint was heated (a minute or less), I unrolled a length of the soldering wire (the metal that melts) and stuck into into the heated up bend where the metal wires meet, see the pictures for clarification. If the metal is hot enough the soldering wire melts and sucks into the open hook part, the spot you want it to go. You want the melted soldering wire to fully encircle the joint where your two metal handles come together in order to get a tight hold. What ended up working best was heating up the metal joint and then keeping the soldering tip in the hook part of the joint while I touched the soldering wire to the heated part. It melted quickly and filled in fast and I pulled the torch tip away and the metal stayed. Next we held it still for a few moments to let the new metal could cool and harden.
THE WOOD BASE
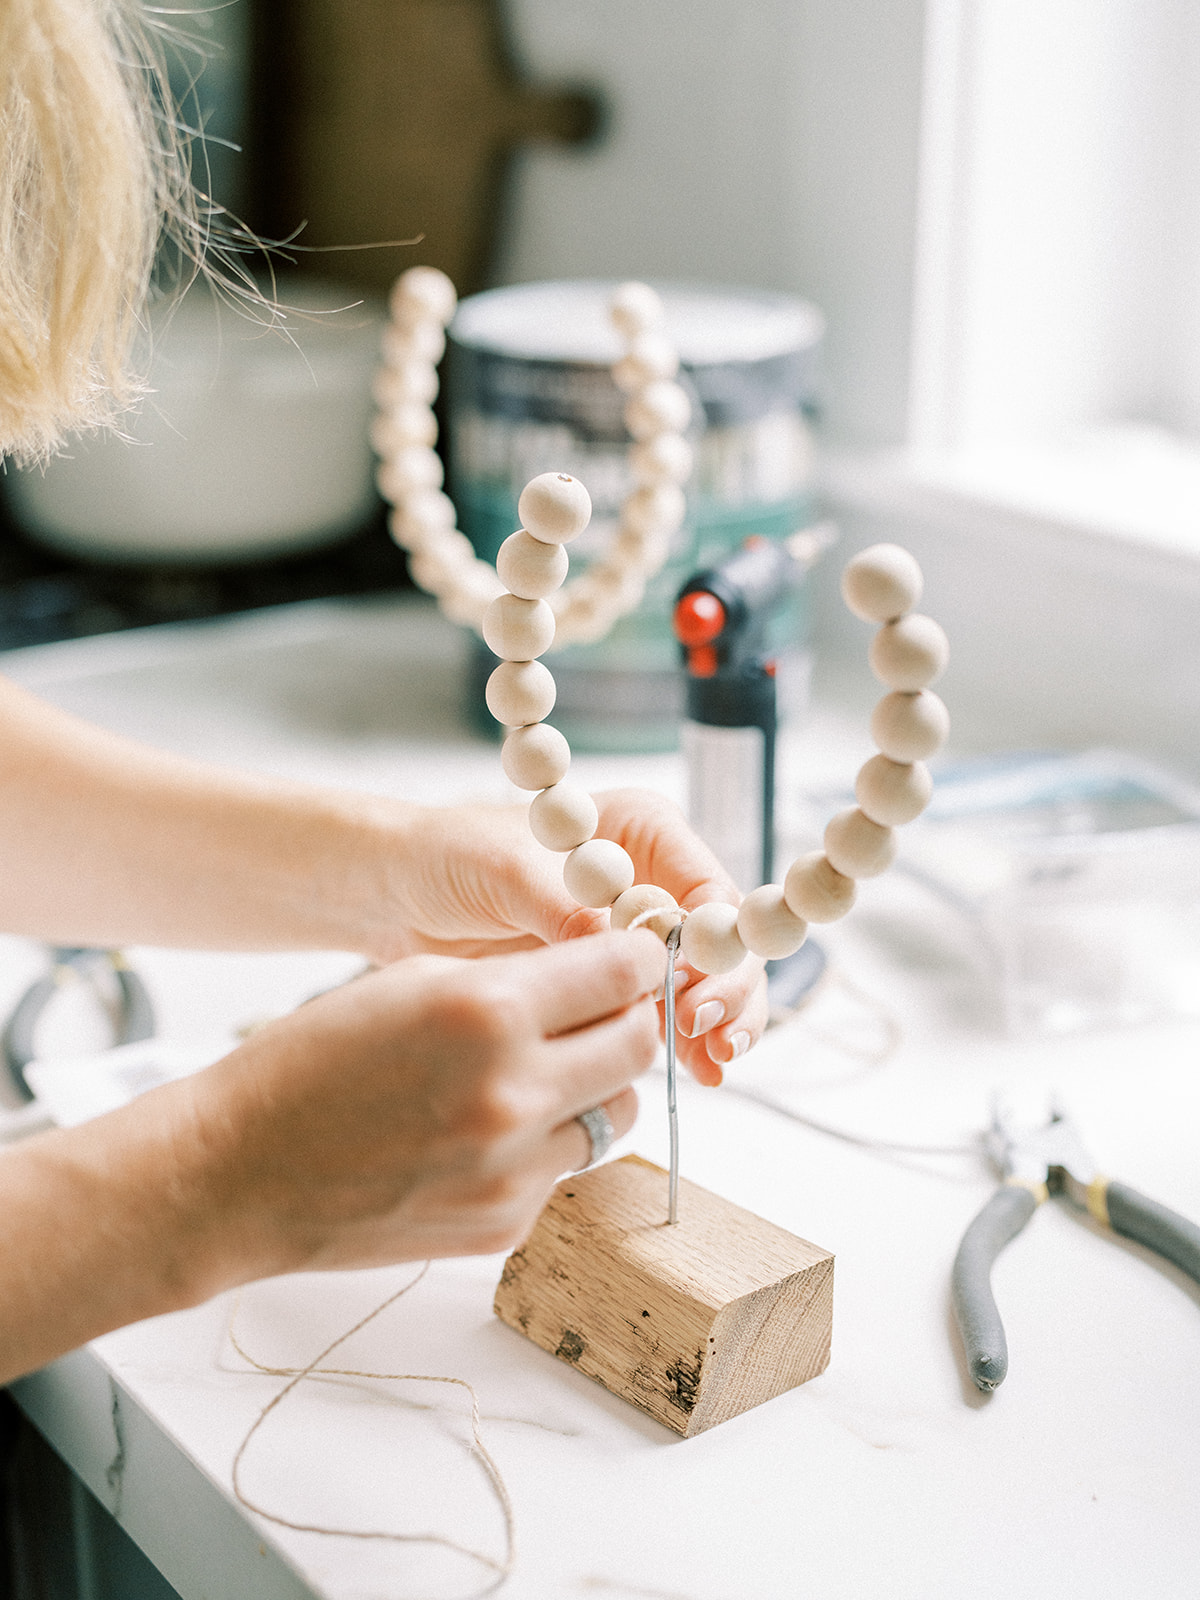
We had left over reclaimed wood from our kitchen shelves so Matt cut a piece out of this 1.5″ thick board, cutting it to 3″ long by 2″ wide. He used a drill bit matched to the diameter of the metal from the paint can handle so that you could slip the metal stand into the drilled hole of the wood base and it would hold tightly. From the bottom of the wood base to the top of the wood beads, this wood bead shelf object is 10″ high. Yours could be taller, we snipped a bit off after they were soldered together to get the look I was after.
He drilled a hole that did not go all the way through rather 3/4 of the way through the wood and right in the center. Once the stand was stuck in the wood, I got to work stringing the beads on my wood bead shelf object.
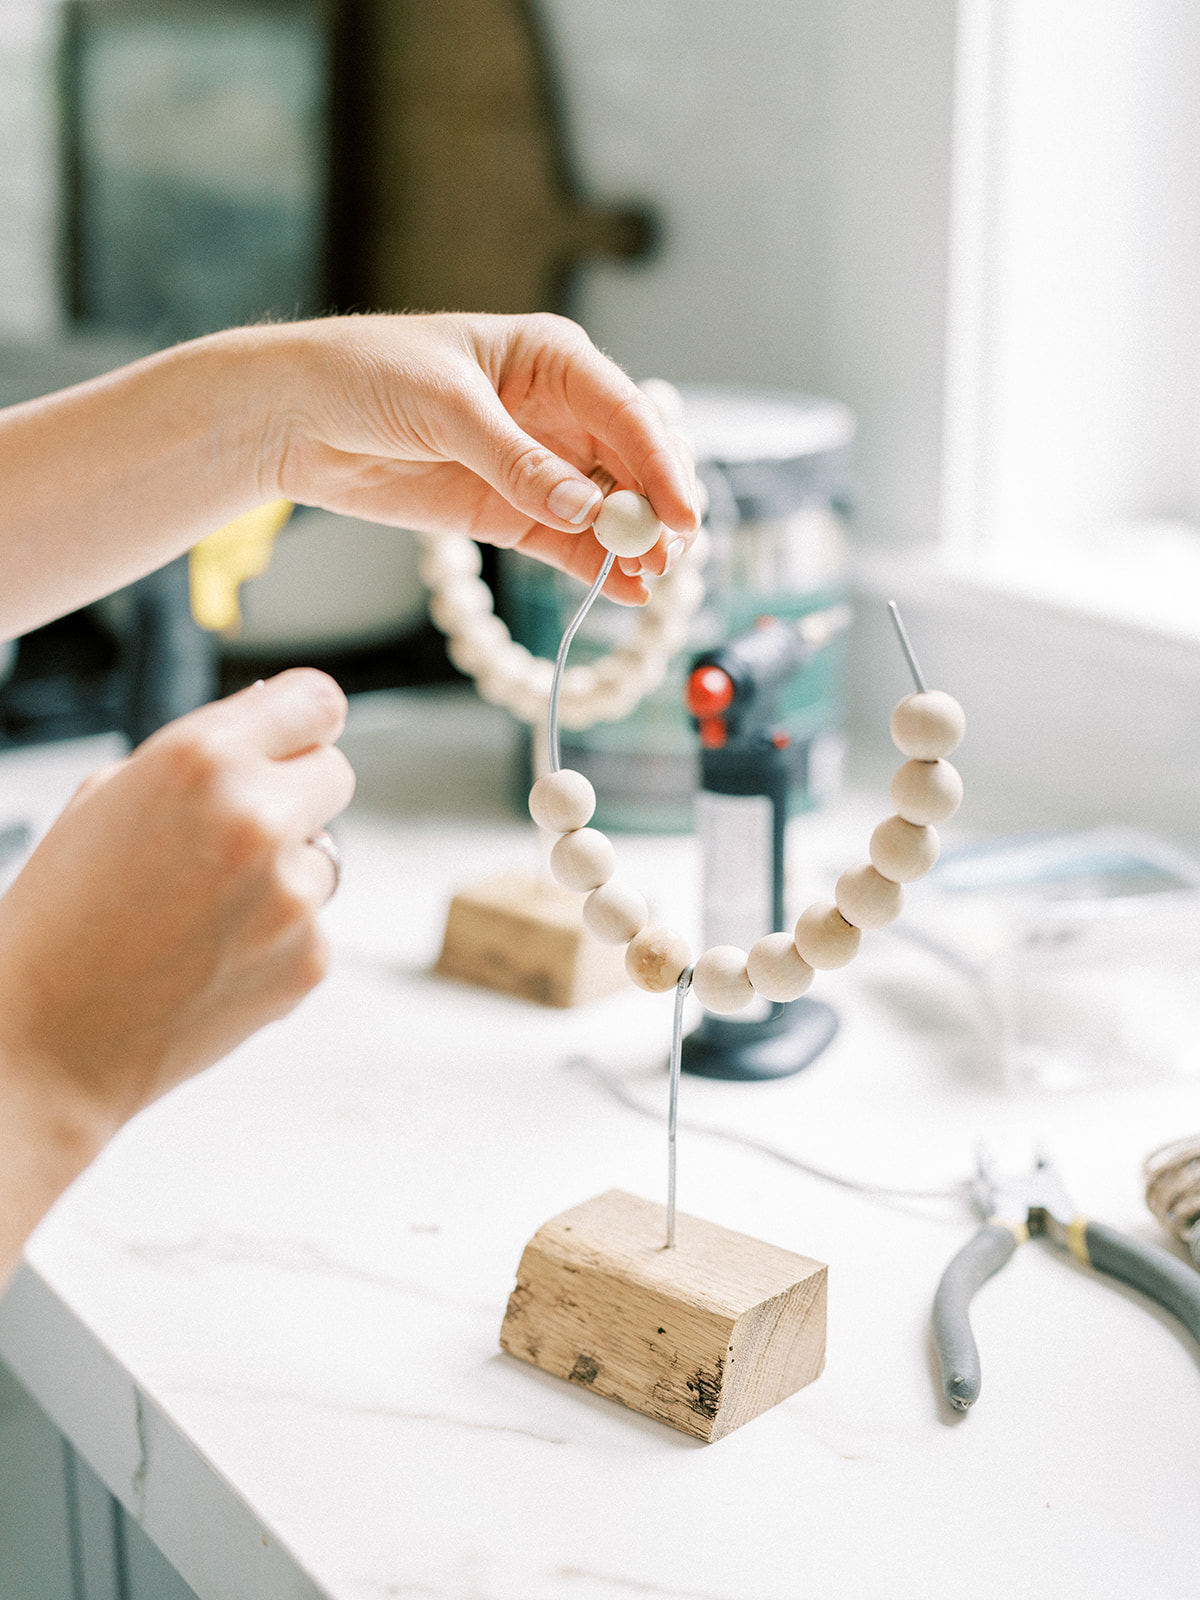
I used hot glue to glue the last bead in place so they don’t slip off when you move it around.
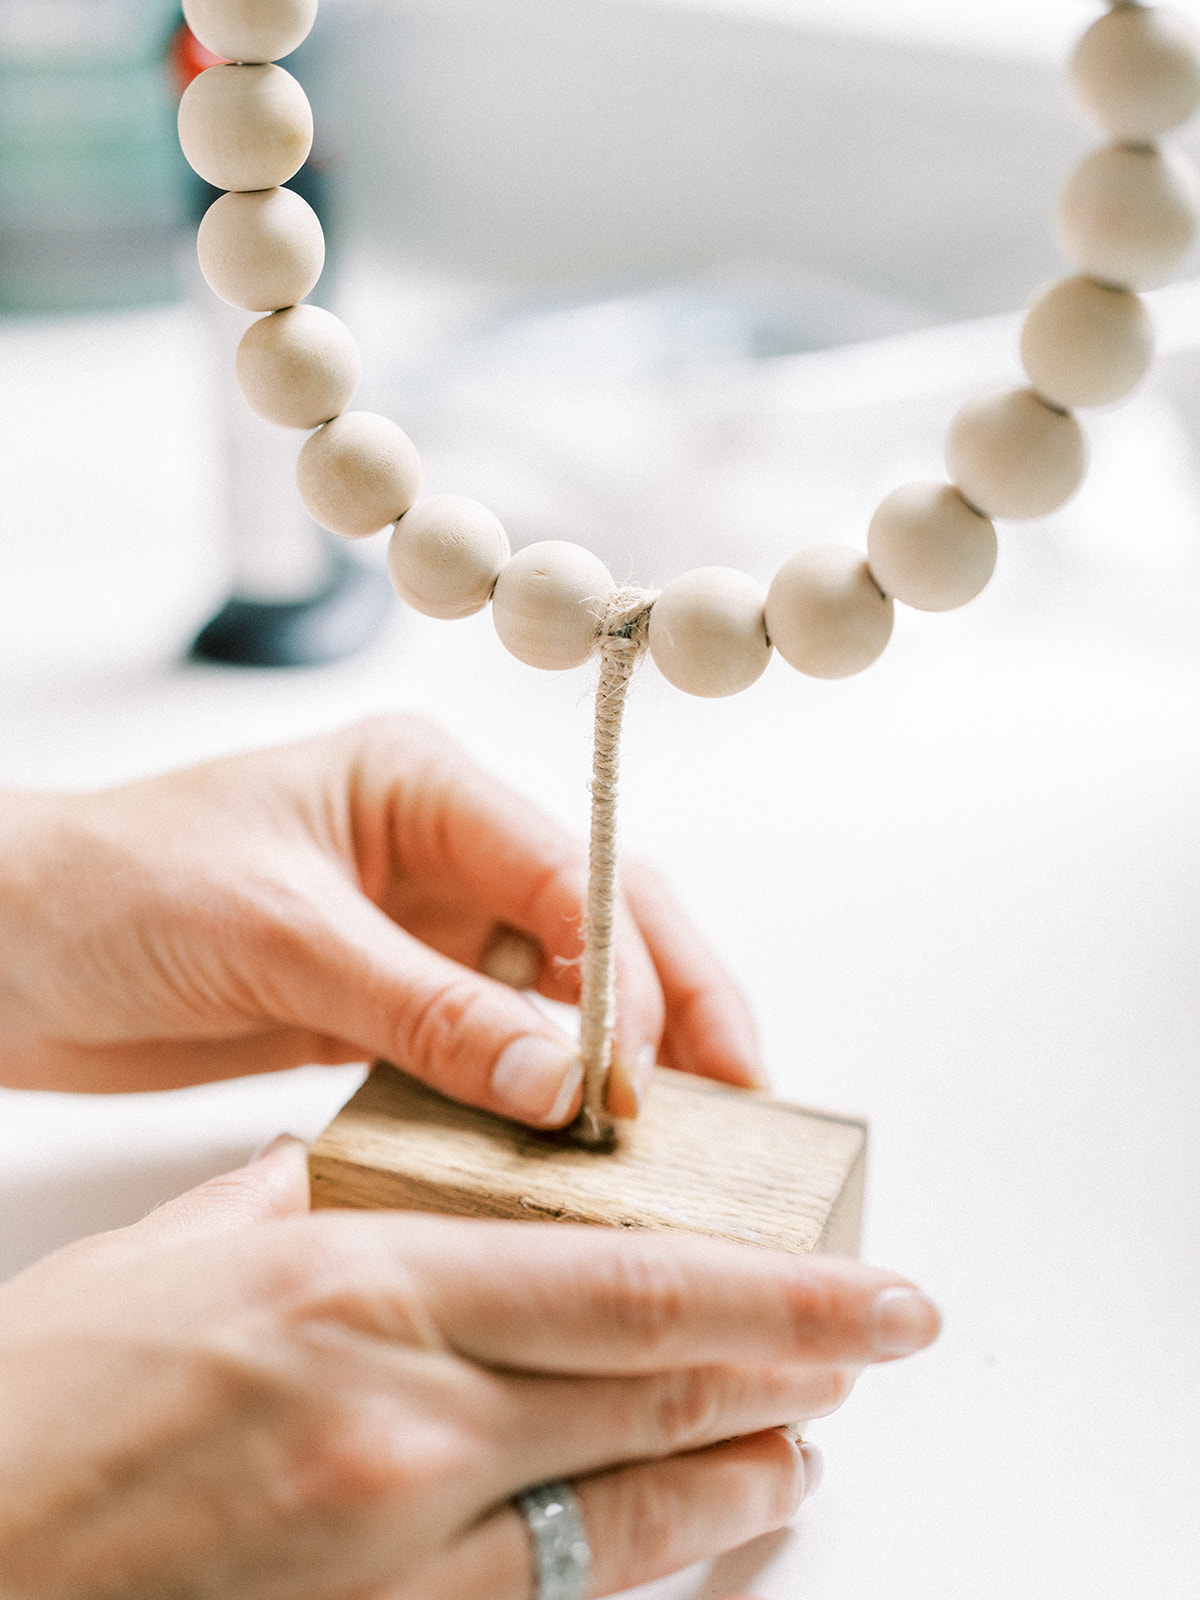
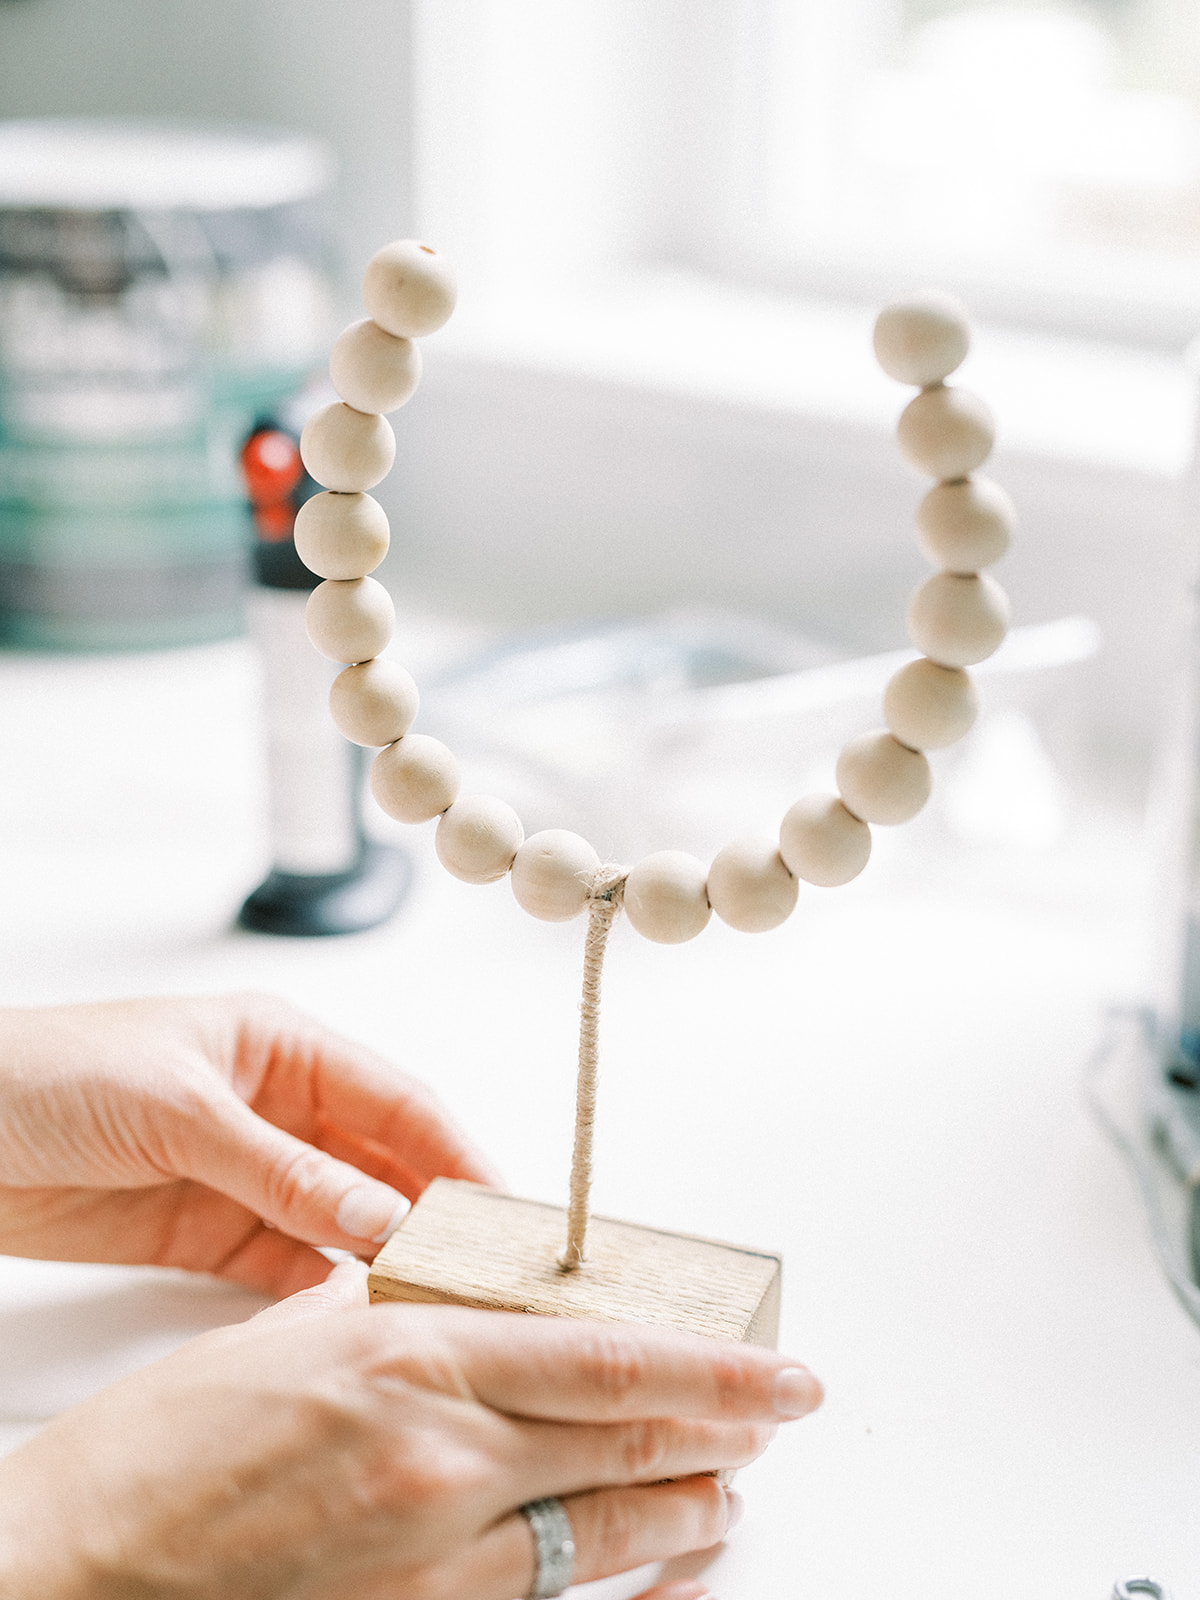
JUTE ROPE WRAPPING
I used an 2 mm jute rope to wrap around the metal, starting at the top and looping it around several times to cover up the metal seam using a little dab of hot glue to start the wrapping.
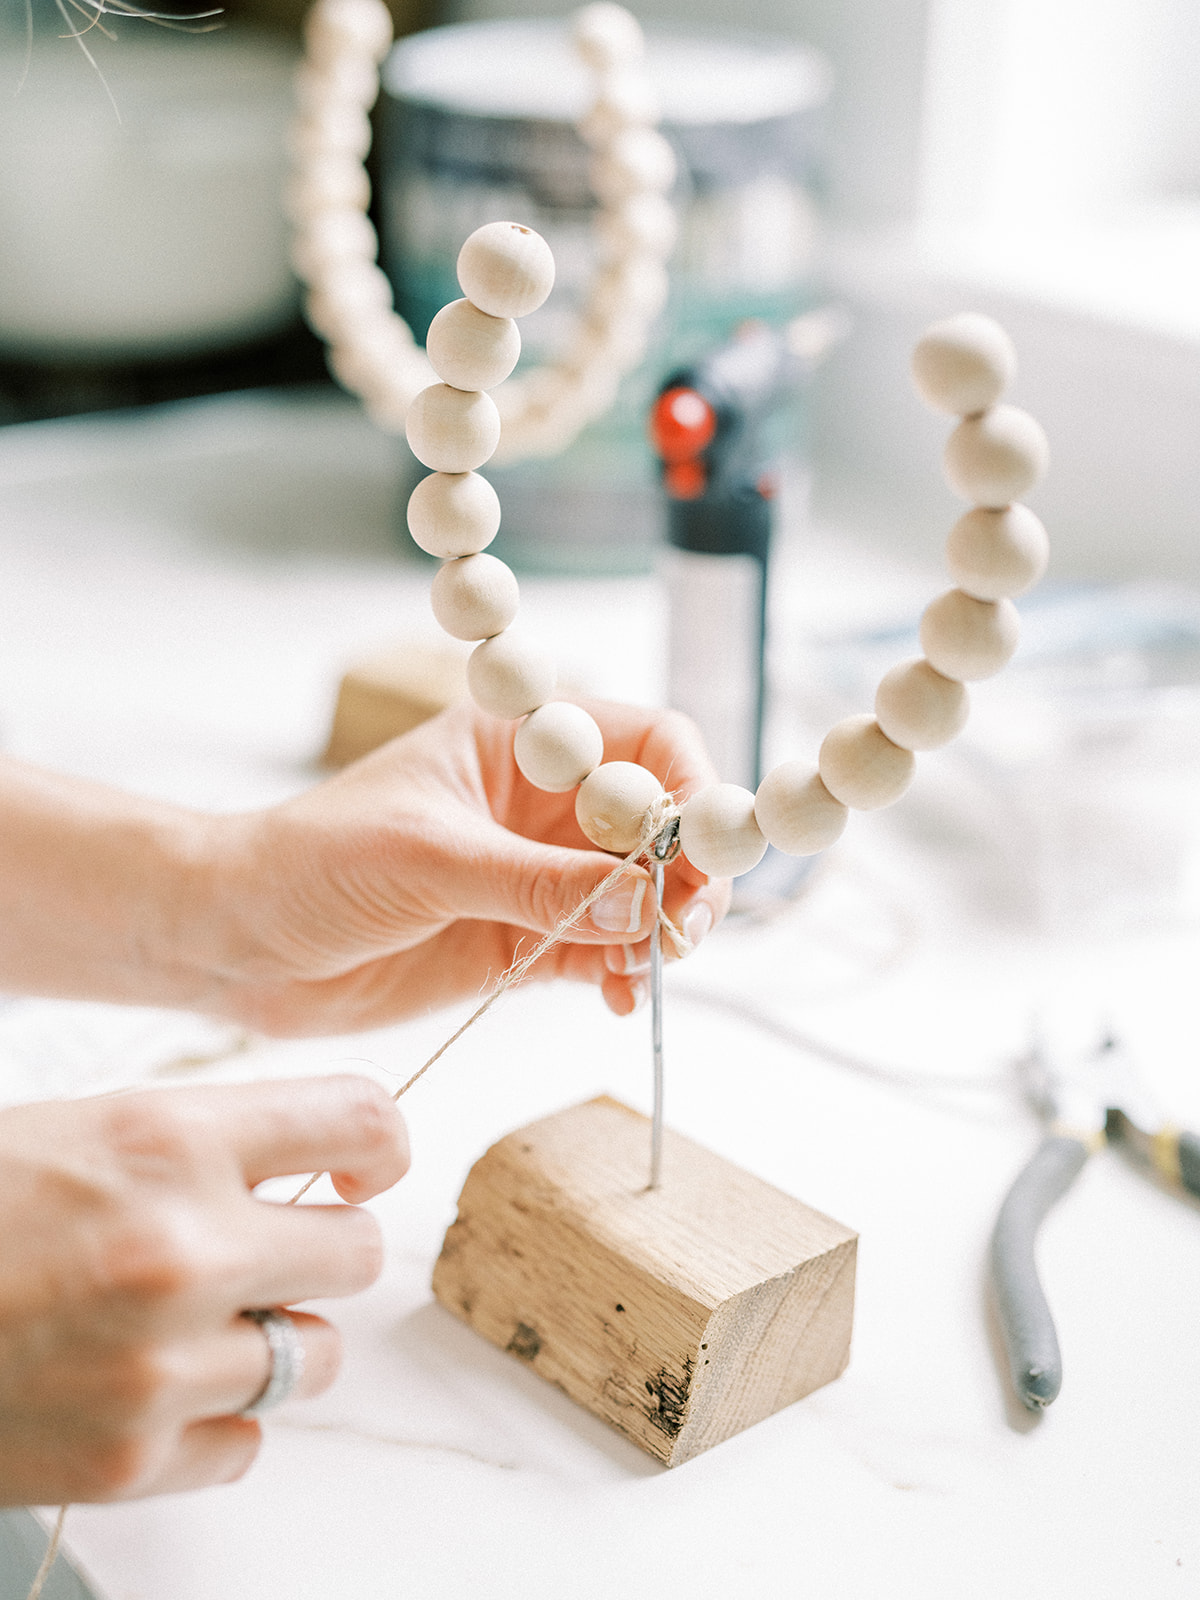
Continue down the stick all the way to the wood base dabbing a bit of either hot glue or gorilla glue as you wind it around.
It looks so professional when you’re done no one will be able to tell you made it. Literally from scratch!
Ruth Eileen Photography took these beautiful pictures so I could share this fun DIY with you all, she’s a genius behind the camera. A big thank you to my muscle, aka husband, for doing all the heavy lifting or rather, wire bending, wood cutting, and learning how to solder. He’s a trooper! I can’t wait to see yours! And if you don’t have a DIY bone in your body, here are some cute shelf objects I loved.
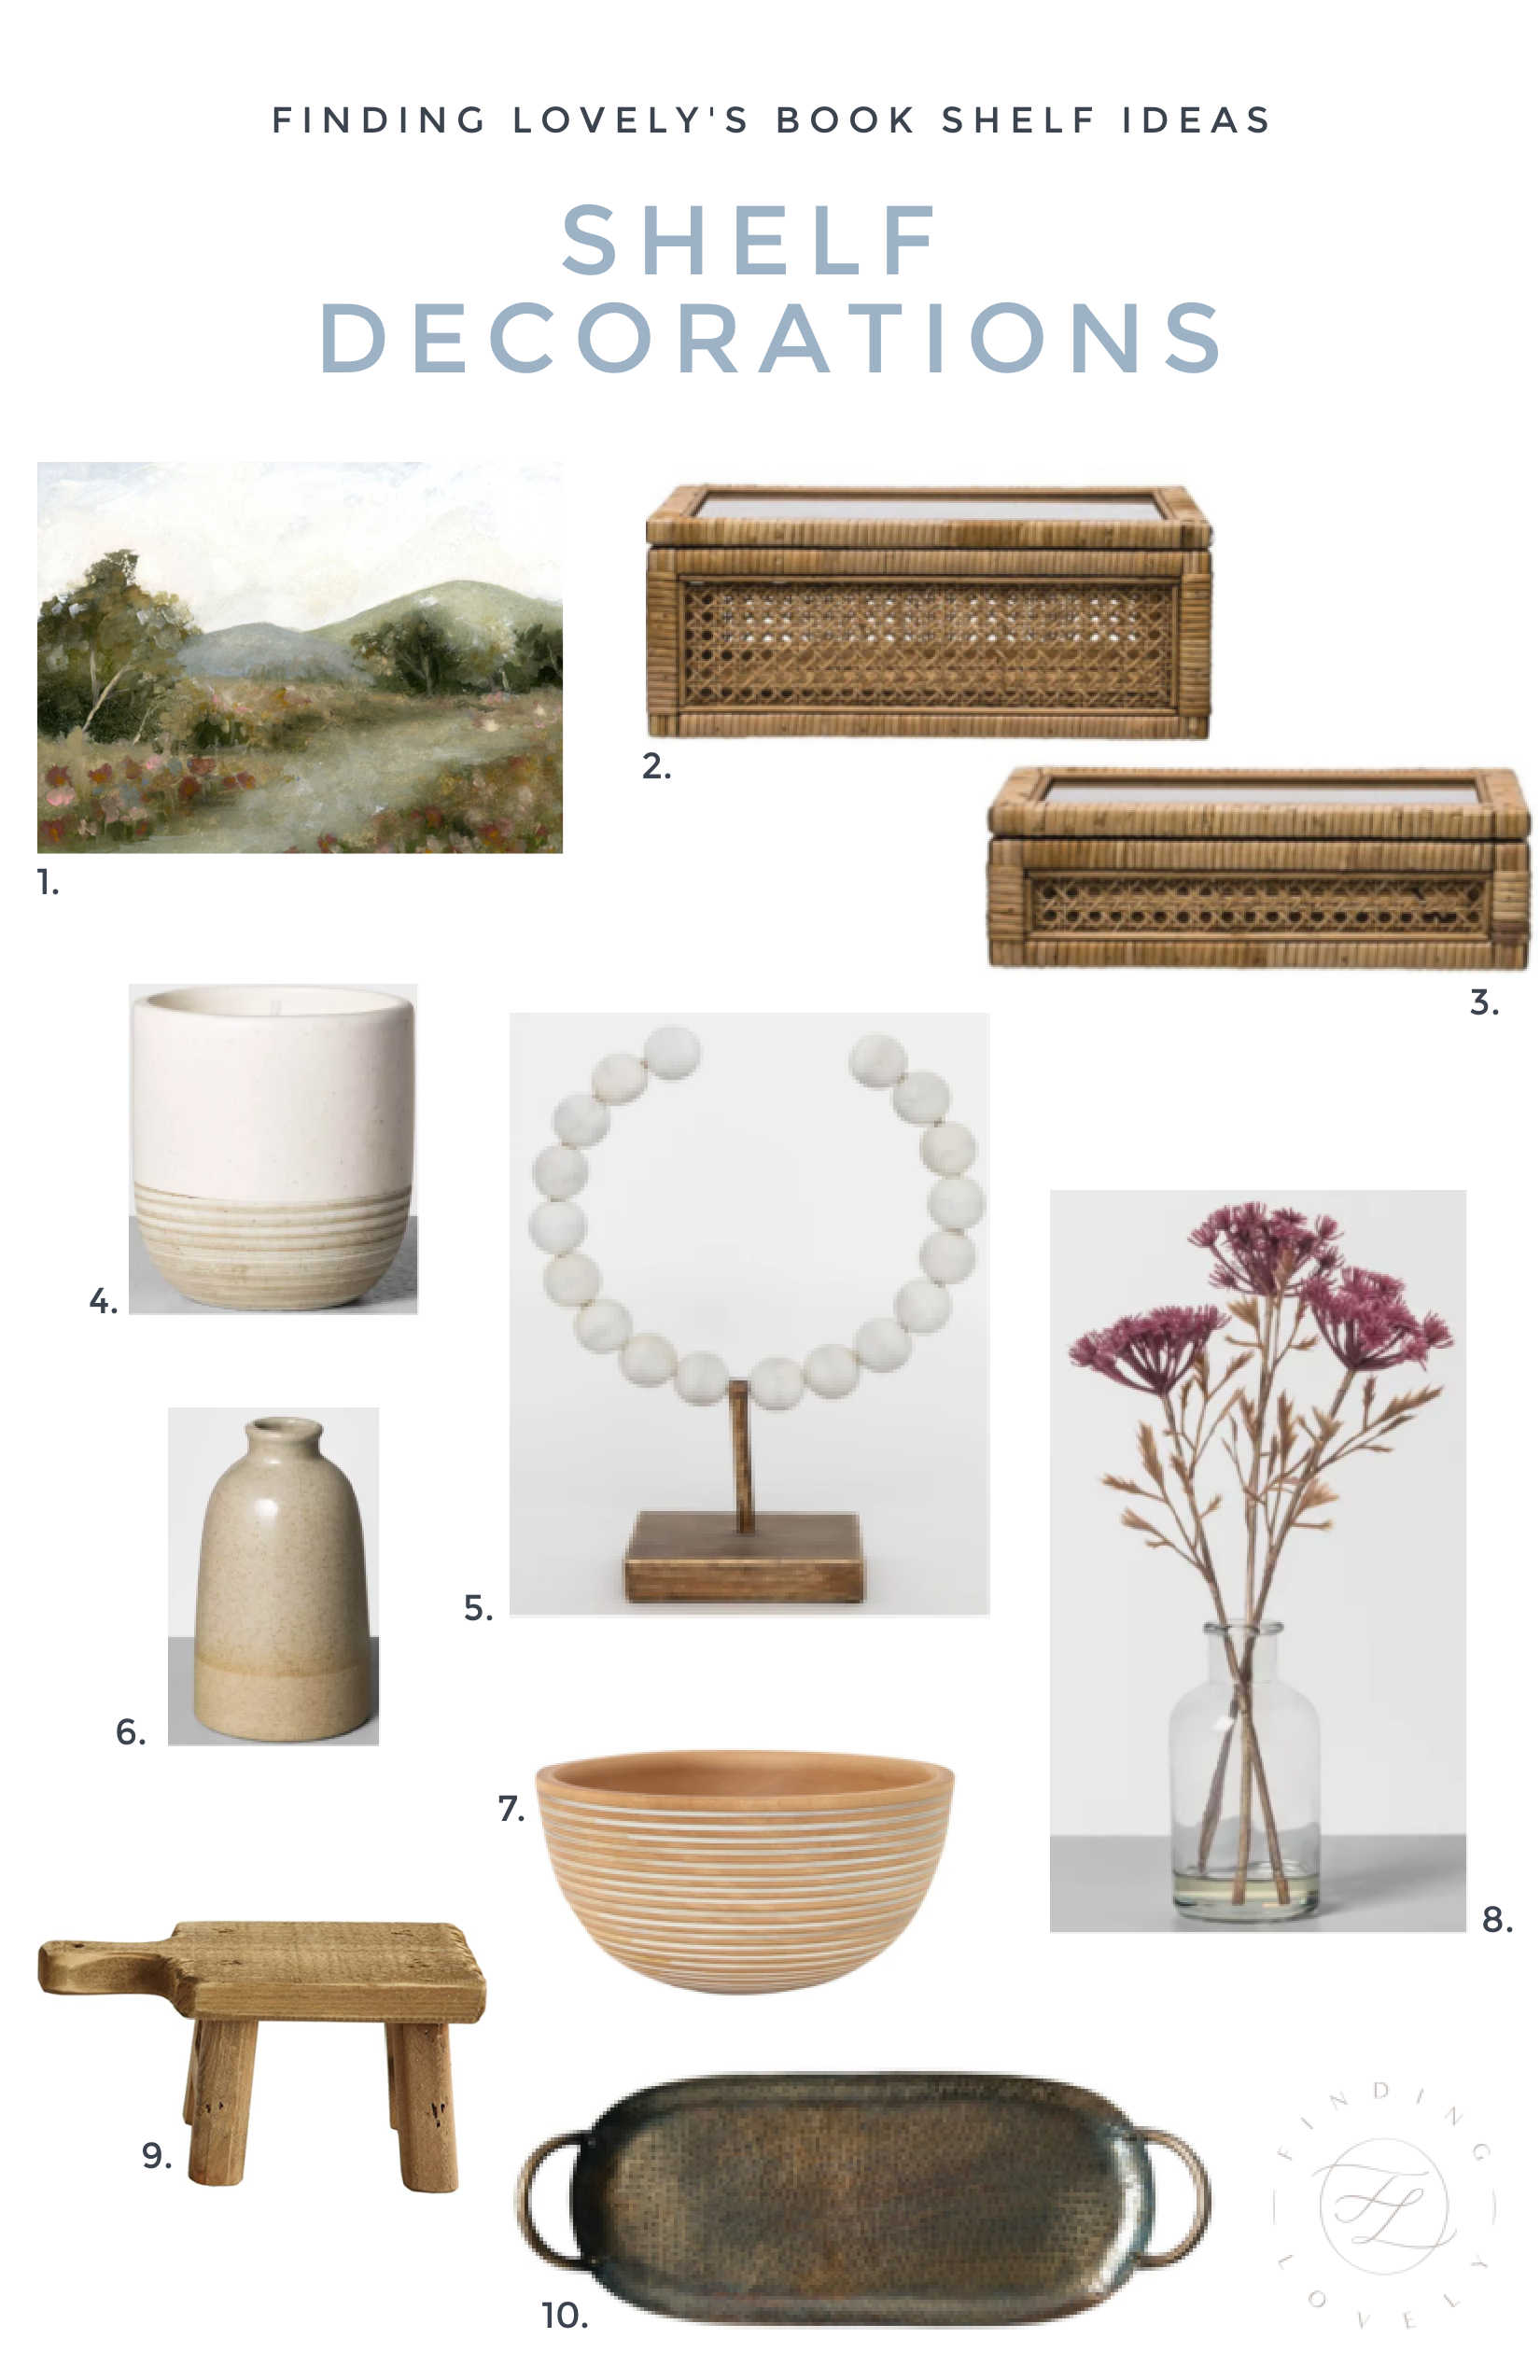
| 1. | 2. | 3. | 4. | 5. | 6. | 7. | 8. | 9. | 10. |

 comment share