
HOME TOUR
11.22.2021
Pinecone Chair Hangings
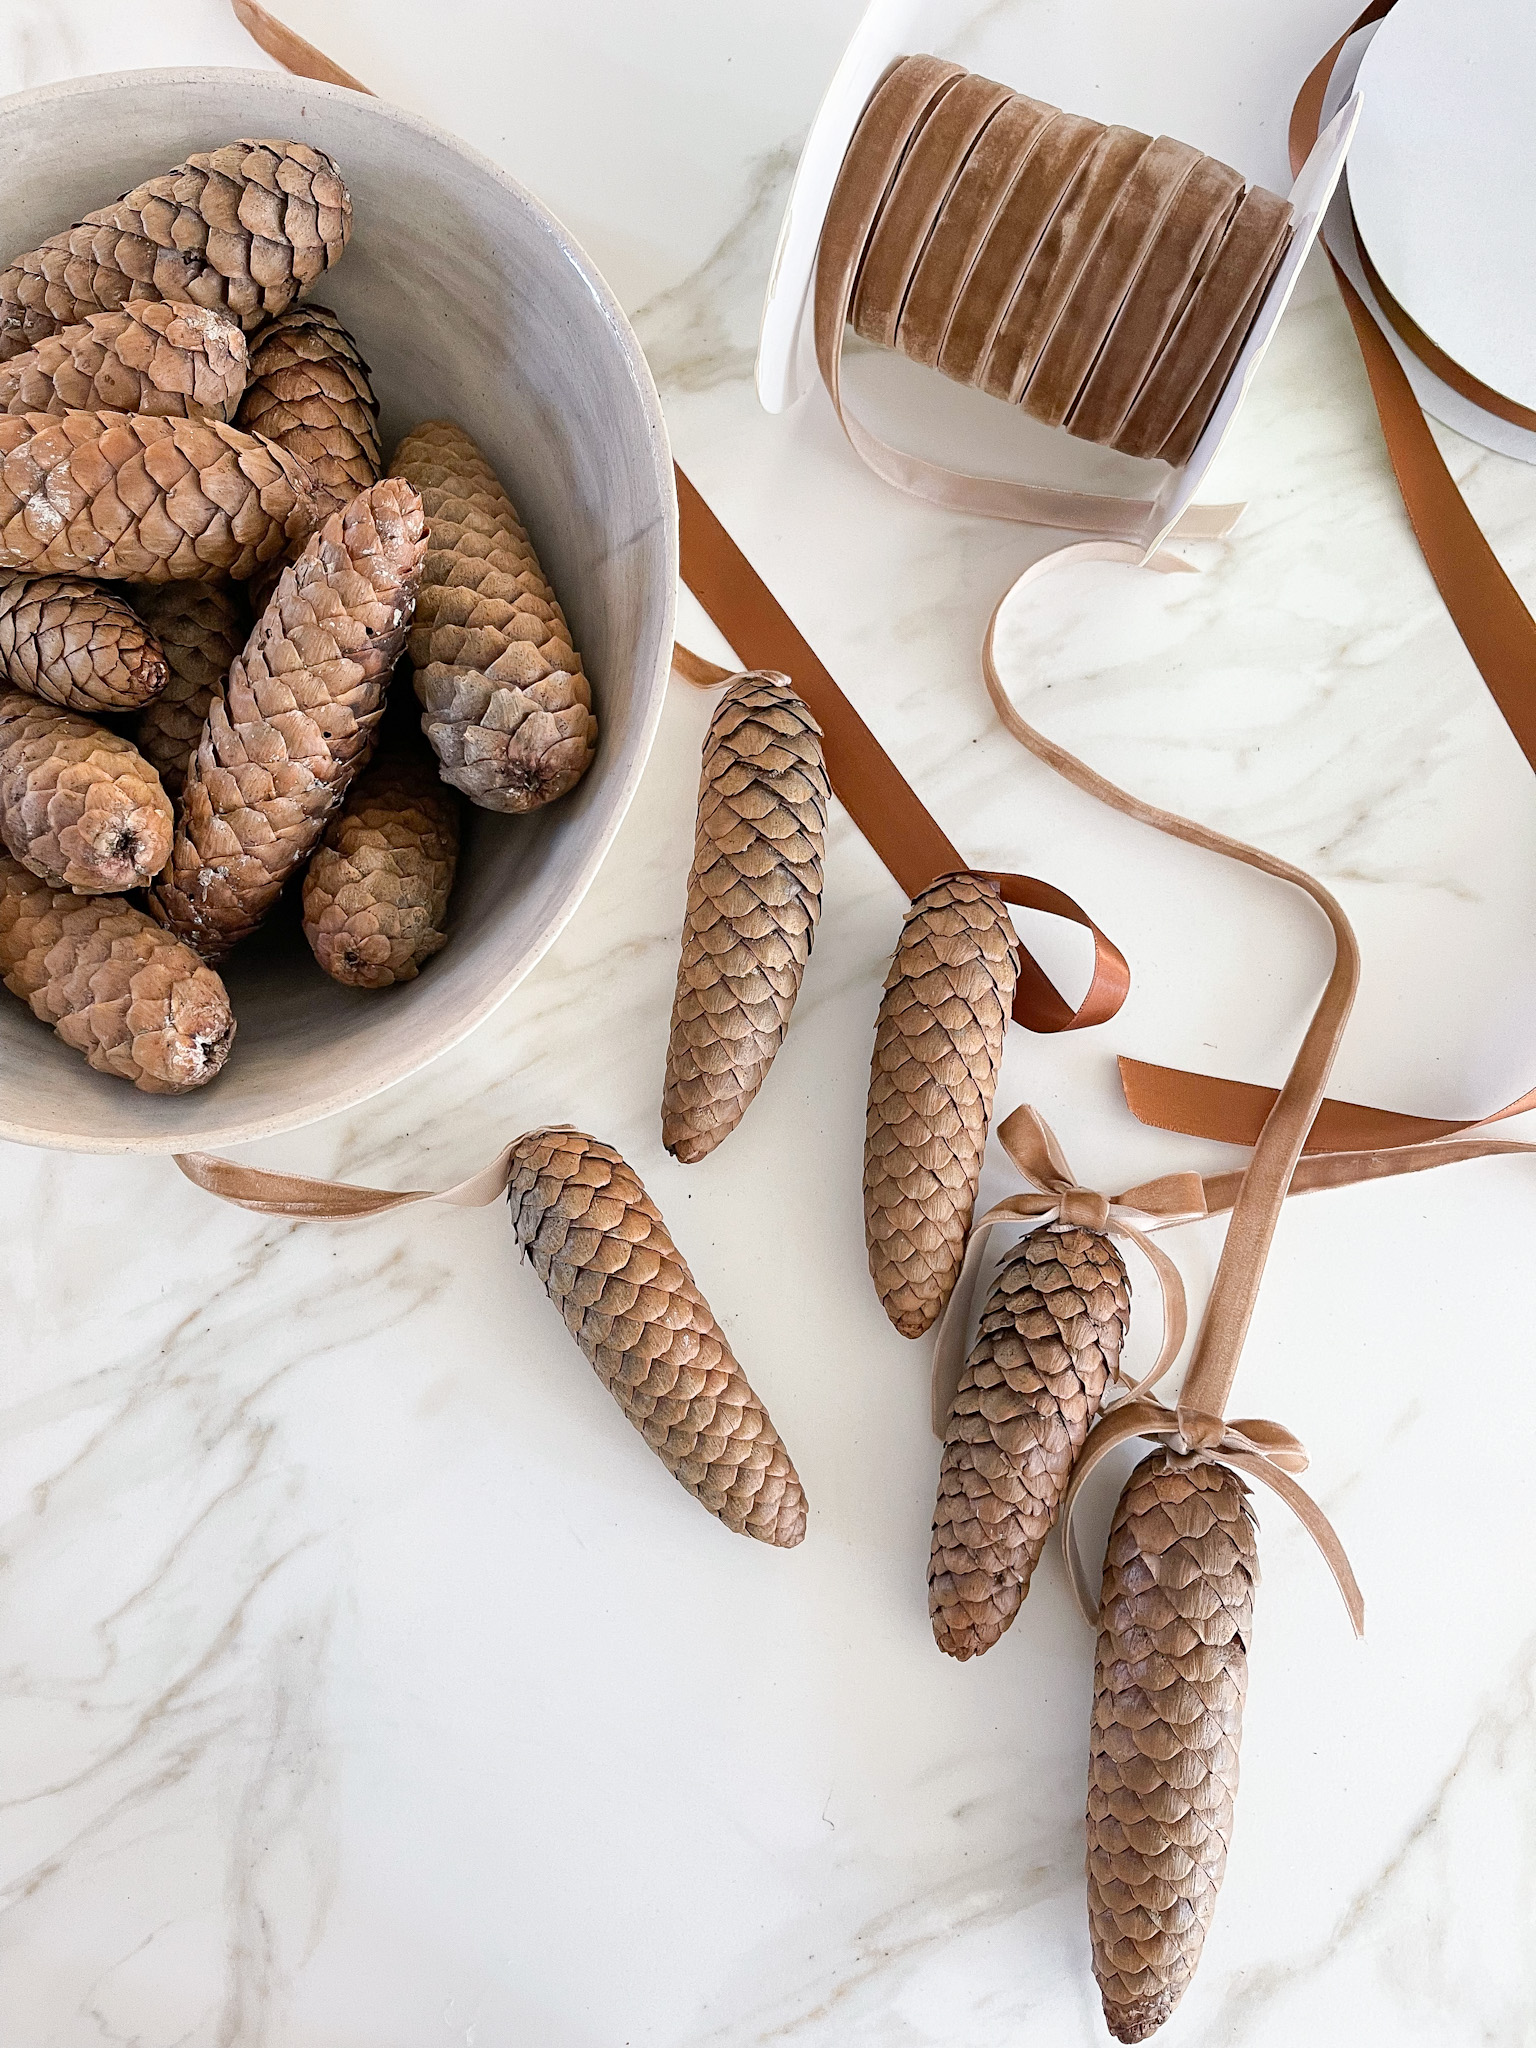
I’m not quite ready to let go of the fall colors I’ve loved so much so they’re making their way into my holiday decorating. Earthy browns, coppers and soft taupe velvets are inching their way throughout our home as I get the Christmas decorations up. For the last few years I’ve tied a wreath to the back of the kitchen counter stools at the island but I wanted something different this year. These easy and inexpensive pinecone chair hangings are the perfect alternative. It works beautifully with our colors this year and I love the texture and natural element it adds. And it doesn’t hurt that they’re budget-friendly this holiday season!
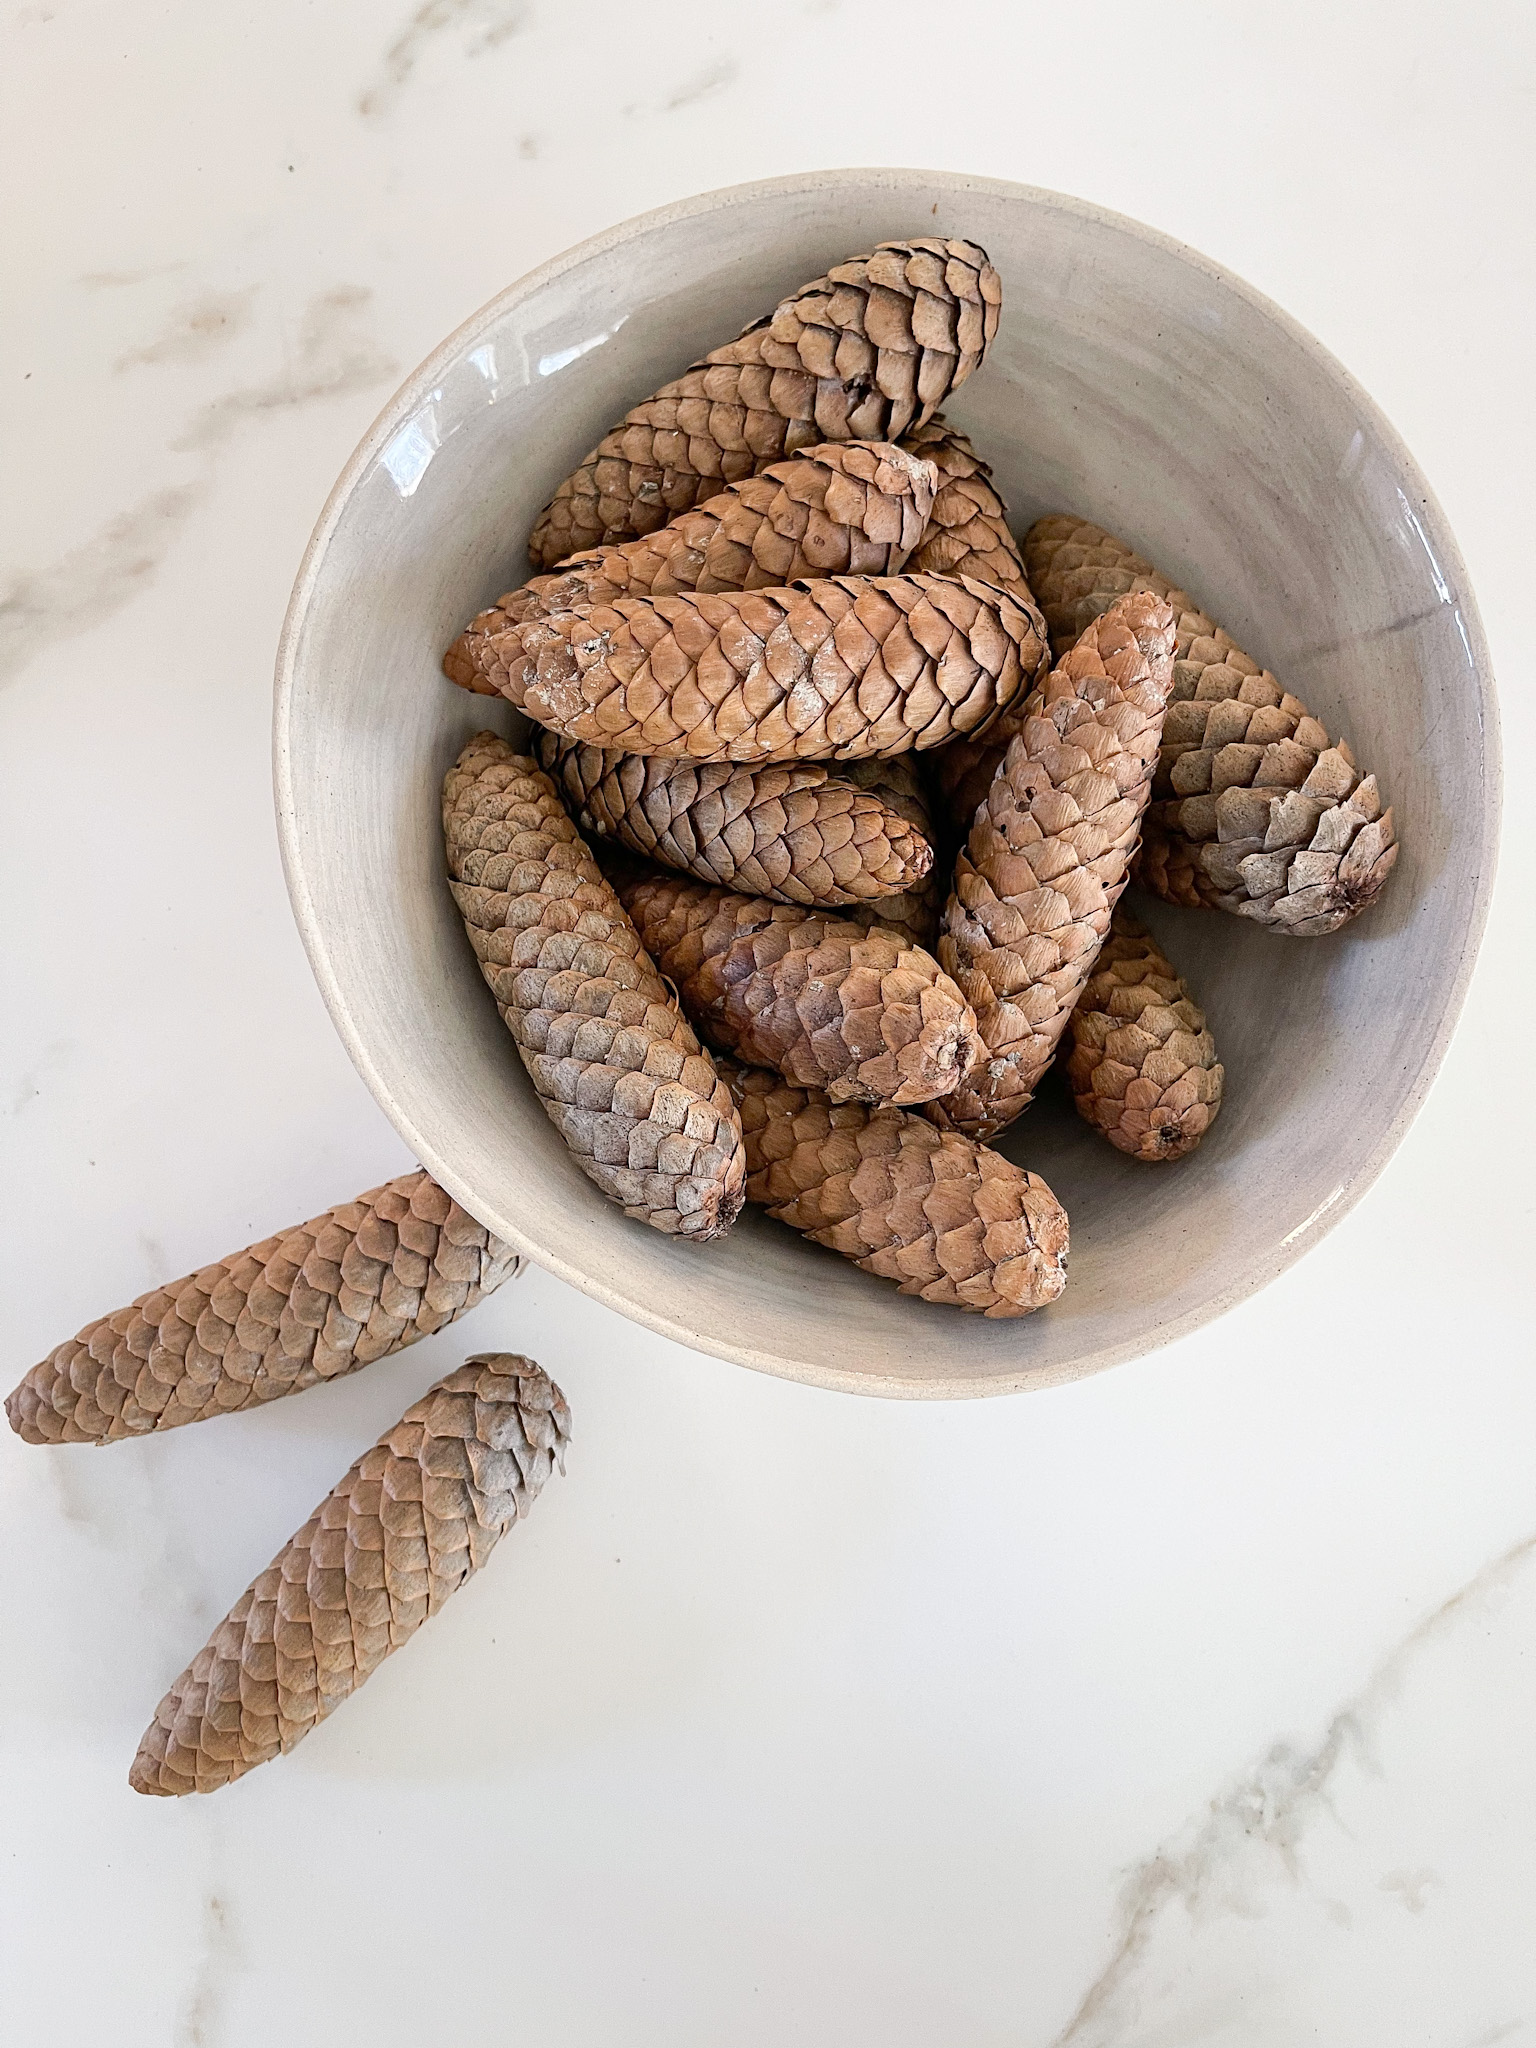
I have no idea what kind of pine tree these are from. I sent Aubrey and our babysitter out on a walk with the mission to bring me back some pinecones. Our neighbor’s tree usually drops a bunch and they came home with a bagful of these long and slender cones. Go on a walk and see what you can find.
SUPPLIES
15 Pinecones (5 per grouping)
Hot Glue Gun and Extra Glue
Ribbon (I used 3/8″ velvet ribbon and a 5/8″ satin ribbon)
TIE RIBBON THROUGH CHAIR
Our Balboa counter stools from Serena & Lily are easy to decorate. I was able to twist the ribbon into a point and stick it through the center of the back of the chair. With a little maneuvering I pulled the ribbon through the other side with limited profanity. There was only one attempt that I gave up and tried the trusty “roll up the ribbon tip into a point with a piece of scotch tape” trick and then guided it through with a paperclip. Clearly depending on what kind of chair you have you may need to get creative to create these pinecone chair hangings. Perhaps a ribbon all the way around the back, a safety pin for an upholstered chair or even a command hook if you’ve got a wood chair.
MICROWAVE THOSE PINECONES
Start by microwaving your pinecones for 30 seconds. Now I know this is the weirdest instruction ever but trust me, you do not want anything inside of those pinecones hatching!! I learned this the hard way years ago when I was still working full time at the hospital. I had made an acorn wreath and came home one day, exhausted from work, to find something inside those gathered acorns had hatched leaving piles of disgusting worms all over my windowsills and crawling all over the floor. Consequently I refuse to be responsible for this atrocity happening to anyone else. You can either lightly bake them in the oven for a few minutes or zap them in the microwave.
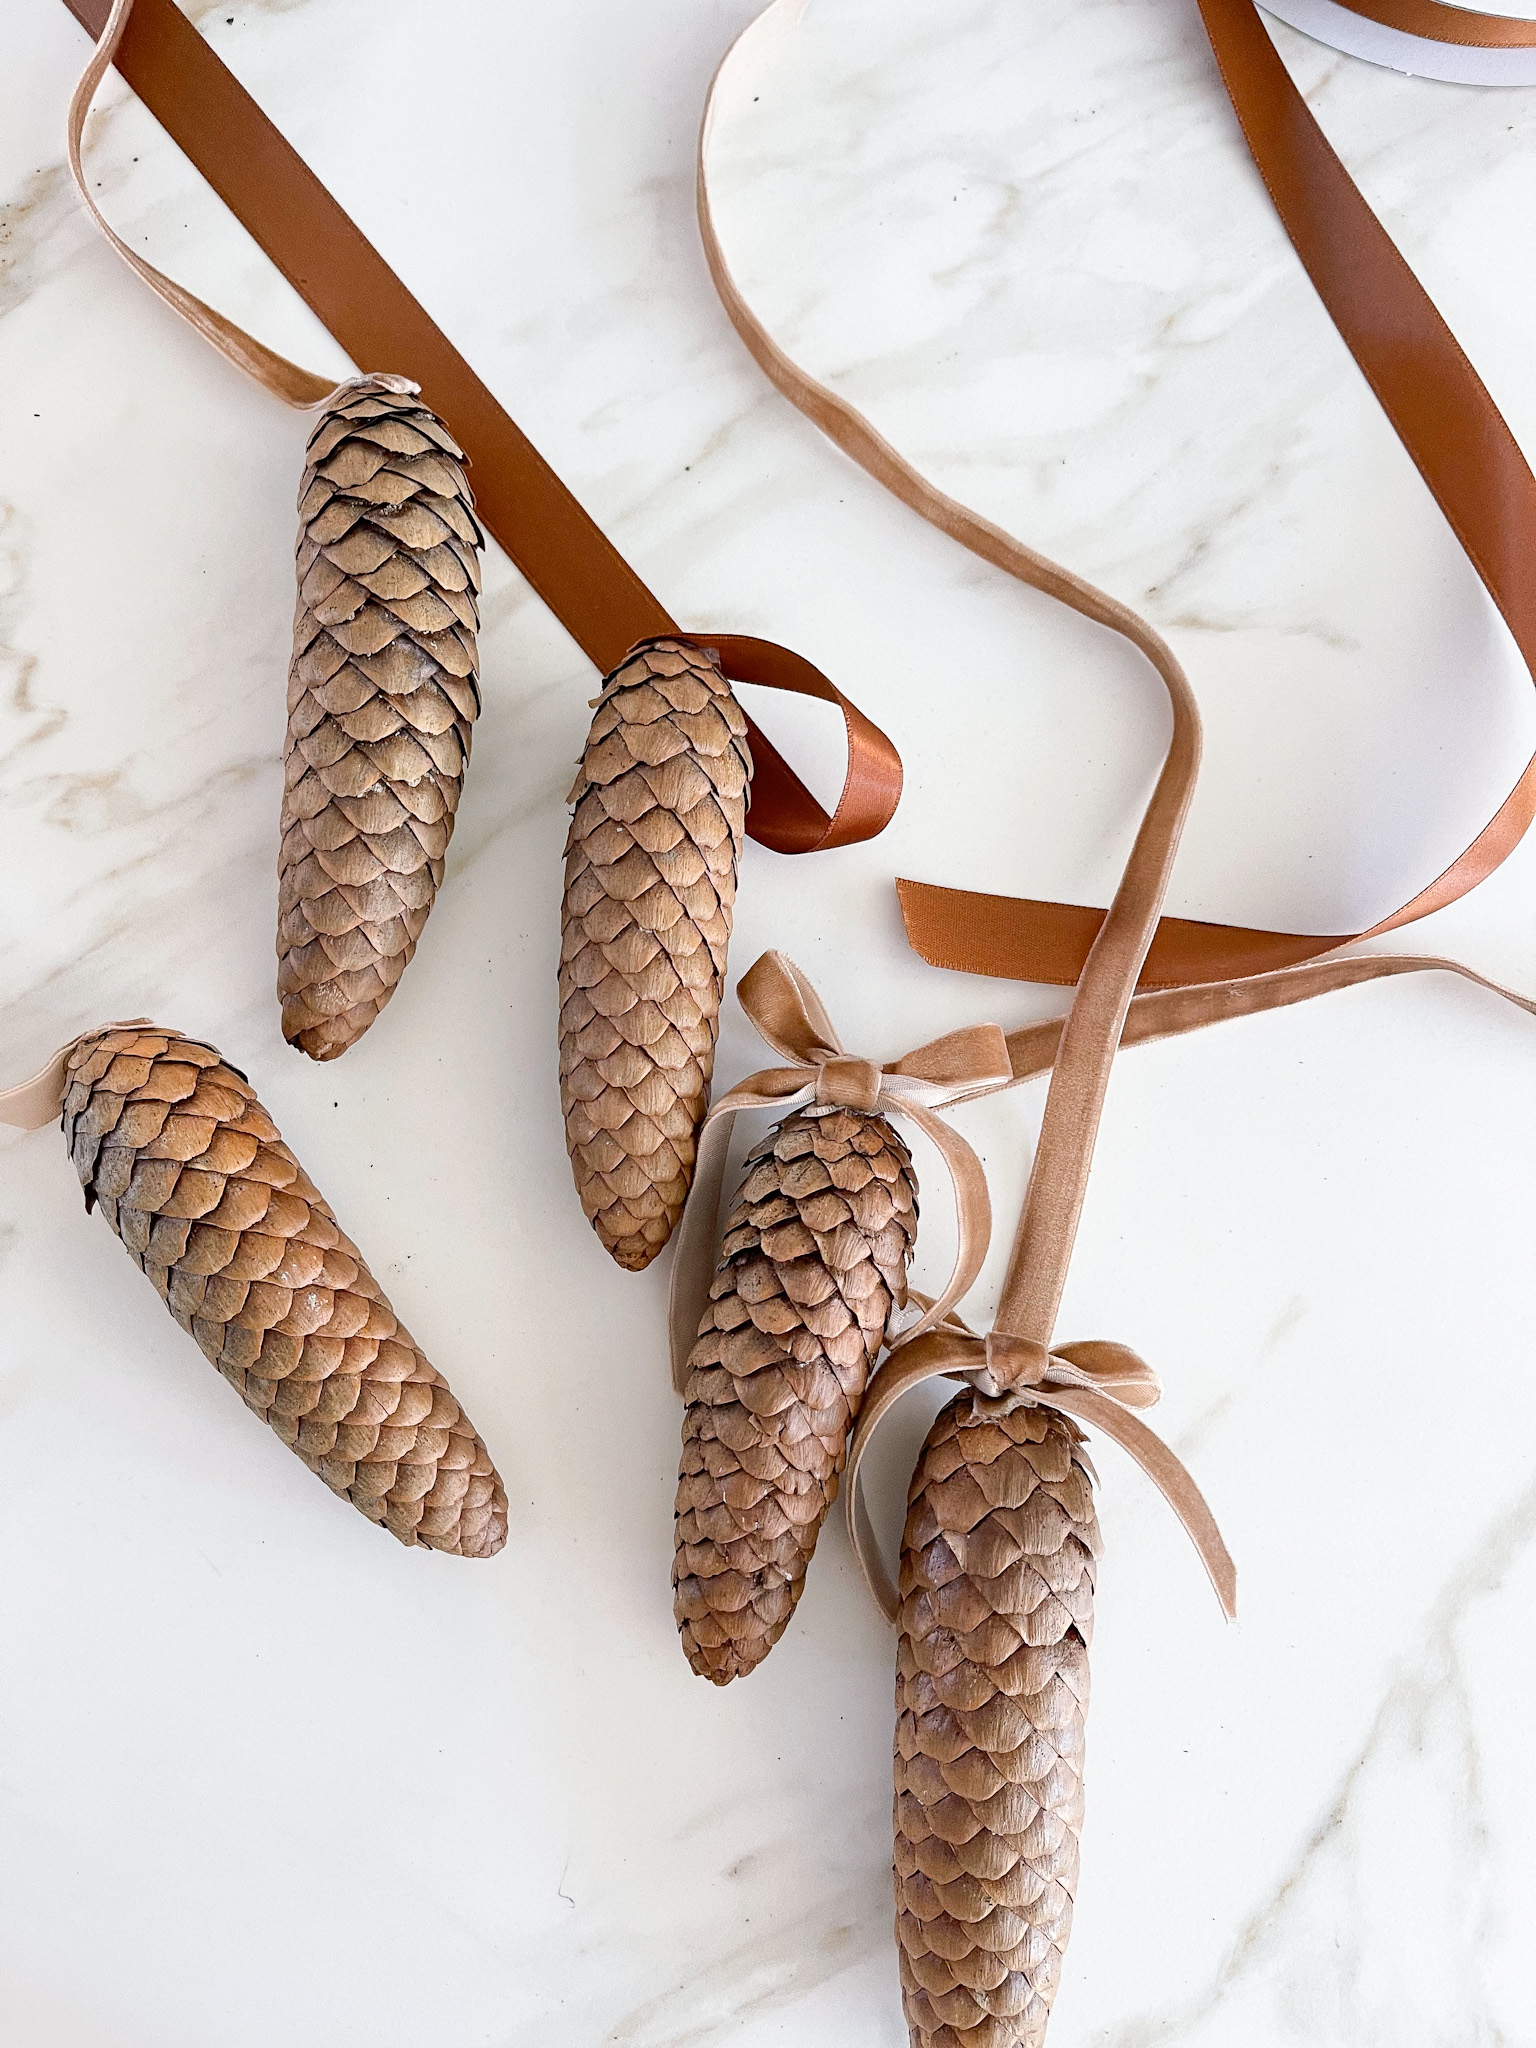
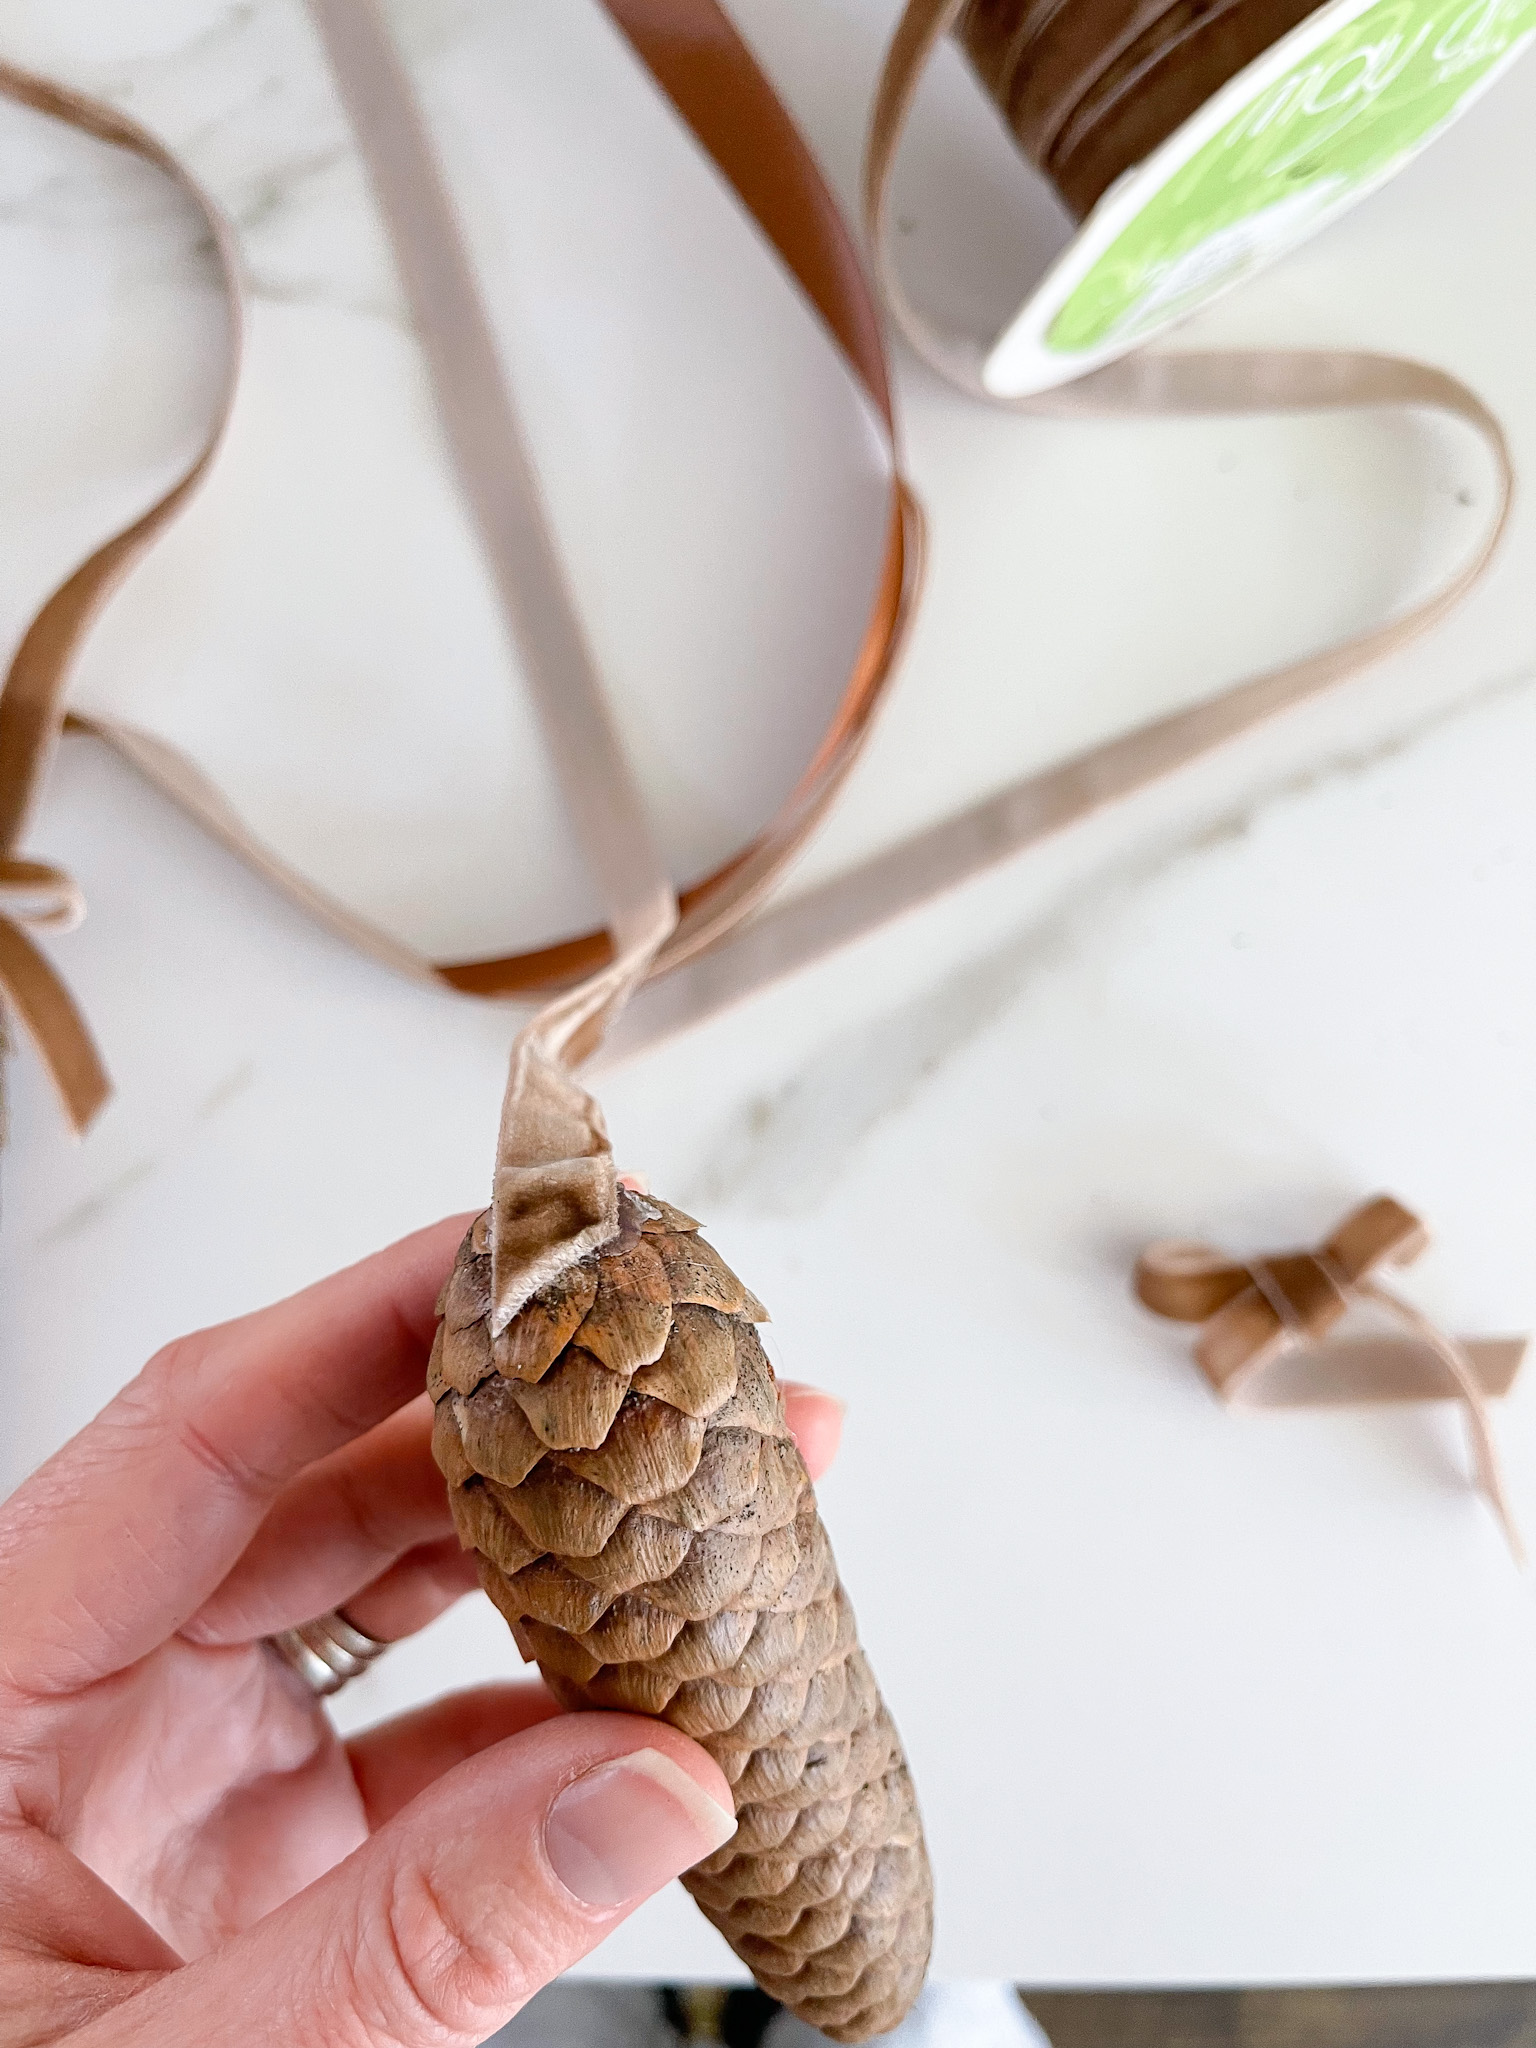
Now that this horror has been averted, cut your ribbon into 8″ lengths, one for each pinecone. You want the pointy part of the pinecone facing down and the wider part of the pinecone or the base at the top. You’ll attach your ribbon to the wider, base of the pinecone so that when it hangs, the tip is down. Dab a small drop of hot glue onto the middle of the base of the pinecone. Add the velvet ribbon to the glue and press down firmly to adhere it well.
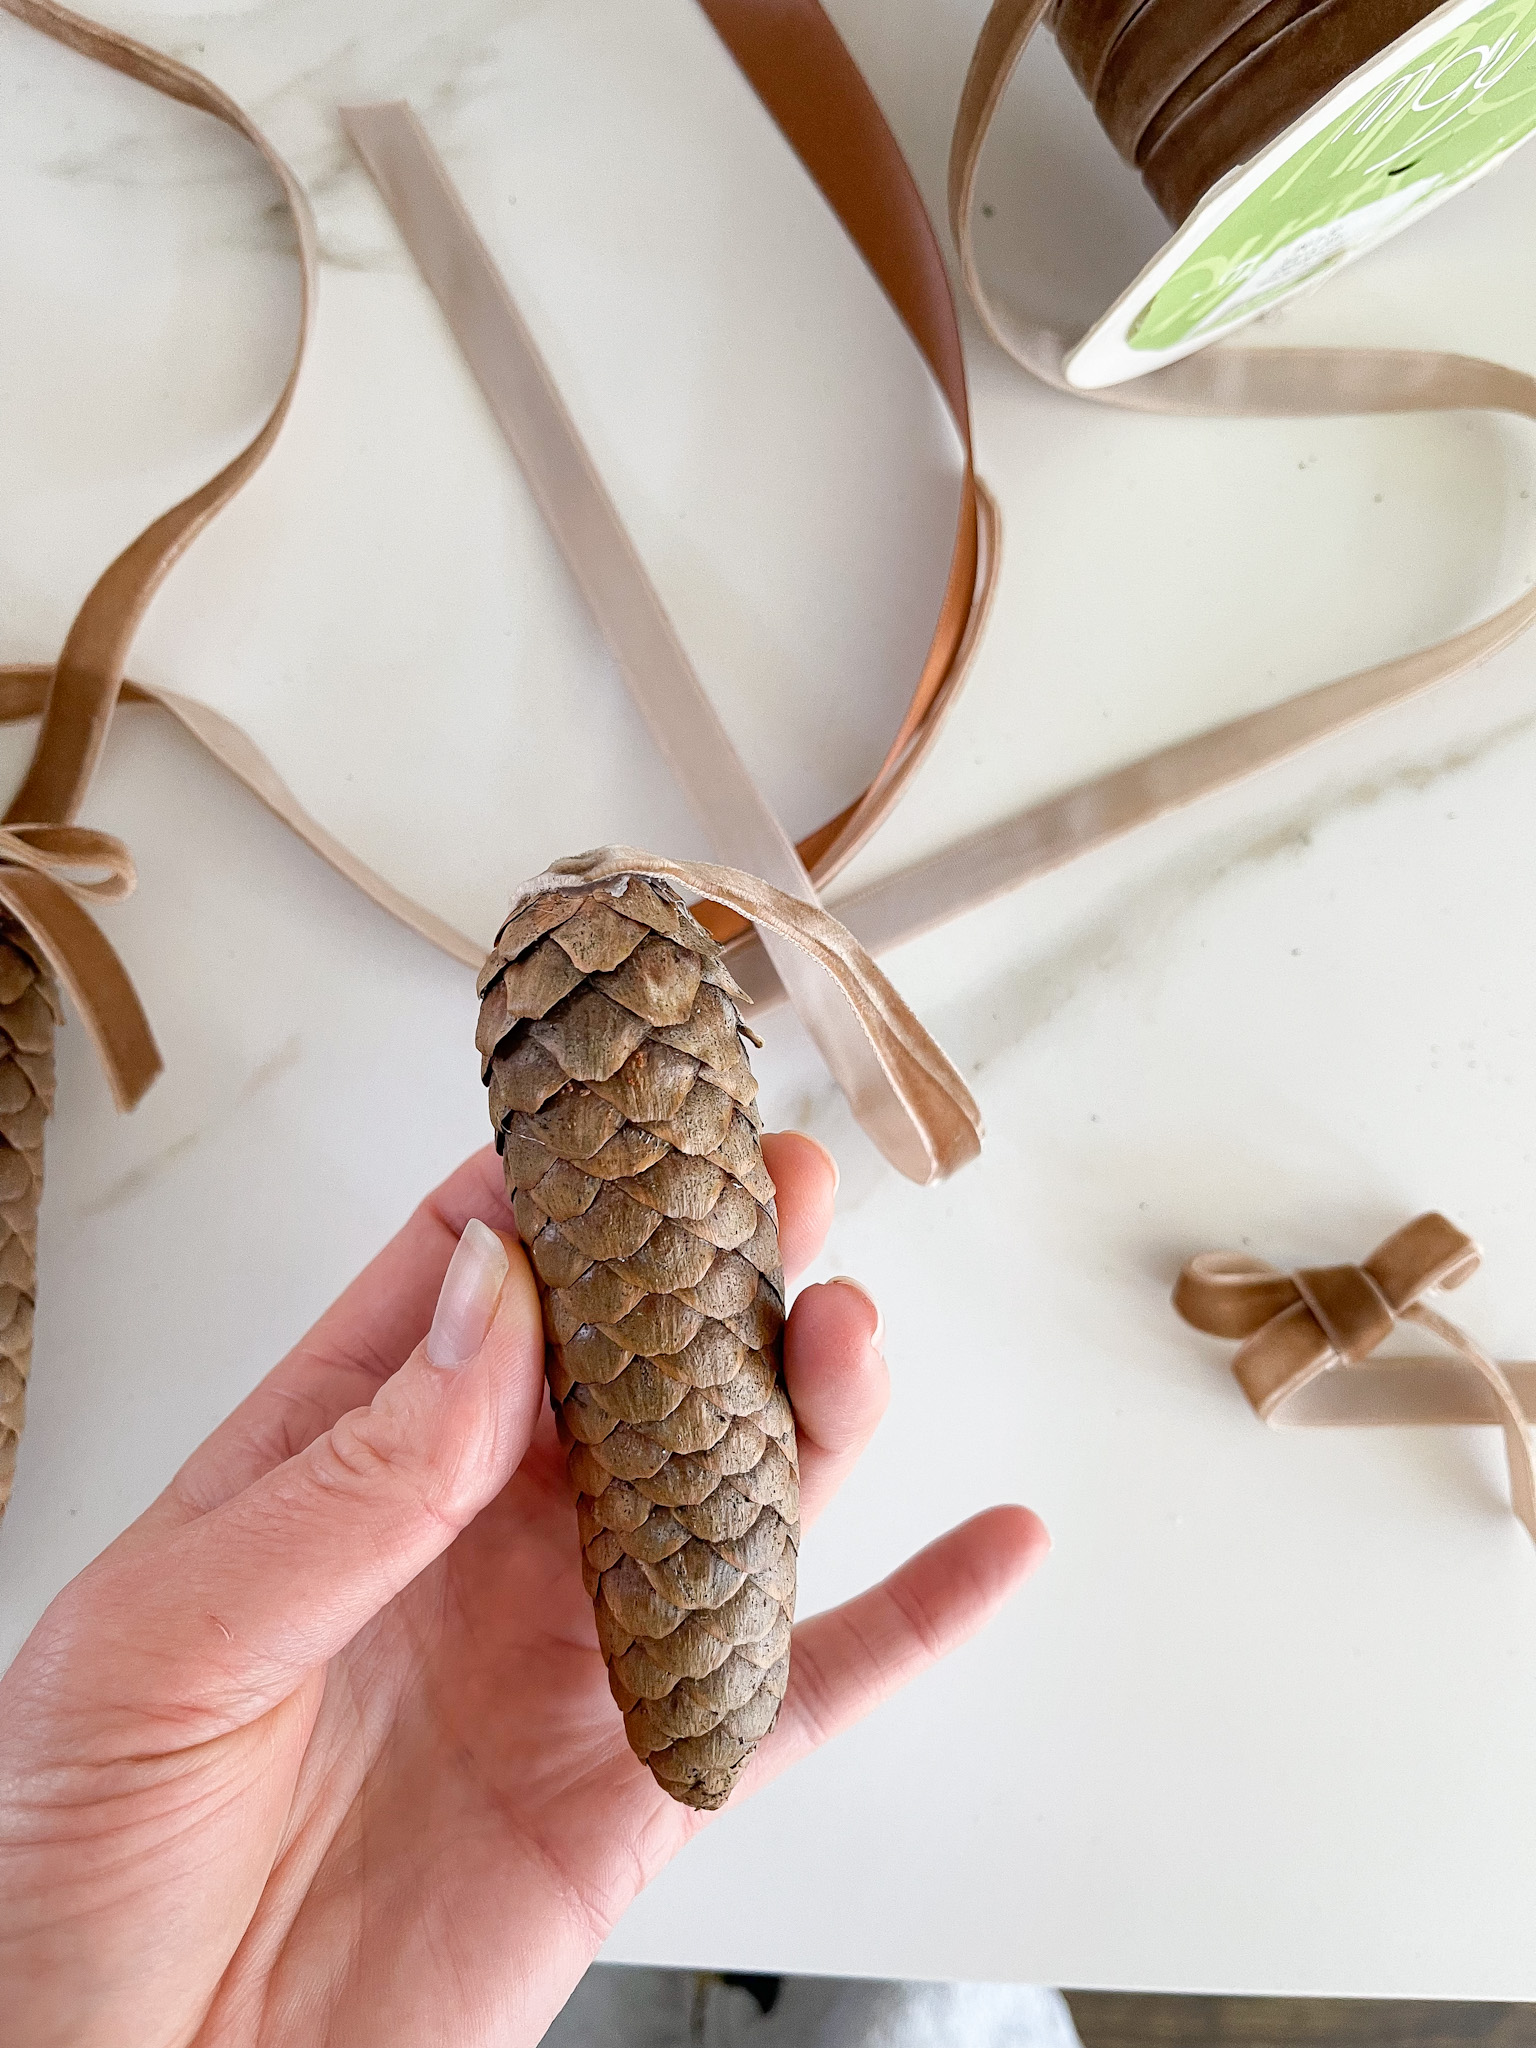
ADDING BOWS TO THE PINECONES
Using the same ribbon make tiny bows, one for each pinecone. Nothing special here, just tie a bow.


Place a dab of hot glue on top of the velvet ribbon you just adhered to the pinecone and glue your bow on.
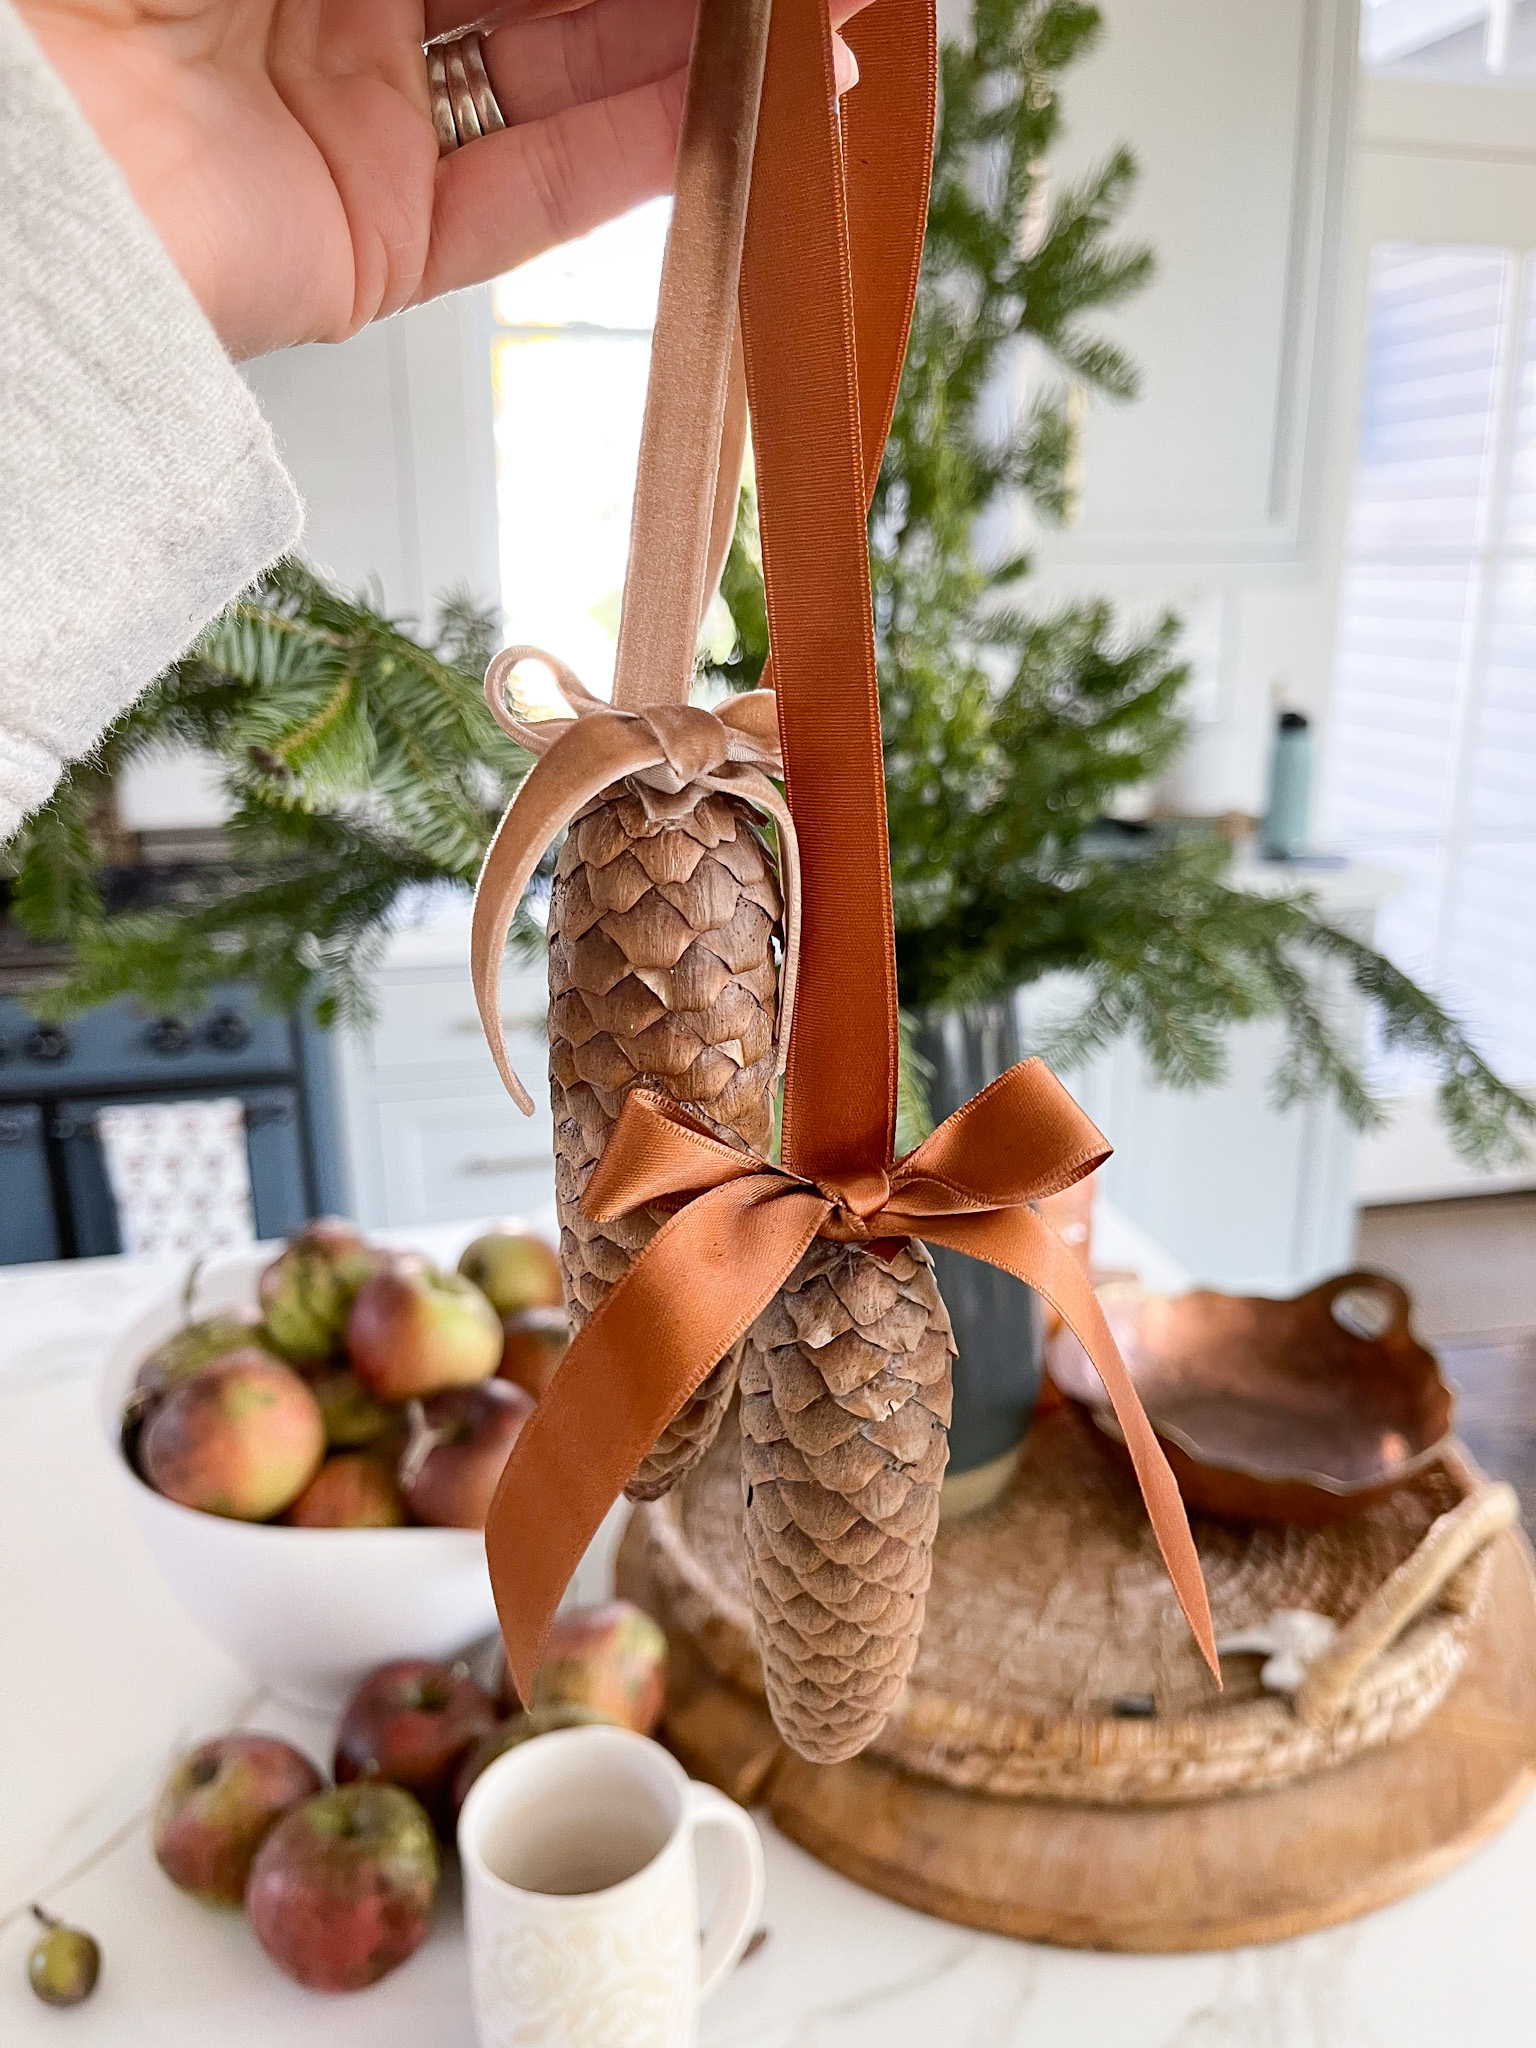
CREATING THE GROUPING
Holding all five ribbons in my hand, I staggered the height of the pinecones, letting some hang down a little lower than others. Tie them together into a loose knot so the grouping stays together. Don’t pull the knot tight yet because you want to stick the ribbon that goes through the chair through the loose knot in order to firmly hold the pinecones in place onto the back of the chair. Once that ribbon goes through the knot, tie the grouping knot tight and now tie a bow with the chair ribbon.
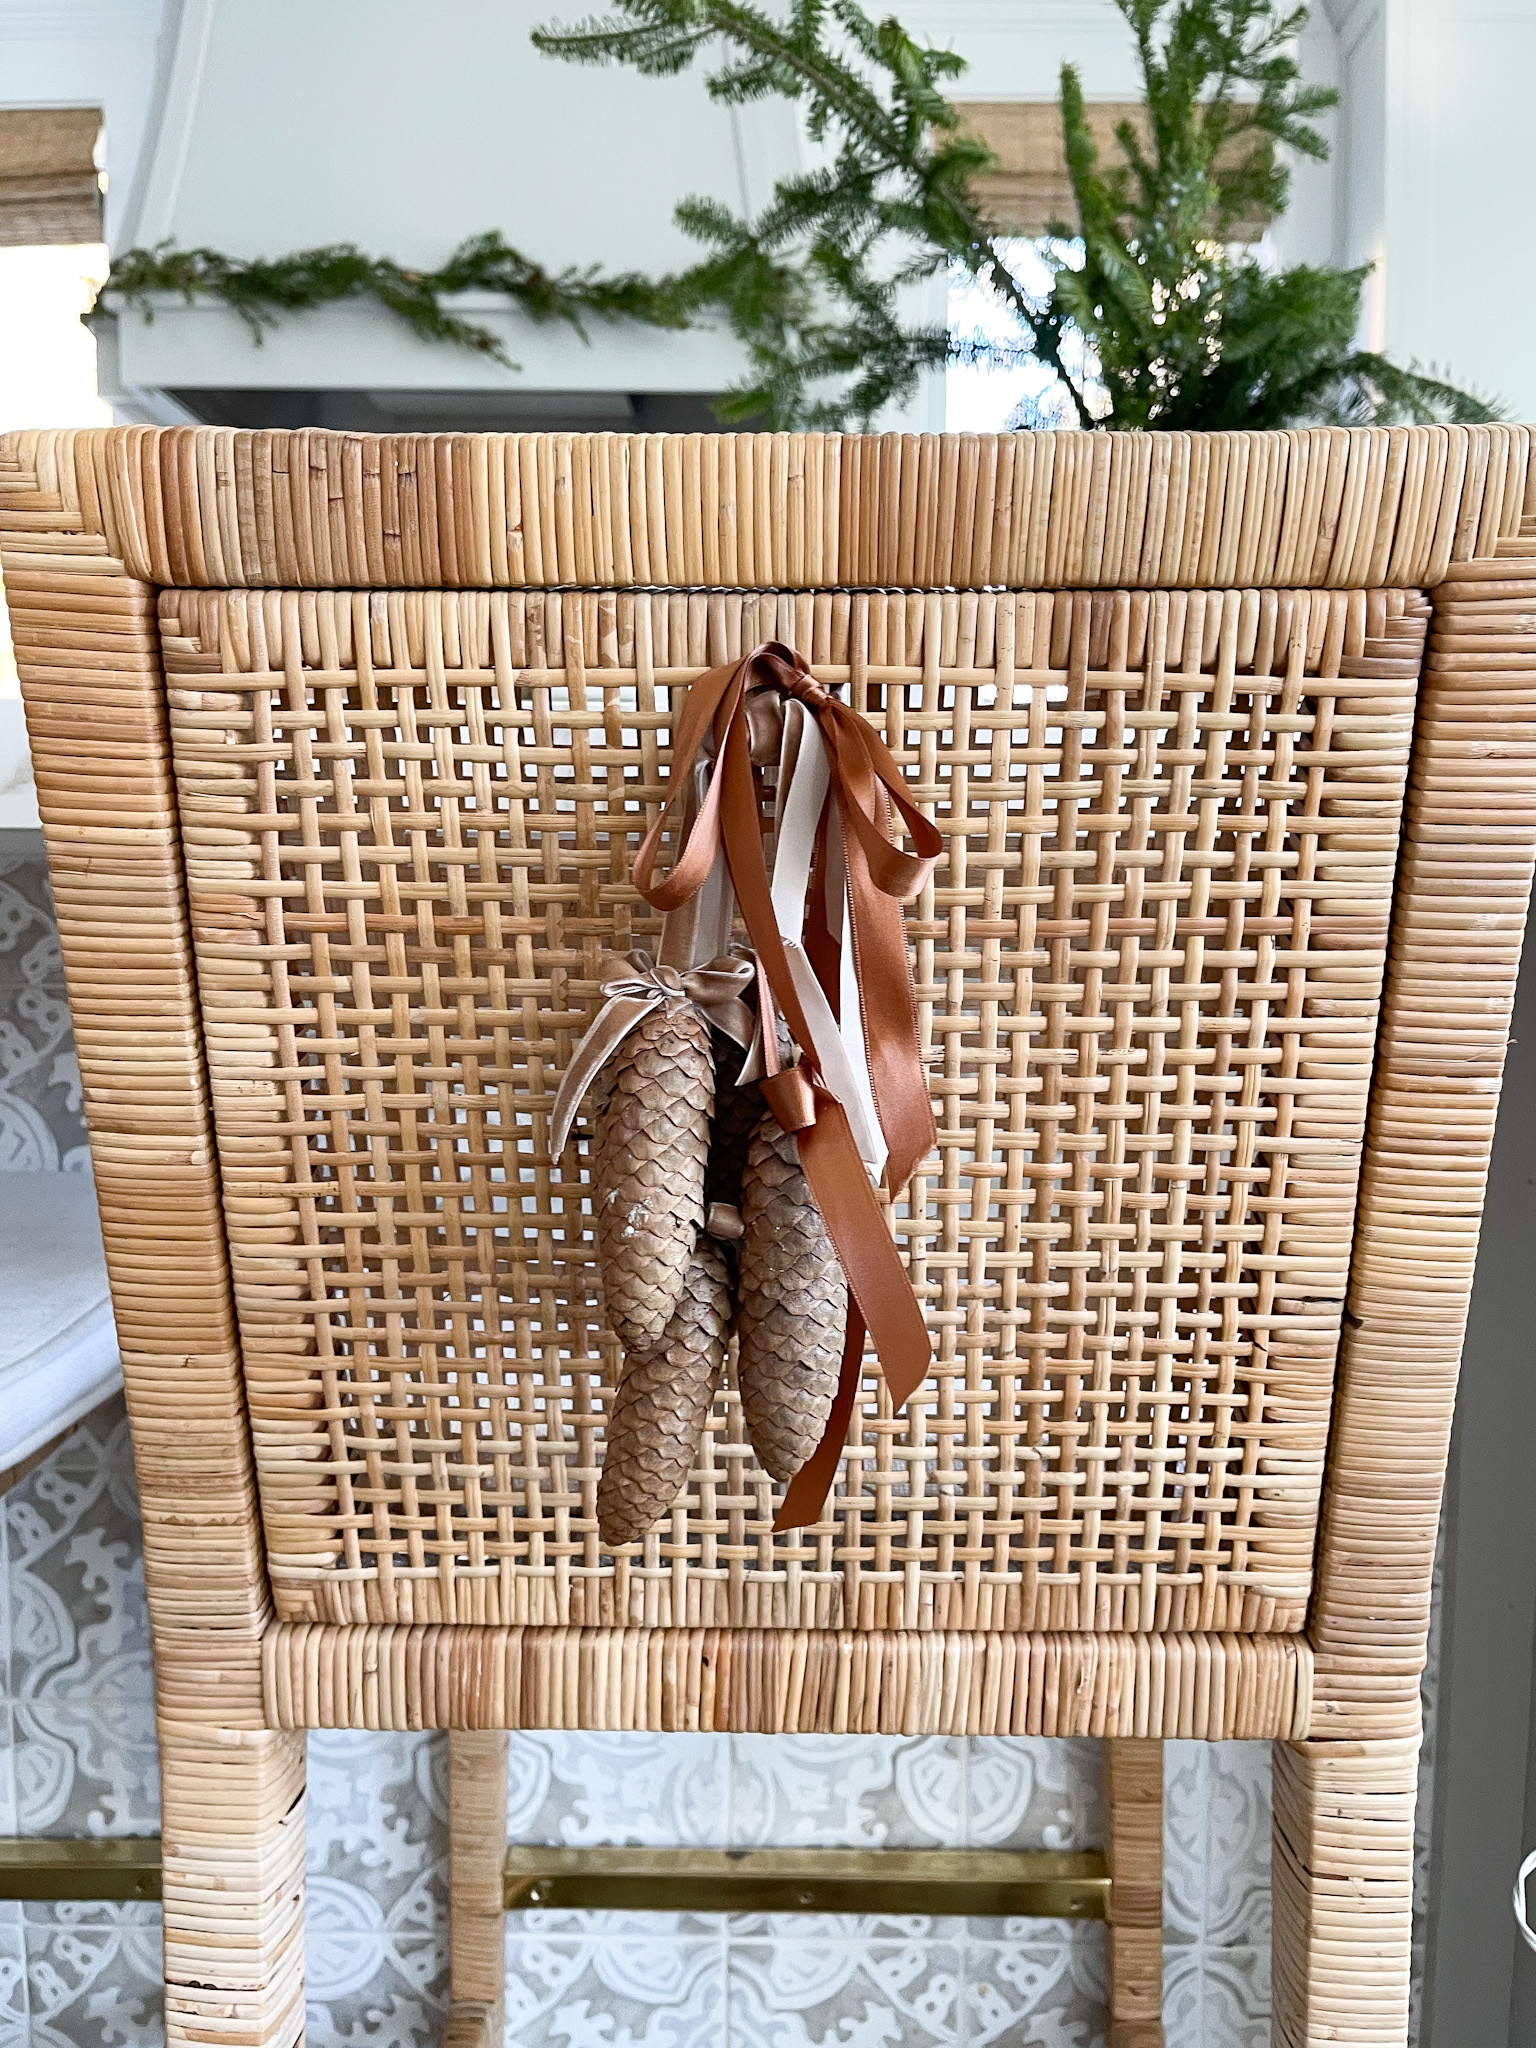
With a little finagling you’ll end up with a beautiful pinecone grouping hanging from the back of each chair. And with a little luck, no tiny hands will yank them off before the holidays are over!

 comment share
[…] favorite chair decoration yet! So simple yet elegant and festive. Get the full instructions here on this blog post. With three little kids I expected a pinecone a day to be on the floor. I’m happy to report […]
[…] year during the Christmas season we had these pinecone bundles on the back of our counter stools. I loved the idea so much that I added little bunches of […]
[…] Dried orange slices and tiny brass bells dress up a table top Christmas tree and clusters of pine cones add interest to the backs of rattan counter stools. (see how to make the pinecone chair hangings here). […]