
HOME TOUR
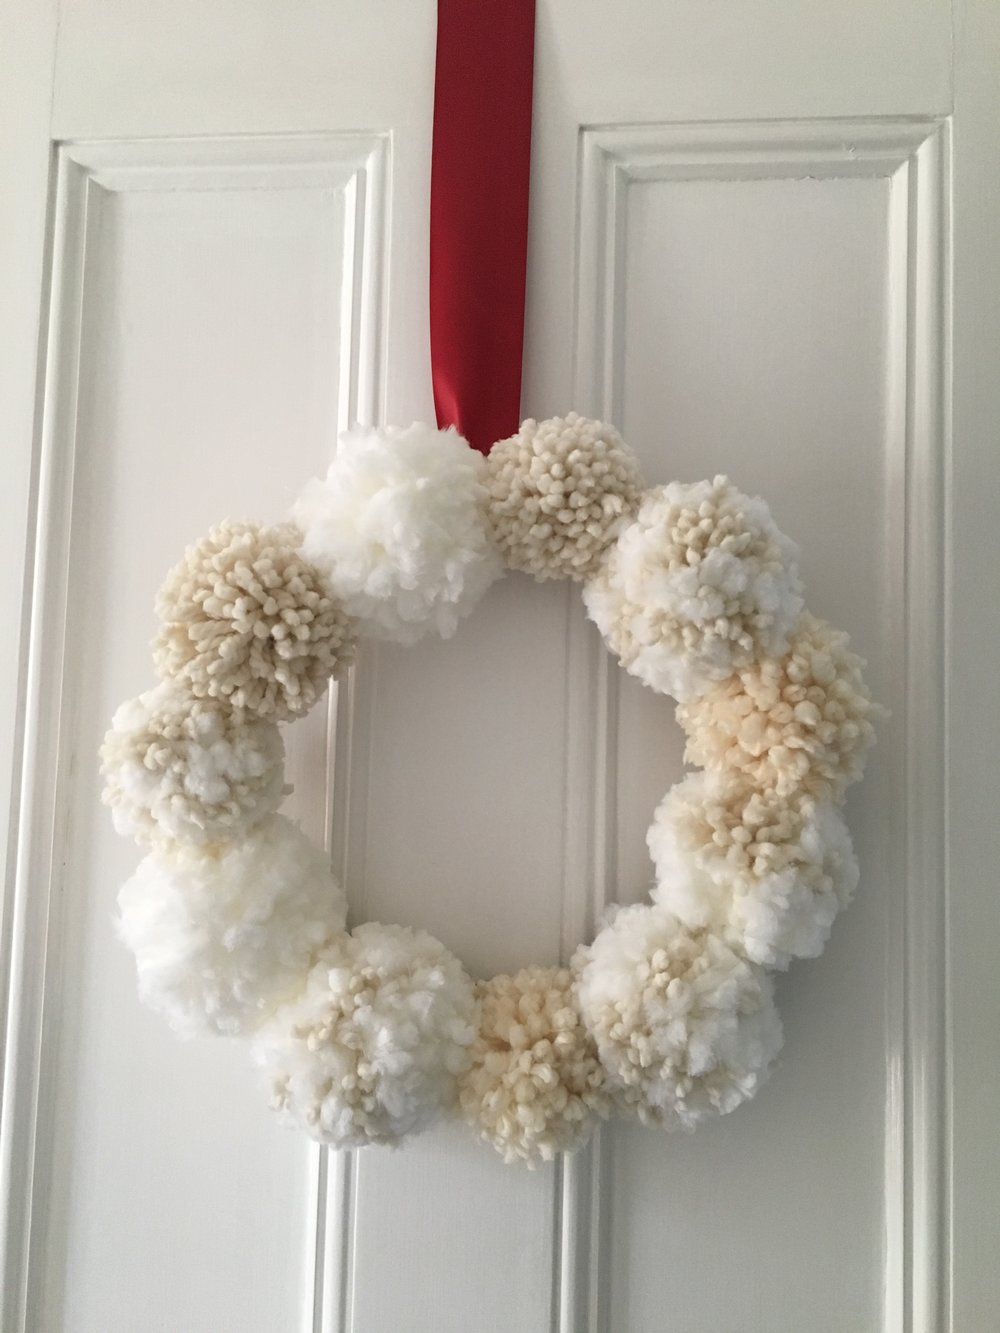
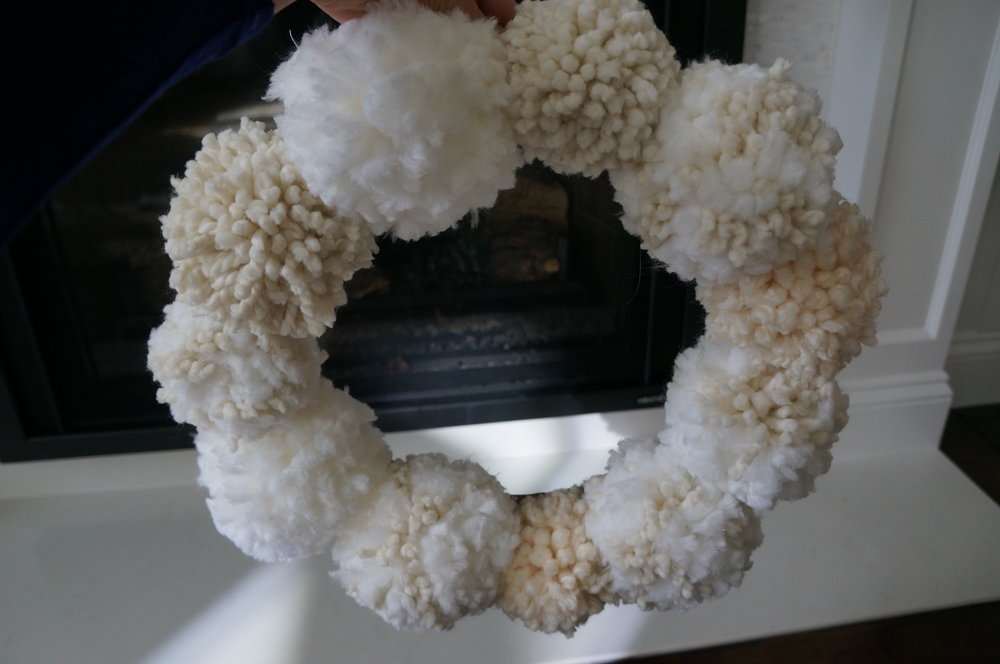
There’s something whimsical about a yarn Pom Pom that just seems fitting for a wreath. And aside from being slightly time consuming, it’s a breeze to make from scratch. And for my second attempt at pom pom wreath making, I didn’t even bother stopping at the craft store to pick up a wreath form. I grabbed a cardboard box and cut out a round shape. So aside from yarn, this was a basically free, made-with-stuff-on-hand project.
 Supplies:
- yarn (I used three types: a puffy thick yarn in white, a thick yarn in cream, and a thinner ivory mohair-like yarn)
- hot glue gun and glue
- sharp scissors
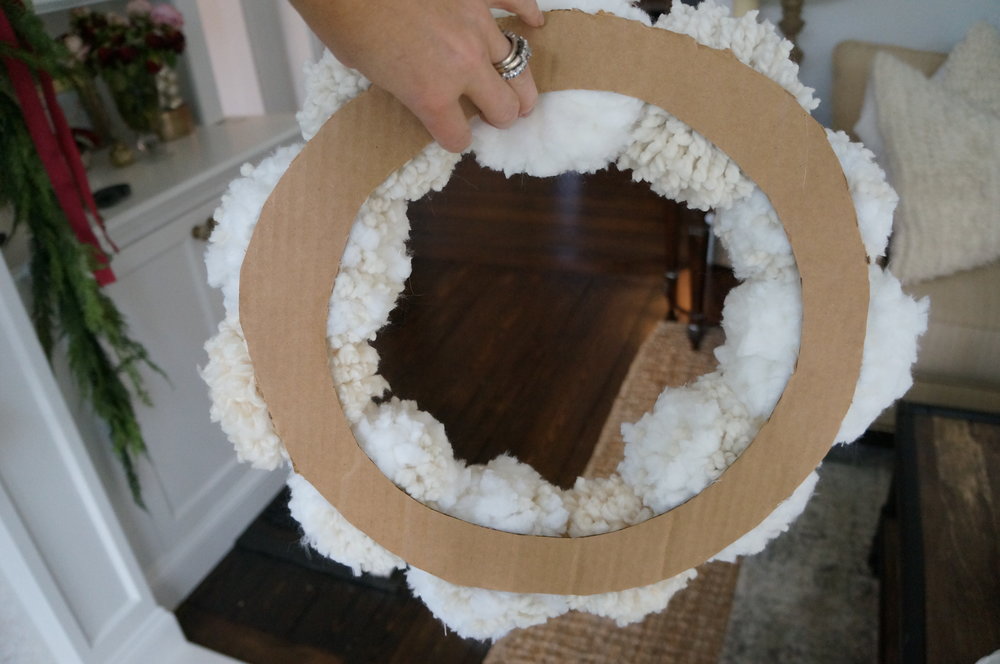
- spare cardboard, wide enough to make form
- something to wrap yarn around to make pom poms (I raided the kid’s book shelf)
1. Make as many pom poms as you feel you will need. Mine were big so I only needed 12 per wreath. Wrap the yarn around a form (I used the “Let’s Go Thomas” book) about 65-75 times, a lot I know but this makes it puffy after it’s trimmed up!
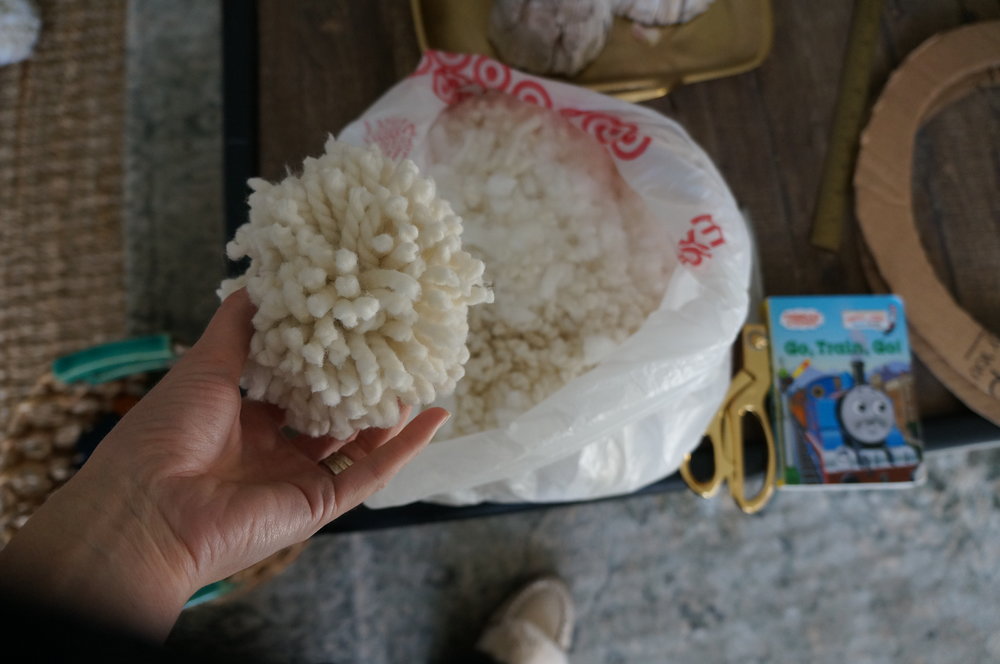
2. Slide wrapped yarn off the form and center on another piece of thin yarn. Tie tightly in the middle.
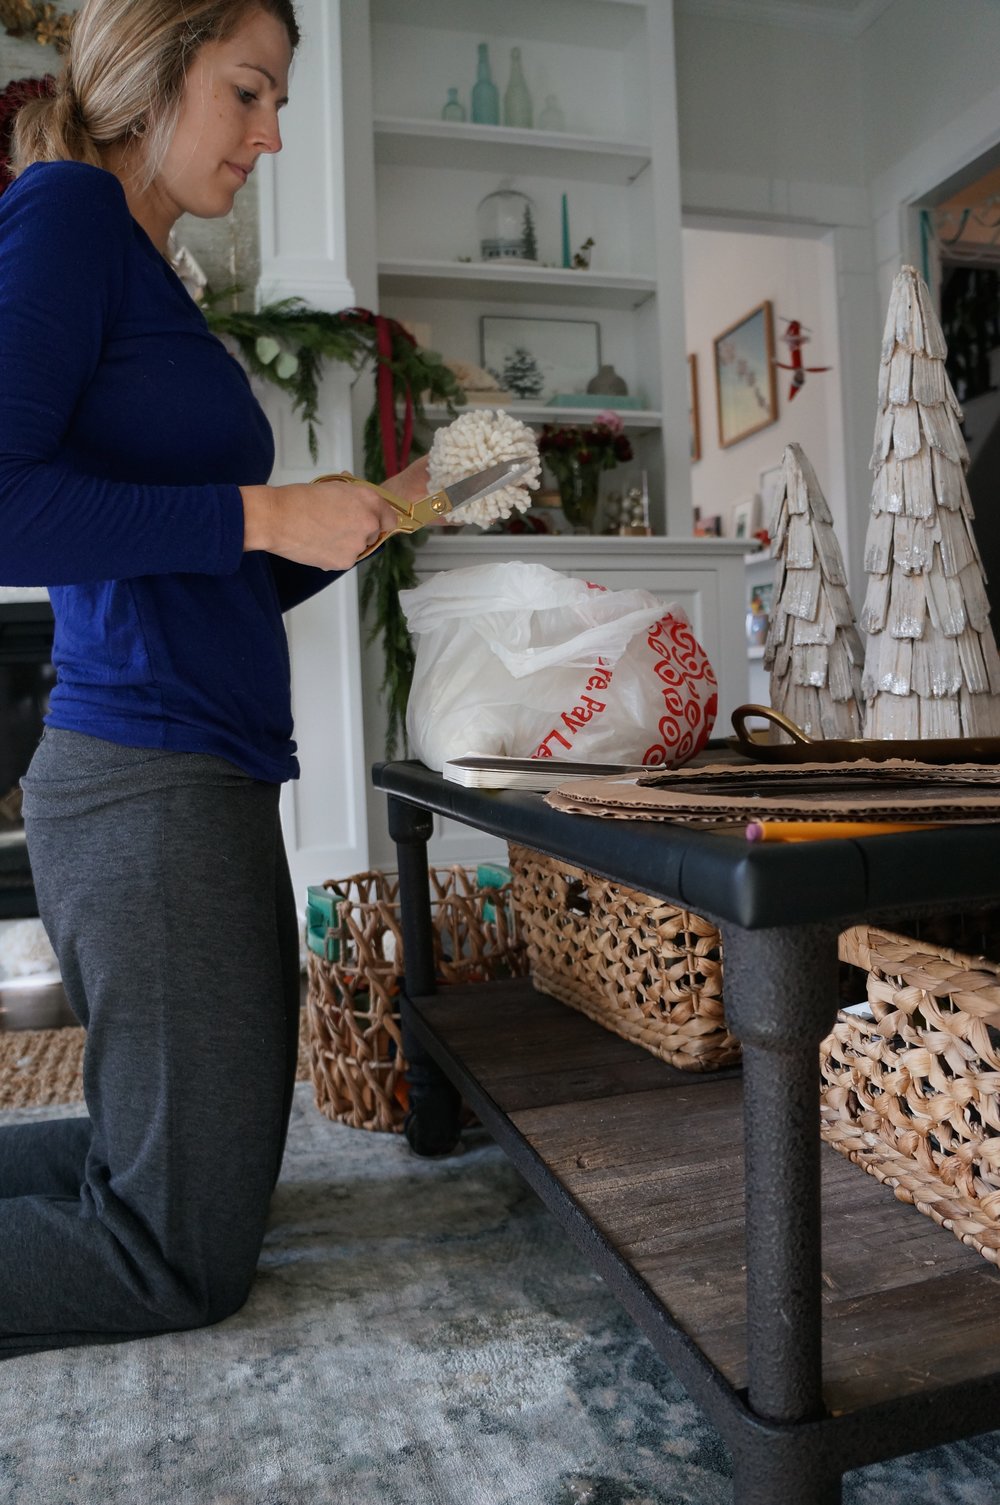
3. Now cut all those loops on both sides (there are a bazillion videos and tutorials out there).
4. Now you have a scraggly looking pom pom and you’re thinking, “I must have done something wrong.” Nothing a good hair cut won’t fix. Shape it into a ball with your scissors as much or as little as you like. This is where my target bag came in handy. Mine needed quite the haircut.
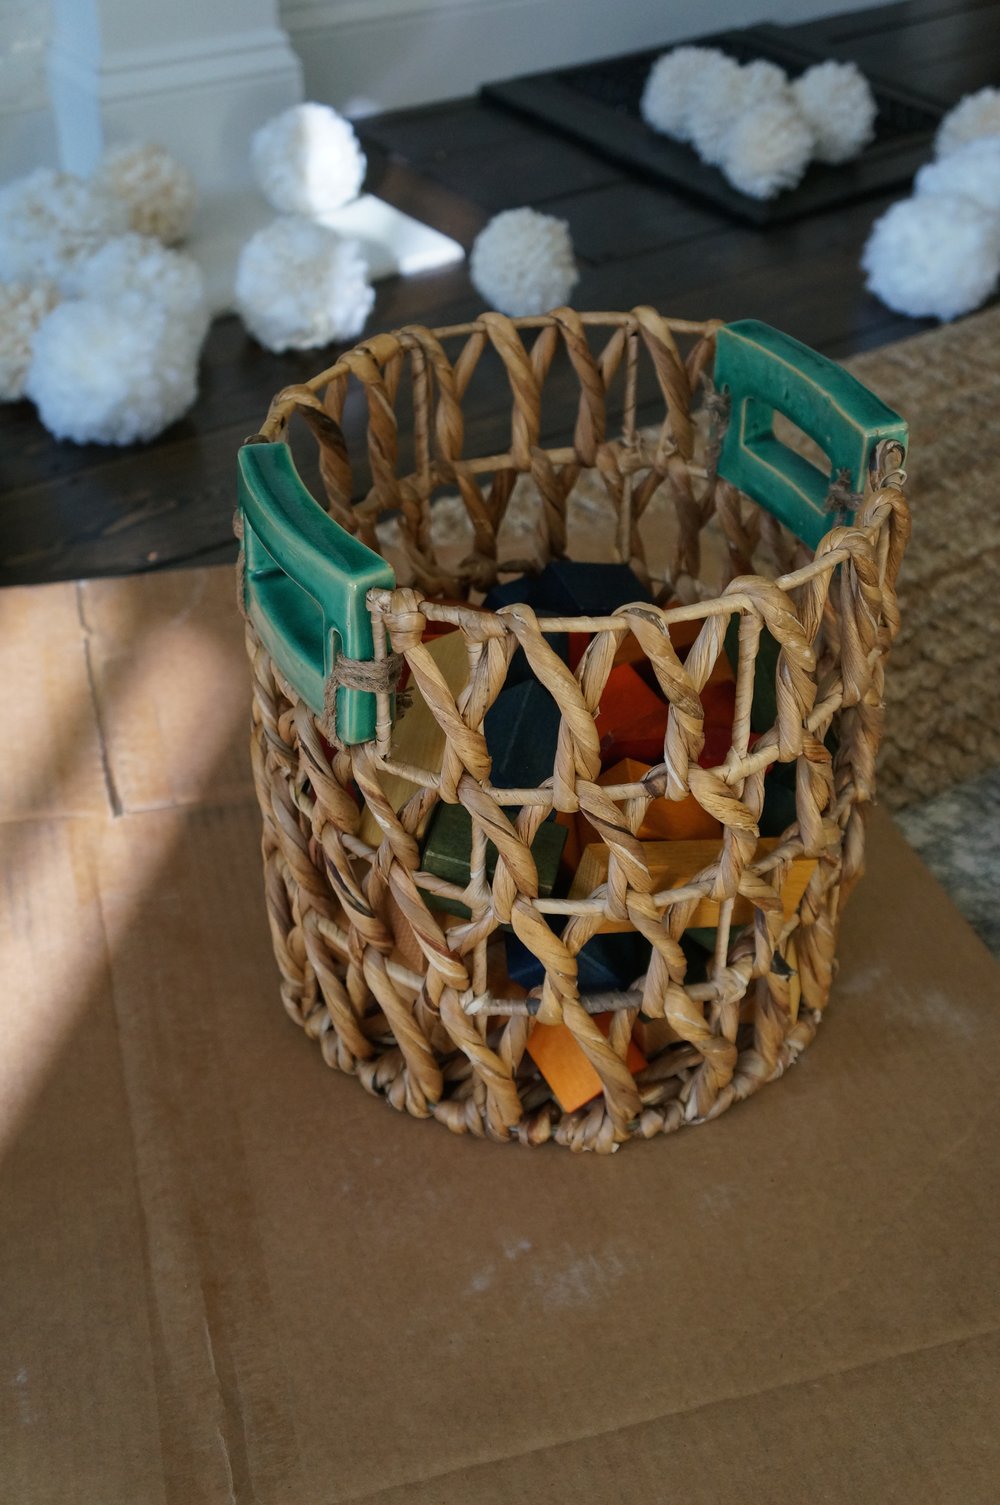
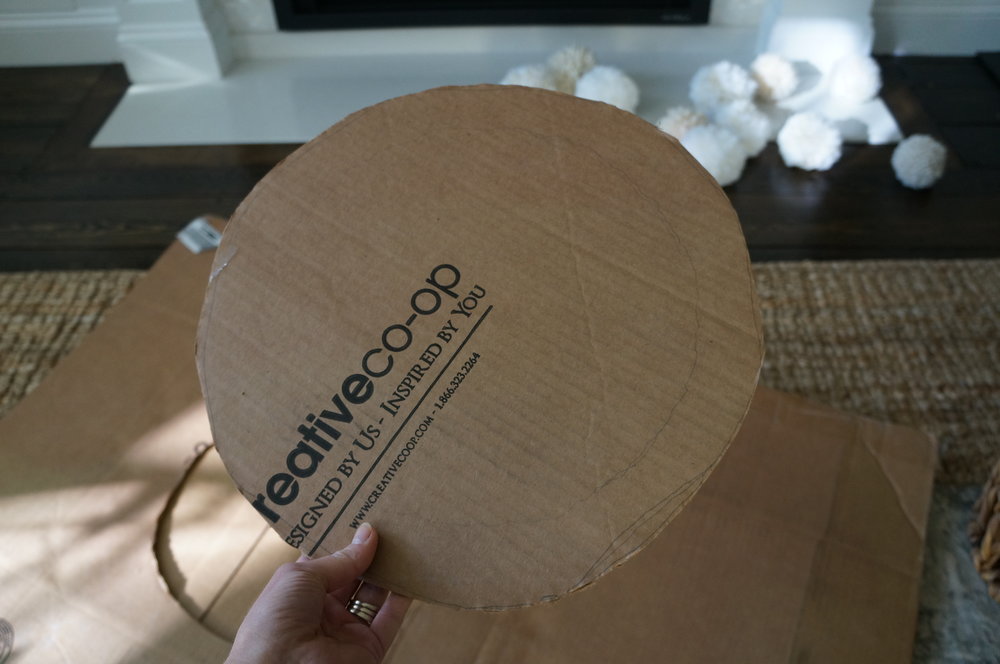
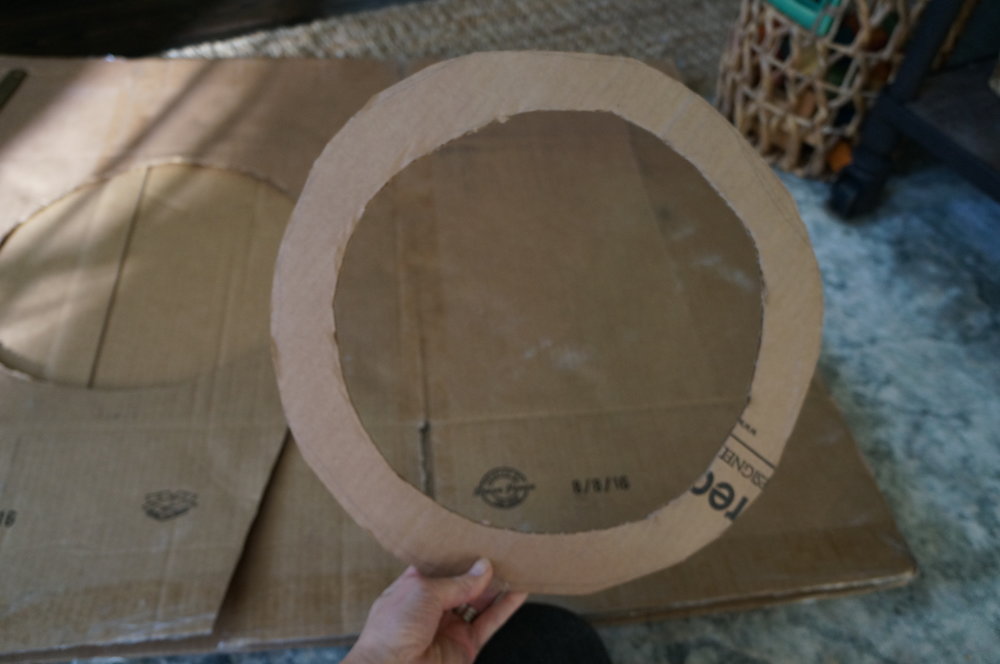
5. I used a basket in the playroom as my inner circle for the wreath size. Honestly anything in your house that is round will work…a large circle platter, baskets, potted plants. You name it. I traced the basket circle on the cardboard and then added two inches all the way around so I had a thin circle form. I cut it out with sharp scissors and ended up poking the scissors through to cut the inner circle. This worked better for me then bending the cardboard and making a cut.
6. Now that you have your cardboard wreath form, start glueing. I set all the pom poms out on the form first to get an idea of spacing / how much I needed to crowd them together to get the look I wanted. Here’s my tip. After the wreath was done, I noticed a few areas after I hung it where I could see glimpses of cardboard. No bueno. And I’m not taking it apart to fix the problem but here’s where you can improve: wrap the wreath form in wide ribbon the color of your yarn.

7. Hot glue the pom poms in place.
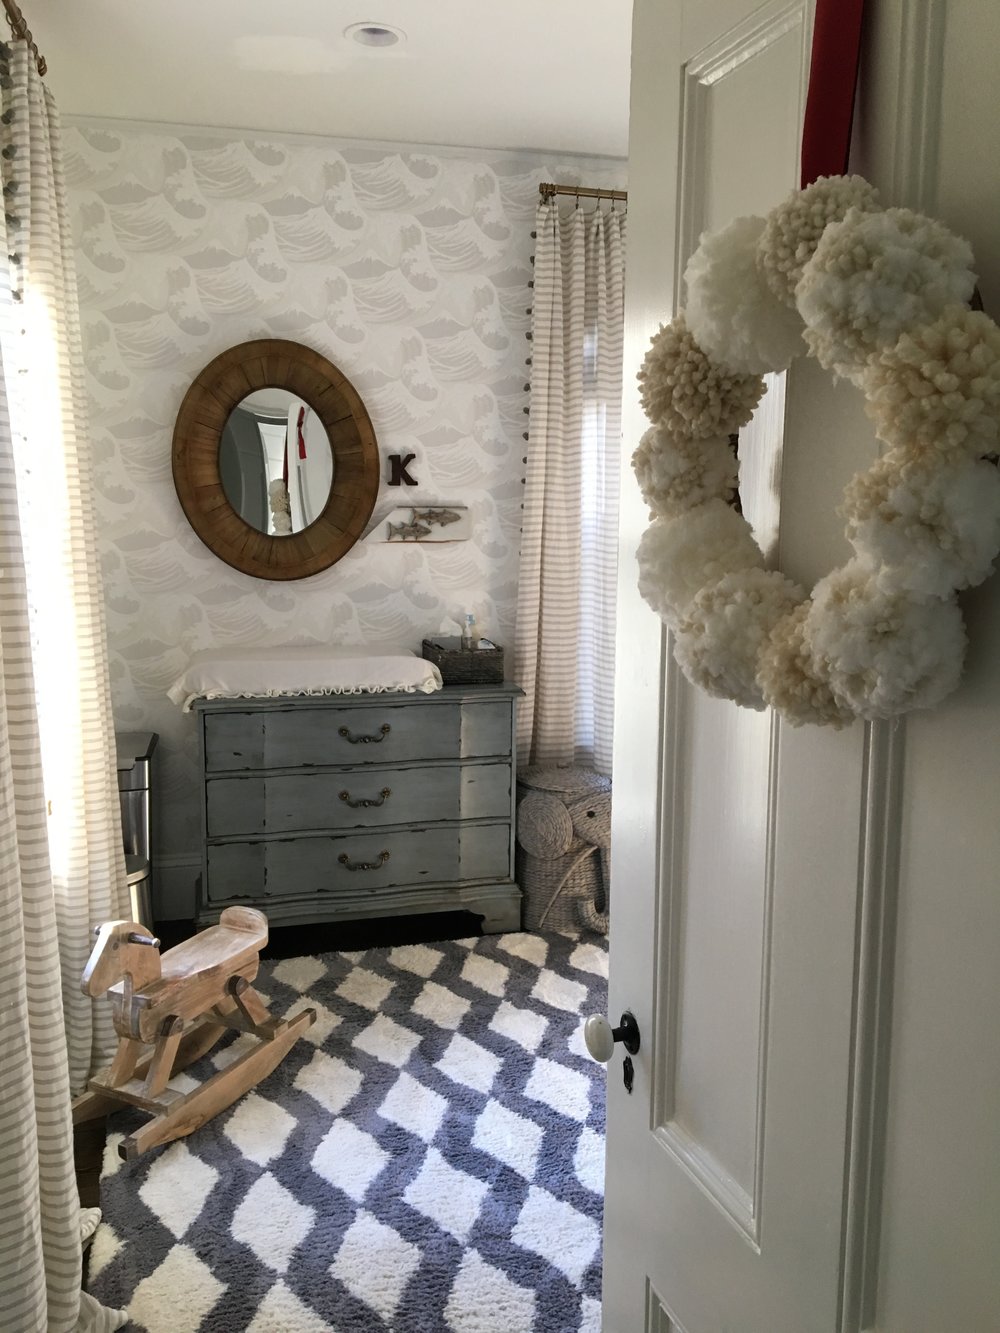
8. I used a Command Strip placed upside down on the back side of the kiddo’s doors to hand the wreath on the front. Brilliant Pinterest hack. I take no credit for that sheer genius.
So there you have it my friends. Fun. Not too hard. And a whimsical way to add some Christmas cheer to our kiddo’s bedroom doors. Happy Holidays friends!

 comment share
[…] WreathSource White Pom Pom Wreath with Tag CardsSource Winter White Pom Pom Wreath with Red RibbonSource Winter Wonderland Pom Pom Wreath with DollsSource Christmas Pudding Pom Pom WreathSource Colorful […]